
Restoring a chipped knife edge isn’t just about sharpening—it’s about precision, patience, and using the right tools. Whether you’re a home cook who accidentally dropped your favorite chef’s knife on a tile floor or a professional chef dealing with daily wear and tear, understanding how to properly restore that damaged edge can mean the difference between a usable blade and one relegated to the junk drawer. A chipped edge doesn’t have to be the end of your knife’s life. With the correct grit selection and proper technique, even severe chips can be repaired, bringing your blade back to peak performance.
This comprehensive guide is designed for anyone serious about knife care—from culinary enthusiasts to seasoned professionals. You’ll learn not only how to identify the severity of a chip but also how to choose the ideal grit for restoration based on your knife type, steel hardness, and intended use. We’ll walk you through the science behind abrasives, compare different sharpening systems, and provide actionable advice to help you avoid common pitfalls. By the end, you’ll have the knowledge and confidence to tackle edge restoration like a pro, saving money on replacements and extending the lifespan of your most trusted kitchen tools.
The market for knife sharpening products has exploded in recent years, offering everything from budget-friendly whetstones to high-end guided systems. But with so many options, it’s easy to get overwhelmed—especially when it comes to selecting the right grit. Coarse, medium, fine, extra-fine… what do these numbers really mean? And how do you know which one to start with when you’re facing a visible chip? This guide cuts through the noise, delivering expert-level insights grounded in metallurgy, sharpening mechanics, and real-world testing. Whether you’re working with carbon steel, stainless steel, or high-end powdered metallurgy blades, we’ve got you covered.

What to Look for When Buying Buying Guide
1. Grit Size and Abrasive Type
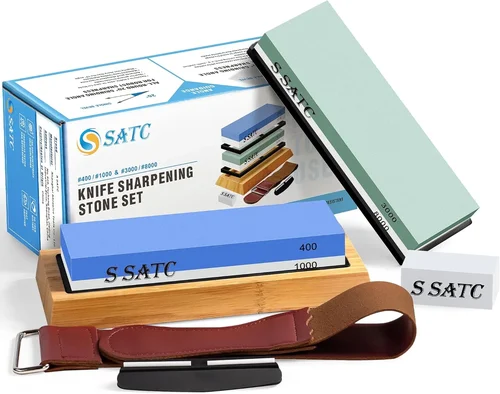
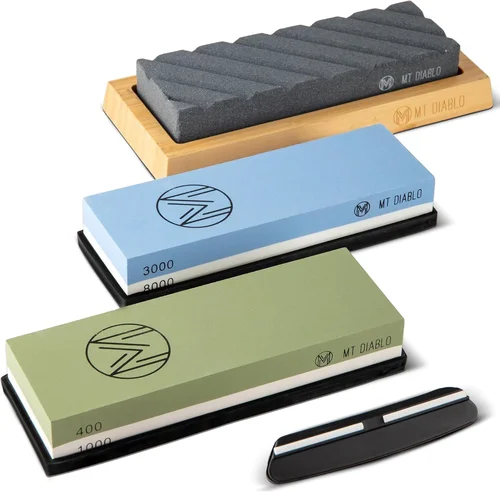
The single most important factor in restoring a chipped knife edge is selecting the appropriate grit size. Grit refers to the number of abrasive particles per square inch on a sharpening stone or surface. Lower numbers (e.g., 120–400) indicate coarse grits ideal for removing significant material—perfect for repairing chips. Higher numbers (e.g., 3000–8000+) are for refining and polishing edges. For chip repair, you typically start with a coarse grit (120–400) to grind away the damaged metal, then progress through medium (800–1200) and fine (2000–3000) grits to reshape and hone the edge.
But grit size isn’t the only consideration—the type of abrasive matters too. Common abrasives include aluminum oxide (durable and affordable), silicon carbide (faster cutting, great for hard steels), and diamond (long-lasting and aggressive). Ceramic stones offer fine finishing but aren’t ideal for heavy material removal. For chip restoration, diamond stones or high-quality aluminum oxide stones in coarse grits are often the best starting points because they remove metal efficiently without wearing down quickly.
2. Knife Steel Hardness and Composition
Not all knives are created equal—and neither are their repair needs. The hardness of your knife’s steel, measured on the Rockwell C scale (HRC), directly affects how it responds to sharpening. Softer steels (below 55 HRC) are easier to grind but may not hold an edge as long. Harder steels (60+ HRC), like those found in Japanese high-carbon or powdered steels (e.g., SG2, R2), are more chip-resistant but require more aggressive abrasives and patience during restoration.
Additionally, the composition of the steel—whether it contains vanadium, cobalt, or other alloys—can influence how it wears and how it should be sharpened. For example, knives with high vanadium content (common in premium European brands) respond well to diamond stones due to their toughness. Understanding your knife’s steel profile helps you choose the right grit progression and avoid unnecessary damage during restoration.
3. Sharpening System Compatibility
Your choice of grit must align with your sharpening system. Are you using whetstones, a guided sharpening system (like the Work Sharp or Lansky), or a pull-through sharpener? Each system has limitations. Whetstones offer the most control and versatility, allowing you to work at precise angles and apply consistent pressure—ideal for chip repair. Guided systems provide angle consistency but may not allow the aggressive material removal needed for large chips unless they include coarse-grit stones or belts.
Pull-through sharpeners, while convenient, often lack the finesse required for proper chip restoration and can actually worsen the problem by creating uneven edges. If you’re serious about restoring chipped edges, invest in a system that supports coarse grits and gives you full control over angle and pressure. This ensures you can effectively remove the damaged metal without compromising the blade’s geometry.
4. Budget & Price Range
Restoring a chipped knife doesn’t have to break the bank, but it does require some investment in quality tools. Entry-level sharpening kits may include only medium or fine grits, which are insufficient for chip repair. To properly restore a damaged edge, you’ll need at least one coarse stone (120–400 grit), ideally made from diamond or high-grade aluminum oxide. These can range from $20 to $80 depending on brand and size.
Mid-range systems ($80–$200) often include multiple grits and better build quality, while premium setups ($200+) may feature water stones, diamond plates, or electric sharpeners with variable speed controls. While it’s tempting to go cheap, skimping on your sharpening tools can lead to frustration, wasted time, and potentially irreparable damage to your knife. Think of it as an investment in your kitchen’s longevity.
5. Build Quality & Durability
A sharpening stone that wears down quickly or loses its flatness is worse than useless—it can ruin your knife’s edge geometry. Look for stones with consistent abrasive distribution and a stable base. Diamond stones should have a solid metal plate with evenly embedded diamonds; avoid flimsy plastic bases. Water stones should be stored properly to prevent warping, and oil stones must be maintained with the correct lubricant.
Durability also extends to the entire sharpening system. Guided systems with plastic components may flex under pressure, leading to inconsistent angles. Metal frames and rigid platforms ensure repeatable results. If you plan to restore knives regularly, prioritize systems built to last. A $150 stone that lasts five years is far more cost-effective than replacing three $30 stones that degrade quickly.
6. Features & Functionality
Modern sharpening systems come with features that can make chip restoration easier and more precise. Look for stones with non-slip bases, angle guides, or built-in flattening surfaces. Some diamond plates include multiple grits on one surface (e.g., 200/600 combo), which is convenient for quick transitions. Others offer dual-sided stones with coarse and fine grits.
Guided systems often include angle indicators, clamp mechanisms, and adjustable arms—features that help maintain consistent bevel angles during aggressive grinding. For beginners, these aids are invaluable. Advanced users might prefer minimalist setups that allow for freehand control. Regardless of your skill level, functionality should enhance—not hinder—your ability to restore a chipped edge effectively.
7. Brand Reputation & User Feedback
Not all sharpening brands are created equal. Established names like King, Shapton, Naniwa, DMT, and Suehiro have decades of experience and loyal followings for good reason. They consistently deliver high-quality abrasives and reliable performance. Reading user reviews—especially those from people who’ve used the product for chip repair—can reveal hidden strengths or weaknesses.
For example, some users report that certain ceramic stones dull quickly when used on hard steels, while others praise specific diamond plates for their longevity and cutting speed. Look for reviews that mention real-world use cases, such as “restored a chipped Santoku” or “fixed a broken tip on my paring knife.” These testimonials provide insight beyond marketing claims and help you make an informed decision.
8. Warranty & Support
While sharpening stones aren’t typically covered by long warranties, reputable brands often offer customer support, replacement policies, or satisfaction guarantees. This is especially important if you’re investing in a high-end system. A company that stands behind its products shows confidence in quality and is more likely to assist if you encounter issues.
Additionally, some brands provide educational resources—videos, guides, or tutorials—on proper sharpening techniques, including chip repair. This added value can be crucial for beginners learning the ropes. Don’t overlook the importance of good customer service; it can make the difference between a frustrating experience and a successful restoration.
Different Types of Buying Guide

Common Buying Mistakes to Avoid
❌ Mistake: Starting with Too Fine a Grit
Why it’s bad: Attempting to restore a chipped edge with a 1000+ grit stone is like trying to sand a wall with 400-grit paper—it’s inefficient and frustrating. Fine grits are designed for polishing, not material removal. You’ll spend hours with minimal progress, potentially overheating the edge and damaging the temper.
What to do instead: Always begin with a coarse grit (120–400) to remove the chip. Only move to finer grits once the edge is reshaped and the chip is gone. This progressive approach saves time and preserves blade integrity.
❌ Mistake: Ignoring Angle Consistency
Why it’s bad: Inconsistent angles during grinding can create uneven bevels, weak spots, or even new chips. This compromises cutting performance and makes future sharpening more difficult.
What to do instead: Use angle guides, sharpening jigs, or practice freehand techniques with a marker on the edge to ensure uniformity. Most knives perform best between 15° and 20° per side, depending on use.
❌ Mistake: Over-Sharpening or Overheating the Edge
Why it’s bad: Applying too much pressure or working too slowly can generate excessive heat, which may anneal (soften) the edge. A softened edge won’t hold sharpness and may require professional re-tempering.
What to do instead: Use light, consistent pressure and keep the blade cool. For water stones, soak them properly; for oil stones, use adequate lubricant. If using electric sharpeners, avoid prolonged contact.
❌ Mistake: Using the Wrong Abrasive for the Steel
Why it’s bad: Soft abrasives like low-grade ceramic may clog or wear down when used on hard steels, reducing effectiveness. Conversely, overly aggressive diamond stones on soft steels can remove too much material.
What to do instead: Match your abrasive to your knife’s steel. Diamond or silicon carbide for hard steels; aluminum oxide for softer or general-purpose knives.
❌ Mistake: Skipping Flattening the Stone
Why it’s bad: A warped or dished stone creates uneven contact, leading to inconsistent sharpening and potential edge damage.
What to do instead: Regularly flatten your stones using a lapping plate or flattening stone. This ensures even abrasion and prolongs the stone’s life.
❌ Mistake: Not Testing the Edge After Restoration
Why it’s bad: Assuming the chip is gone without verification can lead to disappointment. You might miss residual damage or uneven edges.
What to do instead: Use a magnifying glass or run your thumb lightly across the edge (carefully!) to feel for inconsistencies. Perform a paper test or slice a tomato to assess sharpness.
❌ Mistake: Buying Based Solely on Price
Why it’s bad: The cheapest option often lacks the durability, consistency, or grit range needed for effective chip repair. You may end up buying multiple low-quality tools.
What to do instead: Invest in a mid-range system with at least one coarse and one fine stone. Quality pays off in performance and longevity.
Budget Guidelines: How Much Should You Spend?
Entry-Level ($20–$50): At this price point, you’ll find basic oil stones or small diamond plates. These can work for minor chips on softer knives but lack the size, durability, or grit progression needed for serious restoration. Expect limited lifespan and potential inconsistency. Best for occasional use or beginners on a tight budget.
Mid-Range ($50–$150): This is the sweet spot for most users. You can get a quality diamond stone (e.g., DMT DuoSharp Plus) or a set of water stones (e.g., King 400/1000 combo). These offer good material removal, decent durability, and the ability to progress through grits. Ideal for home cooks and light professionals who want reliable performance without overspending.
Premium ($150–$400): Here, you’ll find high-end water stones (Shapton Pro, Naniwa Super Stone), large diamond plates, or guided systems with multiple stones. These deliver exceptional flatness, fast cutting, and long-term value. Perfect for enthusiasts, serious home cooks, and professionals who restore knives regularly.
Luxury ($400+): Top-tier options include electric belt sharpeners (Work Sharp Ken Onion Edition), full water stone sets (8000+ grit), or custom diamond systems. These are built for speed, precision, and heavy-duty use. Reserved for professional kitchens, knife makers, or collectors who demand the absolute best.
Expert Tips for Getting the Best Deal
– Buy during off-seasons: Sharpening tools often go on sale in late winter or early spring, after holiday shopping lulls. Sign up for newsletters from brands like DMT or Shapton to catch promotions.
– Bundle your purchase: Many retailers offer discounts when you buy multiple stones or a complete sharpening kit. A 400/1000/3000 combo often costs less than buying individually.
– Check refurbished or open-box deals: Authorized dealers sometimes sell returned or demo units at significant discounts. These are typically inspected and come with warranties.
– Prioritize versatility: Instead of buying separate stones, consider dual-grit diamond plates or systems that allow stone swapping. This saves money and space.
– Read the fine print on warranties: Some brands offer lifetime guarantees on diamond surfaces but exclude wear from improper use. Understand what’s covered before buying.
– Test before committing: If possible, try a friend’s system or visit a store that allows hands-on demos. Feel the stone’s texture and check for flatness.
– Invest in maintenance tools: A flattening stone or lapping plate extends the life of your sharpening stones and ensures consistent results—worth the small added cost.
– Join online communities: Forums like Reddit’s r/sharpening or BladeForums often share deals, reviews, and restoration tips from experienced users.

Frequently Asked Questions
Q: Can I fix a large chip with a fine-grit stone?
A: Technically yes, but it’s extremely inefficient and risks damaging the edge. Fine grits remove minimal material, so restoring a large chip could take hours and generate harmful heat. Always begin with a coarse grit (120–400) for significant damage.
Q: How do I know if my knife is too damaged to repair?
A: If the chip extends into the spine or compromises the blade’s structural integrity, professional repair or replacement may be needed. However, most edge chips—even deep ones—can be restored with proper technique and the right grit progression.
Q: Do I need a guided system to restore chips?
A: Not necessarily. Freehand sharpening offers more control for aggressive grinding, but guided systems help maintain consistent angles, which is crucial for even edge restoration. Beginners benefit greatly from guides; advanced users may prefer freehand.
Q: Can I use sandpaper for chip repair?
A: Yes, in a pinch. High-quality wet/dry sandpaper (120–600 grit) on a flat surface can work for minor chips. However, it wears quickly and lacks the precision of dedicated sharpening stones. Not recommended for frequent use.
Q: How often should I flatten my sharpening stone?
A: It depends on usage. For regular sharpening, flatten every 2–4 uses. For chip repair, which involves heavy grinding, flatten before and after the session to ensure even contact.
Q: Will restoring a chip weaken the knife?
A: If done correctly, no. Proper restoration removes only the damaged metal and reshapes the edge without compromising the blade’s geometry. However, excessive grinding can thin the edge and reduce durability.
Q: What’s the best grit to start with for a chipped chef’s knife?
A: For most chef’s knives (HRC 56–62), start with a 200–400 grit diamond or aluminum oxide stone. This provides aggressive material removal without being overly destructive. Progress to 800–1200 for shaping, then 2000+ for finishing.
Q: Can electric sharpeners fix chips?
A: Some can, especially belt-based models with coarse belts (60–120 grit). However, they require skill to avoid overheating or uneven grinding. Manual systems offer more control for precise restoration.
Q: How long does it take to restore a chipped edge?
A: It varies. A small chip might take 10–15 minutes with the right tools. A large chip on a hard steel knife could take 30–60 minutes of careful grinding across multiple grits.
Q: Should I send my knife to a professional instead?
A: If the chip is severe, the knife is expensive, or you’re unsure of your skills, yes. Professionals have specialized equipment and experience. But for most home users, learning to restore chips yourself is cost-effective and rewarding.
Our Final Recommendations
Best for Budget-Conscious Buyers: DMT DuoSharp Plus (200/600 grit) – Offers excellent coarse grit performance at an affordable price. Durable, flat, and great for beginners tackling their first chip repair.
Best Overall Value: King 400/1000 Combination Water Stone – A classic choice for a reason. The 400 grit handles chip removal efficiently, while the 1000 grit refines the edge. Requires soaking but delivers professional results.
Best Premium Option: Shapton Pro 320 + 1000 + 5000 Set – Exceptional flatness, fast cutting, and long-lasting. Ideal for serious enthusiasts who want precision and performance across all stages of restoration.
Best for Beginners: Lansky Deluxe 5-Stone System – Includes coarse (120) and medium (200–400) stones with angle guides. Perfect for learning proper technique while effectively repairing chips.
Best for Advanced Users: Work Sharp Ken Onion Edition Belt Sharpener – With replaceable belts from 60 to 6000 grit, this electric system handles everything from major chip repair to mirror finishes. Fast, powerful, and versatile.
Conclusion: Making the Right Choice
Restoring a chipped knife edge is both an art and a science—one that demands the right tools, knowledge, and patience. The key lies in understanding your knife’s needs and matching them with the appropriate grit and sharpening system. Coarse grits remove damage, medium grits reshape, and fine grits refine. Skip any step, and you risk inefficiency or further harm.
As you navigate the options, remember that quality matters more than quantity. A single well-chosen coarse stone can save your favorite knife, while a drawer full of mismatched tools may only add confusion. Prioritize durability, compatibility, and user feedback. And don’t be afraid to start small—your skills will grow with practice.
Ultimately, the best grit for restoring a chipped edge is the one that aligns with your knife, your budget, and your commitment to learning. Whether you’re fixing a paring knife or reviving a high-end gyuto, the satisfaction of bringing a blade back to life is unmatched. So grab your stone, assess that chip, and get to work. Your knives—and your cooking—will thank you.