Knife sharpening is one of those essential kitchen skills that often gets overlooked—until your favorite chef’s knife starts tearing through tomatoes instead of slicing them cleanly. A dull blade isn’t just frustrating; it’s dangerous. When a knife lacks sharpness, you’re forced to apply more pressure, increasing the risk of slips and cuts. That’s why knowing how to sharpen knives effectively—and affordably—is a game-changer for home cooks, outdoor enthusiasts, and even professional chefs on a budget.
This guide is designed to demystify the world of knife sharpening while keeping your wallet intact. Whether you’re working with a $20 paring knife or a high-end Japanese gyuto, the principles of effective sharpening remain the same: consistency, proper angle, and the right tools. Over the next several sections, we’ll walk you through everything from understanding the anatomy of a sharp edge to choosing the most cost-effective sharpening method for your needs. You’ll learn how to evaluate different sharpening systems, avoid common pitfalls, and maintain your blades like a pro—without spending hundreds of dollars.
The market today offers an overwhelming array of options: electric sharpeners, whetstones, pull-through systems, honing rods, and even DIY hacks using ceramic mugs or leather strops. With so many choices, it’s easy to get lost in marketing claims and overpriced gadgets. But the truth is, some of the most effective sharpening methods are also the cheapest. By the end of this guide, you’ll have a clear roadmap to keep your knives razor-sharp using tools that cost less than a fancy dinner out—and last for years.

What to Look for When Buying Buying Guide
1. Budget & Price Range
When it comes to knife sharpening, price doesn’t always equal performance. In fact, some of the most effective sharpening tools are surprisingly affordable. Your budget should reflect not just the initial cost of the sharpener but also long-term value—how often you’ll need replacements, whether it works with all your knives, and how durable it is. Entry-level options like basic whetstones or manual pull-through sharpeners can cost under $20, while premium electric models may run $150 or more. However, spending more doesn’t guarantee better results. A well-maintained $15 double-sided whetstone can outperform a $100 electric sharpener if used correctly. Focus on systems that offer versatility, ease of use, and longevity within your price range.
2. Performance Specifications
Not all sharpeners are created equal—even within the same category. Key performance specs include grit range (for stones), sharpening angle consistency, speed of sharpening, and compatibility with different blade types (e.g., Western vs. Japanese knives). For example, Japanese knives typically require a finer edge (15–18 degrees per side) compared to Western blades (18–22 degrees). Look for sharpeners that allow angle customization or come with preset guides that match your knives’ geometry. Also consider whether the system removes metal aggressively (good for repairing damaged edges) or gently (ideal for maintenance). A sharpener that balances precision with efficiency will save you time and extend your knife’s lifespan.
3. Build Quality & Durability
Cheap doesn’t have to mean flimsy—but it often does. Pay attention to materials: ceramic rods should be solid and scratch-resistant, whetstones should be bonded securely to their bases, and plastic components (common in pull-through sharpeners) should feel sturdy, not brittle. A durable sharpener withstands repeated use without warping, cracking, or losing alignment. For instance, a high-quality diamond stone can last decades with proper care, whereas a low-end ceramic rod might chip after a few uses. Investing slightly more upfront in a well-built tool pays off in reliability and reduced replacement frequency.
4. Features & Functionality
Modern sharpeners come packed with features, but not all are necessary. Useful functionalities include angle guides, non-slip bases, multi-stage sharpening (coarse, medium, fine), and compatibility with serrated or specialty blades. Some manual systems include built-in strops or polishing wheels for finishing touches. Avoid “gimmick” features like LED lights or overly complex mechanisms that add cost without improving performance. Instead, prioritize simplicity and effectiveness. A sharpener that’s easy to set up and use consistently will get used more often—and that’s what keeps your knives sharp.
5. Brand Reputation
While brand names shouldn’t be the sole deciding factor, reputable manufacturers often deliver better quality control and customer support. Established brands like Lansky, Work Sharp, King, and Smith’s have decades of experience and user feedback behind their products. That said, lesser-known brands can offer excellent value—especially in the sub-$30 range. Check independent reviews, warranty terms, and whether the company offers replacement parts (like extra stones or rods). A brand that stands behind its product is more likely to provide a tool you’ll rely on for years.
6. Warranty & Support
A solid warranty signals confidence in a product’s durability. Most quality sharpeners come with at least a 1-year warranty, though some premium models offer 2–5 years. Look for companies that provide clear return policies and responsive customer service. If something breaks or wears out prematurely, you want to know you can get a replacement or refund. This is especially important for electric sharpeners, which have moving parts that can fail. Even manual tools benefit from good support—imagine needing a replacement stone and finding the model discontinued!
7. Size & Portability
If you’re sharpening knives at home, size may not matter much. But for campers, hunters, or travelers, portability is key. Compact whetstones, folding sharpeners, or multi-tools with integrated sharpening surfaces are ideal for on-the-go use. Consider weight, storage requirements, and whether the tool needs water or oil to function (which adds bulk). A pocket-sized diamond file might be all you need for field maintenance, while a full-sized stone set is better suited for kitchen use. Match the sharpener’s size to your lifestyle.
8. User Reviews & Ratings
Never underestimate the power of real-world experience. User reviews reveal nuances that specs sheets miss—like how a sharpener performs on hard steel, whether it leaves burrs, or if it’s truly beginner-friendly. Look for patterns: if multiple users complain about inconsistent angles or poor build quality, steer clear. Conversely, consistent praise for ease of use or long-term value is a strong indicator. Sites like Amazon, BladeForums, and YouTube offer detailed, honest feedback from people who’ve actually used these tools daily.
Different Types of Buying Guide

Common Buying Mistakes to Avoid
❌ Mistake: Choosing Based Solely on Price
Why it’s bad: The cheapest option isn’t always the best value. A $10 pull-through sharpener might seem appealing, but if it damages your knife’s edge or wears out in months, you’ll end up spending more replacing both the sharpener and your blades.
What to do instead: Focus on total cost of ownership. A $25 double-sided whetstone (240/1000 grit) can last years and sharpen dozens of knives perfectly. Invest in quality that matches your usage frequency.
❌ Mistake: Ignoring Angle Consistency
Why it’s bad: Sharpening at inconsistent angles leads to uneven edges, reduced cutting performance, and faster dulling. Many beginners freehand stones without guides, resulting in frustration and wasted effort.
What to do instead: Use angle guides—even simple ones like a coin or rubber shim—or opt for systems with built-in angle control (like Lansky or Work Sharp). Consistency beats speed every time.
❌ Mistake: Over-Sharpening or Using Too Coarse a Grit
Why it’s bad: Aggressive grinding removes excessive metal, shortening your knife’s life. Starting with a 120-grit stone on a slightly dull knife is overkill and creates unnecessary wear.
What to do instead: Match grit to need: use coarse (200–400) only for damaged edges, medium (800–1000) for regular sharpening, and fine (3000+) for polishing. Most home cooks only need 800–1000 grit for maintenance.
❌ Mistake: Neglecting Maintenance of the Sharpener
Why it’s bad: Dirty or clogged stones lose effectiveness. A whetstone packed with metal particles won’t cut properly and can scratch your blade.
What to do instead: Clean stones regularly with water and a soft brush. Flatten them periodically using a lapping plate or sandpaper on glass. Store in a dry place to prevent warping.
❌ Mistake: Assuming Electric = Better
Why it’s bad: Electric sharpeners often use fixed angles and abrasive wheels that can overheat and damage high-carbon or Japanese blades. They’re convenient but lack precision.
What to do instead: Reserve electric sharpeners for Western-style knives and heavy use. For delicate or expensive blades, stick to manual methods like whetstones or guided systems.
❌ Mistake: Skipping Honing Between Sharpenings
Why it’s bad: Many people wait until their knife is completely dull before sharpening, which requires more work and metal removal. This accelerates wear.
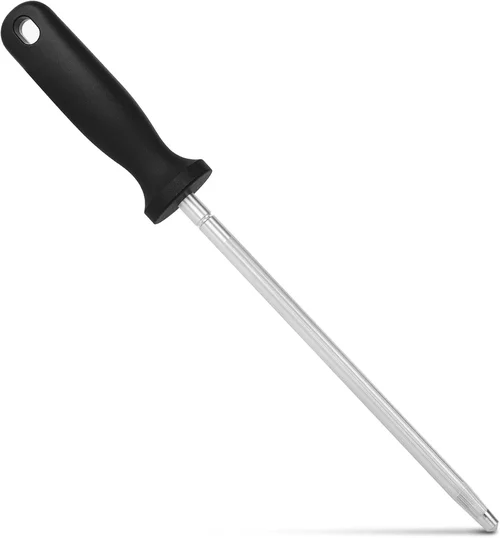
What to do instead: Use a honing rod weekly to realign the edge. Think of it as “tuning” your knife—it keeps the edge straight between full sharpenings and extends the time between stone sessions.
❌ Mistake: Buying Specialized Tools for Every Knife
Why it’s bad: You don’t need a separate sharpener for your paring knife, bread knife, and cleaver. Most versatile systems handle multiple blade types.
What to do instead: Choose a flexible system—like a dual-grit whetstone or adjustable-angle guide—that works across your entire collection. One good tool beats five mediocre ones.
Budget Guidelines: How Much Should You Spend?
Entry-Level ($10–$25): This tier is perfect for occasional users or those testing the waters. Expect basic pull-through sharpeners, single-grit stones, or budget honing rods. While functional, these often lack precision and durability. Great for students, campers, or as a backup—but not ideal for daily kitchen use.
Mid-Range ($25–$60): The sweet spot for most home cooks. Here you’ll find quality double-sided whetstones (e.g., King 1000/6000), reliable guided systems like the Lansky Deluxe, or well-built ceramic rods. These offer excellent performance, longevity, and versatility without breaking the bank. If you own 2–5 knives and sharpen monthly, this range delivers the best value.
Premium ($60–$120): For enthusiasts and serious home chefs. Options include high-end diamond stones (DMT or Atoma), premium electric sharpeners (Work Sharp Culinary), or full guided kits with multiple stones. These provide faster sharpening, finer finishes, and superior build quality. Worth it if you sharpen weekly or own expensive Japanese knives.
Luxury ($120+): Reserved for professionals or collectors. Think Japanese natural water stones, custom-made strops, or industrial-grade electric systems. While impressive, most home users won’t benefit from this level of investment. Only consider if you’re restoring vintage blades or running a commercial kitchen.
Expert Tips for Getting the Best Deal
- Buy during off-seasons: Look for sales in late winter or early spring—many retailers clear out kitchen gadgets before summer grilling season. Black Friday and Prime Day also offer solid discounts on sharpening kits.
- Check manufacturer websites directly: Brands like Lansky and Work Sharp often run exclusive promotions or bundle deals not available on Amazon. Sign up for newsletters to get early access.
- Consider refurbished or open-box items: Reputable sellers (like Amazon Renewed or brand-certified refurbishers) offer tested, warrantied sharpeners at 20–40% off retail.
- Bundle your purchase: Buying a stone + rod + strop together usually costs less than purchasing individually. Kits often include useful extras like angle guides or storage cases.
- Read the fine print on warranties: Some “lifetime” warranties only cover manufacturing defects—not wear and tear. Make sure you understand what’s protected before relying on it.
- Test before committing: If possible, try a friend’s sharpener or visit a store that lets you demo tools. Feel matters—especially with handheld systems.
- Don’t overlook DIY alternatives: A smooth ceramic mug bottom can serve as an emergency sharpening surface. While not a replacement for proper tools, it’s a free hack in a pinch.
- Invest in learning: Watch free YouTube tutorials from experts like Jon at Japanese Knife Imports or ChefSteps. Proper technique maximizes any tool’s effectiveness—and saves money long-term.

Frequently Asked Questions
Q: How often should I sharpen my knives?
A: It depends on usage. Home cooks typically need full sharpening every 3–6 months. Professional chefs may sharpen weekly. Use a honing rod 1–2 times per week to maintain the edge between sharpenings. A simple test: if your knife struggles to slice a ripe tomato cleanly, it’s time to sharpen.
Q: Can I sharpen serrated knives with regular tools?
A: Most standard sharpeners won’t work on serrated blades. You’ll need a tapered ceramic or diamond rod that fits into the scallops. Gently stroke each serration individually. Some pull-through sharpeners have a dedicated serrated slot—check compatibility before buying.
Q: Do I need oil or water for whetstones?
A: It depends on the stone type. Water stones (like King or Shapton) require soaking in water for 5–10 minutes before use. Oil stones (less common today) need honing oil. Diamond stones can be used dry or with water. Always follow the manufacturer’s instructions.
Q: Will sharpening ruin my expensive Japanese knife?
A: Not if done correctly. Japanese knives often use harder steel that holds an edge longer but is more brittle. Use lower-angle guides (15–18°) and avoid aggressive grinding. A fine-grit stone (3000+) helps preserve the delicate edge. When in doubt, start with a coarser stone only if necessary.
Q: Is a honing rod the same as a sharpener?
A: No. A honing rod doesn’t remove metal—it realigns the microscopic edge that bends during use. Think of it as “straightening” the blade. You still need to sharpen periodically to restore the actual cutting edge.
Q: Can I use sandpaper to sharpen knives?
A: Yes! Many professionals use adhesive-backed sandpaper (120–3000 grit) on a flat surface like glass or granite. It’s cheap, effective, and allows precise control. Just ensure the surface stays perfectly flat and clean between grits.
Q: Why does my knife feel sharp but still not cut well?
A: This usually means the edge is microscopically folded or burred, not truly sharp. Run the blade lightly along a leather strop or finish on a high-grit stone (6000+) to remove the burr and polish the edge.
Q: Are electric sharpeners safe for Damascus or handmade knives?
A: Generally not recommended. The high-speed abrasives can overheat and damage layered steel or temper lines. Manual methods give you better control and preserve the knife’s integrity.
Q: How do I know if my whetstone is worn out?
A: A worn stone won’t cut efficiently and may feel glazed or clogged. If flattening doesn’t restore performance, it’s time to replace it. Most quality stones last 2–5 years with regular use.
Q: Can I sharpen scissors with these tools?
A: Some whetstones and guided systems work for scissors, but you’ll need to disassemble them and sharpen each blade individually. Specialized scissor sharpeners exist but are rarely worth the cost for home use.
Our Final Recommendations
Best for Budget-Conscious Buyers: King KW65 1000/6000 Grit Combination Whetstone ($25) – Offers professional-grade sharpening at an unbeatable price. Soak in water, use with a simple angle guide, and enjoy razor edges for years.
Best Overall Value: Lansky Deluxe 5-Stone Sharpening System ($55) – Includes coarse to ultra-fine stones, angle guides, and a carrying case. Perfect for consistent, precise sharpening of all knife types.
Best Premium Option: Work Sharp Culinary E5 Electric Sharpener ($99) – Combines speed and precision with adjustable angles and ceramic honing. Ideal for busy kitchens that need quick, reliable results.
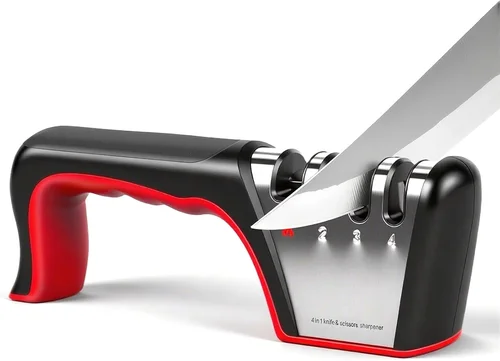
Best for Beginners: Smith’s PP1 Pocket Pal Pull-Through Sharpener ($18) – Simple, portable, and foolproof. Great for learning basics before moving to stones.
Best for Advanced Users: Shapton GlassStone 16000 Grit ($85) – Ultra-fine Japanese stone for mirror finishes and surgical sharpness. Requires skill but delivers unparalleled edge refinement.
Conclusion: Making the Right Choice
Sharpening your knives doesn’t have to be expensive, complicated, or intimidating. With the right knowledge and a modest investment, you can keep every blade in your kitchen performing at its peak. The key is matching the tool to your skill level, knife types, and usage frequency—not chasing the latest gadget or the lowest price tag.
Remember: a sharp knife is a safe knife. By prioritizing consistency over speed, investing in durable tools, and maintaining your edges regularly, you’ll save money, reduce frustration, and enjoy cooking more. Whether you choose a humble whetstone or a guided system, the act of sharpening becomes a mindful ritual that connects you to your craft.
So grab your knife, pick a method from this guide, and start sharpening. Your future self—and your tomatoes—will thank you.