Boiling milk in an electric kettle is convenient, but it can easily burn or overflow if not done right. With the right technique and precautions, you can safely heat milk without scorching or damaging your kettle. This guide shows you exactly how to do it—step by step.
Key Takeaways
- Use a clean, milk-safe kettle: Not all electric kettles are designed for milk—choose one with a non-stick interior or stainless steel that resists staining and odors.
- Fill only to the minimum level: Overfilling causes overflow; fill just enough milk for your needs, usually below the “min” line.
- Heat on low or medium setting: High heat scorches milk quickly; use lower temperatures and stir occasionally if possible.
- Stay nearby and monitor closely: Milk can boil over in seconds—never leave it unattended during heating.
- Clean immediately after use: Residual milk burns onto surfaces and causes odors; rinse and wipe while still warm.
- Consider alternative methods: For frequent use, a dedicated milk frother or stovetop may be safer and more efficient.
- Know your kettle’s limits: Check the user manual—some manufacturers explicitly warn against boiling milk.
📑 Table of Contents
- Why Boiling Milk in an Electric Kettle Can Be Tricky
- Choosing the Right Electric Kettle for Milk
- Step-by-Step Guide to Boiling Milk Safely
- Common Mistakes to Avoid
- Cleaning and Maintenance Tips
- Alternative Methods for Heating Milk
- When to Avoid Boiling Milk in an Electric Kettle
- Final Thoughts: Safety First, Convenience Second
Why Boiling Milk in an Electric Kettle Can Be Tricky
Electric kettles are built for speed and efficiency when heating water. They use high-powered heating elements that bring liquids to a boil in minutes. But milk? That’s a whole different story. Unlike water, milk contains proteins, fats, and sugars that react differently to heat. When exposed to high temperatures, these components can coagulate, stick to the kettle’s interior, and burn—leaving behind a stubborn, smelly residue.
Many people assume that because their kettle boils water effortlessly, it can handle milk just as well. Unfortunately, that’s often not the case. Milk has a lower boiling point than water and tends to foam and expand rapidly as it heats. This foam can trigger the kettle’s automatic shut-off sensor prematurely—or worse, cause a messy overflow that damages the appliance or creates a safety hazard. Plus, once milk burns, it’s nearly impossible to fully remove the smell and taste from the kettle, which can affect future uses.
The good news? With a few smart adjustments and careful monitoring, you can boil milk in an electric kettle without burning it. It’s all about understanding how milk behaves under heat and respecting your kettle’s design limitations. Whether you’re making hot chocolate, chai, or just warming milk for a baby bottle, this method ensures safety, cleanliness, and great results—every single time.
Choosing the Right Electric Kettle for Milk
Not every electric kettle is created equal—especially when it comes to handling dairy. If you plan to boil milk regularly, investing in a kettle designed for this purpose is a wise move. Look for models labeled “milk-friendly” or those with features like temperature control, non-stick interiors, or dedicated milk modes.
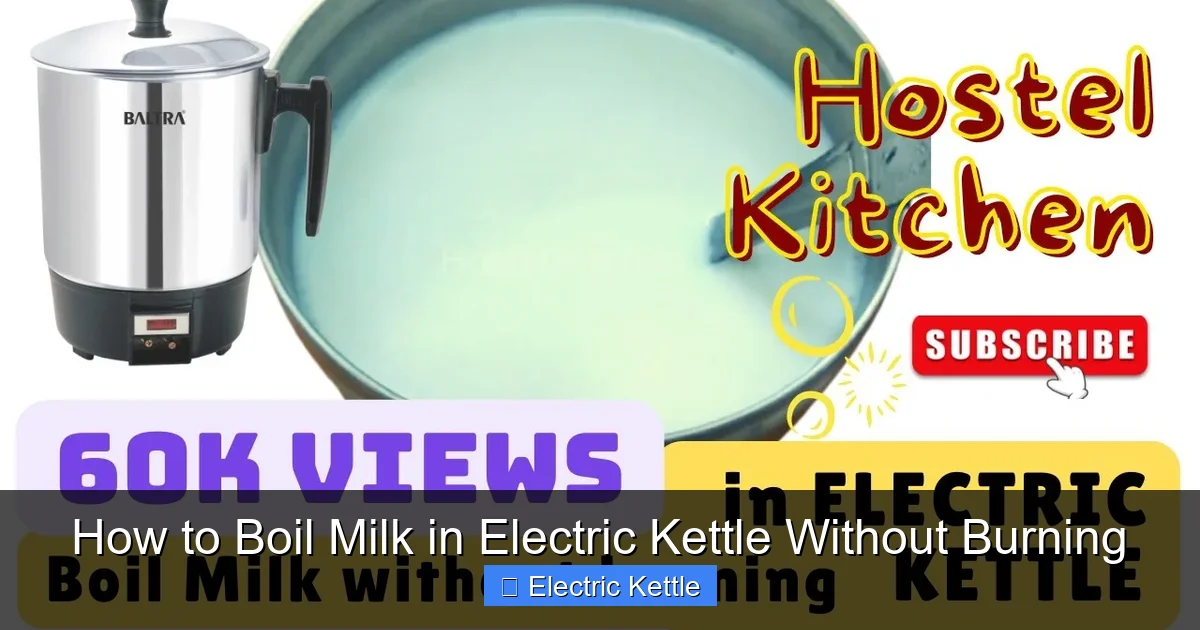
Visual guide about How to Boil Milk in Electric Kettle Without Burning
Image source: i.ytimg.com
Stainless Steel vs. Plastic vs. Glass Kettles
Stainless steel kettles are generally the best choice for boiling milk. They’re durable, resist staining, and distribute heat evenly, reducing hot spots that cause scorching. High-quality stainless steel (like 304-grade) won’t react with milk acids or retain odors. Avoid plastic kettles—they can absorb milk smells and may leach chemicals when heated. Glass kettles look elegant but are fragile and often lack precise temperature controls, making them less ideal for milk.
Non-Stick Coatings: Helpful or Harmful?
Some kettles feature non-stick interiors (often ceramic or PTFE-based) to prevent sticking. While these can make cleanup easier, be cautious. If the coating chips or degrades over time, it may contaminate your milk. Always check manufacturer guidelines—many non-stick kettles aren’t recommended for milk due to the risk of burning and coating damage. If you do use one, stick to low heat and avoid metal utensils.
Temperature Control Features
Kettles with variable temperature settings are a game-changer for milk. Instead of blasting it with full heat, you can select a gentler setting—like 70°C (158°F) for warming or 85°C (185°F) for near-boiling. This prevents rapid boiling and gives you more control. Some premium models even have a “milk” preset that automatically heats to the ideal temperature and shuts off before boiling.
Automatic Shut-Off and Boil-Dry Protection
These safety features are essential. Automatic shut-off prevents the kettle from running dry, which is crucial if milk foams up and triggers the sensor early. Boil-dry protection cuts power if no liquid is detected, reducing fire risk. Always ensure these functions are working before using your kettle for milk.
Size Matters: Don’t Overfill
Even the best kettle can fail if overloaded. Milk expands significantly when heated, so filling beyond the minimum line is a recipe for disaster. Most kettles have a “min” and “max” fill line—for milk, stay well below the max, ideally at or just above the min. A 1-liter kettle should hold no more than 300–400 ml of milk to allow room for expansion.
Step-by-Step Guide to Boiling Milk Safely
Now that you’ve got the right kettle, it’s time to put theory into practice. Follow these steps carefully to boil milk without burning, overflowing, or ruining your appliance.
Step 1: Clean Your Kettle Thoroughly
Before adding milk, make sure your kettle is spotless. Any leftover water scale, mineral deposits, or old milk residue can interfere with heating and cause uneven cooking. Rinse the interior with warm water and wipe with a soft cloth. For deep cleaning, use a mixture of equal parts water and white vinegar—run a cycle, then rinse twice with fresh water to eliminate any vinegar taste.
Step 2: Measure the Right Amount of Milk
Pour only the amount you need into the kettle. Remember: milk foams and rises. For a standard 1.7-liter kettle, 250–300 ml is usually safe. Use a measuring cup for accuracy. Whole milk tends to foam more than skim or low-fat varieties, so adjust accordingly. If you’re unsure, start small—you can always reheat more later.
Step 3: Set the Right Temperature
If your kettle has temperature control, select a setting between 70°C and 85°C (158°F–185°F). This is hot enough to warm or pasteurize milk without reaching a rolling boil. If your kettle only has an on/off switch, use the “keep warm” function if available, or manually monitor and unplug it just before boiling.
Step 4: Heat Gradually and Stay Close
Place the kettle on its base and turn it on. Stay in the room—don’t walk away. Milk can go from warm to boiling over in under a minute. Watch for bubbles forming around the edges and a thin layer of foam on top. These are signs it’s nearing boiling point.
Step 5: Stir Occasionally (If Possible)
Some kettles allow you to open the lid briefly to stir. If yours does, use a silicone or wooden spoon to gently stir the milk every 30–60 seconds. This helps distribute heat evenly and prevents a skin from forming on the surface. Never use metal spoons—they can scratch non-stick surfaces.
Step 6: Turn Off Before Full Boil
The moment you see steady bubbling or hear a change in sound (from a low hum to a louder gurgle), unplug the kettle immediately. Milk doesn’t need to reach a violent boil—just enough heat to achieve your goal. For most recipes, 80°C is sufficient. Overheating destroys nutrients and increases burn risk.
Step 7: Pour Carefully and Clean Right Away
Once heated, pour the milk into your cup, mug, or recipe container. Then, while the kettle is still warm (but not hot), rinse it thoroughly with warm water. Wipe the interior with a soft sponge or cloth. Avoid abrasive scrubbers—they can damage coatings or scratch stainless steel.
Common Mistakes to Avoid
Even experienced users make errors when boiling milk in kettles. Knowing what not to do is just as important as following the right steps.
Leaving the Kettle Unattended
This is the #1 cause of milk disasters. Milk heats faster than you think—especially in a powerful kettle. A quick trip to check your phone or answer the door can result in a burnt mess. Always stay within arm’s reach and keep your eyes on the kettle.
Using High Heat Settings
Cranking the heat to maximum might seem efficient, but it’s a fast track to scorching. Milk proteins denature and stick to hot surfaces almost instantly. Low and slow is the golden rule. If your kettle lacks temperature control, consider using a timer or smart plug to limit heating time.
Overfilling the Kettle
It’s tempting to heat a large batch, but milk expands by up to 20% when boiled. Overfilling leads to overflow, which can short-circuit the kettle or create a slippery, sticky hazard on your countertop. Stick to small quantities and reheat as needed.
Ignoring Manufacturer Warnings
Many kettle manuals explicitly state: “Do not boil milk.” Ignoring this voids warranties and risks damage. If your kettle isn’t designed for dairy, consider alternatives like a microwave-safe jug or stovetop saucepan. Your appliance’s lifespan—and your safety—are worth the extra minute.
Delaying Cleanup
Letting milk dry inside the kettle turns it into a hardened, stinky nightmare. Proteins and fats bake onto surfaces, requiring harsh chemicals or hours of soaking to remove. Clean immediately after use—while the residue is still soft and soluble.
Using Metal Utensils
Even in stainless steel kettles, metal spoons can scratch the interior, creating grooves where milk particles hide and burn. Stick to silicone, wood, or plastic tools for stirring and cleaning.
Cleaning and Maintenance Tips
Proper care extends your kettle’s life and ensures every cup of milk tastes fresh—not like yesterday’s burnt batch.
Immediate Rinse After Use
As soon as you’ve poured out the milk, rinse the kettle with warm water. Swirl it around to loosen any clinging particles, then empty and wipe dry. This simple habit prevents buildup and odors.
Weekly Deep Cleaning
Once a week, descale your kettle using a vinegar solution (1:1 water and white vinegar). Fill to the minimum line, boil, let sit for 15–20 minutes, then rinse thoroughly. This removes limescale and any hidden milk residue.
Odor Removal
If your kettle starts smelling like old milk, try boiling a mixture of water and baking soda (1 tablespoon per liter). Let it cool, then rinse. For stubborn smells, add a slice of lemon and boil—the citric acid neutralizes odors naturally.
Check the Heating Element
Over time, milk solids can accumulate on the heating coil or disc. If you notice slower heating or a burnt smell, inspect the element. Use a soft brush or toothbrush to gently remove debris—never use steel wool or sharp tools.
Store Properly
Keep the kettle dry and uncovered when not in use. Trapped moisture encourages mold and bacteria growth, especially in warm environments. A dry, ventilated space ensures it’s ready for your next use.
Alternative Methods for Heating Milk
While boiling milk in an electric kettle is possible, it’s not always the best option—especially if you do it frequently. Here are safer, more reliable alternatives.
Stovetop Saucepan
The classic method: pour milk into a small saucepan, heat over low to medium heat, and stir constantly with a wooden spoon. This gives you full control and prevents scorching. Use a heavy-bottomed pan for even heat distribution.
Microwave
For quick warming, use a microwave-safe container. Heat in 15–30 second intervals, stirring between each, until desired temperature is reached. Cover with a microwave-safe lid or plate to prevent splatters. Avoid overheating—microwaves can create superheated pockets that erupt when disturbed.
Dedicated Milk Frother or Steamer
Espresso machines often include steam wands for frothing milk. Standalone milk frothers (electric or manual) are affordable and designed specifically for dairy. They heat gently and create perfect foam for lattes and cappuccinos.
Electric Milk Heater
Small countertop appliances made solely for heating milk are available online and in kitchen stores. They’re safe, efficient, and eliminate the risk of damaging your main kettle.
Thermos or Insulated Flask
If you just need warm milk (not boiled), heat it on the stove or microwave, then pour into a pre-warmed thermos. It will stay hot for hours without further cooking.
When to Avoid Boiling Milk in an Electric Kettle
Despite our best efforts, there are times when using an electric kettle for milk simply isn’t worth the risk.
Old or Damaged Kettles
If your kettle has cracks, rust, or a malfunctioning thermostat, don’t use it for milk. Damaged interiors increase the chance of burning and contamination.
Frequent Use
Boiling milk daily? Your kettle wasn’t built for that. Repeated exposure to dairy accelerates wear and tear, leading to odors, stains, and potential electrical issues. Invest in a dedicated milk heater instead.
Unknown Kettle Origin or Quality
Cheap, no-name kettles often lack safety certifications and durable materials. If you’re unsure about your kettle’s quality, stick to water-only use.
Making Large Quantities
Need to heat a liter of milk for a party? A kettle isn’t the right tool. Use a large pot on the stove or multiple batches in a microwave-safe container.
Allergies or Sensitive Taste Buds
If you’re highly sensitive to flavors or have dairy allergies, even trace amounts of old milk residue can cause issues. In these cases, avoid cross-contamination by using separate appliances.
Final Thoughts: Safety First, Convenience Second
Boiling milk in an electric kettle can be a handy shortcut—but only when done responsibly. The key is respect: respect your kettle’s design, respect milk’s unique properties, and respect the potential for mess or damage. With the right kettle, careful technique, and immediate cleanup, you can enjoy perfectly heated milk without the burnt taste or cleanup headache.
Remember, convenience shouldn’t come at the cost of safety or appliance longevity. If you find yourself boiling milk often, consider upgrading to a model with milk-specific features or switching to a more suitable method. Your taste buds—and your kettle—will thank you.
Frequently Asked Questions
Can I boil milk in any electric kettle?
Not all electric kettles are safe for milk. Check your user manual—many manufacturers advise against it. Use only kettles with non-stick or stainless steel interiors and avoid plastic or damaged models.
Why does milk burn so easily in kettles?
Milk contains proteins and sugars that stick to hot surfaces and scorch quickly. Unlike water, it doesn’t evaporate cleanly, leaving behind residue that burns and smells bad.
How much milk should I put in my electric kettle?
Fill only to the minimum line or slightly above—usually 250–400 ml in a standard kettle. Milk expands when heated, so overfilling causes dangerous overflows.
Can I leave milk boiling in the kettle unattended?
No. Milk can boil over in seconds. Always stay nearby and monitor it closely until it reaches the desired temperature.
How do I remove burnt milk smell from my kettle?
Boil a mixture of water and baking soda or white vinegar, let it sit, then rinse thoroughly. For stubborn odors, add lemon slices and boil again.
Is it safe to use my kettle for water after boiling milk?
Yes, as long as you clean it thoroughly immediately after use. Residual milk can affect the taste of water, so rinse well and descale regularly.