Building your own electric brew kettle gives you full control over temperature, timing, and brewing precision—without the high cost of commercial systems. With basic tools, common materials, and a little patience, you can create a reliable, efficient brewing setup tailored to your needs.
Key Takeaways
- Safety is non-negotiable: Always use UL-listed components and follow electrical codes to prevent shocks or fires.
- Choose the right heating element: Immersion elements (3000–5500W) offer even heat distribution and are easy to install.
- Stainless steel is ideal: It resists corrosion, conducts heat well, and is food-safe for brewing applications.
- Temperature control is key: A PID controller lets you maintain precise temps for mashing, boiling, and cooling.
- DIY saves money: Building your own kettle can cost 40–60% less than buying a pre-made electric brew system.
- Customization matters: Add ports, sight glasses, or ball valves to match your brewing style and batch size.
- Test before you brew: Run dry and water tests to ensure all components work safely before your first brew day.
📑 Table of Contents
Why Build Your Own Electric Brew Kettle?
So you’ve been brewing beer at home for a while. Maybe you started with a basic stovetop setup—boiling wort in a pot on the stove, watching it like a hawk to prevent boilovers. You’ve upgraded your fermenters, invested in a hydrometer, and maybe even built a fermentation chamber. But there’s one piece of gear that still feels limiting: your kettle.
Commercial electric brew kettles are fantastic—consistent heat, precise temperature control, and hands-free operation—but they come with a hefty price tag. A high-quality all-in-one electric brewing system can easily cost $800 to $1,500. That’s a lot of homebrew for the price of a single piece of equipment.
That’s where building your own electric brew kettle comes in. Not only is it significantly more affordable, but it also gives you complete control over the design, features, and functionality. You can tailor it to your space, your batch size, and your brewing style. Plus, there’s a deep sense of satisfaction that comes from crafting something with your own hands—something that will help you make better beer.
Whether you’re a weekend warrior brewer or a serious hobbyist aiming for competition-level brews, a DIY electric brew kettle can be a game-changer. It’s not just about saving money—it’s about gaining flexibility, improving consistency, and taking your brewing to the next level.
What You’ll Need: Tools and Materials
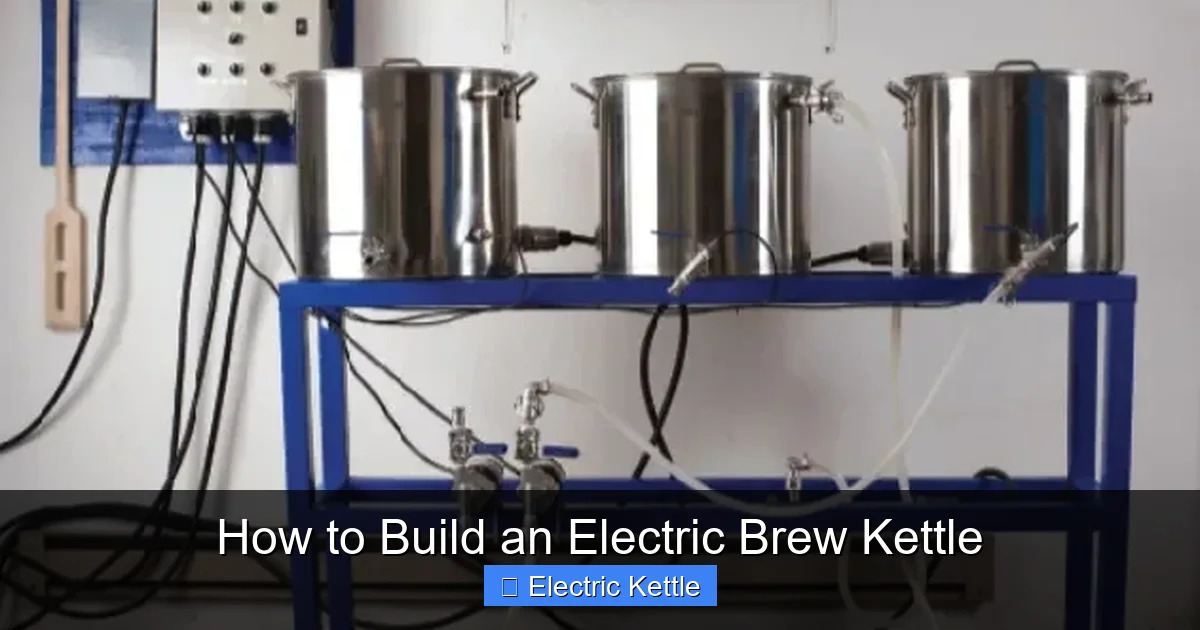
Visual guide about How to Build an Electric Brew Kettle
Image source: irrorwxhiqijjr5q.ldycdn.com
Before you start welding or soldering, take a moment to gather everything you’ll need. The good news? Most of these items are either already in your garage or available at local hardware stores and online retailers like Amazon, Home Depot, or specialty brewing suppliers.
Essential Materials
- Stainless steel kettle: A 5–10 gallon pot is ideal for most homebrewers. Look for food-grade 304 stainless steel with a thick bottom for even heat distribution. Avoid aluminum—it can react with acidic wort and affect flavor.
- Immersion heating element: Choose a 3000W to 5500W element with a 1.5” NPT thread. Higher wattage means faster boil times. Make sure it’s rated for continuous use and has a built-in thermostat or is compatible with external controllers.
- Temperature controller (PID): A digital PID controller like the Auber Instruments SYL-2700 or Inkbird ITC-308 allows precise temperature regulation. This is optional but highly recommended for mashing and step mashing.
- Thermowell: A stainless steel tube that houses your temperature probe. Install it near the bottom of the kettle for accurate readings.
- Ball valve: A ½” or ¾” stainless steel ball valve lets you drain wort easily into your fermenter. Install it at the bottom with a tri-clamp or weldless fitting.
- Sight glass (optional): A clear tube attached to the side of the kettle so you can monitor liquid levels without opening the lid.
- Lid with vent: A tight-fitting lid helps retain heat and prevent boilovers. Add a vent or airlock hole if you plan to use it for covered boils.
- Electrical components: 12-gauge or 10-gauge power cord, inline fuse (30A), and a heavy-duty plug (NEMA 5-15P or 6-20P depending on voltage).
Tools You’ll Need
- Drill with metal drill bits (especially 1.5” step bit for the heating element)
- Tap and die set (for threading holes if needed)
- Wrench set (adjustable and socket)
- Teflon tape (for sealing threaded connections)
- Multimeter (for testing electrical connections)
- Safety gear: gloves, goggles, and heat-resistant apron
Optional Upgrades
- Whirlpool arm: Helps create a vortex during cooling, improving trub separation.
- False bottom: Keeps grain out of the drain valve during lautering if using the kettle as a mash tun.
- Insulation jacket: Wrap the kettle in neoprene or fiberglass insulation to improve heat retention and efficiency.
- Digital display: Mount a small LCD screen to show real-time temperature without opening the controller.
Step-by-Step Build Instructions
Now that you’ve got your parts, it’s time to build. Don’t rush—take your time, double-check measurements, and prioritize safety at every step.
Step 1: Prepare the Kettle
Start by cleaning your stainless steel kettle thoroughly. Remove any labels, stickers, or manufacturing residues. Wash it with warm soapy water and rinse well. You want a clean, grease-free surface for drilling and sealing.
Next, decide where to place your components. The heating element should go on the side, about 2–3 inches above the bottom to avoid scorching. The ball valve goes at the very bottom, centered if possible. The thermowell should be placed opposite the heating element to get an accurate reading away from direct heat.
Use a marker to mark the drill points. Double-check spacing and alignment—once you drill, there’s no going back.
Step 2: Drill the Holes
Put on your safety goggles and gloves. Stainless steel is tough, so use a center punch to make a small indentation at each mark—this helps the drill bit stay in place.
Start with a small pilot bit (⅛”), then gradually step up to the required size. For the heating element, you’ll need a 1.5” hole. A step drill bit works best for this. Go slow and use cutting fluid or WD-40 to reduce friction and prevent overheating.
For the ball valve and thermowell, drill ½” or ¾” holes depending on your fittings. Clean up any metal shavings with a brush or compressed air.
Step 3: Install the Heating Element
Wrap the threads of the heating element with Teflon tape—about 5–6 wraps clockwise. This creates a watertight seal.
Insert the element into the hole from the outside. From the inside, thread on the included lock nut and tighten it securely with a wrench. Don’t overtighten—stainless steel can crack under too much pressure.
If your element has a grounding screw, connect a green grounding wire to it and route it to your power cord’s ground terminal.
Step 4: Install the Ball Valve
For the ball valve, you’ll need a weldless fitting or a bulkhead fitting. These allow you to install a valve without welding.
Insert the rubber gasket into the fitting, then thread the valve into the kettle from the outside. Tighten the lock nut from the inside. Again, use Teflon tape on the threads.
Test the valve by opening and closing it a few times. Make sure it turns smoothly and doesn’t leak.
Step 5: Install the Thermowell
Insert the thermowell into its hole. Use a compression fitting or weldless bulkhead fitting to secure it. These fittings compress a ferrule around the tube to create a seal.
Slide your temperature probe into the thermowell. It should fit snugly but not be forced. The tip should reach near the bottom of the kettle for accurate readings.
Step 6: Wire the Electrical System
This is the most critical step—safety first.
If you’re using a PID controller, follow the manufacturer’s wiring diagram. Typically, you’ll connect:
– The power cord’s live wire to the PID’s input
– The heating element to the PID’s output (via a relay if needed)
– The temperature probe to the PID’s sensor input
– The ground wire to all metal components
Use wire nuts or terminal blocks to secure connections. Wrap them with electrical tape for extra protection.
Install an inline fuse (30A) on the live wire near the plug. This protects against overloads.
Finally, plug everything in and test with a multimeter to ensure there’s no short circuit.
Step 7: Test the System
Before your first brew, run two tests:
1. Dry test: Turn on the kettle with no water. Let it run for 30 seconds. Listen for unusual noises and check for overheating. The element should get hot but not glow red.
2. Water test: Fill the kettle with 2–3 gallons of water. Turn it on and monitor the temperature. Check for leaks around the fittings. Let it run for 10–15 minutes to ensure stable operation.
If everything looks good, you’re ready to brew!
Safety Tips and Best Practices
Building an electric brew kettle is rewarding, but electricity and water are a dangerous mix. Follow these safety guidelines to protect yourself and your equipment.
Electrical Safety
– Always unplug the kettle before servicing or cleaning.
– Use a GFCI (ground fault circuit interrupter) outlet or plug. This cuts power if it detects a ground fault.
– Never operate the kettle without water—dry firing can destroy the element and create a fire hazard.
– Keep all electrical connections dry and elevated off the ground.
Operational Safety
– Never leave the kettle unattended during operation.
– Use a lid with a vent to prevent pressure buildup.
– Wear heat-resistant gloves when handling hot components.
– Keep a fire extinguisher nearby—just in case.
Maintenance Tips
– After each use, clean the kettle with PBW (Powdered Brewery Wash) or oxalic acid to remove scale and residue.
– Inspect seals and gaskets regularly for wear.
– Check electrical connections for corrosion or looseness.
– Store the kettle dry and covered to prevent dust buildup.
Customization Ideas for Your Brew Kettle
One of the best parts of building your own kettle is the freedom to customize. Here are some popular upgrades that can enhance your brewing experience.
Add a Sight Glass
A sight glass lets you monitor volume without opening the lid. Install a clear acrylic or glass tube on the side of the kettle with bulkhead fittings at the top and bottom. Fill it with water—it’ll rise and fall with the kettle’s level.
Install a Whirlpool Arm
After boiling, a whirlpool helps settle trub (protein and hop debris) in the center of the kettle. Attach a stainless steel arm near the top that directs wort in a circular motion. Use a pump to circulate the wort for 10–15 minutes post-boil.
Upgrade to a Mash Tun Combo
If you do all-grain brewing, consider adding a false bottom and converting your kettle into a mash tun. Use a cooler-style false bottom or a stainless steel mesh screen. This lets you mash and sparge in the same vessel—saving time and equipment.
Insulate for Efficiency
Wrap the kettle in an insulation jacket made of neoprene or fiberglass. This reduces heat loss, speeds up heating, and saves energy. You can buy pre-made jackets or DIY one with reflective insulation and Velcro straps.
Add a Digital Display
Mount a small LCD screen near the handle to show real-time temperature. Wire it to your PID controller so you can monitor temps at a glance—no need to walk over to the controller.
Common Mistakes to Avoid
Even experienced DIYers can make errors. Here are some pitfalls to watch out for.
Using the Wrong Wattage
A 1500W element might be fine for a tea kettle, but it’s too weak for brewing. You need at least 3000W to boil 5 gallons efficiently. Go too low, and you’ll spend hours waiting for a boil.
Skipping the PID Controller
While you can run the kettle with just a simple on/off switch, you’ll lose precision. A PID controller lets you set exact temperatures for mashing, boiling, and cooling. It’s worth the investment.
Poor Sealing
Leaks around the heating element or ball valve can ruin your brew and create safety hazards. Always use Teflon tape and check for tight seals. Test with water before brewing.
Ignoring Grounding
Never skip the ground wire. It protects you from electric shock if a fault occurs. Connect it to the kettle body, the heating element, and the power cord.
Overloading the Circuit
A 5500W element on a 120V circuit draws about 46 amps—way over the standard 15- or 20-amp household circuit. Use a 240V outlet or reduce wattage. Check your breaker panel and consult an electrician if needed.
Conclusion
Building your own electric brew kettle is a smart, satisfying project that pays off in better beer and lower costs. With the right materials, careful planning, and attention to safety, you can create a brewing system that rivals commercial setups—at a fraction of the price.
You’ll gain full control over your brew day, from precise temperature management to efficient boil times. Plus, the customization options are endless. Add a sight glass, whirlpool arm, or insulation jacket to match your workflow.
Remember, this isn’t just about saving money. It’s about learning, experimenting, and taking ownership of your craft. Every time you fire up your DIY kettle, you’ll know exactly how it works—and that’s a powerful feeling.
So gather your tools, follow the steps, and get ready to brew like a pro. Your perfect pint is just a build away.
Frequently Asked Questions
Can I use a regular kitchen pot for an electric brew kettle?
Yes, as long as it’s made of food-grade stainless steel and has a thick bottom. Avoid aluminum or non-stick coatings, which can react with wort or degrade over time.
Do I need a 240V outlet for my electric brew kettle?
It depends on the wattage. A 3000W element on 120V draws 25 amps—too much for most home circuits. Use 240V for higher wattage (5000W+) or stick to 3000W on a dedicated 20A circuit.
How do I prevent boilovers?
Use a larger kettle (at least 1.5x your batch size), stir frequently, and consider a lid with a vent. Adding a few drops of anti-foam or using a blow-off tube can also help.
Can I use my electric kettle for mashing?
Yes, if you have a PID controller and a false bottom. Just make sure the heating element doesn’t scorch the grain—use lower temps and stir occasionally.
How often should I clean my brew kettle?
Clean after every use with PBW or oxalic acid. Deep clean monthly to remove scale and buildup, especially around the heating element.
Is it safe to leave the kettle unattended?
No. Always monitor your kettle during operation. Set a timer, stay nearby, and never leave it running while you’re asleep or away from home.