Cleaning burnt milk from an electric kettle doesn’t have to be a nightmare. With the right techniques and household ingredients like vinegar, baking soda, and lemon, you can restore your kettle to like-new condition—safely and effectively.
Key Takeaways
- Act quickly: The sooner you clean burnt milk, the easier it is to remove residue and prevent permanent staining.
- Use natural cleaners: White vinegar, baking soda, and lemon juice are safe, effective, and non-toxic options for cleaning electric kettles.
- Avoid abrasive tools: Never use steel wool or harsh scrubbers on the interior, as they can damage the heating element and coating.
- Boiling method works best: A vinegar-water or lemon-water boil helps loosen burnt-on milk without scrubbing.
- Regular maintenance prevents buildup: Rinse your kettle after each use and descale monthly to avoid future burnt milk issues.
- Check manufacturer guidelines: Always refer to your kettle’s manual before cleaning, especially for coated or non-stick interiors.
- Air dry completely: After cleaning, let the kettle air dry with the lid open to prevent odors and moisture buildup.
📑 Table of Contents
- Why Burnt Milk Is a Common Electric Kettle Problem
- Understanding the Risks of Ignoring Burnt Milk Buildup
- Step-by-Step Guide to Cleaning Burnt Milk from Your Electric Kettle
- Alternative Cleaning Methods for Tough Stains
- Preventing Burnt Milk in the Future
- When to Replace Your Electric Kettle
- Conclusion
Why Burnt Milk Is a Common Electric Kettle Problem
We’ve all been there—rushing to make a quick cup of tea or warm milk for a child, only to get distracted and forget the kettle is on. Before you know it, the milk boils over, sputters, and leaves behind a sticky, burnt mess inside your electric kettle. It’s not just unsightly; burnt milk can create unpleasant odors, affect the taste of future drinks, and even damage your kettle over time if not cleaned properly.
Unlike water, milk contains proteins, fats, and sugars that caramelize when overheated. This creates a tough, sticky residue that clings to the heating element and the interior walls of the kettle. If left untreated, this buildup can reduce heating efficiency, cause strange smells, and even lead to malfunctions. The good news? Cleaning burnt milk from an electric kettle is entirely possible—and often easier than you think—with the right approach and a few common household ingredients.
Many people panic when they see that dark, burnt layer forming inside their kettle, assuming it’s ruined. But with patience and the correct cleaning method, most electric kettles can be restored to full working order. The key is to act quickly, use gentle yet effective cleaning agents, and avoid damaging the sensitive internal components. Whether you own a stainless steel, glass, or plastic electric kettle, there’s a safe and reliable way to tackle burnt milk residue without voiding your warranty or risking damage.
Understanding the Risks of Ignoring Burnt Milk Buildup
Impact on Taste and Odor
One of the most immediate consequences of leaving burnt milk in your kettle is the lingering smell and taste it imparts to future beverages. Milk proteins break down at high temperatures, producing compounds that can give your tea, coffee, or hot water a sour, burnt, or “off” flavor. Even after a quick rinse, these residues can remain embedded in the kettle’s interior, especially around the heating coil or base.
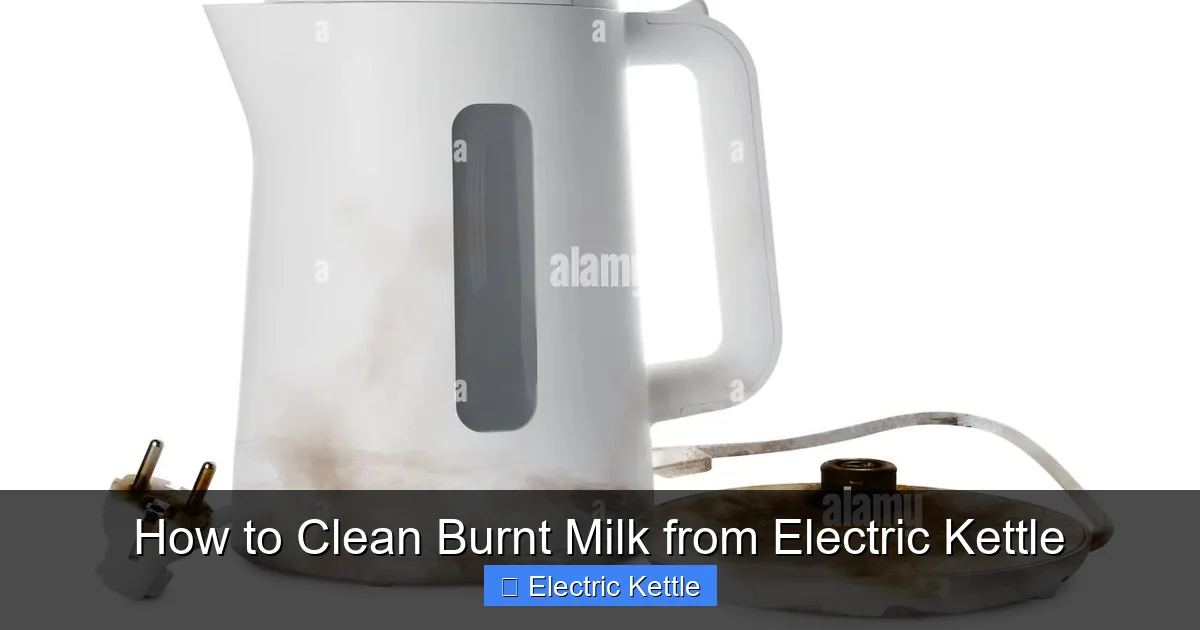
Visual guide about How to Clean Burnt Milk from Electric Kettle
Image source: c8.alamy.com
Imagine pouring yourself a fresh cup of herbal tea, only to detect a faint, unpleasant milk odor. That’s your kettle telling you it needs a deep clean. Over time, these odors can become more persistent, making it difficult to enjoy your drinks without that unwanted aftertaste. For households with children or individuals sensitive to flavors, this can be particularly bothersome.
Potential Damage to the Kettle
Beyond taste and smell, burnt milk can actually harm your electric kettle’s performance and longevity. The sticky residue can coat the heating element, insulating it and reducing its ability to transfer heat efficiently. This forces the kettle to work harder, increasing energy consumption and potentially shortening its lifespan.
In extreme cases, severe buildup can cause overheating, trigger safety shut-offs, or even lead to electrical malfunctions. Some kettles have thermal fuses that blow if they overheat repeatedly—meaning you could end up with a non-functional appliance simply because you didn’t clean up burnt milk in time. Additionally, if your kettle has a non-stick or coated interior, burnt milk can degrade the surface over time, leading to flaking or peeling that contaminates your drinks.
Health and Hygiene Concerns
While burnt milk itself isn’t toxic, the residue can become a breeding ground for bacteria and mold if not cleaned properly. The warm, moist environment inside a kettle—especially when milk residue is present—creates ideal conditions for microbial growth. This is particularly concerning if you use your kettle for baby formula or warm milk for young children.
Even if you don’t notice visible mold, invisible bacteria can thrive in the crevices and around the heating element. Regular cleaning not only improves performance but also ensures your kettle remains a safe, hygienic appliance for daily use. Think of it like cleaning a coffee maker or blender—just because you can’t see the grime doesn’t mean it’s not there.
Step-by-Step Guide to Cleaning Burnt Milk from Your Electric Kettle
Step 1: Safety First – Unplug and Cool Down
Before you begin any cleaning process, safety is paramount. Always unplug your electric kettle from the power source and allow it to cool completely. Never attempt to clean a hot kettle, as you risk burns or electrical shock. Even if the kettle feels only warm, give it at least 30 minutes to cool down—especially if it was recently used to boil milk.
Once cooled, remove any detachable parts if your model allows it, such as the lid or filter. Check your user manual to see what components can be safely removed. This will give you better access to the interior and make the cleaning process more thorough. If your kettle has a built-in filter, rinse it separately under warm water to remove any milk particles.
Step 2: Rinse Out Loose Residue
Start by pouring out any remaining liquid and rinsing the interior with warm water. Use a soft sponge or cloth to gently wipe away any loose milk residue. Avoid using abrasive scrubbers or metal brushes, as these can scratch the interior surface—especially in kettles with non-stick coatings.
For stubborn spots, let the kettle sit with warm water for 10–15 minutes to soften the burnt milk. This pre-soaking step makes it easier to remove the residue without excessive scrubbing. You can also use a soft-bristled toothbrush to gently clean around the heating element and base, where milk often accumulates.
Step 3: Use a Vinegar-Water Solution
White vinegar is one of the most effective and natural cleaners for burnt milk and mineral deposits. Its acidic nature helps break down protein and fat residues while also descaling the kettle. To use vinegar, mix equal parts white vinegar and water—typically 1 cup of each for a standard 1-liter kettle.
Pour the solution into the kettle, making sure it covers the burnt areas. For best results, fill the kettle to about halfway or three-quarters full. Then, plug the kettle back in and bring the solution to a boil. Let it boil for 5–10 minutes, then turn off the kettle and unplug it again.
Allow the vinegar solution to sit in the kettle for at least 30 minutes—or even overnight for severe buildup. The longer it sits, the more time the vinegar has to dissolve the burnt milk. After soaking, pour out the solution and rinse the kettle thoroughly with clean water. You may notice a slight vinegar smell, but this will dissipate after a few rinses.
Step 4: Scrub Gently (If Needed)
After the vinegar soak, most of the burnt milk should have loosened. Use a soft sponge or cloth to wipe the interior. For any remaining spots, dip a cloth in a paste made from baking soda and water (about 2 tablespoons of baking soda with enough water to form a thick paste). Gently scrub the affected areas—baking soda is mildly abrasive but safe for most kettle interiors.
Avoid using steel wool, scouring pads, or harsh chemicals like bleach, as these can damage the kettle’s surface or leave toxic residues. If your kettle has a stainless steel interior, a little elbow grease with a soft sponge is usually enough. For glass kettles, be extra cautious around the heating coil to avoid cracking.
Step 5: Rinse and Deodorize
After scrubbing, rinse the kettle several times with clean water to remove all traces of vinegar, baking soda, and loosened residue. To eliminate any lingering odors, fill the kettle with fresh water, add a few slices of lemon or a tablespoon of lemon juice, and bring it to a boil. Let it cool, then pour out and rinse again.
Lemon not only helps neutralize odors but also leaves a fresh, clean scent. This step is especially helpful if the burnt milk left a strong smell. You can repeat the lemon boil once or twice if needed. Once done, wipe the exterior with a damp cloth and dry it thoroughly.
Step 6: Air Dry and Reassemble
Leave the kettle open to air dry completely before reassembling and storing. This prevents moisture buildup, which can lead to mold or mildew. Make sure all parts, including the lid and filter, are dry before putting them back. Once dry, your kettle should be ready for use—clean, odor-free, and functioning like new.
Alternative Cleaning Methods for Tough Stains
Baking Soda Boil Method
If vinegar isn’t your preferred cleaner, baking soda offers another effective alternative. Mix 2–3 tablespoons of baking soda with water to create a paste, then spread it over the burnt areas. Alternatively, dissolve 1–2 tablespoons of baking soda in water and boil the solution in the kettle for 10 minutes.
Baking soda is mildly abrasive and alkaline, helping to break down milk proteins and fats. After boiling, let the solution sit for 30 minutes, then scrub gently and rinse thoroughly. This method is especially useful for kettles with delicate interiors, as baking soda is gentler than vinegar.
Lemon Juice and Salt Scrub
For a natural, citrus-based approach, combine lemon juice with a small amount of salt to create a scrubbing paste. The acidity of the lemon helps dissolve burnt milk, while the salt acts as a gentle abrasive. Apply the paste to the affected areas and let it sit for 15–20 minutes before scrubbing with a soft cloth.
This method works well for light to moderate buildup and leaves a fresh scent. Be sure to rinse thoroughly to remove all salt residue, as leftover salt can affect the taste of future drinks. Avoid using this method on plastic kettles, as the acidity may degrade certain plastics over time.
Commercial Descaling Solutions
If natural methods aren’t cutting it, consider using a commercial descaling solution designed for electric kettles. These products are formulated to remove limescale, mineral deposits, and organic residues like burnt milk. Follow the manufacturer’s instructions carefully, as some solutions require dilution and specific soaking times.
Look for eco-friendly, non-toxic options that are safe for food-contact surfaces. Avoid harsh chemical cleaners that may leave residues or damage your kettle. After using a descaling solution, rinse the kettle multiple times to ensure no cleaner remains.
Preventing Burnt Milk in the Future
Use the Right Temperature Setting
Many modern electric kettles come with temperature control settings. Milk should never be boiled at full heat—instead, use a lower temperature setting (around 70–80°C or 158–176°F) to warm it gently. Boiling milk causes it to scorch and stick to the sides, increasing the risk of burning.
If your kettle doesn’t have temperature control, consider using a separate milk warmer or stovetop method for heating milk. Reserve your electric kettle for water-based beverages to minimize the risk of burnt milk incidents.
Never Leave the Kettle Unattended
One of the simplest ways to prevent burnt milk is to stay in the kitchen while it’s heating. Milk heats up quickly and can boil over in seconds, especially if the kettle is overfilled. Set a timer or keep an eye on the kettle until it turns off automatically.
If you’re prone to distractions, consider using a kettle with an automatic shut-off feature and boil-dry protection. These safety mechanisms help prevent overheating and reduce the risk of damage.
Clean After Every Use
Make it a habit to rinse your kettle with warm water after each use, especially if you’ve heated milk. A quick rinse removes residue before it has a chance to dry and harden. For added protection, wipe the interior with a soft cloth once a week.
Monthly deep cleaning with vinegar or a descaling solution will keep your kettle in top condition and prevent buildup from affecting performance or taste.
When to Replace Your Electric Kettle
Despite your best efforts, there may come a time when cleaning no longer restores your kettle’s performance. If you notice persistent odors, strange tastes, or visible damage to the interior—such as cracks, peeling coatings, or a corroded heating element—it may be time to replace the appliance.
Most electric kettles last 3–5 years with proper care. If your kettle is older or has suffered repeated overheating incidents, investing in a new model could save you time, frustration, and potential safety risks. Look for kettles with easy-clean interiors, removable filters, and safety features like auto shut-off and boil-dry protection.
Conclusion
Cleaning burnt milk from an electric kettle might seem daunting, but with the right tools and techniques, it’s a manageable task that can extend the life of your appliance and keep your drinks tasting fresh. By acting quickly, using natural cleaners like vinegar and baking soda, and following a gentle cleaning routine, you can restore your kettle to like-new condition.
Remember, prevention is just as important as cleaning. Avoid boiling milk in your kettle when possible, stay attentive during use, and maintain regular cleaning habits. With these tips, you’ll enjoy clean, safe, and great-tasting beverages for years to come.
Frequently Asked Questions
Can I use bleach to clean burnt milk from my electric kettle?
No, you should never use bleach or other harsh chemicals to clean an electric kettle. Bleach can leave toxic residues that are unsafe for drinking and may damage the kettle’s interior. Stick to natural cleaners like vinegar, baking soda, or lemon juice.
How often should I clean my electric kettle?
For regular use, rinse your kettle after each use and perform a deep clean with vinegar or a descaling solution once a month. If you frequently heat milk or live in a hard water area, clean it more often to prevent buildup.
Will cleaning with vinegar damage my kettle?
No, white vinegar is safe for most electric kettles, including stainless steel and glass models. It’s a natural descaler and won’t harm the interior if used properly. Just be sure to rinse thoroughly afterward to remove any vinegar taste.
Can I clean a non-stick electric kettle the same way?
Yes, but be extra gentle. Avoid abrasive scrubbers and use soft sponges or cloths. Vinegar and baking soda are safe for non-stick coatings, but always check your manufacturer’s guidelines first.
Why does my kettle still smell after cleaning?
Lingering odors may indicate trapped residue or bacterial growth. Try a second vinegar or lemon boil, and ensure the kettle is completely dry after cleaning. If the smell persists, the kettle may need replacement.
Is it safe to boil milk in an electric kettle?
It’s not recommended. Milk can easily burn, boil over, and leave stubborn residues. Use a stovetop or dedicated milk warmer instead to avoid damaging your kettle and ensure better results.