Keeping your electric glass kettle clean ensures better-tasting water, longer appliance life, and safer daily use. This guide covers easy, step-by-step methods using common household ingredients like vinegar and lemon to remove limescale and buildup without damaging the delicate glass or heating elements.
Key Takeaways
- Clean regularly: Wipe down your electric glass kettle after each use and deep clean monthly to prevent mineral buildup.
- Use natural cleaners: White vinegar and lemon juice are safe, effective, and eco-friendly options for removing limescale.
- Never submerge the base: Only clean the interior and exterior glass parts—never immerse the electrical base in water.
- Descale with care: Follow a 1:1 vinegar-to-water ratio and let it sit for at least 30 minutes for tough deposits.
- Rinse thoroughly: Always rinse the kettle 2–3 times after cleaning to eliminate any lingering taste or odor.
- Avoid harsh chemicals: Bleach, steel wool, or abrasive scrubbers can scratch glass and damage internal components.
- Maintain performance: A clean kettle heats faster, uses less energy, and delivers purer-tasting water.
📑 Table of Contents
- Why Cleaning Your Electric Glass Kettle Matters
- What You’ll Need to Clean Your Electric Glass Kettle
- Step-by-Step Guide to Cleaning Your Electric Glass Kettle
- Alternative Cleaning Methods
- How Often Should You Clean Your Electric Glass Kettle?
- Common Mistakes to Avoid
- Maintaining Your Kettle Between Cleanings
- Conclusion
Why Cleaning Your Electric Glass Kettle Matters
You rely on your electric glass kettle every morning for your coffee, tea, or instant oatmeal. But have you ever stopped to think about what’s lurking inside that clear, sleek body? Over time, minerals from hard water—like calcium and magnesium—build up as a chalky white film known as limescale. This isn’t just unsightly; it can affect how your kettle performs and even change the taste of your beverages.
A dirty kettle doesn’t heat efficiently. The limescale layer acts as insulation, forcing the heating element to work harder and longer. That means higher energy bills and a shorter lifespan for your appliance. Worse yet, if left unchecked, mineral deposits can flake off into your water, giving your morning cuppa an unpleasant gritty texture or metallic aftertaste.
But it’s not just about performance—it’s about health and safety too. Bacteria and mold can grow in stagnant water or residue left behind in crevices. While glass is naturally non-porous and resists staining better than plastic, it still needs regular care. Cleaning your electric glass kettle isn’t just a chore; it’s a simple habit that protects your investment, your health, and your daily ritual.
The Hidden Dangers of Neglect
Many people assume that because they only use their kettle for boiling water, it stays clean on its own. But that’s a myth. Every time you boil water, especially in areas with hard water, tiny mineral particles settle on the interior walls and around the heating coil. Over weeks and months, this forms a thick crust that’s tough to remove without proper cleaning.
This buildup doesn’t just look bad—it can actually harbor bacteria. Stagnant water left in the kettle between uses creates a breeding ground for microbes. And if you’ve ever noticed a strange smell when you first turn on your kettle in the morning, that’s likely due to organic matter mixing with mineral deposits.
Additionally, excessive limescale can cause overheating. When the heating element is coated, it can’t transfer heat efficiently to the water. This may trigger the kettle’s safety shut-off prematurely or, in rare cases, lead to component failure. In extreme situations, overheating could pose a fire risk—though modern kettles have safeguards, it’s still wise to keep them clean.
Benefits of a Clean Kettle
On the flip side, a well-maintained electric glass kettle offers numerous advantages. First, your water tastes fresher. Without mineral residue altering the flavor, your tea, coffee, or broth will taste exactly as intended. Second, your kettle heats faster and uses less electricity, which saves money over time.
A clean kettle also lasts longer. Manufacturers design these appliances to perform optimally under clean conditions. Regular descaling prevents corrosion and wear on internal parts, especially the heating element and thermostat. Plus, glass kettles are prized for their transparency—why hide that beauty under a layer of grime?
Finally, cleaning your kettle is a small act of mindfulness. Taking five minutes each month to care for a tool you use daily fosters a sense of order and respect for your belongings. It’s a simple way to bring more intention into your routine.
What You’ll Need to Clean Your Electric Glass Kettle
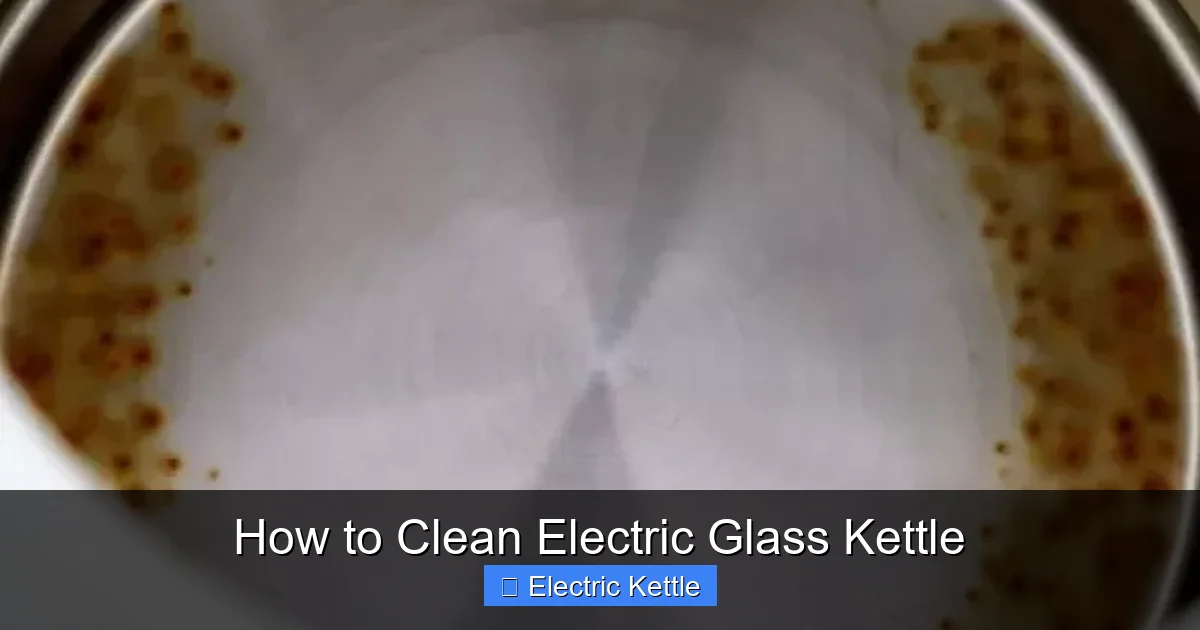
Visual guide about How to Clean Electric Glass Kettle
Image source: irrorwxhiqijjr5q.ldycdn.com
Before diving into the cleaning process, gather the right tools and materials. The good news? You probably already have most of them at home. Avoid buying specialty cleaners unless absolutely necessary—natural solutions work just as well and are gentler on your kettle and the environment.
Essential Cleaning Supplies
Start with white distilled vinegar. It’s acidic enough to dissolve limescale but safe for glass and food-contact surfaces. Lemon juice is another excellent option—its citric acid breaks down minerals naturally and leaves a fresh scent. For light cleaning, plain water and a soft sponge may suffice.
You’ll also need a non-abrasive cloth or sponge. Microfiber works great because it’s gentle on glass and won’t leave lint behind. Avoid steel wool, scouring pads, or anything with rough textures—they can scratch the glass and create tiny grooves where bacteria and minerals accumulate.
A soft-bristled bottle brush can help reach tight spots near the spout or around the heating element base (if accessible). If your kettle has a removable filter or mesh screen, a small toothbrush works perfectly for scrubbing those tiny holes.
For drying, use a clean, dry towel or let the kettle air-dry upside down on a dish rack. Never put a wet kettle back on its base—moisture can seep into electrical components and cause damage.
Optional but Helpful Items
Baking soda is useful for tackling stubborn stains or odors. Make a paste with a little water and gently rub it on discolored areas. It’s mildly abrasive but safe for glass when used correctly.
If you live in an area with extremely hard water, consider using a commercial descaling solution designed for kettles. Look for food-safe, non-toxic formulas. Always follow the manufacturer’s instructions and rinse thoroughly afterward.
A kettle cleaning tablet (often used for coffee makers) can also be effective. Drop one in, add water, boil, and let it sit. These are convenient but usually more expensive than vinegar or lemon.
Finally, keep a spray bottle handy. Fill it with equal parts water and vinegar for quick wipe-downs between deep cleans. This helps prevent buildup from getting out of hand.
Step-by-Step Guide to Cleaning Your Electric Glass Kettle
Now that you’re prepared, let’s walk through the cleaning process. Whether you’re dealing with light residue or heavy limescale, these steps will restore your kettle to like-new condition.
Step 1: Unplug and Cool Down
Safety first! Always unplug your electric glass kettle and let it cool completely before cleaning. Hot surfaces can cause burns, and water on electrical components is a serious hazard. Give it at least 30 minutes after use—or better yet, clean it in the morning before your first boil.
Step 2: Empty and Rinse
Pour out any remaining water. Give the interior a quick rinse with warm water to remove loose debris. If there’s visible scale, don’t worry—we’ll tackle that next.
Step 3: Prepare Your Cleaning Solution
For mild buildup, mix equal parts white vinegar and water. Fill the kettle about halfway—enough to cover the affected areas but not so much that it overflows when boiling. For heavy limescale, use undiluted vinegar or increase the vinegar ratio to 2:1 (vinegar to water).
Alternatively, cut a lemon in half and squeeze the juice into the kettle, then drop in the rinds. Add water to cover the lemon pieces. The citric acid works similarly to vinegar but with a pleasant aroma.
Step 4: Boil and Soak
Plug in the kettle and bring the solution to a boil. Once it reaches boiling point, turn it off and let it sit for at least 30 minutes. For severe scaling, leave it overnight. The acid will dissolve the mineral deposits, making them easy to wipe away.
If you’re using lemon, you can boil the mixture for 5–10 minutes, then let it soak. The heat helps accelerate the reaction.
Step 5: Scrub Gently
After soaking, use a soft sponge or cloth to wipe the interior. Most of the scale should come off easily. For stubborn spots, use a bottle brush or toothbrush to gently scrub around the heating element and spout.
Never use metal utensils or abrasive tools—they can scratch the glass and damage the heating coil. If scale remains, repeat the soak process.
Step 6: Rinse Thoroughly
Empty the kettle and rinse it 2–3 times with clean water. Fill it, swish the water around, and pour it out. This removes any residual vinegar or lemon taste. Taste the water after the final rinse—if it still smells or tastes acidic, rinse again.
Step 7: Wipe the Exterior
While the interior soaks, wipe down the outside of the kettle with a damp microfiber cloth. For fingerprints or smudges, use a bit of vinegar-water solution in a spray bottle. Avoid getting water near the base or control panel.
Dry the exterior with a clean towel. Never submerge the base or let water pool around the electrical connections.
Step 8: Reassemble and Test
If your kettle has a removable filter or lid, reattach it securely. Plug the kettle back in and run a cycle with fresh water (no cleaning solution). This ensures any last traces are flushed out and confirms everything is working properly.
Alternative Cleaning Methods
While vinegar and lemon are the gold standards, other methods can work depending on your preferences or available supplies.
Baking Soda Paste for Stains
If your glass kettle has yellow or brown stains (often from hard water or overheating), make a paste with baking soda and water. Apply it to the stained area, let it sit for 15–20 minutes, then scrub gently with a soft cloth. Rinse well. Baking soda is less acidic than vinegar but effective for surface discoloration.
Commercial Descalers
Products like Durgol, Urnex, or even generic descaling solutions are formulated specifically for kettles and coffee makers. They’re convenient and often faster-acting than DIY methods. Follow the package instructions carefully—most require boiling, soaking, and multiple rinses.
These products are safe when used as directed, but they can be costly over time. Reserve them for heavy buildup or if you prefer not to use vinegar.
Boiling Water Only (For Light Maintenance)
If your kettle is mostly clean and you just want to freshen it up, boil plain water, let it sit for 10 minutes, then rinse. This helps loosen light residue and kills surface bacteria. It’s not a substitute for deep cleaning but works well between vinegar treatments.
Prevention Over Cure
The best cleaning method is prevention. Use filtered or distilled water if your tap water is very hard. This reduces mineral content and slows limescale formation. Also, empty the kettle after each use instead of letting water sit overnight.
Some kettles come with built-in filters or anti-scale cartridges. Replace these as recommended by the manufacturer to maintain performance.
How Often Should You Clean Your Electric Glass Kettle?
Frequency depends on how often you use your kettle and the hardness of your water. As a general rule:
– **Light users (1–2 times per week):** Clean every 2–3 months.
– **Daily users:** Clean monthly.
– **Hard water areas:** Clean every 2–4 weeks.
Signs it’s time to clean include:
– Visible white or gray film inside the kettle
– Slower heating times
– Unusual smells or tastes in boiled water
– Water boiling unevenly or sputtering
Set a reminder on your phone or calendar to stay consistent. Marking “Kettle Clean Day” on the first Sunday of each month makes it easy to remember.
Seasonal Deep Cleaning
Consider doing a thorough deep clean at the start of each season. This ensures your kettle stays in top shape year-round. Winter is especially important—many people use their kettles more for hot drinks, increasing the risk of buildup.
Common Mistakes to Avoid
Even with the best intentions, it’s easy to make errors that can damage your kettle or reduce its effectiveness.
Submerging the Base
Never place the entire kettle in water or run water over the electrical base. This can cause short circuits, damage the heating element, or create a shock hazard. Only clean the glass carafe and lid.
Using Harsh Cleaners
Avoid bleach, ammonia, or oven cleaners. These chemicals can react with glass or leave toxic residues. Even strong citrus cleaners may be too abrasive if not diluted properly.
Skipping the Rinse
Failing to rinse thoroughly after using vinegar or lemon leaves a sour taste in your water. Always rinse at least twice and run a test boil with fresh water.
Scrubbing Too Hard
Glass may seem tough, but it scratches easily. Aggressive scrubbing creates micro-abrasions that trap minerals and bacteria. Use gentle pressure and soft tools only.
Ignoring the Filter
If your kettle has a mesh filter in the spout, clean it regularly. Clogged filters reduce water flow and can harbor mold. Remove it (if possible) and scrub with a toothbrush under warm water.
Maintaining Your Kettle Between Cleanings
Daily habits go a long way in keeping your electric glass kettle clean.
Wipe After Each Use
After boiling, pour out the water and wipe the interior with a dry cloth. This prevents water spots and slows mineral buildup.
Empty Completely
Don’t leave water sitting in the kettle overnight. Stagnant water promotes bacterial growth and accelerates scaling.
Use a Water Filter
Install a faucet filter or use a pitcher filter like Brita to reduce mineral content. Softened water means less limescale and cleaner kettles.
Store Properly
Keep the kettle in a dry, cool place. Avoid stacking items on top of it, which can scratch the glass or damage the lid.
Conclusion
Cleaning your electric glass kettle doesn’t have to be a daunting task. With simple ingredients like vinegar and lemon, a little time, and the right technique, you can keep your kettle sparkling clean and performing at its best. Regular maintenance not only extends the life of your appliance but also ensures every cup of tea or coffee tastes pure and delicious.
By following this guide, you’ll avoid common pitfalls, save money on energy and replacements, and enjoy peace of mind knowing your kettle is safe and hygienic. Make cleaning a monthly habit, and your electric glass kettle will serve you well for years to come.
Remember: a clean kettle is more than just a shiny kitchen tool—it’s a small but meaningful step toward a healthier, more efficient home.
Frequently Asked Questions
Can I use apple cider vinegar to clean my electric glass kettle?
Yes, but white distilled vinegar is preferred. Apple cider vinegar is less acidic and may leave a stronger odor or stain the glass over time. Stick to white vinegar for best results.
Is it safe to boil vinegar in my kettle?
Absolutely. Boiling vinegar is a common and safe method for descaling. Just ensure you rinse the kettle thoroughly afterward to remove any lingering smell or taste.
How do I remove rust spots from my glass kettle?
Rust spots are rare in glass kettles but can occur if metal particles enter the water. Use a paste of baking soda and water, gently scrub, and rinse well. Avoid abrasive tools.
Can I clean the heating element directly?
Most electric glass kettles have concealed heating elements under a stainless steel plate. You can’t access them directly, but soaking with vinegar will clean the surface they contact.
What if my kettle has a plastic base or handle?
Wipe plastic parts with a damp cloth and mild soap. Avoid soaking or using strong acids, as they can degrade plastic over time. Always dry thoroughly.
How do I know if my water is too hard for my kettle?
Signs include rapid limescale buildup, white film on dishes, or soap that doesn’t lather well. You can also test your water with a home hardness test kit available at hardware stores.