Keeping the outside of your electric kettle clean not only improves its appearance but also extends its lifespan and ensures safe, hygienic use. This guide walks you through easy, safe, and effective methods to clean every part of your kettle’s exterior—from stainless steel to plastic—without damaging delicate surfaces or electrical components.
Key Takeaways
- Unplug before cleaning: Always disconnect the kettle from power to prevent electrical hazards and protect internal components.
- Use gentle, non-abrasive cleaners: Harsh chemicals or scrubbing pads can scratch finishes or degrade materials over time.
- Focus on buildup-prone areas: Pay extra attention to the base, handle, spout, and control panel where dust, fingerprints, and mineral residue accumulate.
- Microfiber cloths work best: They lift dirt without scratching and don’t leave lint behind like paper towels.
- Dry thoroughly after cleaning: Moisture left on electrical contacts or seams can lead to corrosion or malfunction.
- Clean regularly for best results: Weekly wipe-downs prevent stubborn stains and make deep cleaning less frequent.
- Avoid submerging the base: Never immerse the power base in water—wipe only with a damp cloth.
📑 Table of Contents
- Why Cleaning the Outside of Your Electric Kettle Matters
- What You’ll Need to Clean Your Electric Kettle Outside
- Step-by-Step Guide to Cleaning Different Exterior Surfaces
- Cleaning Hard-to-Reach Areas and Problem Spots
- Safe Cleaning Practices to Avoid Damage
- How Often Should You Clean the Outside?
- Eco-Friendly and Budget-Friendly Cleaning Tips
- When to Call a Professional (or Replace Your Kettle)
- Conclusion
Why Cleaning the Outside of Your Electric Kettle Matters
Your electric kettle works hard every day—boiling water for tea, coffee, oatmeal, or instant soups. While most people focus on descaling the interior to remove limescale, the exterior often gets overlooked. But here’s the truth: a dirty outside isn’t just unsightly—it can actually affect performance and safety.
Over time, dust, grease, water splashes, and fingerprints build up on the kettle’s surface. On stainless steel models, this creates dull streaks and water spots. On plastic or painted finishes, grime can embed into tiny pores, leading to discoloration or even bacterial growth near the handle and spout—areas you touch frequently. Plus, if moisture seeps into the electrical base due to poor cleaning habits, it could cause short circuits or damage the heating element.
Regularly cleaning the outside of your electric kettle is a simple habit that pays big dividends. It keeps your appliance looking new, maintains hygiene, and ensures it operates safely for years. And the good news? It takes just a few minutes a week. In this guide, we’ll show you exactly how to clean every part of your kettle’s exterior—safely, effectively, and without expensive tools or harsh chemicals.
What You’ll Need to Clean Your Electric Kettle Outside
Before you start, gather these basic supplies. Most are already in your kitchen or bathroom cabinet:
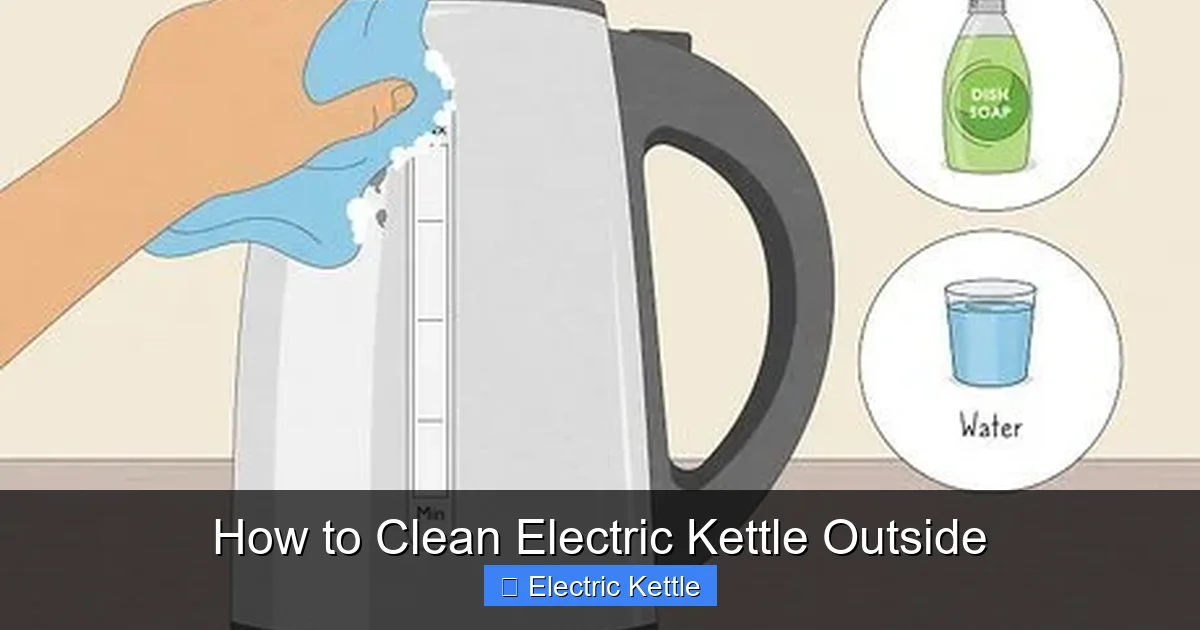
Visual guide about How to Clean Electric Kettle Outside
Image source: wikihow.com
- Microfiber cloths (at least two—one for cleaning, one for drying)
- Mild dish soap or liquid Castile soap
- White vinegar (for tough water spots or mineral deposits)
- Baking soda (for gentle abrasion on stubborn stains)
- Soft-bristled toothbrush or small detailing brush
- Distilled water (optional, but helps prevent new water spots)
- Cotton swabs (for tight spaces like around buttons or vents)
- Isopropyl alcohol (70% or higher, for disinfecting non-porous surfaces)
You don’t need specialty cleaners or expensive gadgets. In fact, avoiding commercial all-purpose sprays is wise—many contain ammonia or bleach, which can degrade plastic components or leave toxic residues near food-contact areas. Stick to natural, food-safe options whenever possible.
Pro tip: Keep a dedicated microfiber cloth just for your kettle. Using the same rag you wipe counters with can transfer grease or cleaning chemicals onto your appliance—defeating the purpose of cleaning!
Step-by-Step Guide to Cleaning Different Exterior Surfaces
Not all electric kettles are made the same. Some have sleek stainless steel bodies, others feature matte plastic finishes, and many include rubberized grips or digital displays. Each material requires a slightly different approach to avoid damage. Here’s how to handle the most common types:
Stainless Steel Kettles
Stainless steel is durable and stylish but shows fingerprints, water spots, and smudges easily. To clean it safely:
- Mix a few drops of mild dish soap with warm water in a bowl.
- Dip a microfiber cloth into the solution, wring it out well (it should be damp, not dripping), and wipe the entire exterior using gentle circular motions.
- For stubborn water spots or hard water stains, make a paste with equal parts white vinegar and water. Apply with a soft cloth, let sit for 1–2 minutes, then buff off with a clean, dry microfiber cloth.
- Always wipe in the direction of the grain (if visible) to prevent swirl marks.
- Finish by drying thoroughly with a second dry microfiber cloth to prevent new water spots.
Avoid steel wool, abrasive sponges, or chlorine-based cleaners—they’ll scratch the surface and ruin the finish.
Plastic or Painted Kettles
Plastic exteriors are prone to staining and can become brittle if exposed to harsh chemicals. Use extra care:
- Wipe down with a cloth dampened with soapy water (mild dish soap + warm water).
- For sticky residues or dried-on spills, apply a paste of baking soda and water. Gently rub with a soft toothbrush, then wipe clean.
- Never use vinegar or alcohol on painted surfaces unless tested first—they can strip paint or cause clouding.
- Rinse your cloth frequently to avoid spreading dirt.
- Dry immediately to prevent water from seeping into seams or under decals.
If your plastic kettle has a glossy finish, consider using a plastic-safe polish once a month to restore shine—but only after cleaning.
Kettles with Rubberized or Textured Grips
Many modern kettles have soft-touch handles or bases for better grip. These textures trap dirt and oils:
- Use a cotton swab dipped in soapy water to clean crevices around the handle.
- For deeper cleaning, mix a teaspoon of baking soda with a few drops of water to form a paste. Apply with an old toothbrush, scrub gently, then wipe away with a damp cloth.
- Rinse thoroughly—baking soda residue can feel gritty if left behind.
- Let air-dry completely before plugging in.
Never soak rubberized parts. Prolonged moisture exposure can cause them to degrade or peel.
Digital Displays and Control Panels
Touchscreens or button panels require special care to avoid damaging sensitive electronics:
- Turn off and unplug the kettle.
- Use a microfiber cloth lightly dampened with water only—no soap or vinegar near electronics.
- For disinfecting, use a cloth lightly sprayed with 70% isopropyl alcohol. Wipe gently and let evaporate completely before use.
- Never spray liquid directly onto the display.
- Use cotton swabs for tight corners around buttons.
If your kettle has a removable base (some premium models do), check the manufacturer’s instructions—you may be able to wipe the underside safely.
Cleaning Hard-to-Reach Areas and Problem Spots
Even with regular wiping, certain spots tend to collect grime. Here’s how to tackle them without disassembling your kettle:
The Power Base and Cord Connection
This is the most critical area to keep dry and clean. Dust and spills here can cause electrical issues.
- Unplug the kettle and let it cool completely.
- Use a dry or slightly damp microfiber cloth to wipe the base. Never soak it.
- For dust buildup in vents or around the cord entry point, use a dry toothbrush or compressed air (like what you’d use for keyboards).
- If you notice corrosion or white powder (a sign of mineral leakage), contact the manufacturer—don’t attempt to clean it yourself.
Spout and Lid Edges
Water droplets and steam condense here, leaving mineral rings or soap scum.
- Soak a cotton ball in white vinegar and wrap it around the spout opening. Secure with a rubber band if needed, and leave for 10–15 minutes.
- Scrub gently with a soft toothbrush, then wipe clean.
- For the lid hinge or seal, use a cotton swab dipped in vinegar to remove buildup.
Handle Underside and Fingerprints
Your hands transfer oils every time you lift the kettle.
- Wipe the handle daily with a dry microfiber cloth to prevent buildup.
- Weekly, clean with a vinegar-water solution (1:1 ratio) on a cloth—safe for most materials.
- Buff with a dry cloth to restore shine.
Water Stains on the Base Plate
If your kettle sits on a countertop, mineral deposits from splashes can leave rings on the bottom rim.
- Make a paste of baking soda and water.
- Apply to the stained area, let sit for 5 minutes, then scrub gently with a toothbrush.
- Wipe clean and dry thoroughly before placing back on the base.
Remember: prevention is easier than removal. Place a small silicone mat or coaster under your kettle to catch drips and reduce staining.
Safe Cleaning Practices to Avoid Damage
Cleaning your kettle seems simple—but a few common mistakes can shorten its life or create safety risks. Follow these golden rules:
Never Submerge the Base or Electrical Parts
The power base contains circuits and heating elements. Even a small amount of water can cause short-circuiting, corrosion, or electric shock. Always wipe only—never rinse, soak, or run under water.
Avoid Harsh Chemicals Near Food Zones
The spout, lid, and handle are near where water pours out. Residues from bleach, ammonia, or strong degreasers can contaminate your drinking water. Stick to food-safe cleaners like vinegar, baking soda, or mild soap.
Don’t Use Abrasive Tools
Steel wool, scouring pads, or rough sponges will scratch stainless steel and plastic. These scratches not only look bad—they also trap bacteria and make future cleaning harder. Microfiber and soft brushes are your best friends.
Let It Cool First
Never clean a hot kettle. Thermal shock can crack plastic components or warp metal. Wait at least 15–20 minutes after use.
Check the Manual
Some kettles have special coatings (like anti-fingerprint or ceramic) that require specific care. If your model came with a care guide, follow it—especially for warranty purposes.
Disinfect Wisely
If someone in your household is sick, disinfect high-touch areas like the handle and button. Use 70% isopropyl alcohol on a cloth—it evaporates quickly and won’t leave residue. Avoid spraying near vents or seams.
How Often Should You Clean the Outside?
Consistency beats intensity. A quick weekly wipe-down prevents major buildup and keeps your kettle looking great with minimal effort.
- Daily: Give the handle and spout a quick dry wipe after use to remove fingerprints and water droplets.
- Weekly: Do a full exterior clean—wipe down all surfaces, clean the base, and tackle problem spots.
- Monthly: Deep clean with vinegar or baking soda for mineral deposits, especially if you live in a hard water area.
- As needed: After spills, sticky residues, or visible grime.
If you use your kettle multiple times a day (like in an office or large household), consider cleaning it twice a week. For occasional users, once a week is sufficient.
Set a reminder on your phone or tie it to another routine—like Sunday night cleanup or Friday coffee prep. Making it habitual ensures you won’t forget.
Eco-Friendly and Budget-Friendly Cleaning Tips
You don’t need to buy specialty cleaners to keep your kettle spotless. In fact, the most effective solutions are already in your pantry—and they’re better for your health and the planet.
Vinegar: The Natural Powerhouse
White vinegar cuts through grease, dissolves mineral deposits, and disinfects naturally. It’s safe on stainless steel, glass, and most plastics (test first). Mix with water (1:1) for general cleaning, or use full strength for tough spots.
Baking Soda: Gentle Abrasion
Perfect for scrubbing without scratching. Make a paste with water and apply to stains. It neutralizes odors too—great if your kettle smells musty.
Lemon Juice: Fresh Scent and Shine
For stainless steel, a cut lemon rubbed directly on the surface removes water spots and leaves a fresh scent. Rinse and dry immediately to avoid acid damage.
Reuse Old Toothbrushes
Designate an old toothbrush as your “kettle brush.” It’s perfect for tight spaces and gets into grooves without scratching.
Skip the Paper Towels
They leave lint and aren’t reusable. Microfiber cloths can be washed and reused hundreds of times—saving money and reducing waste.
By choosing simple, non-toxic ingredients, you protect your kettle, your health, and the environment—all while spending pennies per clean.
When to Call a Professional (or Replace Your Kettle)
Most exterior issues can be fixed at home. But sometimes, damage goes beyond surface dirt. Watch for these signs:
- Cracks or deep scratches that trap moisture or bacteria
- Corrosion or rust on metal parts (not just surface discoloration)
- Frayed power cord or loose connections
- Persistent odors that don’t go away after cleaning
- Warped base that doesn’t sit flat on the heating plate
If you notice any of these, stop using the kettle immediately. Electrical faults can be dangerous. Contact the manufacturer—many offer repair services or discounts on replacements. If your kettle is more than 5–7 years old, it may be time to upgrade to a newer, more efficient model anyway.
Remember: a well-maintained kettle lasts longer, performs better, and saves energy. Regular cleaning is a small investment with big returns.
Conclusion
Cleaning the outside of your electric kettle isn’t just about aesthetics—it’s about safety, hygiene, and longevity. With just a few minutes a week and common household items, you can keep your kettle looking shiny, functioning smoothly, and free from harmful buildup.
Start today: unplug your kettle, grab a microfiber cloth, and give it a quick wipe. Notice how much better it looks—and feels—to use. Over time, this simple habit becomes second nature, and your kettle will thank you with years of reliable service. Whether you’re brewing morning tea or heating water for pasta, a clean kettle ensures every cup is as fresh as the first.
Frequently Asked Questions
Can I use Windex or other glass cleaners on my electric kettle?
It’s not recommended. Many glass cleaners contain ammonia, which can damage plastic components or leave residues near food-contact areas. Stick to mild soap, vinegar, or water-based solutions for safety.
Is it safe to clean the outside of my kettle with vinegar?
Yes—vinegar is safe for stainless steel, glass, and most plastics (test a small area first). Avoid using it on painted or rubberized surfaces unless diluted heavily, as it may cause fading or drying over time.
How do I remove hard water stains from the base of my kettle?
Make a paste of baking soda and water, apply it to the stained area, let it sit for 5–10 minutes, then gently scrub with a soft toothbrush. Wipe clean and dry thoroughly.
Can I put my electric kettle in the dishwasher?
No. Never put any part of an electric kettle—including the exterior—in the dishwasher. The high heat and water pressure can damage electrical components, seals, and finishes.
What should I do if water gets into the base of my kettle?
Unplug it immediately and let it air-dry completely for at least 24–48 hours in a warm, dry place. Do not use it until you’re certain it’s fully dry. If it doesn’t work afterward, contact the manufacturer.
How often should I clean the outside if I use my kettle daily?
Wipe it down daily with a dry microfiber cloth, and do a full clean with soapy water or vinegar solution at least once a week to prevent buildup and maintain hygiene.