Keeping your electric kettle clean isn’t just about looks—it’s essential for health, performance, and longevity. Over time, mineral buildup and residue can affect taste and efficiency. This guide walks you through safe, easy, and effective ways to clean inside of electric kettle using household ingredients.
Key Takeaways
- Regular cleaning prevents limescale buildup: Hard water leaves mineral deposits that reduce heating efficiency and affect water taste.
- Vinegar is a natural and powerful cleaner: A 50/50 mix of white vinegar and water dissolves limescale without harsh chemicals.
- Baking soda works for light stains and odors: Great for scrubbing and deodorizing, especially when combined with water into a paste.
- Never submerge the base or electrical components: Only the kettle’s interior and removable parts should be cleaned—avoid water near the cord or heating element.
- Rinse thoroughly after cleaning: Leftover cleaning solution can affect taste, so always rinse multiple times before use.
- Clean every 1–2 weeks for best results: Frequency depends on water hardness and usage, but regular maintenance keeps your kettle in top shape.
- Use a soft brush or cloth: Avoid abrasive tools that can scratch the interior surface, especially on stainless steel or coated kettles.
📑 Table of Contents
Why Cleaning the Inside of Your Electric Kettle Matters
You probably use your electric kettle daily—maybe even multiple times a day. Whether it’s for your morning coffee, afternoon tea, or instant noodles, that little appliance works hard. But have you ever stopped to think about what’s building up inside?
Over time, especially if you live in an area with hard water, mineral deposits like calcium and magnesium start to accumulate on the heating element and interior walls. This chalky white or brown buildup is called limescale, and it’s more than just unsightly. It can slow down heating, reduce energy efficiency, and even affect the taste of your water. In extreme cases, it can lead to overheating or damage the kettle’s internal components.
But it’s not just minerals. Residue from tea, coffee, or flavored drinks can also stick to the inside, creating a sticky film that traps bacteria and odors. If you’ve noticed a strange smell or a metallic taste in your water, it’s likely time for a deep clean.
Cleaning the inside of your electric kettle isn’t just about maintenance—it’s about health, performance, and longevity. A clean kettle heats faster, uses less energy, and delivers better-tasting water. Plus, it extends the life of your appliance, saving you money in the long run.
The good news? You don’t need expensive cleaners or special tools. With a few common household ingredients and a little time, you can keep your kettle sparkling clean and functioning like new.
What Causes Buildup in Electric Kettles?
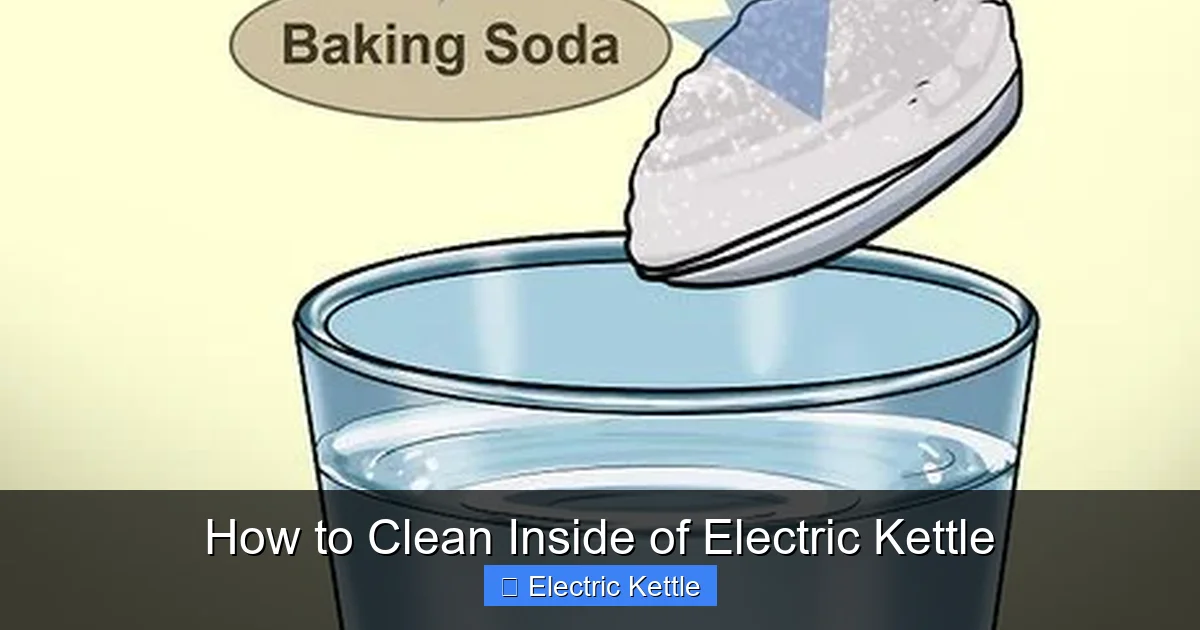
Visual guide about How to Clean Inside of Electric Kettle
Image source: wikihow.com
Before we dive into cleaning methods, it helps to understand what’s causing the problem in the first place. The main culprits are hard water and residue from beverages.
Hard Water and Limescale
Hard water contains high levels of dissolved minerals, especially calcium and magnesium. When you boil water in your kettle, these minerals don’t evaporate—they settle and form a hard, crusty layer known as limescale. This buildup tends to concentrate around the heating element, where water gets hottest.
Limescale doesn’t just look bad. It acts as an insulator, making it harder for the heating element to transfer heat to the water. This means your kettle takes longer to boil, uses more electricity, and may eventually overheat. In severe cases, the buildup can cause the kettle to shut off prematurely or even fail entirely.
The harder your water, the faster limescale builds up. If you notice white flakes in your water or a chalky residue on the kettle’s interior, you’re dealing with hard water. You can test your water hardness with a home test kit or check your local water report online.
Residue from Beverages
Even if you use soft water, residue from tea, coffee, or flavored drinks can accumulate inside your kettle. Tannins from tea and oils from coffee can leave a sticky film that traps dirt and bacteria. Over time, this film can develop odors and even promote mold growth, especially in humid environments.
If you frequently make herbal teas or use sweetened drinks, you may notice a darker stain or a slimy texture inside the kettle. This isn’t just unappealing—it can affect the taste of your water and potentially introduce unwanted flavors into your beverages.
Neglect and Infrequent Cleaning
Many people only clean their kettles when they notice a problem. But waiting too long allows buildup to harden and become more difficult to remove. Regular cleaning—every 1 to 2 weeks—prevents major buildup and keeps your kettle in optimal condition.
Even if your kettle looks clean, microscopic residue can still be present. That’s why it’s important to clean it regularly, not just when you see visible signs of dirt.
Safe and Effective Cleaning Methods
Now that you know why cleaning matters, let’s talk about how to do it safely and effectively. The best methods use natural, non-toxic ingredients that are gentle on your kettle and safe for your health.
Vinegar Solution (Best for Limescale)
White vinegar is one of the most effective and affordable cleaners for electric kettles. Its acetic acid content dissolves limescale without damaging the interior.
Here’s how to use it:
1. Fill the kettle halfway with equal parts white vinegar and water.
2. Bring the solution to a boil, then turn off the kettle and let it sit for 15–30 minutes.
3. For heavy buildup, you can let it sit longer—up to an hour.
4. After soaking, scrub the interior gently with a soft brush or sponge.
5. Rinse thoroughly with clean water at least 3–4 times to remove all vinegar taste.
6. Run a cycle with fresh water (boil and discard) to ensure no residue remains.
Tip: If the vinegar smell lingers, add a slice of lemon or a few drops of lemon juice to the final rinse water.
Baking Soda Paste (Great for Stains and Odors)
Baking soda is a mild abrasive that’s perfect for scrubbing away light stains and neutralizing odors. It’s especially useful if your kettle has a slight film or sour smell.
To use baking soda:
1. Mix 1–2 tablespoons of baking soda with a small amount of water to form a thick paste.
2. Use a soft cloth or sponge to apply the paste to the interior walls and heating element.
3. Gently scrub in circular motions, focusing on stained areas.
4. Let it sit for 10–15 minutes, then rinse thoroughly.
5. Wipe dry with a clean cloth.
For extra cleaning power, you can combine baking soda with vinegar. Add the baking soda first, then pour in vinegar—it will fizz and help loosen buildup. Let it sit for 10 minutes before scrubbing and rinsing.
Lemon Juice (Natural and Fresh-Smelling)
Lemon juice is another natural acid that works well on limescale and leaves a fresh scent. It’s a great alternative if you don’t like the smell of vinegar.
To clean with lemon:
1. Cut a lemon in half and squeeze the juice into the kettle.
2. Add enough water to fill the kettle about halfway.
3. Boil the solution, then let it sit for 30 minutes to an hour.
4. Scrub gently with a soft brush or sponge.
5. Rinse thoroughly and run a clean water cycle to remove any lemon taste.
You can also use lemon slices instead of juice—just drop them in with water and boil. The citric acid works the same way.
Commercial Kettle Cleaners (When Natural Methods Aren’t Enough)
If your kettle has severe limescale or you prefer a ready-made solution, commercial kettle cleaners are available. Look for products specifically designed for electric kettles—avoid generic descalers that may contain harsh chemicals.
Follow the manufacturer’s instructions carefully. Most involve dissolving a tablet or powder in water, boiling, soaking, and rinsing. Always rinse thoroughly to avoid chemical residue.
Tip: Even with commercial cleaners, avoid getting liquid near the electrical base or cord.
Step-by-Step Cleaning Guide
Now that you know the methods, here’s a simple step-by-step guide to cleaning the inside of your electric kettle safely and effectively.
Step 1: Unplug and Cool Down
Always unplug your kettle and let it cool completely before cleaning. Never attempt to clean a hot or recently used kettle—this can cause burns or damage the appliance.
Step 2: Empty and Rinse
Pour out any remaining water and rinse the interior with clean water to remove loose debris.
Step 3: Choose Your Cleaning Method
Decide whether you’re dealing with limescale, stains, or odors. Use vinegar for heavy limescale, baking soda for light stains, or lemon for a fresh clean.
Step 4: Apply the Cleaning Solution
Fill the kettle with your chosen solution (vinegar/water, baking soda paste, or lemon juice/water). Make sure the liquid covers the affected areas, especially the heating element.
Step 5: Boil and Soak
Boil the solution, then turn off the kettle and let it soak. The longer it sits, the more effective it will be—15 minutes for light buildup, up to an hour for heavy limescale.
Step 6: Scrub Gently
Use a soft brush, sponge, or cloth to scrub the interior. Avoid metal scrubbers or abrasive pads, which can scratch the surface. Focus on the heating element and walls where buildup is heaviest.
Step 7: Rinse Thoroughly
Empty the kettle and rinse it multiple times with clean water. Any leftover cleaner can affect the taste of your water, so don’t skip this step.
Step 8: Run a Clean Water Cycle
Fill the kettle with fresh water, boil it, and pour it out. This helps remove any remaining residue and ensures your next cup of tea tastes clean.
Step 9: Dry and Store
Wipe the interior and exterior with a dry cloth. Store the kettle with the lid open to prevent moisture buildup and odors.
Tips for Maintaining a Clean Kettle
Cleaning your kettle regularly is important, but so is maintaining it between cleanings. Here are some simple tips to keep your kettle fresh and efficient.
Use Filtered Water
If you have hard water, consider using filtered or distilled water in your kettle. This reduces mineral buildup and extends the time between cleanings.
Empty After Each Use
Don’t let water sit in the kettle for long periods. Empty it after each use to prevent stagnation and residue buildup.
Wipe the Interior Weekly
Even if you don’t do a deep clean, wipe the inside with a damp cloth once a week to remove light film or stains.
Avoid Overfilling
Overfilling can cause water to splash onto the electrical base during boiling. Stick to the recommended fill line to protect your kettle.
Check the Heating Element
Periodically inspect the heating element for buildup. If you see white or brown crust, it’s time for a vinegar soak.
Store Properly
Keep your kettle in a dry, well-ventilated area with the lid open. This prevents moisture buildup and odors.
Common Mistakes to Avoid
Even with the best intentions, it’s easy to make mistakes when cleaning your electric kettle. Here are some common pitfalls to avoid.
Using Harsh Chemicals
Avoid bleach, ammonia, or abrasive cleaners. These can damage the interior surface and leave toxic residues. Stick to natural options like vinegar, baking soda, or lemon.
Submerging the Base
Never immerse the electrical base or cord in water. Only clean the interior and removable parts. Water can damage the motor and create a safety hazard.
Skipping the Rinse
Rinsing is crucial. Leftover vinegar or cleaner can affect the taste of your water and potentially harm your health if ingested.
Using Metal Scrubbers
Metal brushes or steel wool can scratch the interior, especially on stainless steel or coated kettles. Use soft cloths or non-abrasive sponges instead.
Cleaning Too Infrequently
Waiting too long between cleanings allows buildup to harden. Clean your kettle every 1–2 weeks, or more often if you use it heavily or have hard water.
Ignoring the Lid and Spout
Don’t forget to clean the lid, spout, and any removable filters. These areas can collect residue and affect water flow.
When to Replace Your Electric Kettle
Even with regular cleaning, electric kettles don’t last forever. Most have a lifespan of 3–5 years, depending on usage and maintenance.
Signs it’s time to replace your kettle:
– Persistent limescale that won’t come off
– Rust or corrosion inside
– Leaks around the base or spout
– Inconsistent heating or frequent shut-offs
– Strange noises or burning smells
If your kettle is old or damaged, it’s safer and more efficient to replace it than to keep repairing it. Look for models with removable limescale filters or self-cleaning features to make maintenance easier.
Conclusion
Cleaning the inside of your electric kettle is a simple but essential task that pays off in better-tasting water, faster boiling, and a longer-lasting appliance. With natural ingredients like vinegar, baking soda, and lemon, you can keep your kettle spotless without harsh chemicals or expensive products.
Remember to clean regularly—every 1 to 2 weeks—and always rinse thoroughly to avoid lingering tastes. Avoid common mistakes like using abrasive tools or submerging the base, and store your kettle properly to prevent odors and moisture buildup.
A clean kettle isn’t just about hygiene—it’s about enjoying every cup of tea or coffee to the fullest. So take a few minutes this week to give your kettle the care it deserves. Your taste buds (and your wallet) will thank you.
Frequently Asked Questions
How often should I clean my electric kettle?
Clean your electric kettle every 1–2 weeks, or more often if you use it daily or have hard water. Regular cleaning prevents limescale buildup and keeps your water tasting fresh.
Can I use bleach to clean my kettle?
No, avoid bleach and other harsh chemicals. They can damage the interior and leave toxic residues. Stick to natural cleaners like vinegar, baking soda, or lemon juice.
Is it safe to boil vinegar in my kettle?
Yes, boiling vinegar is safe and effective for removing limescale. Just make sure to rinse the kettle thoroughly afterward to remove any vinegar taste.
What if my kettle has a strange smell?
A strange smell is usually caused by residue or bacteria. Clean the interior with a vinegar or baking soda solution, and run a few cycles with fresh water to eliminate odors.
Can I clean the heating element directly?
Yes, but only with a soft cloth or brush. Never use metal tools or submerge the element in water. Soaking in a vinegar solution helps dissolve buildup safely.
My kettle is still slow after cleaning. What’s wrong?
If your kettle is still slow, there may be severe limescale buildup or a faulty heating element. Try a longer vinegar soak, or consider replacing the kettle if it’s old or damaged.