Drawing an electric kettle may seem tricky at first, but with the right approach, it’s simple and fun. This guide breaks down the process into easy steps, from basic shapes to final details, so you can create a realistic or stylized version with confidence.
Have you ever wanted to draw an electric kettle but didn’t know where to start? Maybe you’re sketching a kitchen scene, designing a product illustration, or just practicing everyday objects. Whatever your reason, drawing an electric kettle is a great way to improve your observational skills and build confidence in rendering everyday items. The good news? It’s easier than you think—especially when you break it down into simple steps.
Electric kettles come in many shapes and styles—sleek stainless steel models, retro-inspired designs, or modern plastic ones with digital displays. But no matter the type, they all share common features: a rounded body, a spout for pouring, a handle for gripping, a lid on top, and a base that connects to the power source. By understanding these core elements, you can draw almost any electric kettle with accuracy and flair. The key is to start simple and build up complexity gradually.
In this guide, we’ll walk you through a step-by-step process to draw a classic electric kettle. Whether you’re a beginner or have some drawing experience, these instructions will help you create a clean, detailed sketch. We’ll cover everything from initial shapes to final shading, with tips on proportions, perspective, and adding realistic textures. By the end, you’ll not only know how to draw an electric kettle—you’ll feel inspired to draw other kitchen appliances too.
Key Takeaways
- Start with basic shapes: Use circles, ovals, and rectangles to map out the kettle’s body, handle, and spout before adding details.
- Focus on proportions: Getting the size and placement of parts right early ensures a balanced and realistic drawing.
- Observe real-life references: Looking at photos or actual kettles helps you understand curves, buttons, and lighting.
- Use light pencil strokes first: Begin with faint lines so you can erase and adjust as needed without damaging the paper.
- Add depth with shading: Use hatching, cross-hatching, or blending to create shadows and make your drawing pop.
- Highlight key features: Don’t forget the power base, lid, and control buttons—they make the electric kettle recognizable.
- Practice makes perfect: The more you draw, the better you’ll get at capturing the unique shape and style of different kettles.
📑 Table of Contents
Understanding the Structure of an Electric Kettle
Before picking up your pencil, it helps to understand what makes an electric kettle unique. Unlike stovetop kettles, electric kettles are designed to sit on a separate power base. This means they often have a flat bottom with electrical contacts, and the heating element is built into the base of the kettle itself. This design affects the shape and proportions, so it’s important to keep it in mind while drawing.
Most electric kettles have a cylindrical or slightly curved body that tapers toward the top. The spout is usually short and rounded, allowing for smooth pouring. The handle is often made of heat-resistant material and curves outward from the body for a comfortable grip. On the lid, you’ll typically find a small knob or button, and some models include a window to see the water level. The power base is usually a flat disc that the kettle sits on, with a cord that plugs into the wall.
When drawing, think of the kettle as a combination of simple 3D forms. The body can be seen as a cylinder or a rounded rectangle. The spout is like a small tube or cone. The handle is a curved shape that wraps around the side. The lid is a flat circle or dome. Breaking the object into these basic forms makes it much easier to sketch accurately.
Common Features to Include
To make your drawing recognizable as an electric kettle, include these key features:
– A rounded or cylindrical body
– A short, curved spout
– A handle that extends from the side
– A flat-bottomed base (for sitting on the power stand)
– A lid with a knob or button
– A power base or stand (optional but helpful for context)
– Control buttons or a display (on modern models)
Even if you’re drawing a simplified version, these elements help convey the function and style of the kettle. For example, a minimalist kettle might have smooth curves and no buttons, while a high-tech model could include a digital screen and multiple settings.
Choosing the Right Reference
One of the best ways to improve your drawing is to use a reference image. Look up photos of electric kettles online or observe one in your kitchen. Pay attention to how light reflects off the surface—does it have a shiny metal finish or a matte plastic coating? Are there visible seams or joints? These details add realism.
If you’re drawing from imagination, try to recall the kettle you use at home. Think about how the handle feels in your hand, how the lid opens, and where the cord connects. These small observations make your drawing more authentic.
Step-by-Step Guide to Drawing an Electric Kettle
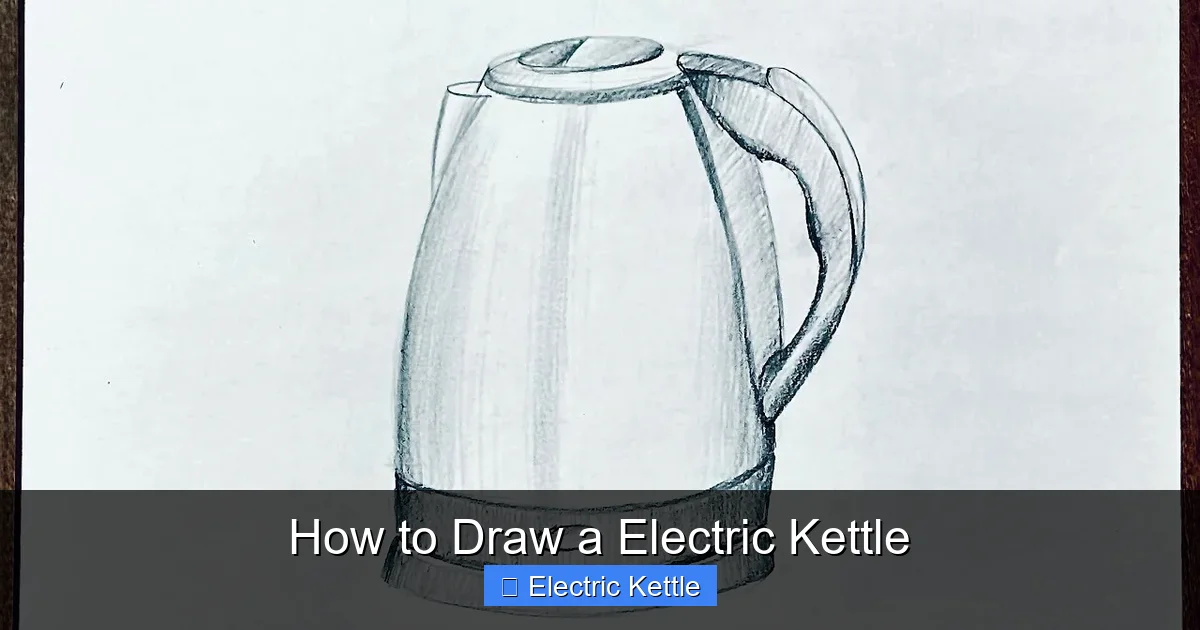
Visual guide about How to Draw a Electric Kettle
Image source: i.ytimg.com
Now that you understand the structure, let’s get into the actual drawing process. We’ll go step by step, starting with light pencil lines and building up to a finished sketch. You can use a regular pencil, a mechanical pencil, or even a digital drawing tool—whatever you’re comfortable with.
Step 1: Sketch the Basic Shapes
Start by drawing a large oval or rounded rectangle in the center of your page. This will be the main body of the kettle. Make it slightly wider at the bottom and narrower at the top, like a gentle curve. Don’t worry about perfection—this is just a guide.
Next, draw a small circle or oval near the top right side of the body. This is the spout. It should be about one-third the width of the body and angled slightly downward for pouring.
On the left side of the body, sketch a curved line that starts near the top and extends outward, then curves back down to meet the body again. This is the handle. Make it wide enough to fit a hand comfortably, but not so large that it looks out of proportion.
At the very top, draw a small circle or dome shape for the lid. Add a tiny rectangle or knob on top of the lid to represent the handle.
Finally, draw a flat oval or rectangle beneath the kettle for the power base. It should be slightly wider than the kettle’s bottom and sit flat on the surface.
Use light, loose strokes for all these shapes. You’ll refine them in the next steps.
Step 2: Refine the Outline
Now that you have the basic layout, go over your shapes with more defined lines. Smooth out the curves of the body and make sure the spout connects naturally to the side. Adjust the handle so it looks like it’s wrapping around the kettle, not just floating beside it.
Erase any overlapping lines or rough edges. Make sure the proportions look balanced—the spout shouldn’t be too big or too small compared to the body. The handle should feel functional, not decorative.
At this stage, you can also add a few details. For example, draw a small line where the lid meets the body to show the seam. Add a tiny circle or button on the handle if your kettle has a release mechanism. If your model has a water level window, sketch a narrow vertical strip on the side.
Remember, keep your lines clean but not too dark. You still want to be able to erase and adjust if needed.
Step 3: Add the Power Base and Cord
The power base is an important part of an electric kettle. Draw a flat, circular platform beneath the kettle. Make it slightly larger than the kettle’s bottom so it looks stable. Add a small notch or indentation on one side where the cord connects.
Now, draw the power cord. Start from the base and curve it gently downward, then extend it off the page or to a nearby outlet. Make the cord look flexible—use soft, flowing lines rather than straight ones. You can add a plug at the end if you like.
If your kettle has a detachable base, you might want to show a slight gap between the kettle and the base to indicate they’re separate pieces.
Step 4: Define the Lid and Spout Details
The lid is usually a simple dome or flat circle, but you can add realism by including a small air vent. Draw a tiny circle or slit near the center of the lid—this allows steam to escape when the water boils.
On the spout, add a subtle curve at the tip to show where the water would pour out. You can also draw a small line along the edge to suggest thickness.
If your kettle has a flip-top lid, sketch a hinge on one side and a button or lever on the other. For a push-button lid, draw a small rectangular button near the handle.
These small details make your drawing look more accurate and functional.
Step 5: Add Control Buttons and Display (Optional)
Many modern electric kettles have buttons or a digital display on the handle or body. If you’re drawing one of these models, add them now.
For buttons, draw small rectangles or circles arranged in a row. Label them with tiny symbols like “Boil,” “Keep Warm,” or “60°C” if you’re feeling detailed.
For a digital display, sketch a small screen—usually a dark rectangle with glowing numbers. You can draw simple digits like “1.7L” or “100°C” to show the water level or temperature.
These features are optional, but they help distinguish your kettle from a basic model and add a modern touch.
Adding Depth and Dimension with Shading
Now that your outline is complete, it’s time to bring your drawing to life with shading. Shading adds depth, making your kettle look three-dimensional instead of flat. It also helps show how light hits the surface, which is especially important for shiny or metallic kettles.
Understanding Light and Shadow
Before shading, decide where your light source is coming from. Imagine a light shining from the top left or top right of the page. This will determine where the highlights and shadows fall.
On a curved surface like a kettle, light creates a gradient—brightest on the side facing the light, gradually darkening toward the opposite side. The darkest area is usually the core shadow, which falls on the side opposite the light.
The spout and handle will also cast small shadows on the body. These help define their shape and position.
Basic Shading Techniques
There are several ways to shade your drawing. Here are three common methods:
– Hatching: Draw parallel lines close together. The closer the lines, the darker the area.
– Cross-hatching: Layer hatching lines in different directions to create deeper shadows.
– Blending: Use a blending stump, tissue, or your finger to smooth out pencil strokes for a soft, gradient effect.
For an electric kettle, blending works well for smooth, reflective surfaces like stainless steel. Hatching is better for matte finishes or textured plastic.
Start by shading the entire kettle lightly, following the curve of the body. Then, darken the areas in shadow, especially under the handle, around the spout, and on the side opposite the light.
Creating Highlights and Reflections
Highlights are the brightest spots where light hits directly. On a shiny kettle, these are often small, sharp white areas. Use an eraser to lift pencil marks and create highlights on the top of the body, the spout, and the lid.
Reflections are trickier but add realism. If your kettle is near a window or another object, you might see a faint reflection on its surface. Draw these as soft, blurred shapes—don’t make them too dark or detailed.
For example, if there’s a countertop below, you might see a subtle reflection of the kettle’s base. Draw this as a light, curved line with a bit of shading underneath.
Tips for Drawing Different Styles of Electric Kettles
Not all electric kettles look the same. Some are sleek and modern, while others are vintage or colorful. Here’s how to adapt your drawing to different styles.
Stainless Steel Kettles
These are the most common type. They have a shiny, reflective surface with smooth curves. When drawing, focus on clean lines and strong contrasts between light and dark. Use blending for soft gradients and an eraser for sharp highlights.
Pay attention to seams—many stainless steel kettles have visible joints where the body is welded. Draw these as thin, straight lines around the middle or near the spout.
Plastic Kettles
Plastic kettles come in bright colors and often have a matte finish. They’re less reflective, so shading is softer and more even. Use hatching or light blending, and avoid harsh highlights.
Some plastic kettles have transparent windows to see the water level. To draw this, shade the surrounding area normally, then leave the window area light or add a faint blue tint to suggest water.
Retro or Vintage Kettles
These often have rounded shapes, pastel colors, and decorative details like chrome trim or floral patterns. When drawing, emphasize the curves and add small design elements.
For example, draw a thin chrome band around the middle of the kettle. Use fine lines to add texture or patterns on the body. Keep the overall shape soft and friendly.
Minimalist or Modern Kettles
These focus on simplicity—clean lines, neutral colors, and hidden controls. When drawing, use smooth, uninterrupted curves and minimal details.
Avoid adding too many buttons or seams. Instead, focus on the overall form and subtle shadows. A single highlight down the center can make the kettle look sleek and modern.
Common Mistakes to Avoid
Even experienced artists make mistakes when drawing everyday objects. Here are some common pitfalls and how to avoid them.
Incorrect Proportions
One of the biggest mistakes is making the spout too large or the handle too small. Always compare the sizes of different parts as you draw. If the spout looks like it could hold as much water as the body, it’s too big.
Use your pencil to measure proportions. Hold your pencil at arm’s length and compare the height of the body to the width of the handle. This helps you see ratios more clearly.
Flat, Lifeless Shading
Shading that’s too even or too dark can make your drawing look flat. Remember to vary the pressure of your pencil—light in highlighted areas, medium in mid-tones, and dark in shadows.
Also, don’t forget to leave some areas completely white for highlights. These small bright spots make the surface look shiny and realistic.
Ignoring Perspective
If you’re drawing the kettle from an angle, make sure the shapes follow proper perspective. The top of the kettle should be narrower than the bottom if viewed from above. The handle should curve naturally around the side, not stick out straight.
Use light construction lines to guide your perspective. For example, draw a centerline down the body to keep the spout and handle aligned.
Overcomplicating Details
It’s tempting to add every tiny detail, but too much can clutter your drawing. Focus on the most important features—body, spout, handle, lid, and base. Save small details like brand logos or texture patterns for later, if at all.
A clean, simple drawing often looks more professional than one crammed with unnecessary elements.
Final Touches and Finishing Your Drawing
Once you’re happy with the shape and shading, it’s time to finalize your drawing. Here’s how to polish it up.
Darken Key Lines
Go over the main outlines with a darker pencil or pen. This makes the kettle stand out from the background. Be careful not to press too hard—you still want the lines to look natural.
Use a fine-tip pen or a softer pencil (like 2B or 4B) for this step. Avoid using a marker unless you’re going for a bold, graphic style.
Add Background or Context (Optional)
To make your drawing more interesting, add a simple background. Draw a countertop, a few utensils, or a window behind the kettle. Keep it minimal so the kettle remains the focus.
You can also add a few steam lines rising from the spout to suggest the kettle is hot. Draw these as soft, wavy lines that fade as they rise.
Sign Your Work
Don’t forget to sign your drawing! Add your name or initials in a corner. It’s a small touch, but it makes your artwork feel complete.
If you’re sharing it online, consider adding a title like “Electric Kettle Study” or “Kitchen Appliance Sketch.”
Conclusion
Drawing an electric kettle is a rewarding exercise that combines observation, proportion, and shading skills. By starting with basic shapes and building up details gradually, you can create a realistic or stylized version that looks professional and polished.
Remember, the key to success is practice. The more you draw everyday objects like kettles, the more confident you’ll become. Don’t be afraid to experiment with different styles, materials, and perspectives. Try drawing a kettle from above, from the side, or even in a busy kitchen scene.
Whether you’re an artist, a designer, or just someone who loves to doodle, knowing how to draw an electric kettle adds a useful skill to your toolkit. So grab your pencil, find a reference, and start sketching. You might be surprised at how much you enjoy it.
And who knows? Your next drawing could be a toaster, a coffee maker, or even a full kitchen setup. The possibilities are endless.
Frequently Asked Questions
What materials do I need to draw an electric kettle?
You only need a pencil, eraser, and paper to get started. For shading, a blending stump or tissue helps create smooth gradients. If you prefer digital art, a tablet and drawing app work just as well.
Can I draw an electric kettle without a reference photo?
Yes, but using a reference makes it easier to get proportions and details right. If you draw from memory, focus on the basic shape and key features like the spout, handle, and base.
How do I make my kettle look shiny and metallic?
Use strong contrasts between light and dark areas. Add sharp highlights with an eraser and blend shadows smoothly. Pay attention to reflections and avoid shading too evenly.
What’s the easiest way to draw the handle?
Start with a curved line that wraps around the side of the kettle. Make it wide enough to look functional, and connect it to the body at two points. Use light strokes first to adjust the shape.
Should I include the power cord in my drawing?
It’s optional, but including the cord helps show that it’s an electric kettle. Draw it as a soft, curved line coming from the base, and add a plug at the end for realism.
How can I practice drawing different types of kettles?
Look up photos of various electric kettles online—stainless steel, plastic, retro, minimalist—and try sketching each style. Focus on how the shape, color, and details change between models.