Is your electric kettle not heating, leaking, or refusing to turn on? Don’t rush to buy a new one—many common issues can be fixed at home with simple tools and a bit of know-how. This guide walks you through safe, step-by-step solutions to revive your kettle and keep it running smoothly for years.
Key Takeaways
- Safety first: Always unplug the kettle and let it cool completely before attempting any repairs to avoid electric shock or burns.
- Common issues are often fixable: Problems like no heating, auto shut-off failure, or limescale buildup can usually be resolved without professional help.
- Descaling is essential: Regular cleaning with vinegar or commercial descalers prevents mineral buildup that can damage internal components.
- Check the base and power cord: Loose connections, frayed wires, or a damaged power base are frequent culprits behind power issues.
- Thermal fuse replacement may be needed: If the kettle won’t heat at all, a blown thermal fuse could be the cause and is often replaceable.
- Know when to replace: If the heating element is cracked or the kettle has electrical damage, it’s safer to replace it than risk a fire hazard.
- Prevent future problems: Use filtered water, avoid overfilling, and clean your kettle monthly to extend its lifespan.
📑 Table of Contents
- Why Your Electric Kettle Might Be Broken—And How to Fix It
- Safety First: Essential Precautions Before Repairing Your Kettle
- Common Electric Kettle Problems and How to Diagnose Them
- Step-by-Step Guide: How to Fix a Broken Electric Kettle
- When to Repair vs. When to Replace Your Electric Kettle
- Preventing Future Problems: Maintenance Tips for a Long-Lasting Kettle
- Conclusion: Save Money and Reduce Waste by Fixing Your Kettle
Why Your Electric Kettle Might Be Broken—And How to Fix It
We’ve all been there: you’re craving a hot cup of tea or coffee, you press the button on your electric kettle, and… nothing happens. Or worse—it starts heating but shuts off halfway, leaks water all over the counter, or makes a strange buzzing noise. It’s frustrating, especially when you rely on your kettle daily. But before you toss it in the trash and head to the store for a new one, take a breath. Many common electric kettle problems can be fixed at home with a little patience and the right approach.
Electric kettles are among the most convenient kitchen appliances, but like any device with electrical components and moving parts, they can wear out or malfunction over time. The good news? Most issues aren’t as serious as they seem. Whether it’s a simple cleaning job, a loose wire, or a replaceable part, you might be able to restore your kettle to full working order without spending a dime—or calling a repair technician. This guide will walk you through the most common problems, how to diagnose them, and step-by-step solutions to fix your broken electric kettle safely and effectively.
Safety First: Essential Precautions Before Repairing Your Kettle
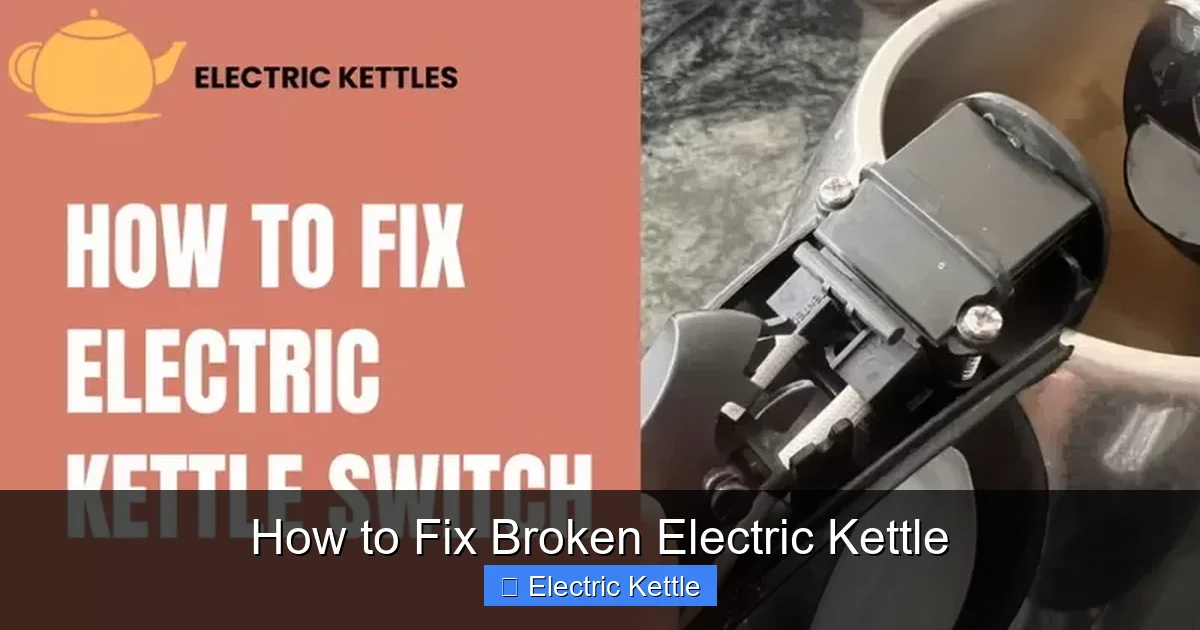
Visual guide about How to Fix Broken Electric Kettle
Image source: irrorwxhiqijjr5q.ldycdn.com
Before you even think about opening up your kettle or poking around inside, it’s crucial to prioritize safety. Electric kettles involve water and electricity—two things that don’t mix well. A single mistake could lead to electric shock, fire, or serious injury. So, let’s go over the must-follow safety rules.
Unplug and Cool Down
Always unplug the kettle from the power outlet before inspecting or repairing it. Even if it seems off, there could still be residual electricity in the circuit. Also, make sure the kettle has cooled down completely. Handling a hot kettle can cause burns, and opening it while warm may warp plastic parts or release steam unexpectedly.
Work in a Dry, Well-Lit Area
Choose a clean, dry workspace with good lighting. Avoid working near sinks, wet countertops, or anywhere water might splash. Keep a towel nearby to wipe your hands and dry tools. Moisture increases the risk of electric shock, so keep everything as dry as possible.
Use Proper Tools
You’ll likely need a Phillips or flathead screwdriver, needle-nose pliers, and possibly a multimeter for testing electrical components. Avoid using metal tools near live circuits, and never force parts apart. If a component feels stuck, double-check for hidden screws or clips before applying pressure.
Never Reassemble and Test While Wet
After cleaning or repairing, make sure all parts are completely dry before reassembling and plugging the kettle back in. Even a small amount of moisture can cause a short circuit or damage the heating element.
Know Your Limits
If you’re not comfortable working with electrical components, or if you suspect serious damage like a cracked heating element or burnt wiring, it’s best to stop and consult a professional. Some repairs aren’t worth the risk. When in doubt, replace the kettle—your safety is more important than saving $30.
Common Electric Kettle Problems and How to Diagnose Them
Now that you’re safety-ready, let’s look at the most frequent issues that cause electric kettles to stop working. Identifying the problem correctly is the first step toward fixing it.
Kettle Won’t Turn On or Heat Up
This is the most common complaint. You press the button, but nothing happens—no light, no sound, no heat. Possible causes include:
– A tripped thermal fuse
– A faulty power switch
– A damaged power cord or base
– A blown internal fuse
To diagnose, first check if the outlet is working by plugging in another device. If the outlet is fine, inspect the power cord for fraying or kinks. Then, examine the base of the kettle and the power station it sits on. Are the contacts clean and aligned? Try wiggling the kettle slightly—if it flickers on and off, the connection may be loose.
Kettle Turns On but Stops Heating Midway
If your kettle starts heating but shuts off before the water boils, it could be due to:
– Overheating protection kicking in (common if the kettle is old or clogged)
– A failing thermostat
– Mineral buildup on the heating element
This often happens when limescale insulates the heating coil, preventing proper heat transfer. The thermostat senses the element is too hot (because heat isn’t transferring to the water) and shuts it off to prevent damage.
Water Leaking from the Kettle
Leaks are usually caused by:
– A cracked or warped lid or spout
– A damaged seal or gasket
– Overfilling beyond the maximum line
– A cracked inner chamber (less common but serious)
Check the lid and spout for hairline cracks. If the leak comes from the base, it could indicate a cracked interior—this is harder to fix and may require replacement.
Strange Noises or Smells
Buzzing, popping, or a burning smell are red flags. Buzzing could mean electrical arcing inside, while a burnt smell might indicate overheating or melted components. Stop using the kettle immediately if you notice these signs.
Auto Shut-Off Not Working
Modern kettles are designed to turn off automatically when water reaches boiling point. If yours doesn’t, it could be due to a faulty thermostat or steam sensor. This is a safety hazard—never leave a kettle unattended if the auto shut-off fails.
Step-by-Step Guide: How to Fix a Broken Electric Kettle
Now that you know what might be wrong, let’s get into the actual fixes. We’ll cover the most common repairs you can do at home.
Step 1: Clean and Descale the Kettle
Mineral buildup is the #1 cause of kettle problems. Hard water leaves behind limescale, which coats the heating element and insulates it, reducing efficiency and causing overheating.
How to descale:
1. Fill the kettle halfway with equal parts white vinegar and water.
2. Let it sit for 1–2 hours (or overnight for heavy buildup).
3. Boil the solution, then let it cool.
4. Pour out the liquid and scrub the inside with a soft brush or sponge.
5. Rinse thoroughly with clean water 3–4 times to remove all vinegar taste.
6. Run a cycle with fresh water to flush out any remaining residue.
Pro tip: For mild buildup, use lemon juice instead of vinegar. Cut a lemon in half, squeeze it into the kettle, add water, and boil. Let it sit for 30 minutes before rinsing.
Step 2: Check the Power Base and Cord
If the kettle isn’t turning on, the issue might be with the power connection.
– Inspect the power cord for cuts, kinks, or exposed wires. If damaged, replace the cord or the entire kettle.
– Look at the base of the kettle and the power station. Are the metal contacts clean and shiny? Use a cotton swab and rubbing alcohol to clean them.
– Try rotating the kettle on the base—sometimes the contacts only connect at certain angles.
– Test the outlet with another appliance to confirm it’s working.
If the cord is intact and the outlet works, the problem may be internal.
Step 3: Test and Replace the Thermal Fuse
The thermal fuse is a small safety device that cuts power if the kettle overheats. It’s usually located under the heating element and can blow due to age or overheating.
How to test and replace:
1. Unplug the kettle and let it cool.
2. Remove the base (usually held by 3–4 screws).
3. Locate the thermal fuse—it looks like a small disc or cylinder with two wires.
4. Use a multimeter to test for continuity. If there’s no beep or reading, the fuse is blown.
5. Purchase an identical replacement fuse (check the model number).
6. Desolder the old fuse and solder in the new one, or use crimp connectors if you’re not comfortable with soldering.
7. Reassemble and test.
Note: If you don’t have a multimeter, you can try replacing the fuse outright—they’re inexpensive (usually under $5).
Step 4: Fix a Faulty Power Switch
The power switch can wear out over time, especially if the kettle is used frequently.
– Open the kettle’s base and locate the switch mechanism.
– Check for loose wires or burnt contacts.
– If the switch feels loose or doesn’t click properly, it may need replacement.
– Order a compatible switch online (search by kettle model) and install it following the wiring diagram.
Tip: Before replacing, try cleaning the switch with contact cleaner spray to remove dirt or oxidation.
Step 5: Repair or Replace the Thermostat
The thermostat controls when the kettle turns on and off. If it’s faulty, the kettle may not heat or may not shut off.
– This repair is more advanced and may require soldering.
– Test the thermostat with a multimeter for continuity at different temperatures.
– If defective, replace it with an identical part.
Warning: Incorrect thermostat installation can cause overheating or fire. If you’re unsure, consult a technician.
Step 6: Fix Leaks and Seal Issues
For minor leaks:
– Check the lid seal (gasket). Remove it, clean it, and reseat it. If cracked or brittle, replace it.
– Ensure you’re not overfilling the kettle.
– Tighten any loose screws on the spout or handle.
For cracks in the inner chamber:
– This is usually not repairable. Epoxy glue may work temporarily, but it’s not food-safe long-term. Replace the kettle.
When to Repair vs. When to Replace Your Electric Kettle
Not every broken kettle is worth fixing. Here’s how to decide.
Repair It If:
– The issue is limescale buildup (easy fix).
– The thermal fuse is blown (inexpensive part).
– The power cord is frayed but the kettle is otherwise in good condition.
– The switch or thermostat is faulty but replaceable.
– The kettle is relatively new or high-quality (e.g., stainless steel, brand-name).
Replace It If:
– The inner chamber is cracked or rusted.
– The heating element is damaged or corroded.
– There’s evidence of electrical burning or melting.
– The kettle is old (over 5 years) and has multiple issues.
– Replacement parts are unavailable or too expensive.
Cost comparison: A new thermal fuse costs $3–$7. A new kettle costs $20–$60. If the repair costs more than half the price of a new kettle, it’s usually better to replace it.
Preventing Future Problems: Maintenance Tips for a Long-Lasting Kettle
An ounce of prevention is worth a pound of cure. Keep your kettle in top shape with these simple habits.
Descale Monthly
Even if you use filtered water, minerals can still build up. Make descaling a monthly routine, especially if you live in a hard water area.
Use Filtered Water
Filtered or distilled water reduces mineral content and extends the life of the heating element.
Don’t Overfill
Always stay between the minimum and maximum fill lines. Overfilling can cause leaks and strain the heating system.
Empty After Use
Don’t let water sit in the kettle for days. Stagnant water promotes bacterial growth and accelerates corrosion.
Store Properly
Keep the kettle unplugged and dry when not in use. Store it with the lid open to prevent moisture buildup.
Inspect Regularly
Every few months, check the cord, base, and interior for signs of wear, cracks, or buildup.
Conclusion: Save Money and Reduce Waste by Fixing Your Kettle
Fixing a broken electric kettle isn’t just about saving money—it’s also about reducing waste and making smarter choices. The average kettle lasts 3–5 years, but with proper care and timely repairs, you can easily extend that to 7–10 years. Instead of contributing to landfill waste, take the time to troubleshoot and fix common issues like limescale, blown fuses, or loose connections.
Remember, most problems are fixable with a little effort and the right knowledge. Start with the simplest solutions—cleaning and checking connections—before moving on to more complex repairs. And always prioritize safety: when in doubt, unplug, step back, and consider replacement.
By following this guide, you’ll not only revive your kettle but also gain confidence in handling small appliance repairs. Who knows? You might even inspire others to do the same. So next time your kettle acts up, don’t panic—grab a screwdriver, some vinegar, and get to work. Your perfect cup of tea is just a repair away.
Frequently Asked Questions
Can I fix a cracked electric kettle?
It depends on the location and severity of the crack. Small cracks in the lid or spout may be repairable with food-safe epoxy, but cracks in the inner chamber or heating element usually require replacement for safety reasons.
Why does my kettle smell like burning?
A burning smell often indicates overheating, melted plastic, or electrical arcing. Stop using the kettle immediately and inspect for burnt components. If you find damage, replace the kettle to avoid fire hazards.
How often should I descale my electric kettle?
Descale your kettle every 1–3 months, depending on water hardness. If you notice reduced heating speed or white deposits, it’s time to clean it.
Is it safe to use a kettle that leaks?
No. Leaks can lead to water contacting electrical components, increasing the risk of short circuits or electric shock. Stop using it and repair or replace it.
Can I replace the heating element in my kettle?
Most electric kettles have sealed heating elements that aren’t user-replaceable. If the element is damaged, it’s usually safer and more cost-effective to replace the entire kettle.
Why won’t my kettle turn off automatically?
This is usually due to a faulty thermostat or steam sensor. The kettle may overheat or boil dry, which is a fire risk. Have it repaired or replaced immediately.