If your electric kettle isn’t heating, the problem is often the heating element. This guide walks you through diagnosing, cleaning, and repairing or replacing the element safely. With simple tools and caution, you can restore your kettle’s function and avoid unnecessary replacements.
Key Takeaways
- Diagnose the issue first: Confirm the heating element is the culprit by checking power supply, thermostat, and continuity before disassembly.
- Safety is critical: Always unplug the kettle and let it cool completely before attempting any repairs to avoid electric shock or burns.
- Clean mineral buildup regularly: Limescale and debris are common causes of heating failure—use vinegar or descaling solutions to maintain performance.
- Test with a multimeter: Use a multimeter to check for continuity in the heating element; no reading means it’s likely burnt out and needs replacement.
- Replacement parts are available: Most kettle heating elements can be purchased online or from appliance stores—match the model number for compatibility.
- Know when to replace the kettle: If the kettle is old, cracked, or parts are unavailable, it’s safer and more cost-effective to buy a new one.
- Prevent future issues: Use filtered water and descale monthly to extend the life of your heating element and kettle.
📑 Table of Contents
- Why Your Electric Kettle Isn’t Heating: Common Causes
- Understanding the Electric Kettle Heating Element
- Safety First: Preparing to Fix Your Kettle
- Step-by-Step Guide to Diagnosing the Problem
- How to Clean the Heating Element
- Replacing the Heating Element: A Detailed Walkthrough
- Preventing Future Heating Element Problems
- Conclusion
Why Your Electric Kettle Isn’t Heating: Common Causes
There’s nothing more frustrating than reaching for your electric kettle in the morning, pressing the button, and waiting… only to realize it’s not heating up. You’re not alone. One of the most common reasons an electric kettle stops working is a faulty heating element. But before you rush to buy a new one, it’s worth investigating. Often, the issue isn’t as serious as it seems—and with a little know-how, you might be able to fix it yourself.
The heating element is the heart of your electric kettle. It’s the component responsible for converting electrical energy into heat, which then warms the water. When it fails, your kettle becomes little more than a fancy water container. But why does it fail? Several factors can contribute: mineral buildup from hard water, electrical surges, worn-out thermostats, or simply age. Understanding these causes is the first step toward fixing the problem.
In this guide, we’ll walk you through everything you need to know about how to fix electric kettle heating element issues. From diagnosing the problem to safely replacing the part, we’ll cover practical steps, safety tips, and preventive maintenance. Whether you’re a DIY enthusiast or just trying to save money, this guide will help you get your kettle back in action—without calling a technician.
Understanding the Electric Kettle Heating Element
Before diving into repairs, it’s important to understand how the heating element works. Most electric kettles use a concealed heating element, meaning it’s located beneath the base of the kettle and not visible from the inside. This design helps prevent direct contact with water, reducing the risk of corrosion and electrical hazards. The element is typically made of a coiled metal wire—often stainless steel or nickel alloy—that heats up when electricity passes through it.
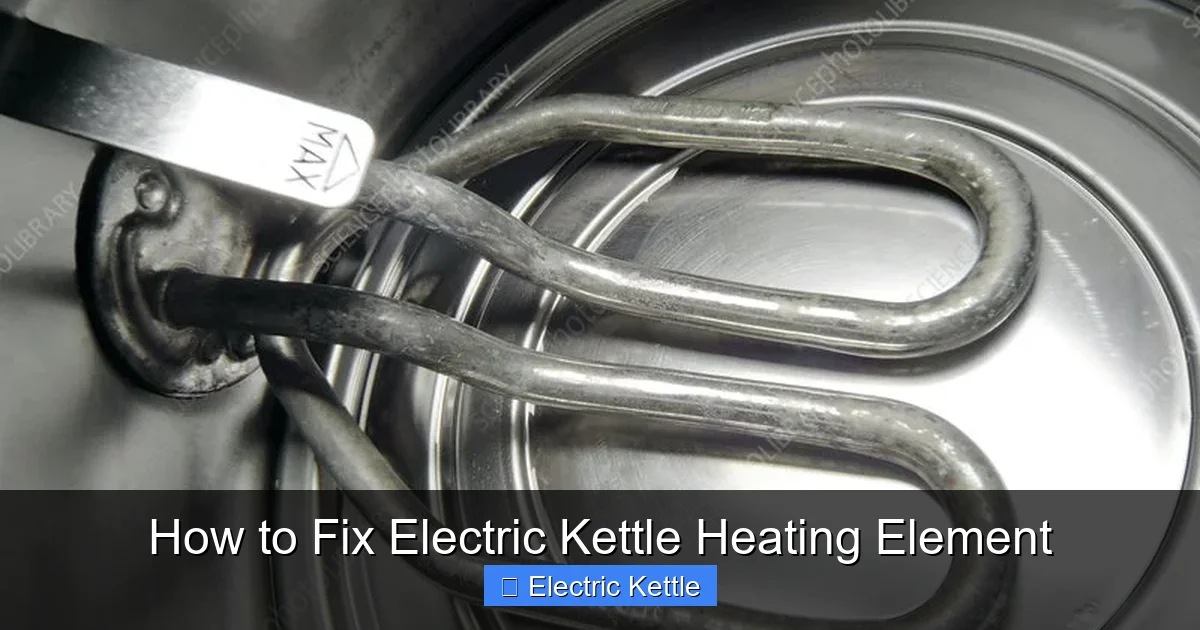
Visual guide about How to Fix Electric Kettle Heating Element
Image source: media.sciencephoto.com
When you turn on the kettle, electricity flows from the power base through the connector at the bottom of the kettle into the heating element. The resistance in the wire generates heat, which transfers to the water via conduction. A thermostat monitors the temperature and cuts off power once the water reaches boiling point. Some models also include a thermal fuse as a safety backup in case the thermostat fails.
Over time, this element can degrade. Mineral deposits from hard water can coat the surface, insulating it and reducing heat transfer. Electrical surges can burn out the coil. Or the connections between the element and the power base can become loose or corroded. Recognizing these signs early can help you address the issue before it leads to complete failure.
Types of Heating Elements
Not all heating elements are the same. There are two main types found in electric kettles: exposed and concealed. Exposed elements are less common today but can still be found in older or budget models. They sit directly in the water, making them more prone to scaling and corrosion. Concealed elements, on the other hand, are sealed under a stainless steel plate at the bottom of the kettle. They’re more durable and easier to maintain, which is why most modern kettles use this design.
Another variation is the immersion heating element, which is partially submerged in water. While efficient, these are more vulnerable to mineral buildup and require regular cleaning. Some high-end kettles feature rapid-boil elements made from advanced materials like titanium or ceramic-coated metals, which resist scaling and heat up faster.
Knowing your kettle’s element type helps determine the best repair approach. For example, cleaning a concealed element requires removing the base, while an exposed element might be accessible from the inside. Always refer to your user manual or look up your model online to identify the correct type.
Safety First: Preparing to Fix Your Kettle
Repairing an electric kettle involves working with electricity and water—two things that don’t mix well. That’s why safety must be your top priority. Before you even think about opening the kettle, make sure it’s completely unplugged from the power source. Never attempt repairs while the kettle is connected to electricity, even if it’s turned off. Capacitors inside can retain a charge, posing a shock risk.
Let the kettle cool down completely. If you’ve recently used it, the heating element and surrounding parts can remain hot for several minutes. Touching them too soon can result in burns. Wait at least 30 minutes after use before handling the kettle. Also, work in a dry, well-lit area with no water nearby. Keep a towel handy to wipe up any spills, and avoid working on wet surfaces.
Wear safety gloves if possible, especially if you’re dealing with sharp edges or corroded parts. Safety goggles are also recommended when using tools like screwdrivers or pliers. And never submerge the kettle’s base or electrical components in water—only the interior should be cleaned with liquid.
Tools and Supplies You’ll Need
To fix your electric kettle heating element, you’ll need a few basic tools. A multimeter is essential for testing electrical continuity—this will help you determine if the element is truly faulty. You’ll also need a set of screwdrivers (usually Phillips and flathead), needle-nose pliers, and possibly a socket wrench depending on your kettle’s design.
Other useful items include a soft brush or toothbrush for cleaning, white vinegar or a commercial descaling solution, and a clean cloth. If you plan to replace the heating element, make sure you have the correct replacement part on hand. You can usually find this by searching your kettle’s model number online. Some kits come with gaskets or seals, so check what’s included.
Keep a notepad nearby to document your steps. This helps if you need to reassemble the kettle in the correct order or troubleshoot further. And always double-check that your replacement part matches the original in size, wattage, and connector type.
Step-by-Step Guide to Diagnosing the Problem
Before you start disassembling your kettle, it’s crucial to confirm that the heating element is actually the problem. Sometimes, the issue lies elsewhere—like a faulty power cord, a broken switch, or a tripped thermal fuse. Jumping straight to replacing the element without proper diagnosis can waste time and money.
Start by checking the basics. Is the kettle plugged in? Is the outlet working? Try plugging another device into the same socket to confirm. If the outlet is fine, inspect the power cord for fraying or damage. A broken cord can interrupt power flow, making it seem like the element isn’t working.
Next, test the kettle on a different outlet. Sometimes, the problem is with the electrical circuit, not the kettle. If it still doesn’t heat, move on to internal components. Listen for a clicking sound when you press the power button—this usually indicates the thermostat is engaging. If there’s no sound, the switch or thermostat might be faulty.
Using a Multimeter to Test the Heating Element
The most reliable way to check the heating element is with a multimeter. Set the device to measure resistance (ohms). A working element will show a low resistance reading—typically between 20 and 50 ohms, depending on the kettle’s wattage. No reading or an infinite reading (OL) means the element is open and needs replacement.
To test, remove the kettle’s base (we’ll cover disassembly next). Locate the two terminals where the heating element connects to the power circuit. Touch the multimeter probes to these terminals. If the reading is zero or very low, the element is likely intact. If it’s infinite, the coil is broken.
Don’t forget to test other components too. Check the thermostat and thermal fuse for continuity. A blown fuse will show no resistance. Some kettles have a resettable thermal cutoff—press the reset button if available. If none of these tests reveal the issue, the heating element is probably the culprit.
How to Clean the Heating Element
Even if your heating element tests fine, it might still be underperforming due to mineral buildup. Hard water leaves behind limescale—a chalky deposit that insulates the element and reduces heat transfer. Over time, this can cause the kettle to heat slowly or not at all. Cleaning it regularly can restore performance and extend the element’s life.
The good news is that cleaning is simple and doesn’t require disassembly. Fill the kettle halfway with equal parts water and white vinegar. Let it sit for 30 minutes to an hour. The acid in the vinegar dissolves mineral deposits. For heavy scaling, you can boil the solution, but be cautious—vinegar fumes can be strong. Open a window or turn on a fan.
After soaking, scrub the interior with a soft brush or sponge. Pay attention to the area around the heating element plate. Rinse thoroughly with clean water several times to remove all vinegar residue. Then, fill the kettle with fresh water and boil it once or twice to eliminate any lingering taste.
When Cleaning Isn’t Enough
If cleaning doesn’t solve the problem, the element may be permanently damaged. Mineral buildup can cause hot spots that burn out the coil. Or the element might have developed a crack or corrosion. In these cases, cleaning won’t help—you’ll need to replace it.
Also, if the kettle makes unusual noises—like sizzling or popping—it could indicate arcing within the element. This is a serious issue that can lead to electrical failure or fire. Stop using the kettle immediately and replace the element or the entire unit.
Replacing the Heating Element: A Detailed Walkthrough
If cleaning and testing confirm that the heating element is faulty, it’s time to replace it. This process varies slightly depending on your kettle model, but the general steps are similar. Most kettles have a removable base that houses the electrical components. You’ll need to access this area to disconnect the old element and install the new one.
Start by unplugging the kettle and letting it cool. Place it on a stable surface and remove any screws on the base. Use the appropriate screwdriver—some screws are hidden under rubber feet or labels, so inspect carefully. Once the screws are out, gently lift the base. Be careful not to pull too hard, as wires may still be connected.
Inside, you’ll see the heating element mounted to the bottom of the kettle. It’s usually held in place by two screws and connected to wires via spade connectors. Take a photo or note the wire positions before disconnecting anything. This ensures you can reassemble correctly.
Installing the New Element
Remove the old element by unscrewing the mounting screws and disconnecting the wires. Clean the area around the mounting surface to remove any residue or corrosion. Then, position the new element in place. Make sure it sits flat and aligns with the screw holes.
Secure it with the screws, but don’t overtighten—this can crack the base or damage the element. Reconnect the wires to the correct terminals. Most replacement elements have labeled or color-coded connectors to make this easier. Double-check your connections before reassembling.
Once everything is connected, carefully reattach the base and screw it back into place. Plug in the kettle and test it with a small amount of water. If it heats properly, you’ve successfully fixed the issue. If not, double-check your wiring and connections.
Preventing Future Heating Element Problems
Now that your kettle is working again, take steps to prevent future issues. The best way to protect the heating element is by using soft or filtered water. Hard water is the number one enemy of electric kettles—it accelerates scaling and reduces efficiency. If you live in an area with hard water, consider installing a water softener or using bottled water for boiling.
Descale your kettle regularly—at least once a month, or more often if you use it daily. This simple maintenance task can add years to your kettle’s life. Use vinegar, citric acid, or a commercial descaler. Avoid abrasive cleaners or steel wool, which can scratch the interior and damage the element.
Also, avoid overfilling the kettle. Water should never rise above the maximum fill line, as it can seep into the base and damage electrical components. And don’t run the kettle dry—this can overheat and destroy the element in seconds. Always ensure there’s water inside before turning it on.
When to Replace the Entire Kettle
Sometimes, replacing the heating element isn’t worth it. If your kettle is over 5 years old, has cracks in the body, or shows signs of electrical wear (like scorch marks or melting), it’s safer to replace the whole unit. Newer kettles are more energy-efficient and come with better safety features.
Also, if the replacement part is hard to find or costs more than half the price of a new kettle, buying a new one makes more sense. Look for models with removable bases or serviceable parts if you prefer to repair in the future.
Conclusion
Fixing an electric kettle heating element might seem daunting, but with the right tools and precautions, it’s a manageable task. By diagnosing the problem, cleaning regularly, and replacing faulty parts, you can extend your kettle’s life and save money. Always prioritize safety, and don’t hesitate to consult a professional if you’re unsure.
Remember, prevention is key. Use filtered water, descale monthly, and avoid common mistakes like running the kettle dry. With proper care, your kettle can serve you well for many years. And if all else fails, investing in a quality replacement ensures you’ll enjoy hot water whenever you need it.
Frequently Asked Questions
Can I fix a burnt-out heating element myself?
Yes, you can fix a burnt-out heating element yourself if you have basic tools and follow safety precautions. Use a multimeter to confirm the element is faulty, then replace it with a compatible part. Always unplug the kettle and work in a dry area.
How often should I descale my electric kettle?
Descale your electric kettle at least once a month if you use it regularly. In areas with hard water, do it every two weeks. Regular descaling prevents mineral buildup and keeps the heating element working efficiently.
What causes an electric kettle heating element to fail?
Common causes include mineral buildup from hard water, electrical surges, worn-out thermostats, or age. Running the kettle dry can also burn out the element instantly. Proper maintenance reduces the risk of failure.
Is it safe to use vinegar to clean the heating element?
Yes, white vinegar is safe and effective for cleaning the heating element. It dissolves limescale without damaging the metal. Just rinse thoroughly afterward to remove all vinegar residue and avoid altering the taste of your water.
How do I know if my heating element needs replacing?
Test the element with a multimeter. If it shows no continuity (infinite resistance), it’s likely burnt out. Other signs include slow heating, strange noises, or the kettle not heating at all despite being plugged in.
Can I replace just the heating element, or do I need a new kettle?
You can usually replace just the heating element if the rest of the kettle is in good condition. However, if the kettle is old, cracked, or parts are unavailable, replacing the entire unit is often safer and more cost-effective.