Is your electric kettle lid stuck, wobbly, or not sealing properly? You don’t always need to replace the whole kettle—many common lid problems can be fixed at home with basic tools and a little patience. This guide walks you through step-by-step solutions to restore your kettle’s functionality safely and effectively.
Key Takeaways
- Identify the root cause: Most lid issues stem from loose screws, worn hinges, or mineral buildup—diagnose before fixing.
- Use the right tools: A small Phillips or flathead screwdriver, tweezers, and rubbing alcohol are often all you need.
- Clean regularly: Prevent future problems by descaling your kettle and wiping the lid mechanism monthly.
- Check for wear and tear: Plastic latches and rubber seals degrade over time and may need replacement.
- Follow safety first: Always unplug the kettle and let it cool completely before attempting any repair.
- Know when to replace: If the lid is cracked or the hinge is broken beyond repair, consider a new kettle for safety.
📑 Table of Contents
- Why Your Electric Kettle Lid Might Be Malfunctioning
- Common Electric Kettle Lid Problems and What They Mean
- Tools and Materials You’ll Need for the Repair
- Step-by-Step Guide to Fixing a Stuck or Jammed Lid
- How to Tighten a Loose or Wobbly Lid
- Replacing a Worn-Out Lid Gasket or Seal
- When to Replace the Entire Kettle
- Preventing Future Lid Problems
Why Your Electric Kettle Lid Might Be Malfunctioning
Electric kettles are everyday heroes in the kitchen—quick, efficient, and reliable. But when the lid starts acting up, it can turn your morning coffee routine into a frustrating ordeal. Whether it won’t close, won’t open, or just feels loose and wobbly, a faulty lid isn’t just annoying—it can also affect the kettle’s performance and safety.
You might be tempted to toss the kettle and buy a new one, but in many cases, the problem is fixable. Most electric kettle lid issues are mechanical or caused by buildup, not electrical faults. Understanding why your lid is misbehaving is the first step toward a solution. Common culprits include mineral deposits from hard water, loose internal screws, worn-out hinges, or a damaged latch mechanism. Even something as simple as food residue or steam residue can interfere with smooth operation over time.
Before you panic or head to the store, take a moment to assess the situation. Is the lid stuck shut? Does it pop open unexpectedly while boiling? Does it rattle or feel unstable when you lift it? Each symptom points to a different underlying issue, and many of them can be resolved with a little DIY know-how. The good news? You don’t need to be a repair expert to fix most of these problems. With the right approach, you can restore your kettle to like-new condition—saving money and reducing waste.
Common Electric Kettle Lid Problems and What They Mean
Lid Won’t Open or Is Stuck Shut
One of the most common complaints is a lid that refuses to budge. This usually happens when mineral deposits—like limescale—build up around the hinge or latch area. Over time, these deposits harden and act like glue, locking the lid in place. If you’ve recently used your kettle in a hard water area, this is likely the cause.
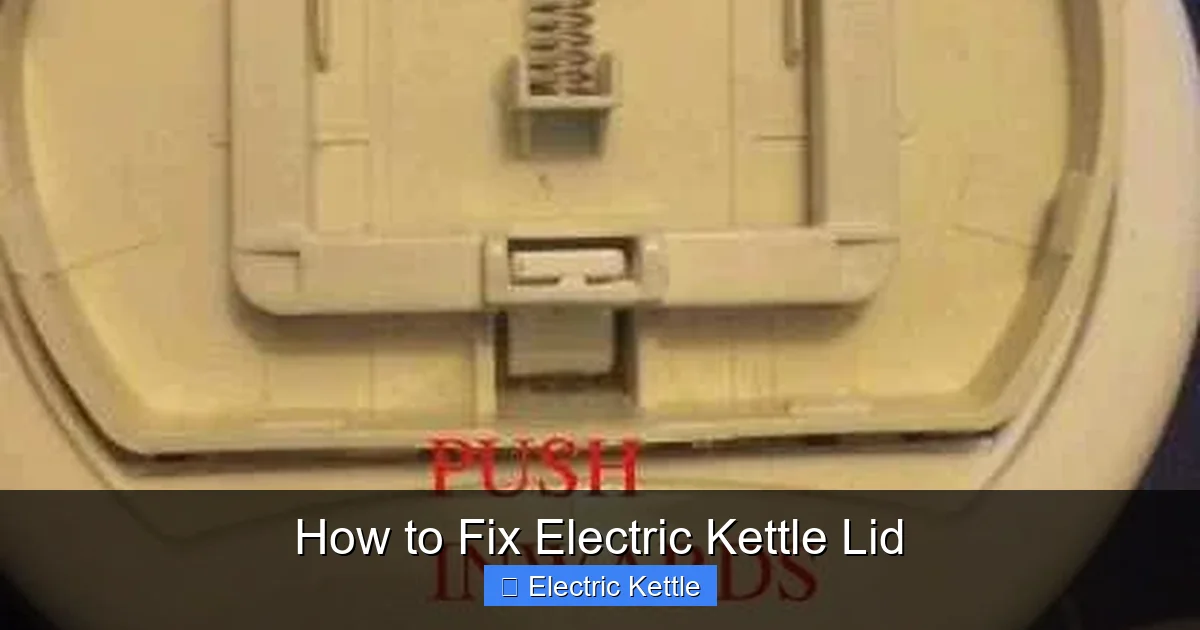
Visual guide about How to Fix Electric Kettle Lid
Image source: kitchenadvising.com
Another possibility is that the release button or latch mechanism has become misaligned or jammed. Sometimes, food particles or dust get trapped inside the small moving parts, preventing smooth operation. In rare cases, the lid may have been forced shut too hard, bending a component slightly out of place.
Lid Opens Unexpectedly During Boiling
If your kettle lid pops open while water is heating, it’s not just inconvenient—it can be dangerous. Steam escaping unexpectedly can cause burns or damage nearby surfaces. This issue is often due to a faulty pressure-release mechanism or a weak latch that can’t withstand internal steam pressure.
Some kettles are designed with a spring-loaded lid that should only open when manually pressed. If the spring is worn out or the latch isn’t engaging properly, the lid may lift under pressure. This is especially common in older models or kettles that have been dropped or mishandled.
Loose or Wobbly Lid
A lid that moves around too much or feels unstable when opened is usually a sign of loose internal screws or a damaged hinge. Most electric kettles have a hinge assembly mounted inside the body, secured with small screws. Over time, these screws can loosen due to repeated use or thermal expansion and contraction.
In some cases, the plastic housing around the hinge may crack, especially if the kettle has been dropped or exposed to extreme temperature changes. A wobbly lid not only feels flimsy but can also lead to poor sealing, reducing heating efficiency and increasing the risk of spills.
Lid Doesn’t Seal Properly
A poor seal might not seem like a big deal, but it can affect how quickly your water boils and how much energy your kettle uses. If steam escapes around the edges of the lid, the kettle has to work harder to reach boiling point. This inefficiency can shorten the appliance’s lifespan and increase your electricity bill.
The seal is often maintained by a rubber or silicone gasket around the lid’s rim. Over time, this gasket can harden, crack, or lose its shape. Sometimes, it just gets dirty or misaligned. A compromised seal can also allow dust and debris to enter the kettle, affecting water taste and cleanliness.
Lid Release Button Is Stiff or Unresponsive
The button you press to open the lid should move smoothly with a satisfying click. If it feels stiff, sticky, or doesn’t respond at all, the mechanism underneath may be obstructed or damaged. This is often due to dried mineral deposits, food residue, or a broken spring.
In some models, the button is connected to a small lever or rod that engages the latch. If this component is bent or misaligned, the button won’t function properly. Cleaning the area around the button and checking for obstructions is usually the first step in troubleshooting.
Tools and Materials You’ll Need for the Repair
Basic Toolkit Essentials
Before you start taking apart your kettle, gather the right tools. Most electric kettle lid repairs require only a few basic items that you probably already have at home. A small Phillips or flathead screwdriver is essential for removing screws. Precision screwdrivers (like those used for eyeglasses or electronics) work best for tiny components.
Tweezers are handy for removing small parts or debris from tight spaces. Needle-nose pliers can help with gripping and bending small metal pieces, but use them gently to avoid damaging plastic components. A soft brush—like an old toothbrush—is perfect for scrubbing away mineral buildup without scratching surfaces.
Cleaning Supplies
For cleaning, you’ll need white vinegar or a commercial descaling solution. Vinegar is natural, effective, and safe for most kettle interiors. Rubbing alcohol (isopropyl alcohol, 70% or higher) is great for disinfecting and removing sticky residues from plastic parts. Cotton swabs or soft cloths help you reach narrow areas around the hinge and latch.
Warm water and mild dish soap are useful for general cleaning, especially for removable parts like the lid gasket. Avoid abrasive cleaners or steel wool, as they can scratch plastic and metal surfaces, leading to future corrosion or damage.
Safety Gear and Precautions
Safety should always come first. Before you begin, make sure the kettle is unplugged and completely cool. Never attempt repairs on a hot or recently used kettle—steam and hot surfaces can cause burns. Work in a well-lit area with plenty of space to lay out parts.
If you’re sensitive to cleaning chemicals, wear gloves to protect your hands. While most household cleaners are safe, it’s better to be cautious. Also, keep small parts like screws and springs in a container so they don’t get lost. Labeling parts as you remove them can help during reassembly.
Optional Replacement Parts
In some cases, cleaning and tightening won’t be enough. If a hinge is cracked, a spring is broken, or the gasket is worn out, you may need replacement parts. Check your kettle’s model number (usually on the bottom or base) and search online for compatible components. Many manufacturers sell spare parts, or you can find universal replacements from third-party suppliers.
Rubber or silicone gaskets are relatively inexpensive and easy to install. Hinges and latches may be trickier to replace, depending on the kettle’s design. If you can’t find exact replacements, consider whether the repair is worth the effort—sometimes, it’s more practical to upgrade to a new kettle.
Step-by-Step Guide to Fixing a Stuck or Jammed Lid
Step 1: Unplug and Cool Down
Start by unplugging the kettle from the power outlet. Let it sit for at least 30 minutes to ensure it’s completely cool. This prevents burns and reduces the risk of electrical shock. Never attempt to force open a hot lid—thermal expansion can make parts more brittle and prone to breaking.
Step 2: Inspect the Lid and Release Mechanism
Look closely at the lid, especially around the hinge and the release button. Check for visible signs of damage, such as cracks, bent metal, or stuck debris. Use a flashlight if needed to see into small crevices. Gently press the release button to see if it moves at all or if it’s completely frozen.
Step 3: Clean Around the Hinge and Latch
Mix equal parts white vinegar and water in a small bowl. Dip an old toothbrush into the solution and scrub around the hinge and latch area. Focus on removing any white, chalky buildup—this is limescale. For stubborn deposits, let the vinegar sit for 10–15 minutes before scrubbing again.
Use cotton swabs dipped in rubbing alcohol to clean tight spots around the release button. This helps dissolve sticky residues and disinfects the area. Wipe away loosened debris with a damp cloth, then dry thoroughly with a clean towel.
Step 4: Test the Release Button
After cleaning, try pressing the release button again. It should move more freely now. If it still feels stiff, gently wiggle it back and forth while pressing to help break up any remaining residue. Avoid using excessive force, as this can damage delicate components.
Step 5: Apply a Small Amount of Lubricant (If Needed)
In rare cases, a tiny drop of food-safe lubricant (like silicone-based grease) can help loosen a stiff mechanism. Apply it sparingly to the hinge or latch pivot point. Never use oil-based lubricants, as they can attract dust and degrade plastic over time. Wipe away any excess to prevent buildup.
Step 6: Reassemble and Test
Once the lid opens smoothly, close it and test the seal. Press down gently to ensure it latches securely. Plug in the kettle and run a quick test cycle with a small amount of water. Watch to see if the lid stays closed during heating and opens easily afterward.
How to Tighten a Loose or Wobbly Lid
Step 1: Remove the Lid (If Possible)
Some electric kettle lids are designed to be removable. Look for a small tab or release lever on the hinge. Gently pull or press it to detach the lid from the body. If your lid isn’t meant to be removed, skip to the next step and work with it in place.
Step 2: Locate the Hinge Screws
Most hinges are secured with one or two small screws on the inside of the kettle body. You may need to remove a plastic cover or access panel to reach them. Use the appropriate screwdriver to carefully unscrew and set them aside in a safe place.
Step 3: Tighten the Screws
Once the screws are exposed, tighten them gently with your screwdriver. Don’t overtighten—this can strip the threads or crack the plastic housing. The goal is to secure the hinge firmly without applying excessive pressure. If the screw holes are stripped, you may need to use a slightly larger screw or insert a small piece of toothpick or matchstick to fill the gap before reinserting the screw.
Step 4: Check for Cracks or Damage
While the hinge is exposed, inspect the surrounding plastic for cracks or warping. If you find damage, assess whether it’s repairable. Small cracks can sometimes be fixed with food-safe epoxy, but extensive damage may require a replacement part or a new kettle.
Step 5: Reattach the Lid and Test
Reassemble the lid and any removed panels. Open and close the lid several times to ensure it moves smoothly and feels stable. The wobble should be significantly reduced or eliminated. If the lid still feels loose, double-check that all screws are tight and that no components are misaligned.
Replacing a Worn-Out Lid Gasket or Seal
Step 1: Remove the Old Gasket
The gasket is usually a thin rubber or silicone ring that fits into a groove around the lid’s rim. Carefully peel it out using your fingers or a pair of tweezers. If it’s stuck, gently work it loose with a soft tool—avoid using anything sharp that could scratch the lid.
Step 2: Clean the Groove
Once the old gasket is removed, clean the groove thoroughly. Use a cotton swab dipped in rubbing alcohol to remove any residue or debris. Let it dry completely before installing the new gasket.
Step 3: Install the New Gasket
Take the replacement gasket and press it firmly into the groove, starting at one point and working your way around. Make sure it sits evenly and isn’t twisted or bunched up. Some gaskets are designed to stretch slightly, so don’t force it—gentle pressure is usually enough.
Step 4: Test the Seal
Close the lid and press down to ensure it seals properly. Look for any gaps where steam might escape. Run a test boil with a small amount of water to confirm that the kettle heats efficiently and the lid stays closed.
When to Replace the Entire Kettle
While many lid issues are fixable, there are times when replacing the kettle is the safest and most practical option. If the lid is cracked, the hinge is broken beyond repair, or the kettle itself shows signs of electrical problems (like sparks, burning smells, or inconsistent heating), it’s time to retire it.
Older kettles may also lack modern safety features, such as automatic shut-off or boil-dry protection. Upgrading to a newer model can improve performance, energy efficiency, and safety. When shopping for a replacement, look for kettles with sturdy lids, easy-to-clean designs, and accessible spare parts.
Remember, your safety is more important than saving a few dollars on a repair. If you’re unsure about any step or feel uncomfortable working with electrical appliances, consult a professional or consider replacing the kettle.
Preventing Future Lid Problems
The best way to avoid lid issues is through regular maintenance. Descale your kettle every 1–2 months, especially if you live in a hard water area. Wipe down the lid and hinge area after each use to prevent buildup. Avoid forcing the lid open or closed, and never use excessive force on the release button.
Store your kettle in a dry, cool place when not in use. Keep it away from moisture and direct sunlight, which can degrade plastic and rubber components over time. With proper care, your electric kettle—and its lid—can last for many years.
Frequently Asked Questions
Can I use WD-40 to fix a stuck kettle lid?
No, avoid using WD-40 or other oil-based lubricants. They can attract dust and degrade plastic parts over time. Instead, use a food-safe silicone lubricant sparingly, or simply clean the mechanism with vinegar and alcohol.
Is it safe to repair an electric kettle myself?
Yes, as long as you unplug the kettle and let it cool completely. Avoid touching electrical components, and only work on mechanical parts like the lid, hinge, or gasket. If you’re unsure, consult the manufacturer or a professional.
How often should I descale my electric kettle?
Descale every 1–2 months if you use your kettle daily, or more often in hard water areas. Regular descaling prevents mineral buildup that can affect the lid and heating performance.
Can I replace just the lid on my electric kettle?
It depends on the model. Some manufacturers sell replacement lids, but they’re not always available. Check the brand’s website or contact customer support. If a replacement isn’t offered, you may need to replace the entire kettle.
Why does my kettle lid make a clicking noise?
A clicking sound is usually normal and comes from the thermostat or heating element. However, if the noise is accompanied by the lid opening unexpectedly, it could indicate a faulty latch or pressure issue.
What should I do if the lid still doesn’t work after cleaning?
Double-check for loose screws, damaged hinges, or worn gaskets. If all else fails, consider replacing the kettle. Continuing to use a malfunctioning appliance can be unsafe and inefficient.