If your electric kettle isn’t working, don’t panic—many issues are easy to fix at home. From checking the power source to cleaning mineral buildup, this guide walks you through common problems and practical solutions to restore your kettle’s function quickly and safely.
Key Takeaways
- Check the power source first: Ensure the kettle is plugged in, the outlet works, and the circuit breaker hasn’t tripped.
- Inspect the base and connections: Look for loose wires, corrosion, or damage where the kettle connects to its base.
- Clean mineral deposits regularly: Limescale buildup can block heating elements and sensors—descaling improves performance.
- Test the thermostat and heating element: A faulty thermostat or broken element often causes failure to heat.
- Reset the thermal cut-off switch: Many kettles have a safety reset button that trips during overheating—press it to restore function.
- Avoid overfilling or underfilling: Operating outside the recommended water level can trigger safety locks or damage components.
- Know when to replace: If repairs don’t work or the kettle is old, replacement may be safer and more cost-effective.
📑 Table of Contents
- Introduction: Why Your Electric Kettle Might Not Be Working
- Step 1: Verify the Power Source and Connections
- Step 2: Examine the Kettle’s Internal Components
- Step 3: Clean Mineral Buildup and Descale the Kettle
- Step 4: Reset the Thermal Cut-Off Switch
- Step 5: Check Water Level and Safety Features
- Step 6: Know When to Replace Your Electric Kettle
- Conclusion: Keep Your Kettle Boiling with Confidence
Introduction: Why Your Electric Kettle Might Not Be Working
We’ve all been there—rushing to make morning coffee or tea, only to press the button and hear… nothing. Your electric kettle, usually so reliable, suddenly refuses to cooperate. It’s frustrating, especially when you’re counting on that hot water for breakfast, cooking, or even sterilizing baby bottles. But before you toss it in the trash or call a technician, take a breath. In most cases, an electric kettle not working isn’t a death sentence—it’s often a simple issue you can fix yourself with a little know-how and some basic tools.
Electric kettles are among the most convenient kitchen appliances, heating water faster and more efficiently than stovetop versions. Yet, like any electrical device, they can develop problems over time. Whether it’s a power issue, internal component failure, or just built-up gunk from hard water, the root cause is usually identifiable and fixable. The key is knowing where to look and what to test. This guide will walk you through the most common reasons your electric kettle might stop working and show you exactly how to troubleshoot and repair it—step by step, safely, and without unnecessary expense.
Step 1: Verify the Power Source and Connections
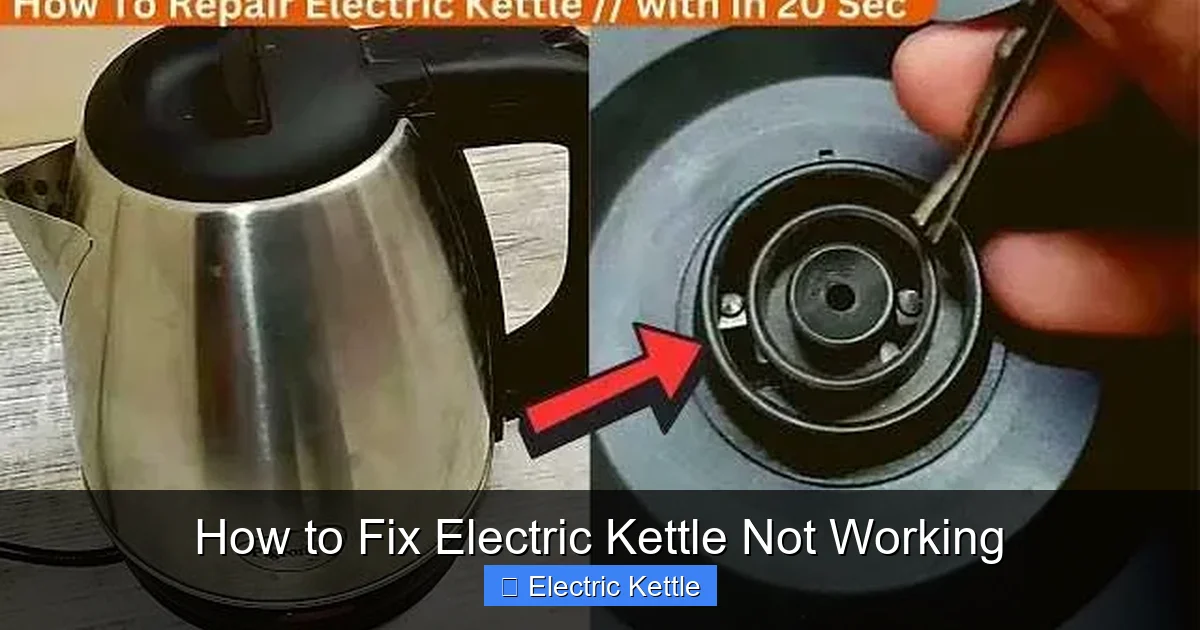
Visual guide about How to Fix Electric Kettle Not Working
Image source: kitchenadvising.com
The first and most overlooked step in fixing an electric kettle not working is checking whether it’s actually receiving power. It sounds obvious, but you’d be surprised how often the problem lies not with the kettle itself, but with the power supply.
Check the Power Outlet
Start by plugging another device—like a lamp or phone charger—into the same outlet you use for your kettle. If that device doesn’t work, the issue is with the outlet, not the kettle. Try a different outlet, preferably one on a different circuit. If the outlet works with other devices, move on to the next step.
Inspect the Power Cord and Plug
Look closely at the kettle’s power cord and plug. Are there any visible signs of damage—fraying, burns, or bent prongs? A damaged cord can prevent electricity from reaching the kettle. If you spot damage, do not use the kettle. Replace the cord if possible, or consider replacing the entire unit for safety.
Test the Kettle Base and Connection Points
Most electric kettles have a detachable base that connects to the kettle via a circular connector. Over time, this connection can become loose or corroded. Unplug the kettle and examine the base and the bottom of the kettle. Look for dirt, moisture, or white/green corrosion around the metal contacts. Use a dry cloth to clean them gently. If corrosion is present, a cotton swab dipped in vinegar can help dissolve it—just make sure everything is completely dry before plugging back in.
Try a Different Outlet or Circuit
Sometimes, the outlet itself is fine, but the circuit is overloaded or tripped. Check your home’s circuit breaker panel to see if the corresponding switch has flipped. If it has, reset it and try the kettle again. Also, avoid using the kettle on the same circuit as high-wattage appliances like microwaves or toasters, as this can cause voltage drops.
Step 2: Examine the Kettle’s Internal Components
If power is reaching the kettle but it still won’t heat, the issue likely lies inside. Most modern electric kettles have a few key internal components: the heating element, thermostat, thermal fuse, and sometimes a control board. Understanding how these work can help you pinpoint the problem.
Locate the Heating Element
In most electric kettles, the heating element is a coiled or flat metal disc located at the bottom of the water chamber. It heats up when electricity passes through it, transferring heat to the water. If the element is visibly cracked, burnt, or covered in thick limescale, it may not function properly.
Test the Heating Element for Continuity
To check if the heating element is working, you’ll need a multimeter—a tool that measures electrical continuity. Set the multimeter to the ohms (Ω) setting. Disconnect the kettle from power, remove the base, and locate the two terminals connected to the heating element. Touch the multimeter probes to each terminal. If the reading shows infinite resistance (or “OL”), the element is broken and needs replacement. A working element should show low resistance, typically between 10–30 ohms, depending on the kettle’s wattage.
Check the Thermostat
The thermostat regulates water temperature and turns off the heating element once the water reaches boiling point. If it fails, the kettle may not heat at all or may overheat. Thermostats can wear out over time or get stuck in the “off” position. To test it, use the multimeter to check for continuity across the thermostat terminals when the kettle is cold. If there’s no continuity, the thermostat may need replacing.
Inspect the Thermal Fuse (Thermal Cut-Off)
Many kettles include a thermal fuse—a small, one-time-use safety device that cuts power if the kettle overheats. It’s usually located near the heating element or thermostat. Once it blows, it cannot be reset. Use the multimeter to test for continuity. If there’s no reading, the fuse is blown and must be replaced. Be cautious: replacing a blown thermal fuse without fixing the underlying overheating issue could lead to repeated failures.
Step 3: Clean Mineral Buildup and Descale the Kettle
One of the most common—and preventable—reasons an electric kettle stops working is mineral buildup, especially in areas with hard water. Over time, calcium and magnesium deposits (limescale) accumulate on the heating element and inside the water chamber, insulating the element and reducing heat transfer. This can cause the kettle to overheat, trip safety mechanisms, or fail to heat at all.
Recognize the Signs of Limescale
You might notice white or chalky residue inside the kettle, slower boiling times, or a strange smell when heating. In severe cases, the heating element may appear completely encased in scale. If left untreated, this buildup can permanently damage the kettle.
Descale with Vinegar (Natural Method)
The easiest and most eco-friendly way to descale is with white vinegar. Fill the kettle halfway with equal parts water and white vinegar. Let it sit for at least 30 minutes—or overnight for heavy buildup. Then, bring the solution to a boil, turn off the kettle, and let it cool. Pour out the liquid and rinse thoroughly with clean water. Repeat if necessary. Finally, run the kettle with fresh water 2–3 times to remove any vinegar taste.
Use a Commercial Descaler
If vinegar isn’t strong enough, try a commercial descaling solution designed for kettles. Follow the manufacturer’s instructions carefully. These products are often more potent and may work faster, but they can be harsher on internal components if overused.
Prevent Future Buildup
To minimize limescale, use filtered or distilled water when possible. Empty the kettle after each use to prevent water from sitting and depositing minerals. Descale your kettle every 1–2 months, depending on water hardness and usage frequency.
Step 4: Reset the Thermal Cut-Off Switch
Many electric kettles are equipped with a thermal cut-off switch—a safety feature that automatically shuts off power if the kettle overheats or runs dry. This switch is designed to protect the appliance and prevent fire hazards. However, it can sometimes trip unnecessarily or get stuck in the “off” position, making the kettle appear broken.
Locate the Reset Button
The reset button is usually a small, red or black button located on the handle, base, or near the heating element. It may be recessed and require a paperclip or small tool to press. Consult your kettle’s user manual if you’re unsure where it is.
Reset the Switch Safely
Before resetting, ensure the kettle is unplugged and completely cool. Press the reset button firmly until you hear or feel a click. Plug the kettle back in and test it. If it works, great! If not, the switch may be faulty or another component may be causing repeated tripping.
Understand Why It Tripped
If the thermal cut-off keeps tripping, investigate the cause. Common reasons include:
– Running the kettle with no water (dry boiling)
– Mineral buildup causing overheating
– A faulty thermostat failing to shut off the element
– Blocked vents or steam outlets
Fixing the root cause is essential—otherwise, the problem will recur.
Step 5: Check Water Level and Safety Features
Electric kettles are designed to operate within specific water level ranges. Using too little or too much water can trigger safety mechanisms or damage internal components.
Avoid Underfilling
Most kettles have a minimum water level mark—usually around 0.5 to 1 cup (120–240 ml). Running the kettle with less than this can cause the heating element to overheat, trip the thermal fuse, or even crack. Always ensure there’s enough water to cover the heating element completely.
Don’t Overfill
Similarly, overfilling can cause water to spill into the base or electrical components, leading to short circuits or damage. Never fill above the “Max” line. Excess water can also take longer to boil, stressing the heating element.
Check the Float Switch (in Some Models)
Some kettles use a float switch to detect water level. If the float gets stuck or the mechanism fails, the kettle may not turn on. Gently move the float (usually a small plastic piece near the spout) to see if it moves freely. Clean any debris that might be blocking it.
Ensure Proper Lid Closure
Many kettles won’t operate if the lid isn’t fully closed. This is a safety feature to prevent steam burns or spills. Make sure the lid clicks securely into place. If the latch is broken or misaligned, the kettle may not activate.
Step 6: Know When to Replace Your Electric Kettle
Despite your best efforts, some kettles simply can’t be fixed. Knowing when to replace rather than repair can save you time, money, and potential safety risks.
Age and Wear
Most electric kettles last 3–5 years with regular use. If yours is older and has recurring issues—even after repairs—it may be nearing the end of its lifespan. Components like thermostats and heating elements degrade over time.
Repeated Failures
If the same problem keeps happening (e.g., thermal fuse keeps blowing, kettle won’t heat), it’s a sign of a deeper issue. Continuing to repair may not be cost-effective or safe.
Safety Concerns
If you notice burning smells, smoke, sparks, or electrical shocks, stop using the kettle immediately. These are serious safety hazards and indicate potential fire or electrocution risks.
Cost of Repairs vs. Replacement
Replacing internal components like thermostats or heating elements can cost nearly as much as a new kettle—especially for older models. Unless you’re handy with electronics and can source parts cheaply, buying a new kettle is often the smarter choice.
Upgrade to a Better Model
If you’re replacing your kettle, consider upgrading to a newer model with features like:
– Variable temperature control (great for tea)
– Keep-warm function
– Auto shut-off and boil-dry protection
– Stainless steel or BPA-free plastic construction
Modern kettles are more efficient, safer, and often more affordable than ever.
Conclusion: Keep Your Kettle Boiling with Confidence
An electric kettle not working doesn’t have to mean the end of your morning routine. With a systematic approach—starting with power checks, moving to internal inspections, and addressing maintenance issues like limescale—you can often restore your kettle to full function. Simple fixes like resetting the thermal switch, cleaning the base, or descaling can make a world of difference.
Remember, safety comes first. Always unplug the kettle before inspecting or cleaning it, and never attempt repairs if you’re unsure. When in doubt, consult the manufacturer or consider replacement. Regular maintenance—like descaling and proper water level use—can extend your kettle’s life and prevent future problems.
By understanding how your electric kettle works and knowing how to troubleshoot common issues, you’ll save money, reduce waste, and enjoy hot water on demand—just when you need it most.
Frequently Asked Questions
Why won’t my electric kettle turn on at all?
This is often due to a power issue—check if the outlet works, the cord is intact, and the kettle is properly seated on its base. If those are fine, the thermal cut-off switch may have tripped and needs resetting.
Can I fix a burnt heating element in my kettle?
In most cases, no—heating elements are not user-replaceable and require soldering skills. If the element is burnt or broken, it’s usually safer and more cost-effective to replace the entire kettle.
How often should I descale my electric kettle?
Descale every 1–2 months if you use hard water, or every 3–4 months with soft water. Regular descaling prevents mineral buildup and keeps your kettle heating efficiently.
Is it safe to use my kettle if it smells like burning?
No. A burning smell could indicate electrical damage, overheating, or melted components. Unplug the kettle immediately and do not use it until inspected or replaced.
Why does my kettle stop working after a few seconds?
This may be due to a faulty thermostat, thermal fuse, or safety lock triggered by low water level. Check the water level, reset the thermal switch, and test internal components with a multimeter.
Can I repair my kettle myself, or should I call a professional?
Simple fixes like cleaning, resetting switches, or checking connections can be done at home. However, if you’re uncomfortable with electronics or the issue involves internal wiring, it’s best to consult a professional or replace the kettle.