Is your electric kettle not turning on or shutting off unexpectedly? A faulty switch could be the culprit. This guide walks you through diagnosing and fixing common electric kettle switch problems—safely and without expensive replacements.
Key Takeaways
- Always unplug the kettle before attempting any repairs to avoid electric shock or injury.
- Most switch issues stem from dirt, corrosion, or worn contacts—cleaning or replacing the switch often solves the problem.
- Use a multimeter to test switch continuity and confirm if the switch is truly faulty.
- Replacement switches are affordable and widely available online or at appliance parts stores.
- Improper reassembly can cause leaks or electrical hazards—follow disassembly steps carefully.
- Regular maintenance extends your kettle’s lifespan and prevents future switch failures.
- If you’re unsure, consult a professional—safety should always come first.
📑 Table of Contents
- Why Your Electric Kettle Switch Might Be Failing
- Understanding How the Electric Kettle Switch Works
- Safety First: Precautions Before You Begin
- Step-by-Step Guide to Diagnosing the Switch Problem
- How to Fix a Faulty Electric Kettle Switch
- Preventing Future Switch Problems
- When to Call a Professional
- Conclusion
Why Your Electric Kettle Switch Might Be Failing
Electric kettles are among the most used appliances in modern kitchens. Whether you’re brewing morning coffee, preparing instant noodles, or making tea, a reliable kettle is essential. But when the switch stops working—clicking without heating, failing to turn on, or turning off mid-boil—it can throw your routine into chaos. The good news? In many cases, the issue lies with the switch itself, and it’s often fixable without buying a new kettle.
The switch in an electric kettle is more than just a button you press. It’s a critical component that completes the electrical circuit, allowing current to flow to the heating element. Over time, this switch can wear out due to repeated use, exposure to steam, or mineral buildup from hard water. When it fails, your kettle may not heat at all, or it might shut off prematurely. Understanding how the switch works and what causes it to fail is the first step toward a successful repair.
Understanding How the Electric Kettle Switch Works
Before diving into repairs, it helps to know what’s happening inside your kettle when you press that button. Most electric kettles use a bimetal switch or a thermostatic switch that activates when you press the lid or handle button. This switch connects the power supply to the heating element, which then heats the water. Once the water reaches boiling point (usually around 100°C or 212°F), the thermostat automatically cuts off power to prevent overheating.
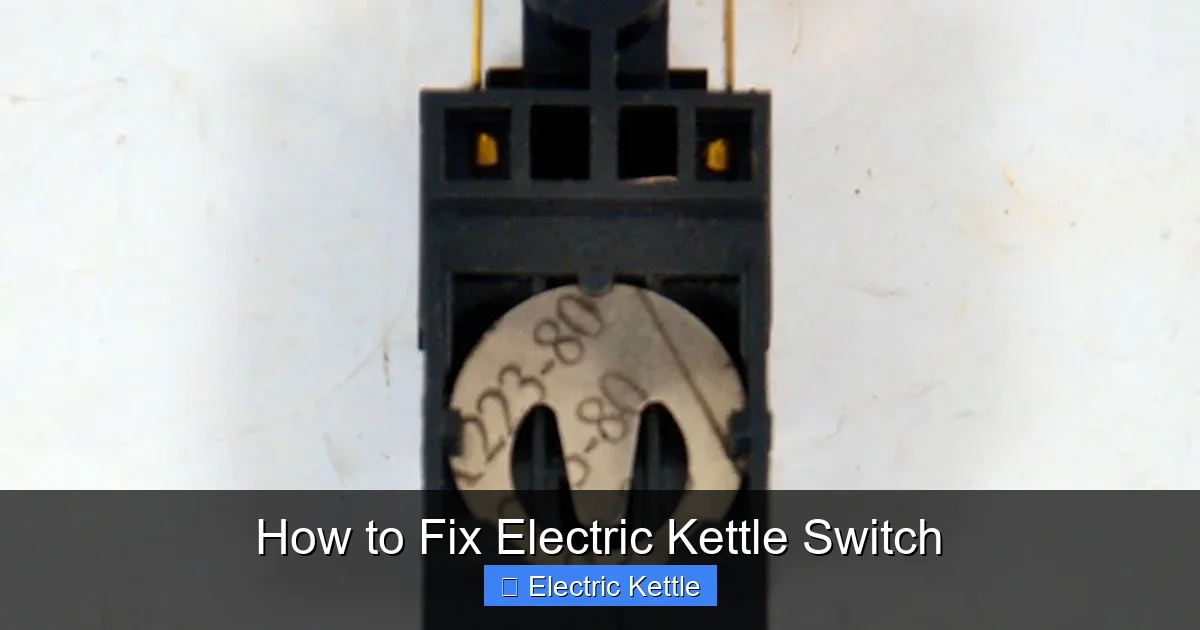
Visual guide about How to Fix Electric Kettle Switch
Image source: shop.testerelectricalservice.com
The Role of the Thermostat and Switch
The switch and thermostat work hand-in-hand. When you press the button to start heating, the switch closes the circuit. The thermostat monitors the temperature and opens the circuit once boiling is reached. In some models, the switch also includes a latching mechanism that keeps the circuit closed until the water boils. If either component fails, the kettle won’t function properly.
Common Switch Types in Electric Kettles
There are two main types of switches found in electric kettles:
- Manual push-button switches: These require you to press and hold the button to keep the kettle heating. They’re common in older or budget models.
- Automatic latching switches: These click into place when pressed and stay on until the thermostat shuts off the power. Most modern kettles use this type.
Knowing which type your kettle uses will help you diagnose the problem and find the right replacement part.
Safety First: Precautions Before You Begin
Repairing an electric kettle involves working with electrical components, so safety must be your top priority. Even when unplugged, residual electricity can remain in the circuit. Follow these essential safety steps before starting any repair:
Unplug the Kettle Immediately
Never attempt to fix a kettle while it’s plugged in. Even if it’s not heating, the power cord can still carry live current. Unplug it from the wall outlet and wait at least 10 minutes to allow any stored energy to dissipate.
Let the Kettle Cool Completely
If the kettle was recently used, the heating element and internal parts may be extremely hot. Wait until the kettle is at room temperature before handling it. Touching hot components can cause burns.
Work in a Dry, Well-Lit Area
Moisture increases the risk of electric shock. Choose a dry workspace with good lighting so you can clearly see small parts and connections. Avoid working on wet countertops or near sinks.
Use Proper Tools and Wear Protection
Gather the right tools: a screwdriver set (usually Phillips and flathead), needle-nose pliers, and a multimeter. Wear safety glasses to protect your eyes from debris, and consider wearing rubber-soled shoes for added insulation.
Avoid Opening Sealed Units
Some kettles have sealed bases or glued casings designed to prevent tampering. Forcing them open can damage the unit or void warranties. If your kettle appears sealed, check the manufacturer’s website for repair guides or consider professional help.
Step-by-Step Guide to Diagnosing the Switch Problem
Once you’ve taken safety precautions, it’s time to figure out what’s wrong. Not all kettle problems are switch-related—sometimes the issue is with the power cord, heating element, or thermostat. Use this diagnostic process to pinpoint the cause.
Step 1: Check the Power Source
Before assuming the switch is faulty, rule out external issues. Plug the kettle into a different outlet. Try another appliance in the same outlet to confirm it’s working. If the outlet is dead, the problem isn’t your kettle.
Step 2: Inspect the Power Cord and Plug
Look for frayed wires, bent prongs, or burn marks on the plug. A damaged cord can prevent power from reaching the switch. Gently wiggle the cord near the base while the kettle is plugged in—if the light flickers or the kettle turns on briefly, the cord may be broken internally.
Step 3: Listen for the Click
Press the switch while the kettle is plugged in (but not heating). You should hear a distinct click. If there’s no sound, the switch may not be engaging. If it clicks but the kettle doesn’t heat, the switch might be closing the circuit but failing to maintain contact.
Step 4: Test the Heating Element
Use a multimeter to check the heating element for continuity. Set the multimeter to the ohms (Ω) setting. Disconnect the wires from the heating element and touch the probes to the terminals. A reading close to zero indicates continuity; no reading means the element is broken and needs replacement.
Step 5: Test the Switch with a Multimeter
This is the most reliable way to confirm a faulty switch. Set your multimeter to continuity mode (usually marked with a sound wave symbol). Disconnect the wires from the switch terminals. Press the switch and touch the probes to the terminals. If the multimeter beeps or shows continuity, the switch is working. If not, it’s likely defective.
Step 6: Check for Mineral Buildup
Hard water leaves behind limescale, which can insulate contacts and prevent proper connection. Open the kettle base (if accessible) and look for white, chalky deposits around the switch or terminals. Clean them with a vinegar solution or commercial descaler.
How to Fix a Faulty Electric Kettle Switch
Once you’ve confirmed the switch is the problem, you have two options: clean it or replace it. Cleaning works for minor issues like dirt or corrosion. Replacement is needed for worn-out or broken switches.
Option 1: Cleaning the Switch
If the switch is dirty or corroded, cleaning might restore function. Here’s how:
- Disassemble the kettle base using a screwdriver. Keep track of screws and parts.
- Locate the switch mechanism—usually near the handle or base.
- Use a cotton swab dipped in isopropyl alcohol to gently clean the contact points.
- For stubborn grime, use a small brush (like a toothbrush) to scrub gently.
- Allow all parts to dry completely before reassembling.
- Reconnect wires and test the kettle.
This method works best for switches that click but don’t maintain contact. Avoid using water, as it can cause rust or short circuits.
Option 2: Replacing the Switch
If cleaning doesn’t work, replacement is the next step. Follow these steps:
- Identify your kettle model and purchase a compatible switch. Search online using the model number (usually on the base).
- Disassemble the kettle as described above.
- Take a photo of the wiring before disconnecting anything—this helps during reassembly.
- Use needle-nose pliers to carefully disconnect the wires from the old switch.
- Remove the old switch and install the new one in the same position.
- Reconnect the wires exactly as they were. Double-check connections.
- Reassemble the kettle and test it with water (not dry) to avoid damaging the heating element.
Replacement switches cost between $5 and $15 and are available on Amazon, eBay, or appliance parts websites. Always buy from reputable sellers to ensure quality.
Reassembly Tips
Putting the kettle back together can be tricky. Here are some tips:
- Align all parts carefully—misaligned components can cause leaks or electrical issues.
- Tighten screws evenly to avoid cracking the plastic housing.
- Ensure wires are not pinched or stretched during reassembly.
- Test the switch action before fully securing the base.
If the kettle leaks after reassembly, disassemble it again and check for loose seals or misaligned gaskets.
Preventing Future Switch Problems
A little maintenance goes a long way in extending your kettle’s life and preventing switch failures. Here’s how to keep your kettle in top condition:
Descale Regularly
Hard water is the enemy of electric kettles. Mineral buildup can insulate heating elements and corrode switch contacts. Descale your kettle every 1–2 months, depending on water hardness. Use a mixture of equal parts white vinegar and water. Fill the kettle, boil, let it sit for 30 minutes, then rinse thoroughly.
Avoid Overfilling
Filling above the maximum line can cause water to seep into the base, damaging the switch and electrical components. Always stay below the “Max” mark.
Don’t Run the Kettle Dry
Never turn on the kettle without water. Dry boiling can overheat the switch and thermostat, leading to permanent damage. Most modern kettles have automatic shut-off, but it’s still a risky habit.
Store Properly
Keep the kettle in a dry place with the lid open to allow moisture to escape. Trapped steam can lead to corrosion over time.
Use a Surge Protector
Power surges can damage sensitive electronics in kettles. Plug your kettle into a surge protector to guard against voltage spikes.
When to Call a Professional
While many switch issues are DIY-friendly, some situations call for expert help. Consider professional repair if:
- The kettle is still under warranty—opening it may void the warranty.
- You’re uncomfortable working with electrical components.
- The base is sealed or glued shut, making disassembly risky.
- You’ve tried cleaning and replacing the switch, but the problem persists.
- There are signs of burning, melting, or smoke—these indicate serious electrical faults.
A qualified appliance technician has the tools and expertise to diagnose and fix complex issues safely. In some cases, replacing the entire kettle may be more cost-effective than repairing it.
Conclusion
Fixing an electric kettle switch might seem daunting, but with the right tools and precautions, it’s a manageable task for most homeowners. By understanding how the switch works, diagnosing the problem correctly, and following safe repair practices, you can save money and reduce waste. Regular maintenance—like descaling and proper use—can prevent many common issues before they start.
Remember, safety always comes first. If you’re ever unsure, don’t hesitate to seek professional help. With a little care and attention, your kettle can serve you reliably for years to come. So the next time your kettle refuses to boil, don’t rush to the store—grab your screwdriver and give it a try. You might just surprise yourself.
Frequently Asked Questions
Can I fix my electric kettle switch without soldering?
Yes, many kettle switches use screw terminals or clip-on connectors, so soldering isn’t always necessary. Check your model’s wiring setup before starting. If soldering is required and you’re not experienced, consider professional repair.
How often should I descale my electric kettle?
Descale every 1–2 months if you have hard water, or every 3–4 months with soft water. Frequent use may require more frequent descaling to prevent mineral buildup.
Is it safe to use a kettle with a loose switch?
No. A loose or faulty switch can cause intermittent heating, overheating, or electrical shorts. Stop using the kettle immediately and repair or replace the switch.
Where can I buy a replacement switch for my kettle?
Replacement switches are available on Amazon, eBay, appliancepartspros.com, or directly from the manufacturer’s website. Always match the model number for compatibility.
Why does my kettle turn off before boiling?
This could be due to a faulty thermostat, mineral buildup on the heating element, or a failing switch. Test the thermostat and switch with a multimeter to identify the issue.
Can I use my kettle if the switch doesn’t click?
No. A non-clicking switch usually means it’s not engaging the circuit. The kettle won’t heat, and forcing it could damage other components. Repair or replace the switch first.