Discover how to make electric kettle from scratch using basic electrical components and safety precautions. This guide walks you through selecting materials, wiring, assembly, and testing—perfect for DIY enthusiasts who want a custom, functional electric kettle.
Key Takeaways
- Understand the core components: A functional electric kettle requires a heating element, thermostat, power cord, kettle body, and control switch—each playing a vital role in safe operation.
- Safety is non-negotiable: Working with electricity and water demands strict adherence to safety protocols, including insulation, grounding, and using certified parts.
- Choose the right materials: Use heat-resistant, food-grade stainless steel for the kettle body and high-wattage, waterproof heating elements designed for immersion.
- Follow proper wiring techniques: Correctly connect the heating element, thermostat, and power supply to avoid short circuits or overheating.
- Test thoroughly before use: Perform dry and wet tests to ensure the kettle heats efficiently and shuts off automatically at the right temperature.
- Know your limits: While DIY projects are rewarding, commercial kettles undergo rigorous safety testing—consider this before relying on a homemade version daily.
- Maintain and inspect regularly: Even a well-built DIY kettle needs periodic checks for wear, corrosion, or electrical faults.
📑 Table of Contents
- Introduction: The Appeal of Building Your Own Electric Kettle
- Understanding How an Electric Kettle Works
- Essential Components for Building an Electric Kettle
- Step-by-Step Guide to Assembling Your Electric Kettle
- Safety Precautions and Best Practices
- Testing and Troubleshooting Your DIY Electric Kettle
- Conclusion: Is Building an Electric Kettle Worth It?
Introduction: The Appeal of Building Your Own Electric Kettle
There’s something deeply satisfying about creating something with your own hands—especially when it’s a device you use every day. Imagine starting your morning with a cup of tea brewed using an electric kettle you built yourself. It’s not just about saving money or avoiding store-bought models; it’s about understanding how things work, gaining hands-on experience with electronics, and customizing a tool to your exact preferences.
An electric kettle is one of the most common kitchen appliances, yet few people know how it actually functions. At its core, it’s a simple device: it uses electricity to heat water quickly and efficiently. But building one from scratch? That’s a project that blends engineering, safety awareness, and a bit of creativity. Whether you’re a hobbyist, a student learning electronics, or just someone who loves DIY projects, making an electric kettle can be both educational and rewarding.
Of course, this isn’t a project to take lightly. Electricity and water are a dangerous combination if not handled properly. That’s why this guide emphasizes safety at every step. We’ll walk you through the components you’ll need, how to assemble them correctly, and how to test your creation before using it. By the end, you’ll not only have a working electric kettle but also a deeper appreciation for the technology behind everyday conveniences.
Understanding How an Electric Kettle Works
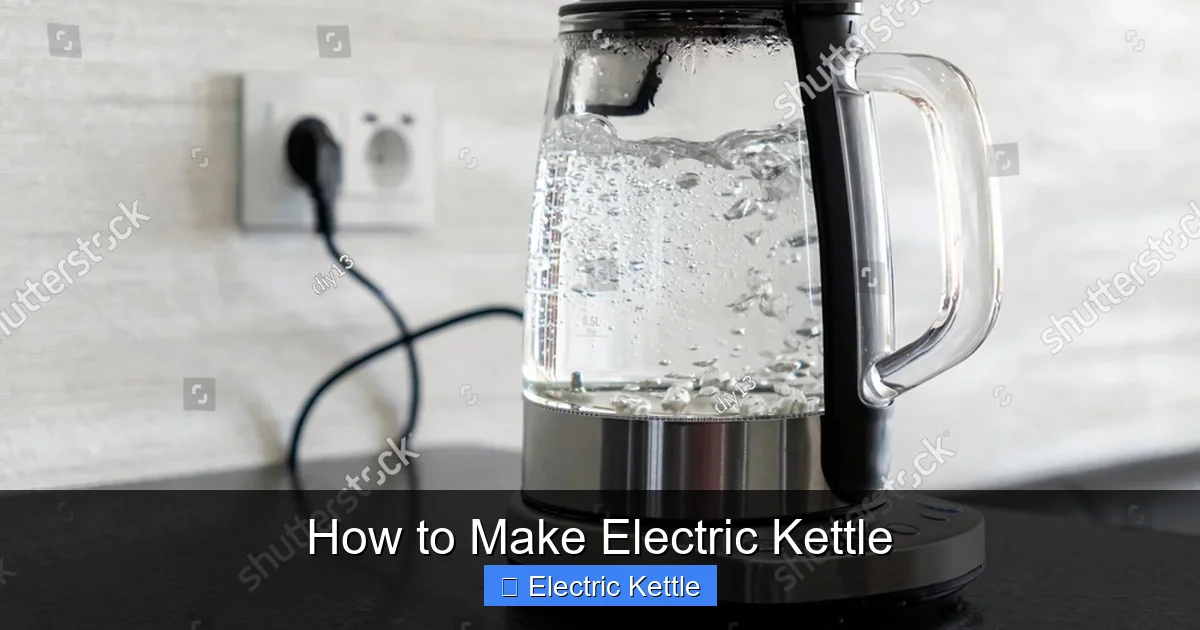
Visual guide about How to Make Electric Kettle
Image source: shutterstock.com
Before you start gathering parts, it’s important to understand the basic principles behind an electric kettle. Knowing how it functions will help you make smarter design choices and troubleshoot issues later.
At its heart, an electric kettle converts electrical energy into heat energy. When you plug it in and turn it on, electricity flows through a heating element—usually a coiled wire made of a high-resistance alloy like nichrome. This resistance causes the wire to heat up rapidly. The heat is then transferred directly to the water inside the kettle, bringing it to a boil in just a few minutes.
Most modern electric kettles also include a thermostat—a small device that monitors the water temperature. Once the water reaches boiling point (around 100°C or 212°F at sea level), the thermostat automatically cuts off the power to prevent overheating. Some advanced models even have features like variable temperature settings, keep-warm functions, or LED indicators.
The key advantage of an electric kettle over stovetop methods is efficiency. Because the heating element is submerged directly in the water (in immersion-type kettles), there’s minimal heat loss. This means faster boiling times and lower energy consumption. Additionally, automatic shut-off features make electric kettles safer and more convenient than traditional kettles that require constant monitoring.
Understanding these principles will guide your design. For example, you’ll need to choose a heating element with the right wattage for your desired boiling speed, and ensure your thermostat can accurately detect when the water has boiled. You’ll also need to consider insulation, heat distribution, and how to safely enclose all electrical components.
Essential Components for Building an Electric Kettle
Now that you understand how an electric kettle works, let’s look at the parts you’ll need to build one. Each component plays a critical role in the kettle’s function and safety.
Heating Element
The heating element is the heart of your electric kettle. It’s responsible for converting electrical energy into heat. For a DIY project, you’ll want an immersion-type heating element—this means it’s designed to be submerged directly in water.
Look for a stainless steel or titanium heating element with a power rating between 1000W and 1500W. Higher wattage means faster boiling, but it also draws more current, so make sure your power source and wiring can handle it. The element should be rated for continuous use and resistant to corrosion.
You can purchase heating elements online from electronics suppliers or salvage them from old kettles (though this requires careful disassembly and testing). Make sure the element has insulated leads and a secure mounting base so it can be attached to the kettle body.
Thermostat (Automatic Shut-Off)
A thermostat is essential for safety. Without it, your kettle could overheat, potentially causing damage or even a fire. The thermostat monitors the temperature of the water or the heating element itself and cuts power when boiling point is reached.
For a DIY kettle, a bimetallic thermostat is a good choice. These are commonly used in commercial kettles and are relatively easy to integrate. They consist of two metals bonded together that expand at different rates when heated, causing a switch to open and break the circuit.
Choose a thermostat rated for 100°C (212°F) and compatible with your heating element’s voltage and current. Some thermostats come with a reset button, while others are auto-resetting. Auto-resetting types are more convenient but may cycle on and off if the water cools slightly.
Kettle Body (Container)
The container holds the water and houses the heating element. It must be made of a material that can withstand high temperatures and is safe for food contact.
Stainless steel is the best choice—it’s durable, non-reactive, and easy to clean. Avoid aluminum or copper unless they’re lined with a food-safe coating, as these metals can leach into water when heated.
The size of the kettle depends on your needs. A typical household kettle holds 1 to 1.7 liters. Make sure the container has a lid with a secure seal and a spout for pouring. You’ll also need to drill a hole in the bottom or side to mount the heating element.
Power Cord and Plug
You’ll need a heavy-duty power cord rated for at least 10 amps and 250 volts. Look for a cord with a grounded (three-prong) plug for added safety. The insulation should be heat-resistant and flexible.
Avoid using old or damaged cords. The connection between the cord and the heating element must be secure and insulated to prevent short circuits.
Control Switch (Optional)
While many kettles rely on the thermostat for on/off control, you may want to add a manual switch for convenience. A simple toggle or push-button switch can be wired in series with the heating element to give you control over when the kettle turns on.
Make sure the switch is rated for the voltage and current of your system. It should be mounted in a safe, accessible location on the kettle body.
Insulation and Sealing Materials
To prevent electrical hazards, all connections must be properly insulated. Use heat-shrink tubing, electrical tape, or silicone sealant to cover exposed wires and terminals.
If you’re mounting the heating element through the kettle wall, use a waterproof gasket or high-temperature silicone to seal the opening. This prevents water from leaking into the electrical compartment.
Step-by-Step Guide to Assembling Your Electric Kettle
Now that you have all the components, it’s time to assemble your electric kettle. Follow these steps carefully to ensure a safe and functional build.
Step 1: Prepare the Kettle Body
Start by selecting your stainless steel container. Clean it thoroughly to remove any debris or oils. Using a drill and a hole saw, create a hole in the bottom or side of the kettle where the heating element will be mounted. The hole should match the diameter of the element’s base.
If you’re using a pre-made heating element with a threaded base, you may need to use a lock nut and washer to secure it from the inside. Apply high-temperature silicone around the edges to create a watertight seal.
Step 2: Install the Heating Element
Carefully insert the heating element into the hole you drilled. Secure it with the provided hardware, ensuring it’s tightly fastened and won’t leak. The element should be fully submerged when the kettle is filled with water.
Double-check that the electrical leads are accessible from the outside and that no part of the element is exposed where it could cause a short.
Step 3: Wire the Circuit
Now it’s time to connect the electrical components. Here’s a simple wiring diagram:
– Connect one wire from the power cord to one terminal of the heating element.
– Connect the other wire from the power cord to one terminal of the thermostat.
– Connect the remaining terminal of the thermostat to the second terminal of the heating element.
This creates a series circuit: power flows from the cord → thermostat → heating element → back to the cord. When the thermostat detects boiling temperature, it opens the circuit and stops the flow of electricity.
Use crimp connectors or soldering to make secure connections. Cover all joints with heat-shrink tubing or electrical tape. Never leave bare wires exposed.
Step 4: Mount the Thermostat and Switch
Attach the thermostat to the heating element or near it so it can accurately sense temperature. Some thermostats are designed to clip onto the element; others need to be mounted separately.
If you’re adding a manual switch, mount it on the kettle body in a convenient location. Wire it in series with the thermostat so both must be closed for the kettle to operate.
Step 5: Insulate and Seal
Once all wiring is complete, insulate every connection. Use silicone sealant around the base of the heating element and any holes where wires pass through the kettle body.
Ensure the interior of the kettle is completely dry before testing. Any moisture near electrical components can cause a short circuit.
Step 6: Attach the Lid and Handle
Secure the lid to the kettle body. It should fit snugly to prevent steam from escaping and to protect the internal components. If your kettle has a handle, attach it using heat-resistant screws or rivets.
Make sure the handle is comfortable to grip and doesn’t get too hot during operation.
Safety Precautions and Best Practices
Building an electric kettle involves significant risks. Electricity and water don’t mix, and a single mistake can lead to electric shock, fire, or injury. Follow these safety guidelines to protect yourself and others.
Use Only Certified Components
Whenever possible, use components that are certified by safety organizations like UL (Underwriters Laboratories) or CE (Conformité Européenne). These certifications mean the parts have been tested for safety and reliability.
Avoid using salvaged parts unless you’re certain they’re in good condition and rated for your application.
Ensure Proper Grounding
Your kettle must be grounded to prevent electric shock. Use a three-prong plug and ensure the metal body of the kettle is connected to the ground wire. This provides a safe path for electricity in case of a fault.
Never Operate Without Water
Running the heating element dry can cause it to overheat and fail, potentially starting a fire. Always ensure there’s enough water in the kettle before turning it on. A good rule of thumb is to fill it to at least the minimum level marked on commercial kettles—usually about 0.5 liters.
Test in a Safe Environment
Before using your kettle for the first time, perform a dry test: plug it in and turn it on without water. Watch for sparks, smoke, or unusual smells. If anything seems wrong, unplug it immediately and check your wiring.
Then, perform a wet test with a small amount of water. Observe how quickly it heats and whether the thermostat shuts off correctly.
Keep Away from Children and Pets
Even a well-built DIY kettle can be dangerous if mishandled. Store it out of reach of children and never leave it unattended while in use.
Regular Maintenance
Over time, mineral deposits can build up on the heating element, reducing efficiency. Clean your kettle regularly with a vinegar solution to remove limescale.
Also, inspect the power cord, plug, and connections periodically for signs of wear or damage.
Testing and Troubleshooting Your DIY Electric Kettle
Once your kettle is assembled, thorough testing is essential. This ensures it works as intended and is safe to use.
Initial Dry Test
Plug in the kettle and turn it on—without adding any water. Listen for unusual noises and watch for sparks or smoke. The heating element may glow red, which is normal, but it should not smoke or smell burnt.
If everything looks good, turn it off and let it cool.
Wet Test with Small Amount of Water
Fill the kettle with about 250ml of water. Plug it in and turn it on. Time how long it takes to boil. A 1000W element should boil this amount in 2–3 minutes.
Observe whether the thermostat shuts off the power when the water reaches boiling point. You should hear a click when the circuit opens.
Check for Leaks
Inspect the area around the heating element and any seals. Look for water dripping or pooling. If you find a leak, unplug the kettle and reseal the connection with more silicone.
Common Issues and Fixes
– Kettle doesn’t heat: Check the power cord, connections, and thermostat. Use a multimeter to test continuity.
– Thermostat doesn’t shut off: The thermostat may be faulty or improperly mounted. Replace or reposition it.
– Water leaks: Reapply sealant around the heating element base.
– Overheating: Ensure the thermostat is correctly calibrated and in contact with the heating element.
Conclusion: Is Building an Electric Kettle Worth It?
Making an electric kettle is a challenging but rewarding project that teaches valuable skills in electronics, engineering, and safety. You’ll gain hands-on experience with wiring, thermal dynamics, and material selection—all while creating a functional kitchen appliance.
However, it’s important to be realistic. Commercial electric kettles are designed and tested to meet strict safety standards. They undergo rigorous quality control, including drop tests, overheat protection, and long-term durability assessments. A DIY kettle, no matter how well-built, may not offer the same level of reliability or safety.
That said, if you’re careful, use quality components, and follow safety protocols, you can build a kettle that works well for occasional use. It’s a great learning experience and a fun way to impress friends with your DIY skills.
Just remember: if you’re unsure about any part of the process, consult an electrician or consider buying a certified kettle instead. Safety should always come first.
With the right knowledge and precautions, building your own electric kettle can be a fascinating journey into the world of home electronics. Whether you’re doing it for fun, education, or practical use, take your time, stay safe, and enjoy the process.
Frequently Asked Questions
Can I really make an electric kettle at home?
Yes, it’s possible to build a functional electric kettle using basic electrical components like a heating element, thermostat, and power cord. However, it requires careful planning, proper wiring, and strict attention to safety.
Is it safe to use a homemade electric kettle?
A DIY electric kettle can be safe if built correctly with certified parts, proper insulation, and grounding. However, it won’t have the same safety certifications as commercial models, so use it with caution and regular inspections.
What wattage should the heating element be?
For a typical household kettle, a heating element between 1000W and 1500W is ideal. Higher wattage boils water faster but requires thicker wiring and a robust power source.
Do I need a thermostat in my DIY kettle?
Yes, a thermostat is essential for safety. It prevents the kettle from overheating by cutting power when the water reaches boiling point. Without it, the risk of fire or damage increases significantly.
Can I use a plastic container for the kettle body?
No, plastic is not recommended. Most plastics can’t withstand high temperatures and may melt or release harmful chemicals. Use food-grade stainless steel for safety and durability.
How do I prevent electrical shocks when building the kettle?
Ensure all connections are insulated, use a grounded power cord, and keep electrical components away from water. Never handle the kettle with wet hands, and always unplug it before cleaning or maintenance.