Calcium deposits in your electric kettle are common but easy to fix. With simple household ingredients like vinegar and lemon, you can restore your kettle’s performance and improve water taste in minutes.
Key Takeaways
- Calcium deposits form due to hard water: Minerals like calcium and magnesium build up over time, especially in areas with high mineral content in tap water.
- Vinegar is the most effective natural cleaner: Its acetic acid dissolves limescale quickly and safely without damaging the kettle’s interior.
- Lemon juice offers a fresh-smelling alternative: Citrus acid works similarly to vinegar and leaves a pleasant scent after cleaning.
- Regular cleaning prevents buildup: Descaling every 2–4 weeks keeps your kettle efficient and extends its lifespan.
- Avoid harsh chemicals: Bleach or strong commercial cleaners can leave toxic residues and damage internal components.
- Rinse thoroughly after cleaning: Always run multiple cycles with clean water to remove any lingering taste or odor.
- Use filtered water to reduce future deposits: Switching to filtered or distilled water minimizes mineral buildup over time.
📑 Table of Contents
Why Calcium Deposits Build Up in Electric Kettles
If you’ve noticed a chalky white or gray film inside your electric kettle—especially around the heating element or on the bottom—you’re likely dealing with calcium deposits, also known as limescale. These deposits are a natural byproduct of boiling water, particularly if you live in an area with hard water. Hard water contains high levels of dissolved minerals, primarily calcium and magnesium. When water is heated repeatedly, these minerals precipitate out and cling to surfaces, forming stubborn crusts that can affect both performance and taste.
Over time, this buildup doesn’t just look unappealing—it can actually reduce your kettle’s efficiency. The layer of limescale acts as an insulator, making it harder for the heating element to transfer heat to the water. This means your kettle takes longer to boil, uses more energy, and may even overheat in extreme cases. In addition, mineral residues can alter the taste of your water, tea, or coffee, giving it a slightly metallic or bitter flavor. That’s why regular maintenance isn’t just about aesthetics—it’s about preserving functionality and ensuring you’re drinking clean, great-tasting water every time.
The good news? Removing calcium deposits from your electric kettle is simple, affordable, and doesn’t require special tools or chemicals. With a few common household ingredients and a little time, you can restore your kettle to like-new condition. Whether you’ve just spotted the first signs of scale or your kettle has been neglected for months, the methods outlined in this guide will help you tackle the problem effectively and safely.
Signs Your Electric Kettle Needs Descaling
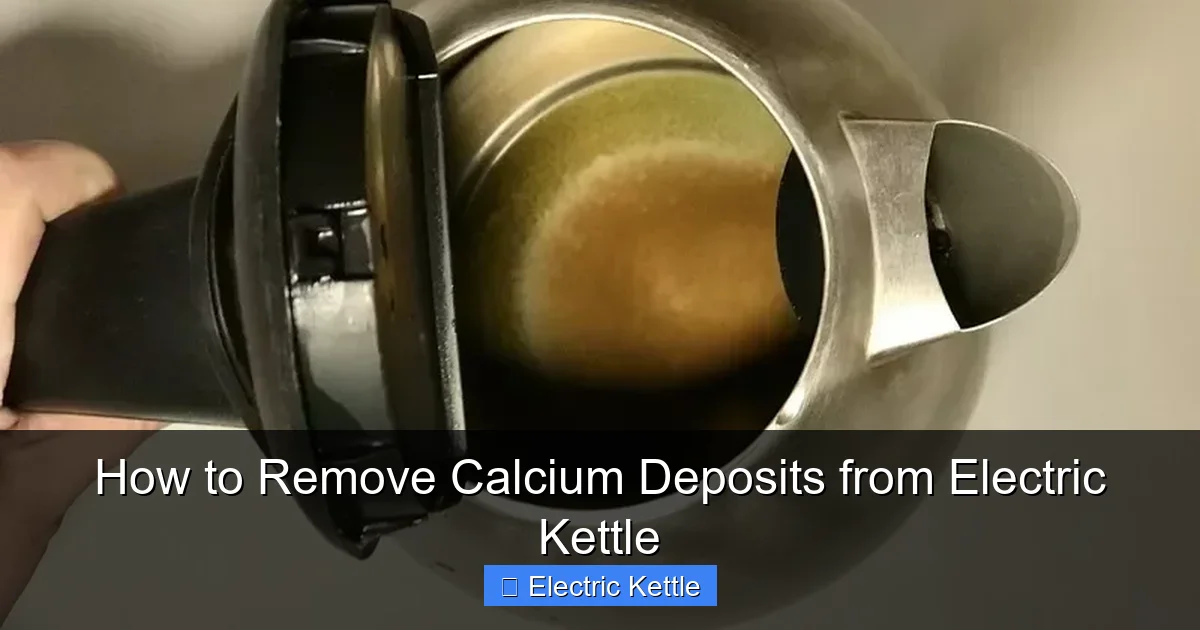
Visual guide about How to Remove Calcium Deposits from Electric Kettle
Image source: irrorwxhiqijjr5q.ldycdn.com
Knowing when to clean your kettle is half the battle. While some buildup is inevitable, catching it early makes the process much easier. Here are the most common signs that your electric kettle is due for a deep clean:
One of the first indicators is a visible white or off-white residue on the interior surfaces, especially near the heating coil or at the bottom of the kettle. This chalky film may start as a light dusting but can quickly harden into a crusty layer if left untreated. You might also notice similar deposits around the spout or inside the lid, where steam condenses and leaves behind mineral traces.
Another telltale sign is a change in how your kettle performs. If it’s taking noticeably longer to boil water than it used to, limescale could be insulating the heating element. You might also hear unusual sounds—like popping or crackling—during heating, which can occur when trapped minerals expand and contract rapidly. In severe cases, the kettle may shut off prematurely due to overheating, triggered by the reduced heat transfer caused by thick scale buildup.
Taste is another important clue. If your morning tea or coffee starts to taste off—perhaps slightly bitter, metallic, or “mineral-y”—it could be due to residue from the kettle. Even if you can’t see the scale, dissolved minerals can leach into your water during boiling, affecting flavor. And if you notice cloudiness in freshly boiled water, that’s another red flag. While not harmful, it’s a sign that your kettle needs attention.
Finally, check the water level markings or any plastic components. Limescale can cause discoloration or make these parts look cloudy or stained. If you’ve been using your kettle for several months without cleaning, it’s a safe bet that some degree of buildup has occurred—even if it’s not immediately obvious.
Top Natural Methods to Remove Calcium Deposits
When it comes to removing calcium deposits from your electric kettle, natural solutions are not only effective but also safe for both your appliance and your health. Unlike harsh chemical descalers, which can leave behind toxic residues or damage internal components, natural cleaners like vinegar and lemon are gentle yet powerful. Here are the most reliable methods you can try at home.
Vinegar Solution: The Gold Standard
White distilled vinegar is arguably the best and most widely recommended solution for descaling electric kettles. Its high acetic acid content (typically 5–8%) effectively breaks down calcium carbonate—the main component of limescale—into water-soluble compounds that can be easily rinsed away. Plus, vinegar is inexpensive, non-toxic, and readily available in most kitchens.
To use vinegar, start by filling your kettle halfway with equal parts white vinegar and water. For example, if your kettle holds 1.7 liters, use about 425 ml of vinegar and 425 ml of water. Turn on the kettle and bring the solution to a boil. Once it reaches boiling point, turn off the kettle and let the mixture sit for at least 30 minutes—or up to an hour for heavy buildup. The longer it sits, the more time the acid has to dissolve the scale.
After soaking, discard the vinegar solution and scrub the interior gently with a soft sponge or brush. Avoid using abrasive scrubbers, as they can scratch the surface and create grooves where future deposits can accumulate. Rinse the kettle thoroughly with clean water, then run it through two or three full cycles with fresh water to eliminate any lingering vinegar taste or smell. This step is crucial—don’t skip it, even if you don’t detect an odor. Residual vinegar can affect the taste of your drinks.
For maintenance, consider descaling with vinegar every 4–6 weeks, depending on how often you use your kettle and the hardness of your water. If you live in a particularly hard water area, you may need to clean it more frequently.
Lemon Juice: A Fresh-Smelling Alternative
If the smell of vinegar bothers you, lemon juice is an excellent alternative. Like vinegar, lemon contains citric acid, which reacts with calcium deposits to dissolve them. It also leaves behind a fresh, citrusy scent that many people find more pleasant.
To use lemon juice, cut a fresh lemon in half and squeeze the juice directly into the kettle. Add enough water to fill it about halfway, then bring the mixture to a boil. Let it sit for 30–60 minutes, depending on the severity of the buildup. For extra effectiveness, you can add the lemon halves themselves to the solution—the pulp and rind contain additional acids and oils that help break down scale.
After soaking, discard the lemon water and scrub the interior gently. Rinse thoroughly and run several cycles with clean water to remove any citrus residue. Some people even enjoy the subtle lemon flavor it can impart to water, though this usually fades after a few uses.
One advantage of lemon is that it’s less likely to leave a strong aftertaste, making it ideal if you’re sensitive to vinegar. However, it may require a longer soak time compared to vinegar, especially for thick or old deposits.
Baking Soda Paste for Stubborn Spots
While baking soda (sodium bicarbonate) isn’t as strong an acid as vinegar or lemon, it can be useful for spot-cleaning or polishing the exterior of your kettle. It’s mildly abrasive, which helps lift surface stains without scratching.
To make a paste, mix 1–2 tablespoons of baking soda with a small amount of water until it forms a thick consistency. Apply the paste to affected areas using a soft cloth or sponge, then gently scrub in circular motions. Rinse well with water. This method works best for light buildup or for cleaning the outside of the kettle, where mineral stains may appear on stainless steel or plastic surfaces.
Note: Baking soda alone won’t dissolve heavy limescale inside the kettle, so it’s best used in combination with vinegar or lemon for a thorough clean. Some people even mix baking soda with vinegar for a fizzing reaction that can help loosen deposits—though this should be done cautiously, as the reaction produces carbon dioxide gas and can overflow if not monitored.
Commercial Descalers: When to Consider Them
While natural methods are usually sufficient, there are times when a commercial descaler might be worth considering. These products are specifically formulated to remove limescale and often contain stronger acids or chelating agents that work faster than household ingredients.
Look for descalers labeled as safe for electric kettles and follow the manufacturer’s instructions carefully. Many are available in liquid or tablet form and are designed to be used monthly for maintenance. However, always ensure the product is food-safe and rinse the kettle thoroughly after use.
That said, most experts agree that natural cleaners are just as effective for routine descaling—and they’re far more economical and eco-friendly. Reserve commercial products for extreme cases or if your kettle has a special coating that requires specific care.
Step-by-Step Guide to Descaling Your Electric Kettle
Now that you know the best methods, let’s walk through a clear, step-by-step process to safely and effectively remove calcium deposits from your electric kettle. Whether you’re using vinegar, lemon, or a combination, these steps will ensure a thorough clean without damaging your appliance.
Step 1: Unplug and Cool Down
Safety first! Always make sure your electric kettle is completely unplugged and cooled down before cleaning. Never attempt to descale a hot or recently used kettle, as the sudden temperature change from adding cold liquid can cause cracking or warping, especially in glass or plastic models.
Step 2: Prepare Your Cleaning Solution
Choose your preferred method—vinegar, lemon, or a combo—and prepare the solution. For vinegar, mix equal parts white distilled vinegar and water. For lemon, use the juice of one lemon plus water. Fill the kettle to about the halfway mark. If your kettle has a removable limescale filter or mesh, take it out and soak it separately in the same solution.
Step 3: Boil and Soak
Plug in the kettle and bring the solution to a full boil. Once boiling, turn off the power and let the mixture sit for at least 30 minutes. For heavy buildup, extend the soak time to 1–2 hours. You’ll likely see bubbles forming on the scale as it begins to dissolve—this is a good sign.
Step 4: Scrub Gently
After soaking, discard the solution and use a soft sponge, brush, or cloth to gently scrub the interior. Focus on areas with visible scale, especially around the heating element. Avoid metal scouring pads or abrasive cleaners, as they can scratch the surface and trap future deposits.
Step 5: Rinse Thoroughly
Rinse the kettle several times with clean water. Then, fill it completely with fresh water and run it through a full boiling cycle. Repeat this process 2–3 times to ensure all traces of vinegar, lemon, or cleaning agents are gone. This step is essential to prevent any off-flavors in your drinks.
Step 6: Dry and Reassemble
Once rinsed, dry the exterior with a clean cloth and allow the interior to air dry completely before reassembling any removable parts. Make sure the kettle is fully dry before storing or using it again.
Step 7: Maintain Regularly
To prevent future buildup, aim to descale your kettle every 4–6 weeks, or more often if you use it daily or have very hard water. Keeping a cleaning schedule will save you time and effort in the long run.
Preventing Future Calcium Buildup
While cleaning your kettle is important, prevention is even better. By making a few simple changes to your routine, you can significantly reduce the rate at which calcium deposits form—saving you time, energy, and money.
Use Filtered or Distilled Water
The most effective way to prevent limescale is to reduce the mineral content in your water. Switching to filtered water—whether from a pitcher filter, under-sink system, or faucet attachment—can dramatically cut down on calcium and magnesium. If you’re serious about prevention, consider using distilled water, which contains virtually no minerals. While it may seem like an extra step, the difference in kettle performance and longevity is well worth it.
Empty the Kettle After Each Use
Leaving water sitting in your kettle—especially overnight—gives minerals more time to settle and adhere to surfaces. Make it a habit to empty the kettle after each use and wipe the interior dry with a cloth. This simple practice can go a long way in minimizing buildup.
Wipe Down After Boiling
After boiling water, take a moment to wipe the inside of the kettle with a clean, dry cloth. This removes residual moisture and helps prevent mineral deposits from forming. It’s a small habit that adds up over time.
Choose a Kettle with a Removable Filter
Some electric kettles come with built-in limescale filters or mesh screens that trap minerals before they reach the heating element. If you’re in the market for a new kettle, look for models with this feature—it makes maintenance much easier.
Monitor Water Hardness
If you’re unsure about your water’s mineral content, consider testing it with a home water hardness kit. These are inexpensive and available online or at hardware stores. Knowing your water hardness level can help you determine how often you need to descale and whether filtration is necessary.
Common Mistakes to Avoid When Cleaning Your Kettle
Even with the best intentions, it’s easy to make mistakes when descaling your electric kettle. Avoiding these common pitfalls will help protect your appliance and ensure effective cleaning.
Using Harsh Chemicals
Bleach, ammonia, or strong drain cleaners may seem like quick fixes, but they’re dangerous and unnecessary. These chemicals can corrode internal components, leave toxic residues, and even react with metal parts to produce harmful fumes. Stick to food-safe, natural cleaners.
Skipping the Rinse Cycle
One of the biggest mistakes people make is not rinsing the kettle thoroughly after cleaning. Residual vinegar or lemon can affect the taste of your water and may even cause stomach discomfort if ingested in large amounts. Always run multiple cycles with clean water.
Using Abrasive Tools
Steel wool, harsh scrub brushes, or metal scrapers can scratch the interior of your kettle, creating grooves where limescale can accumulate more easily. Use only soft sponges, cloths, or non-abrasive brushes.
Overfilling with Cleaning Solution
Filling the kettle too full with vinegar or lemon solution can cause overflow when boiling, potentially damaging the electrical base or creating a mess. Stick to filling it no more than halfway.
Ignoring the Manufacturer’s Instructions
Some kettles have special coatings or materials that require specific care. Always check the user manual before cleaning, especially if your kettle is made of glass, stainless steel, or has a non-stick interior.
Conclusion
Removing calcium deposits from your electric kettle doesn’t have to be a chore. With simple, natural ingredients like vinegar and lemon, you can keep your kettle clean, efficient, and free of unpleasant tastes. Regular descaling not only improves performance but also extends the life of your appliance, saving you money in the long run.
By recognizing the signs of buildup, using the right cleaning methods, and adopting preventive habits, you can enjoy fresh, great-tasting water with every boil. Whether you’re a daily tea drinker or just use your kettle occasionally, a little maintenance goes a long way. So the next time you spot that chalky residue, don’t panic—grab a bottle of vinegar, follow these steps, and your kettle will be back to its best in no time.
Frequently Asked Questions
Can I use apple cider vinegar instead of white vinegar?
Yes, apple cider vinegar contains acetic acid and can help dissolve limescale, but it may leave a stronger smell and slight discoloration. White distilled vinegar is preferred for its neutral scent and clarity.
How often should I descale my electric kettle?
It depends on water hardness and usage, but generally every 4–6 weeks is sufficient. If you use your kettle daily or have very hard water, consider descaling monthly.
Is it safe to drink water after descaling with vinegar?
Yes, as long as you rinse the kettle thoroughly and run multiple cycles with clean water. Any residual vinegar taste or smell will disappear after proper rinsing.
Can I clean a glass electric kettle the same way?
Absolutely. Glass kettles can be descaled using vinegar or lemon just like metal ones. Be extra gentle when scrubbing to avoid scratching the glass.
Will descaling void my kettle’s warranty?
No, using natural cleaners like vinegar or lemon is typically safe and won’t void the warranty. Avoid harsh chemicals, which may damage the kettle and invalidate coverage.
What if my kettle has a non-stick coating?
Use extra caution—avoid abrasive scrubbers and stick to gentle cleaning methods. Vinegar or lemon solutions are still safe, but rinse thoroughly to protect the coating.