You absolutely can cook rice in a pressure cooker—and it’s one of the quickest, most reliable ways to get perfectly cooked grains every time. Whether you’re making jasmine, basmati, brown rice, or even wild rice, a pressure cooker simplifies the process with minimal effort and consistent results. In just a few minutes under pressure, you’ll have tender, fluffy rice ready to serve as a side dish or base for stir-fries, curries, and more.
Key Takeaways
- Pressure cookers are excellent for cooking rice: They use steam and high pressure to cook rice evenly and quickly, reducing cooking time by up to 70% compared to traditional stovetop methods.
- Different rice types require different settings: White rice, brown rice, and wild rice each need unique water ratios and pressure times for optimal texture and doneness.
- Proper water-to-rice ratio is critical: A general rule is 1:1 for white rice and 1.25:1 for brown rice, but always check specific guidelines based on grain type.
- Natural release works best for most rice: Let the pressure drop on its own after cooking to prevent overcooking and ensure even fluffiness.
- Quick release is useful for faster meals: Use quick release only when necessary, as it can cause uneven cooking and mushy rice if done too early.
- Cleaning and maintenance matter: Rinse rice before cooking, clean the inner pot regularly, and avoid overfilling to maintain performance and longevity.
- You can enhance flavor and nutrition: Add salt, butter, or broth instead of water, and consider soaking brown rice beforehand to improve digestibility and reduce phytic acid.
Key Takeaways
- Understanding can you cook rice in a pressure cooker: Provides essential knowledge
Quick Answers to Common Questions
How long does it take to cook rice in a pressure cooker?
Most white rice cooks in just 3 minutes under high pressure, while brown rice takes 6–8 minutes. Wild rice requires 20–25 minutes. Always follow specific guidelines for your rice variety.
Do I need to soak rice before pressure cooking?
Soaking isn’t required for white rice but highly recommended for brown and wild rice. It softens the outer layers, reduces cooking time, and improves digestibility.
Can I cook rice directly in the pressure cooker without sautéing?
Yes, you can add rice and liquid together and skip the sauté step. However, lightly toasting the rice first enhances flavor and prevents sticking.
What’s the best way to release pressure after cooking rice?
For most rice types, use a natural release for 10 minutes, then do a quick release for any remaining pressure. This ensures even cooking and prevents mushiness.
Can I cook multiple types of rice at once in a pressure cooker?
Not recommended. Different rice varieties have different cooking times and water ratios. Cooking them together risks over- or undercooking. Prepare separately.
📑 Table of Contents
- Can You Cook Rice in a Pressure Cooker?
- Why Choose a Pressure Cooker for Rice?
- Types of Rice That Work Best in a Pressure Cooker
- Step-by-Step Guide to Cooking Rice in a Pressure Cooker
- Common Mistakes and How to Avoid Them
- Tips for Perfect Rice Every Time
- Troubleshooting: What to Do When Things Go Wrong
- Conclusion
Can You Cook Rice in a Pressure Cooker?
If you’ve ever stood over a pot of rice on the stove, watching the water bubble away and wondering if you’ll remember to take it off the heat in time, then a pressure cooker might just be your new best friend. The short answer? Yes, you can absolutely cook rice in a pressure cooker. In fact, many home cooks swear by this method for its speed, consistency, and hands-off ease. Whether you’re preparing a simple side dish or building a meal around perfectly fluffy grains, a pressure cooker delivers reliable results every time.
Unlike traditional boiling or steaming methods that can take 30 minutes or more, pressure cooking rice typically takes just 3 to 6 minutes under high pressure. That’s not only faster but also conserves energy and preserves nutrients better than prolonged heat exposure. Plus, because the sealed environment traps steam and moisture, rice cooked in a pressure cooker tends to be more evenly cooked—no more mushy bottoms or dry, chalky grains.
In this article, we’ll walk through everything you need to know about cooking rice in a pressure cooker, from choosing the right type of rice to mastering release techniques and troubleshooting common issues. We’ll also share pro tips to help you achieve restaurant-quality results at home—without the guesswork.
Why Choose a Pressure Cooker for Rice?
The Science Behind Pressure Cooking Rice
Pressure cookers work by trapping steam inside a sealed vessel, which increases the internal temperature beyond the boiling point of water (typically up to 250°F or 121°C). This high-heat, high-pressure environment accelerates the gelatinization of starch molecules in rice grains, breaking them down faster than conventional methods. As a result, the rice absorbs water quickly and cooks uniformly throughout.
Visual guide about Can You Cook Rice in a Pressure Cooker
Image source: ricecookerreviewcentral.com
This process not only reduces cooking time dramatically but also helps lock in moisture and flavor. Unlike boiling, where excess water evaporates and can lead to inconsistent textures, pressure cooking maintains a stable environment that ensures each grain gets exactly what it needs—water and heat—in perfect balance.
Benefits Over Traditional Methods
Cooking rice on the stovetop or in a rice cooker has its place, but pressure cookers offer several distinct advantages:
- Time efficiency: Most rice varieties cook in under 10 minutes under pressure, compared to 20–40 minutes on the stove.
- Consistency: No more worrying about burning the bottom or undercooking the top. The sealed system ensures even heat distribution.
- Energy savings: Pressure cookers use less electricity or gas because they cook faster and retain heat well.
- Hands-off convenience: Once you set it and forget it, there’s no need to stand watch while stirring or adjusting heat.
- Flavor enhancement: By using liquid like broth instead of plain water, you infuse subtle flavors into the rice without extra effort.
That said, not all pressure cookers are created equal. Electric models (like Instant Pots) tend to be more user-friendly and programmable, while stovetop versions give you more control over timing and pressure levels. But regardless of the type, the core principle remains the same: high pressure + controlled steam = perfectly cooked rice.
Types of Rice That Work Best in a Pressure Cooker
White Rice
White rice—especially long-grain varieties like basmati or jasmine—is among the easiest and most popular choices for pressure cooking. Its refined starch structure allows it to absorb water efficiently and remain separate and fluffy once cooked. When prepared correctly, white rice from a pressure cooker rivals that made in commercial kitchens.
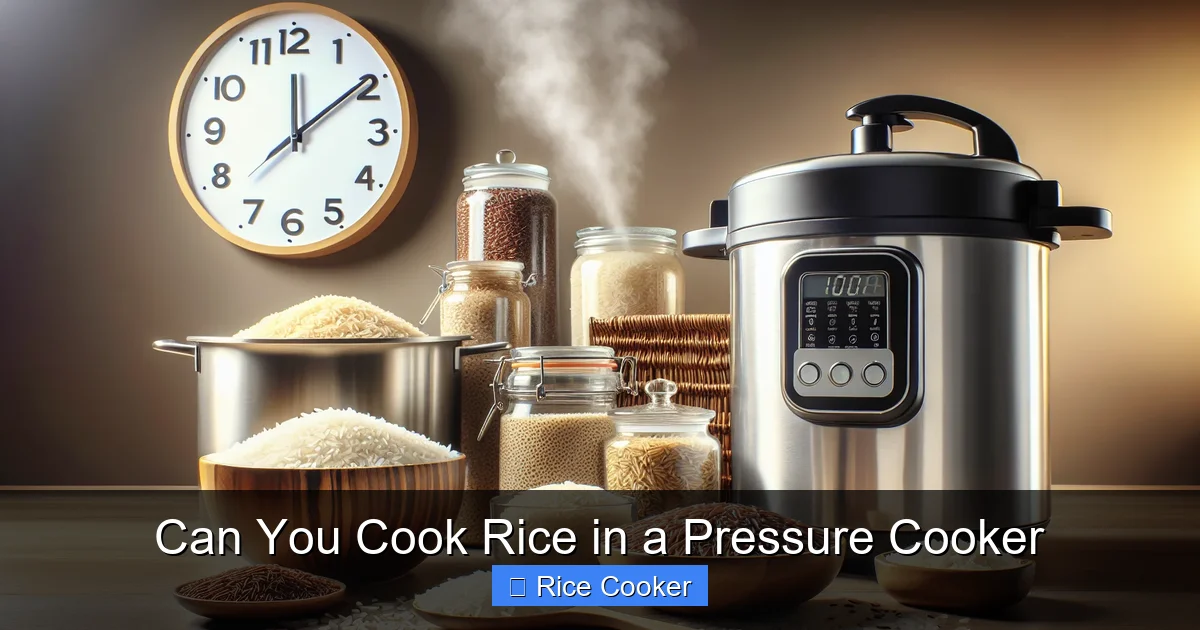
Visual guide about Can You Cook Rice in a Pressure Cooker
Image source: missvickie.com
For white rice, a 1:1 water-to-rice ratio is generally recommended. For example, 1 cup of uncooked white rice requires 1 cup of water (or broth). After sautéing the rinsed rice briefly (optional but helpful), add the liquid, secure the lid, and bring to high pressure. Cook for 3 minutes, then allow a natural release for 10 minutes followed by a quick release for any remaining pressure.
Brown Rice
Brown rice contains bran layers that slow down water absorption and increase cooking time compared to white rice. Because of this, it usually needs more water and longer cooking periods. However, with the right technique, brown rice can turn out wonderfully chewy yet tender in a pressure cooker.
A good starting point is a 1.25:1 water-to-rice ratio (e.g., 1 cup brown rice to 1.25 cups liquid). Soak the rice for 20–30 minutes beforehand if possible—this helps soften the outer bran layer and reduces cooking time. Cook under high pressure for 6–8 minutes, then let it naturally release for 10 minutes before doing a quick release. This combination prevents gummy results and ensures even doneness.
Wild Rice
Wild rice is technically a grass seed, not true rice, and it has a unique texture and nutty flavor. It’s denser and takes longer to cook than other varieties due to its fibrous nature. In a pressure cooker, wild rice benefits greatly from extended soaking and generous water amounts.
Use a 2:1 water-to-rice ratio (e.g., 1 cup wild rice to 2 cups liquid) and soak overnight if possible. Cook on high pressure for 20–25 minutes, then do a full natural release (about 15–20 minutes). This long, gentle cooking process breaks down tough fibers while preserving the rice’s signature chewiness.
Other Varieties
Short-grain rice (like sushi or arborio) can also be pressure-cooked, though they may become slightly stickier than desired. Japonica-style short-grains often benefit from shorter cooking times and less water. Meanwhile, glutinous (sticky) rice can be tricky due to its high amylopectin content, so monitor closely and adjust timing accordingly.
Remember: experimentation is key. Start with trusted ratios and gradually tweak based on your preferences and equipment performance.
Step-by-Step Guide to Cooking Rice in a Pressure Cooker
Preparing Your Ingredients
Before you begin, gather your rice, liquid, and any optional flavorings (salt, butter, garlic, etc.). Rinse the rice thoroughly under cold running water until the water runs clear. This removes excess starch and prevents clumping. Drain well using a fine-mesh strainer.
If you’re using brown or wild rice, consider soaking it first. Fill a bowl with cold water, add the rice, and let it sit for 20–30 minutes (or overnight for wild rice). Soaking softens the hulls and reduces cooking time while improving digestibility.
Setting Up the Pressure Cooker
Add 1 tablespoon of oil or butter to the inner pot (if using an electric model). Heat on sauté mode for 30 seconds, then add the rinsed rice. Sauté for 1–2 minutes to toast the grains lightly—this enhances aroma and helps prevent sticking. Be careful not to burn it!
Pour in your measured liquid (water, broth, or coconut milk for added richness). Stir gently to combine, then close the lid securely. Ensure the vent valve is set to sealing position.
Selecting the Right Setting
Most modern pressure cookers come with preset functions like “Rice,” “Manual,” or “Multi-Cook.” If your appliance has a dedicated rice setting, use it—it’s calibrated for ideal timing and pressure. Otherwise, select “Manual” or “Pressure Cook” and set the timer according to the rice type:
- White rice: 3 minutes
- Brown rice: 6–8 minutes
- Wild rice: 20–25 minutes
Press start and wait for the cooker to build pressure. Once it reaches full pressure (you’ll hear a hissing sound or see steam), the timer begins counting down.
Releasing the Pressure
This is arguably the most important step. There are two main release methods:
- Natural Release (NR): Simply turn off the heat and let the pressure drop on its own. This usually takes 10–20 minutes depending on the model. NR is ideal for most rice types because it allows residual heat to finish cooking gently, preventing sudden temperature shifts that can ruin texture.
- Quick Release (QR): Manually open the vent valve to release pressure immediately. Use QR only after the initial NR period or when instructed by your recipe. Too much QR can cause undercooked or mushy rice.
For white rice, try 10 minutes NR + QR. For brown rice, 10 minutes NR alone often suffices. Wild rice may need a full 15–20 minute NR.
Fluffing and Serving
Once all pressure is released, carefully remove the lid away from your face (to avoid steam burns). Use a fork or rice paddle to gently fluff the grains. Taste and adjust seasoning if needed. Serve immediately while warm.
Common Mistakes and How to Avoid Them
Using Too Much or Too Little Water
The #1 cause of failed rice is incorrect water measurement. Too little water leads to dry, hard grains; too much creates soupy, sticky results. Always measure both rice and liquid by volume using dry measuring cups—never eyeball it.
Tip: For brown rice, add an extra quarter cup of water if your cooker runs hot or if you live at high altitude.
Skipping the Rinse
Unrinsed rice leaves behind excess starch, which can make cooked rice gummy or clumpy. Even if you’re short on time, a quick rinse makes a big difference in final texture.
Rushing the Natural Release
Many people impatiently opt for quick release, but this often backfires. Without enough NR time, the rice continues cooking unevenly, resulting in some grains being overdone while others stay undercooked. Patience pays off here.
Overfilling the Pot
Never fill your pressure cooker beyond two-thirds full when cooking rice. Rice expands as it cooks, and overfilling can block the vent or cause overflow, leading to safety hazards and messes.
Ignoring Altitude Adjustments
At higher elevations, water boils at lower temperatures, affecting cooking times. If you live above 3,000 feet, increase cooking time by 1–2 minutes for white rice and 2–3 minutes for brown rice.
Not Cleaning the Lid Seal
A dirty rubber seal or clogged vent can prevent proper pressure buildup. Clean these parts after each use with warm, soapy water and dry thoroughly before reassembling.
Tips for Perfect Rice Every Time
Enhance Flavor with Broth or Stock
Substitute half or all of the water with vegetable, chicken, or beef broth. The added umami depth elevates plain rice into something special. You can also toss in a bay leaf, onion slice, or clove during sautéing for extra aroma.
Add Fat for Creaminess
A pat of butter or splash of olive oil during sautéing adds richness and prevents stickiness. For vegan options, try coconut oil or avocado oil—they complement certain rice types beautifully.
Try Different Liquid Ratios for Texture
Want softer rice? Increase water slightly. Craving firmer, more separated grains? Reduce water by 1–2 tablespoons. Experiment to find your ideal consistency.
Store Leftovers Properly
Cooked rice can be refrigerated for up to 5 days or frozen for 3 months. Reheat with a splash of water to restore moisture, and fluff with a fork before serving.
Use a Timer App
Set reminders for when to start and stop releases. Many smartphones have countdown timers—perfect for tracking NR phases without guesswork.
Invest in a Rice Measuring Cup
Standard kitchen measuring cups aren’t accurate for rice. A dedicated rice cup (which holds 180ml) ensures precise ratios and consistent results.
Troubleshooting: What to Do When Things Go Wrong
Mushy or Sticky Rice
This usually happens with quick release or insufficient draining after rinsing. To fix it next time, extend natural release time and ensure thorough rinsing. Also verify you’re not using too much water.
Undercooked Grains
If your rice still feels crunchy, it likely didn’t get enough pressure time or wasn’t fully pressurized. Next batch: increase cooking time by 1 minute and confirm the lid seals properly before starting.
Gritty Texture
Grittiness suggests either old rice (try fresh stock) or inadequate soaking for brown/wild rice. Store rice in an airtight container away from light and moisture to preserve quality.
Burst or Burnt Rice
This occurs when rice sticks to the bottom without enough fat or liquid. Always preheat the pot, add oil/butter, and avoid overcrowding. If burnt bits appear, discard them and strain the rest.
No Steam or Pressure Build-Up
Check that the lid is locked correctly, the vent isn’t blocked, and the seal is clean and undamaged. Replace worn-out seals promptly.
Rice Doesn’t Expand
Some varieties (like parboiled or instant rice) expand less than others. Confirm you’re using raw, unprocessed rice unless the recipe specifies otherwise.
Conclusion
Cooking rice in a pressure cooker isn’t just possible—it’s one of the smartest, most efficient ways to prepare this staple food at home. With just a few simple steps and attention to detail, you can consistently produce fluffy, flavorful rice that complements any meal. Whether you’re cooking white, brown, or wild rice, the principles remain the same: measure carefully, respect the timing, and honor the release process.
Beyond convenience, pressure cooking offers nutritional and culinary benefits that make it worth adding to your kitchen toolkit. It saves time, reduces cleanup, and opens doors to creative flavor combinations. And once you master the basics, you’ll wonder how you ever lived without it.
So go ahead—grab your pressure cooker, rinse some rice, and press play. Before you know it, you’ll be serving up restaurant-worthy grains that leave everyone asking for seconds.
Frequently Asked Questions
Is it safe to cook rice in a pressure cooker?
Yes, pressure cookers are designed with multiple safety mechanisms to prevent accidents. Always follow manufacturer instructions and never override safety features.
Can I use a rice cooker instead of a pressure cooker?
Absolutely. Rice cookers are specifically designed for rice and often yield equally good results, especially for white rice. However, pressure cookers are faster and better for larger batches.
Should I rinse my rice before cooking it in a pressure cooker?
Yes, rinsing removes excess starch and prevents clumping. Rinse until the water runs clear, then drain thoroughly before adding to the cooker.
Can I cook rice with broth instead of water?
Definitely! Using broth adds flavor and nutrients. Replace water entirely or mix half broth and half water for balanced taste.
How do I store leftover pressure-cooked rice?
Store in an airtight container in the refrigerator for up to 5 days or freeze for up to 3 months. Reheat with a splash of water and fluff with a fork.
Does altitude affect pressure cooking rice?
Yes. At higher altitudes, water boils at lower temperatures, so cooking times may need adjustment. Increase pressure cooking time by 1–2 minutes per 1,000 feet above sea level.