
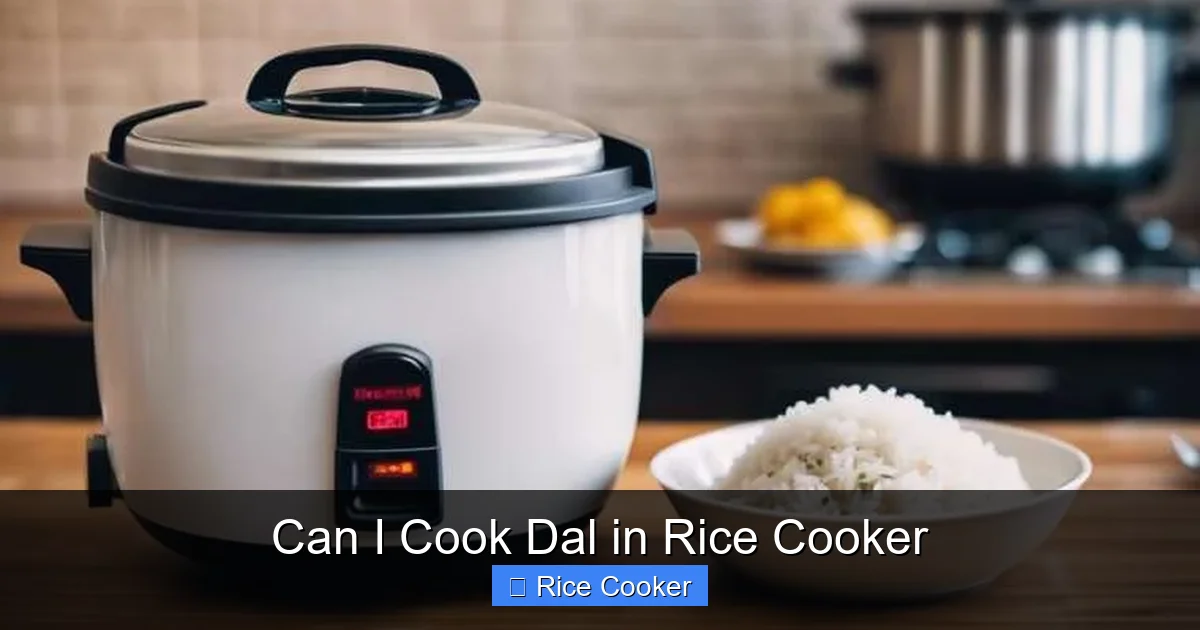
Cooking dal in a rice cooker is not only possible—it’s simple and efficient. With the right technique, your rice cooker can produce tender, flavorful dal without any extra equipment. You’ll save time, energy, and still enjoy a wholesome meal.
Have you ever stood over a stove, stirring lentils for what feels like forever, only to end up with either burnt edges or undercooked centers? Or maybe you’re someone who loves dal but dreads the long simmering process? If so, I’ve got great news: you don’t need a separate pot or constant attention to make delicious dal. Your trusty rice cooker can do the job beautifully—yes, even if you’ve never thought of it that way before.
Rice cookers were originally designed for boiling rice, but their ability to maintain steady heat and automatically switch to warming mode has made them surprisingly adaptable. Dal, which includes various types of lentils and split peas, cooks similarly to rice in terms of moisture requirements and heat distribution. That means turning your rice cooker into a dal maker is not only possible—it’s one of the easiest kitchen hacks out there!
In this guide, we’ll walk through everything you need to know about cooking dal in a rice cooker. From choosing the right kind of dal to mastering water ratios, adding spices safely, and even storing leftovers—we’ve covered it all. Whether you’re new to Indian cuisine or just looking for a faster way to prepare protein-rich meals, this article will show you how simple and satisfying it can be.
Key Takeaways
- Rice cookers are versatile: They can handle grains like dal just as well as rice, thanks to their precise temperature control and automated cooking cycle.
- No special settings needed: Most standard rice cookers use the “white rice” or “pulse” setting for dal, making it beginner-friendly.
- Water ratios matter: Using the correct water-to-dal ratio ensures soft texture without mushiness or dryness.
- Add-ins enhance flavor: Spices, onions, garlic, and ghee can be added before or during cooking to deepen taste.
- Cleanup is easy: Non-stick rice cooker bowls mean less scrubbing after meals.
- Saves time and fuel: One-pot cooking reduces prep and cleanup while keeping nutrients intact.
- Great for meal prep: Cook large batches and store for quick weekday meals or leftovers.
📑 Table of Contents
- Why Use a Rice Cooker for Cooking Dal?
- Choosing the Right Type of Dal
- Essential Tips Before You Start Cooking
- Step-by-Step Guide: How to Cook Dal in a Rice Cooker
- Flavor Variations and Recipe Ideas
- Troubleshooting Common Issues
- Benefits Beyond Convenience
- Storing and Reheating Leftovers
- Frequently Asked Questions
Why Use a Rice Cooker for Cooking Dal?
Before diving into recipes, let’s talk about why this method works so well—and why you might want to adopt it regularly.
First off, **rice cookers are engineered for consistent results**. Unlike stovetop cooking, where you have to monitor heat levels and stir constantly, a rice cooker handles all of that automatically. Once you add water and dal, it takes care of the rest. No more watching the clock or worrying about burning the bottom!
Second, **they preserve nutrients better**. Because dal cooks quickly at controlled temperatures, fewer vitamins and minerals are lost compared to prolonged boiling on the stove. This is especially true for B-complex vitamins found in legumes.
Third, **it’s incredibly convenient**. Got leftover dal from yesterday’s lunch? Pop it back in the rice cooker on “warm” until you’re ready to eat. Need a side dish while dinner’s roasting? Add dal and set it aside—no multitasking required.
Lastly, **most modern rice cookers come with non-stick inner pots**, which makes cleanup a breeze. Just rinse or wipe down after use; no soaking or scraping needed.
Of course, every appliance has limits. For example, if you plan to thicken dal into dals (like dal makhani), you may still need some stovetop simmering afterward. But for plain dal—whether red, green, masoor, or toor—your rice cooker is more than capable.
Choosing the Right Type of Dal
Not all dal is created equal when it comes to rice cooker compatibility. Some varieties cook faster, others require longer times, and a few might benefit from pre-soaking. Here’s how to pick the best ones:
**Masoor Dal (Red Lentils):** These cook the fastest—usually within 15–20 minutes—and turn into a creamy consistency ideal for soups or idli batter. Since they lose their skin during processing, they don’t need soaking.
**Toor Dal (Split Pigeon Peas):** A staple in Indian kitchens, toor dal takes around 25–30 minutes to become soft and mushy. It’s perfect for making sambar or plain dal with ghee and cumin seeds.
**Moong Dal (Split Green Gram):** Mild-flavored and quick-cooking, moong dal is great for kids or those with sensitive stomachs. It usually needs about 20 minutes in the rice cooker.
**Urad Dal (Black Gram):** Often used in dosa or vada batter, urad dal should always be soaked overnight before cooking—even in a rice cooker—to prevent gumminess.
**Chana Dal (Split Bengal Gram):** Slightly chewy and nutty, chana dal benefits from soaking for 4–6 hours. It holds its shape better than other dals, making it good for salads or curries.
When buying dal, look for whole, uniform pieces without cracks or discoloration. Avoid overly processed or powdered varieties, as they may break down too much during cooking.
Essential Tips Before You Start Cooking
Even though rice cookers simplify cooking, there are a few small details that make a big difference in outcome.
**Tip #1: Rinse the dal thoroughly.**
Before adding water, place your dal in a strainer and run cool water through it until the water runs clear. This removes dust, debris, and excess starch, preventing cloudiness and ensuring even cooking.
**Tip #2: Soak when necessary.**
While many dals cook fine without soaking, doing so reduces cooking time and improves digestibility. For stubborn varieties like urad dal or chana dal, soak for at least 4 hours (overnight is best).
**Tip #3: Use the right water ratio.**
Too little water = dry, hard dal. Too much = soupy mess. As a general rule:
– Masoor & Moong dal: 2.5 cups water per 1 cup dal
– Toor & Chana dal: 3 cups water per 1 cup dal
Adjust slightly based on your rice cooker model and desired consistency.
**Tip #4: Don’t overfill the cooker.**
Most rice cookers max out at 1–2 cups of uncooked ingredients. Overfilling risks overflow or uneven heating. Plan accordingly—cook smaller batches unless your machine is large enough.
**Tip #5: Add salt at the end.**
Adding salt early can toughen dal proteins. Wait until the final 5 minutes of cooking, or skip it entirely and season after draining.
Now that we’ve covered preparation basics, let’s move on to actual cooking methods.
Step-by-Step Guide: How to Cook Dal in a Rice Cooker
Ready to give it a try? Follow these simple steps for foolproof dal every time.
Gather Your Ingredients
– 1 cup dried dal (masoor, toor, moong, or chana)
– 2.5–3 cups filtered water (adjust as above)
– Optional: 1 tbsp oil or ghee for richness
– Optional: Pinch of turmeric (prevents oxidation and adds color)
– Optional: Salt (added after cooking)
Prepare the Dal
1. Rinse the dal under running water until the water clears.
2. If using chana or urad dal, soak for 4+ hours. Drain completely before proceeding.
3. Transfer rinsed/drained dal to the inner pot of your rice cooker.
Add Water and Seasonings
Pour in the measured water. Add turmeric if desired—it helps keep dal bright yellow and boosts antioxidant content. A splash of oil prevents sticking and adds subtle flavor.
Start the Cook Cycle
Close the lid securely and press the “Cook” button. On most models, this defaults to the white rice setting, which works perfectly for dal. The cycle typically lasts 20–35 minutes depending on dal type and quantity.
Check for Doneness
Once the cook cycle ends, open the lid carefully (steam may escape). Gently mash a spoonful with your fingers—it should be soft and creamy, almost like porridge. If still firm, close the lid and let it steam-warm for another 5–10 minutes.
Drain Excess Liquid (Optional)
For fluffier dal, transfer cooked dal to a colander and drain off extra liquid. Return to the pot and stir gently. This step is especially useful for masoor dal.
Season and Serve
Add salt, butter, or fresh herbs. Stir well and serve hot with roti, rice, or naan.
And that’s it! In under 40 minutes total—including prep—you’ve got restaurant-quality dal with zero stress.
Flavor Variations and Recipe Ideas
Plain dal is delicious, but why stop there? Your rice cooker opens doors to countless flavor combinations.
Tempered Dal (Indian Style)
After draining excess water, return dal to the rice cooker pot. Set it to “Warm” mode. In a small pan, heat 2 tbsp ghee, add 1 tsp cumin seeds, 1 chopped onion, 2 minced garlic cloves, and 1 finely chopped tomato. Sauté until soft. Pour mixture into the warm dal, mix well, and let sit for 10 minutes. Garnish with cilantro and lemon juice.
Dal with Vegetables
Add diced carrots, potatoes, and green beans along with the water. Cook as usual. Once done, finish with coconut milk and curry leaves for an authentic South Indian twist.
Spicy Red Dal
Use red lentils and add 1 chopped green chili, 1 tsp red chili powder, and ½ tsp garam masala during the last 5 minutes of cooking. Finish with a dollop of yogurt and crushed coriander seeds.
Sweet Dal (Unconventional but Delicious!)
Try moong dal cooked with jaggery, cardamom, and a handful of cashews. It makes a unique dessert dal perfect for festive occasions.
Remember: Always add delicate flavors like fresh herbs or dairy after cooking, since high heat can diminish their aroma.
Troubleshooting Common Issues
Despite its ease, cooking dal in a rice cooker isn’t foolproof. Here’s how to fix common problems:
**Problem: Dal is too watery**
Cause: Too much water or insufficient cooking time.
Solution: Drain excess liquid after cooking. Alternatively, transfer to a saucepan and simmer gently until desired thickness returns.
**Problem: Dal is gummy or sticky**
Cause: Over-processing or wrong water ratio.
Solution: Next time, reduce water by ¼ cup. Also, avoid pressing the “keep warm” function for too long—it continues cooking.
**Problem: Dal won’t soften**
Cause: Undersized dal pieces or lack of soaking.
Solution: Buy whole-split dal (not pre-crushed) and soak chana/urad dal overnight.
**Problem: Burnt bottom**
Cause: Mineral buildup or worn-out heating plate.
Solution: Clean your rice cooker regularly with vinegar-water solution. Replace inner pot if scratched.
**Problem: Dal tastes flat**
Cause: No seasoning or old dal.
Solution: Freshest dal has vibrant flavor. Store in airtight containers away from light.
With practice, you’ll learn your machine’s quirks and adjust accordingly.
Benefits Beyond Convenience
Cooking dal in a rice cooker isn’t just about saving time—it offers real nutritional and environmental advantages too.
For starters, **legumes are among the most sustainable foods on earth**. They require minimal water, fix nitrogen in soil, and produce fewer greenhouse gases than meat. By choosing dal over animal proteins occasionally, you’re helping reduce your carbon footprint.
Nutritionally, dal is packed with plant-based protein, fiber, iron, folate, and potassium. Regular intake supports heart health, stabilizes blood sugar, and aids digestion. And because rice cookers cook quickly, you retain more of these beneficial compounds than with slow-cooked stovetop versions.
Plus, using one appliance instead of multiple pots and pans means **less energy consumption and cleaner countertops**. In households where space is limited—like tiny apartments or dorm rooms—a rice cooker doubles as a rice maker, steamer, and now, dal cooker. Talk about maximizing utility!
Storing and Reheating Leftovers
Got extra dal? No problem. Proper storage keeps it safe and tasty for days.
**Refrigeration:** Cool completely within 2 hours of cooking. Store in an airtight container for up to 4 days.
**Freezing:** Portion into ice cube trays or small containers. Frozen dal keeps for up to 3 months. Thaw overnight in the fridge before reheating.
**Reheating Tips:**
– Microwave: Add 1–2 tbsp water per cup of dal, cover, and heat in 1-minute intervals until hot.
– Stovetop: Simmer gently in a saucepan with a splash of water or broth. Stir often to prevent sticking.
– Rice cooker: Switch to “Warm” mode for up to 2 hours—perfect for serving straight from the machine!
Avoid reheating more than once to maintain quality and food safety.
Frequently Asked Questions
Can I cook any type of dal in a rice cooker?
Most common dals—masoor, toor, moong, and chana—work well. However, chana and urad dal benefit from soaking first to ensure tenderness. Avoid ultra-processed or instant dal mixes, as they may become too mushy.
Visual guide about Can I Cook Dal in Rice Cooker
Image source: webstaurantstore.com
How much water do I need for 1 cup of dal?
It depends on the dal type. Masoor and moong dal need about 2.5 cups water. Toor and chana dal require closer to 3 cups. When in doubt, start with less water—you can always drain excess later.
Do I need to soak dal before cooking in a rice cooker?
Not always. Quick-cooking dals like masoor and moong don’t require soaking. But chana, urad, and older batches may soften faster if soaked for 4–6 hours. Soaking also improves digestibility.
Can I add spices while cooking?
Yes, but add robust spices like cumin, turmeric, or chili powder at the beginning. Delicate flavors such as fresh ginger, garlic, or herbs should go in after cooking. Avoid adding salt early, as it can toughen dal.
What if my rice cooker doesn’t have a specific dal setting?
That’s totally fine! Use the standard “white rice” or “pulse” setting. Many machines automatically adjust timing and heat for legumes. Just remember to check doneness manually near the end.
Is cooking dal in a rice cooker healthier than stovetop methods?
Generally yes. Shorter cooking times help preserve heat-sensitive nutrients like B vitamins and antioxidants. Plus, no added fats or oils are needed during the main cooking phase, though you can always enrich afterward with ghee or oil.
Frequently Asked Questions
Can I cook any type of dal in a rice cooker?
Most common dals—masoor, toor, moong, and chana—work well. However, chana and urad dal benefit from soaking first to ensure tenderness. Avoid ultra-processed or instant dal mixes, as they may become too mushy.
How much water do I need for 1 cup of dal?
It depends on the dal type. Masoor and moong dal need about 2.5 cups water. Toor and chana dal require closer to 3 cups. When in doubt, start with less water—you can always drain excess later.
Do I need to soak dal before cooking in a rice cooker?
Not always. Quick-cooking dals like masoor and moong don’t require soaking. But chana, urad, and older batches may soften faster if soaked for 4–6 hours. Soaking also improves digestibility.
Can I add spices while cooking?
Yes, but add robust spices like cumin, turmeric, or chili powder at the beginning. Delicate flavors such as fresh ginger, garlic, or herbs should go in after cooking. Avoid adding salt early, as it can toughen dal.
What if my rice cooker doesn’t have a specific dal setting?
That’s totally fine! Use the standard “white rice” or “pulse” setting. Many machines automatically adjust timing and heat for legumes. Just remember to check doneness manually near the end.
Is cooking dal in a rice cooker healthier than stovetop methods?
Generally yes. Shorter cooking times help preserve heat-sensitive nutrients like B vitamins and antioxidants. Plus, no added fats or oils are needed during the main cooking phase, though you can always enrich afterward with ghee or oil.