
Absolutely! You can cook rice perfectly in your Instant Pot—no rice cooker needed. With the right water ratio, settings, and a few simple tricks, you’ll get fluffy, flavorful grains every time. Whether you’re cooking white, brown, or wild rice, this electric pressure cooker does the heavy lifting so you don’t have to.
Key Takeaways
- Yes, you can cook rice in an Instant Pot. It’s one of the most popular uses for this versatile kitchen tool.
- White rice cooks faster than brown rice. White rice typically takes 3–5 minutes under pressure; brown rice needs 20–25 minutes.
- Use the correct water-to-rice ratio. The standard is 1:1 for white rice and 1.25:1 for brown rice.
- Natural release works best for fluffy texture. Let the pressure drop on its own rather than quick-releasing.
- Seasonings and flavors can be added easily. Try salt, butter, or broth for extra taste without extra steps.
- Cleanup is simple. Most parts are dishwasher-safe, and there’s little mess after cooking.
- Troubleshooting is straightforward. Overcooked rice? Too much liquid. Undercooked? Add more time or reduce water slightly.
Quick Answers to Common Questions
How long does it take to cook rice in an Instant Pot?
White rice takes 3–5 minutes under high pressure; brown rice takes 20–25 minutes. Wild rice may need up to 30 minutes.
Do I need to rinse the rice before cooking?
Yes, especially for long-grain varieties like basmati or jasmine. Rinsing removes excess starch and prevents stickiness.
Can I cook more than one type of rice at once?
It’s not recommended. Different rices cook at different speeds and require specific water ratios, so cook them separately.
Should I use quick release or natural release for rice?
Natural release is best for fluffy rice. Let the pressure drop on its own for 10–15 minutes, then do a quick release.
Can I keep rice warm in the Instant Pot?
Yes! Once cooked, switch to “Keep Warm” mode for up to 10 hours. Just avoid leaving it too long, as it can dry out.
📑 Table of Contents
- Can I Cook Rice in an Instant Pot?
- Why Choose the Instant Pot for Cooking Rice?
- Types of Rice You Can Cook in an Instant Pot
- Step-by-Step Guide: How to Cook Perfect Rice in an Instant Pot
- Troubleshooting Common Issues When Cooking Rice
- Tips for Flavorful Instant Pot Rice
- Cleaning and Maintaining Your Instant Pot After Cooking Rice
Can I Cook Rice in an Instant Pot?
If you’ve ever owned an Instant Pot, chances are you’ve wondered whether it can handle something as simple as cooking rice—especially when your trusty old rice cooker has seen better days. The answer? Absolutely, yes! In fact, many home cooks consider the Instant Pot their go-to appliance for preparing rice because it delivers consistent, fluffy results with minimal supervision.
Unlike traditional stovetop methods that require constant stirring and attention, the Instant Pot uses pressure cooking to seal in moisture and cook grains evenly. Whether you’re making a quick weeknight dinner or prepping meals ahead for the week, knowing how to cook rice in your Instant Pot is a game-changer. Not only does it save time, but it also reduces cleanup since you’re using just one pot for both cooking and serving.
Why Choose the Instant Pot for Cooking Rice?
The Instant Pot isn’t just another kitchen gadget—it’s a multi-functional powerhouse that combines pressure cooking, slow cooking, steaming, sautéing, and even yogurt-making into one device. But when it comes to rice, what makes it so special?
Visual guide about Can I Cook Rice in an Instant Pot
Image source: favfamilyrecipes.com
Consistency and Control
One of the biggest headaches with stovetop rice is getting the water-to-rice ratio right—too much water leads to mushy rice, while too little leaves it dry and chalky. The Instant Pot eliminates guesswork by maintaining precise temperature and pressure throughout the cooking process. Once you set it and forget it, your rice comes out uniformly cooked every single time.
Time-Saving Efficiency
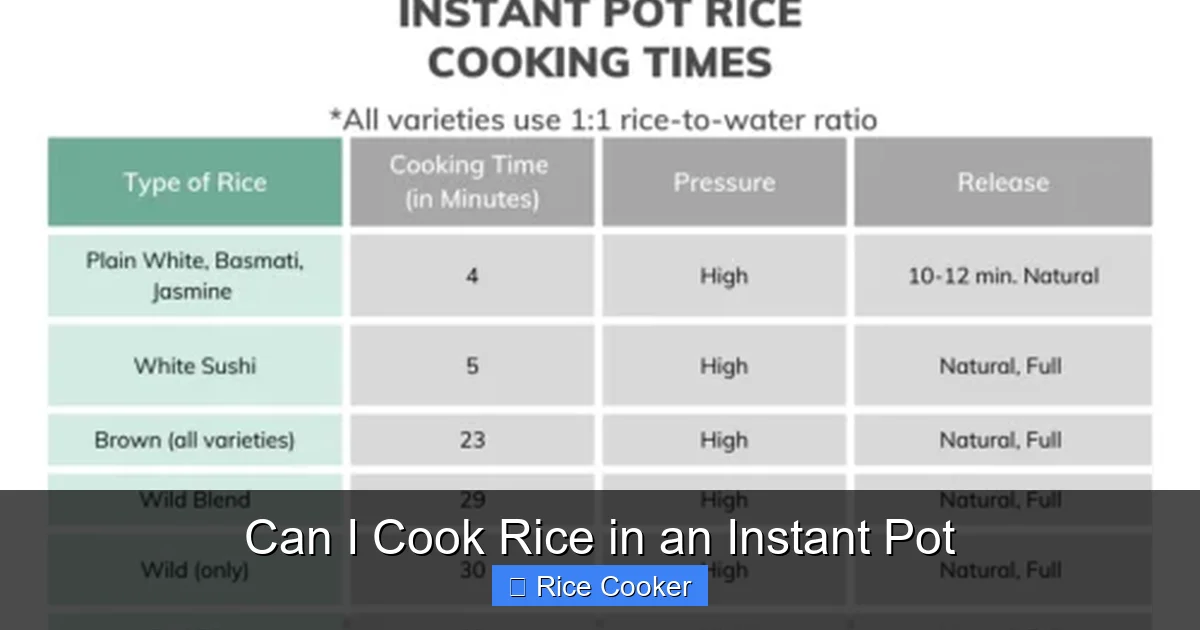
Traditional rice takes anywhere from 15 to 45 minutes depending on the type, but in the Instant Pot, white rice cooks in just 3 to 5 minutes under high pressure. Brown rice takes longer—about 20 to 25 minutes—but that’s still significantly faster than boiling it on the stove. Plus, there’s no need to stand over the pot waiting for bubbles or adjusting heat levels.
Energy-Efficient Cooking
The Instant Pot uses less energy than keeping a pot of water simmering on the stove. After reaching pressure, it maintains heat efficiently, which means lower electricity bills and reduced carbon footprint—something worth noting if you’re eco-conscious.
Versatility Beyond Plain Rice
You’re not limited to plain white rice. With the Instant Pot, you can make fragrant basmati, nutty wild rice, savory jasmine rice, or even sushi rice with ease. Add herbs, spices, or broths to infuse flavor directly into the grains without needing extra pots or pans.
Types of Rice You Can Cook in an Instant Pot
Not all rice is created equal, and different varieties require slightly different techniques. Here’s a breakdown of common types and how they perform in your Instant Pot:
Visual guide about Can I Cook Rice in an Instant Pot
Image source: i2.wp.com
White Rice (Long-Grain)
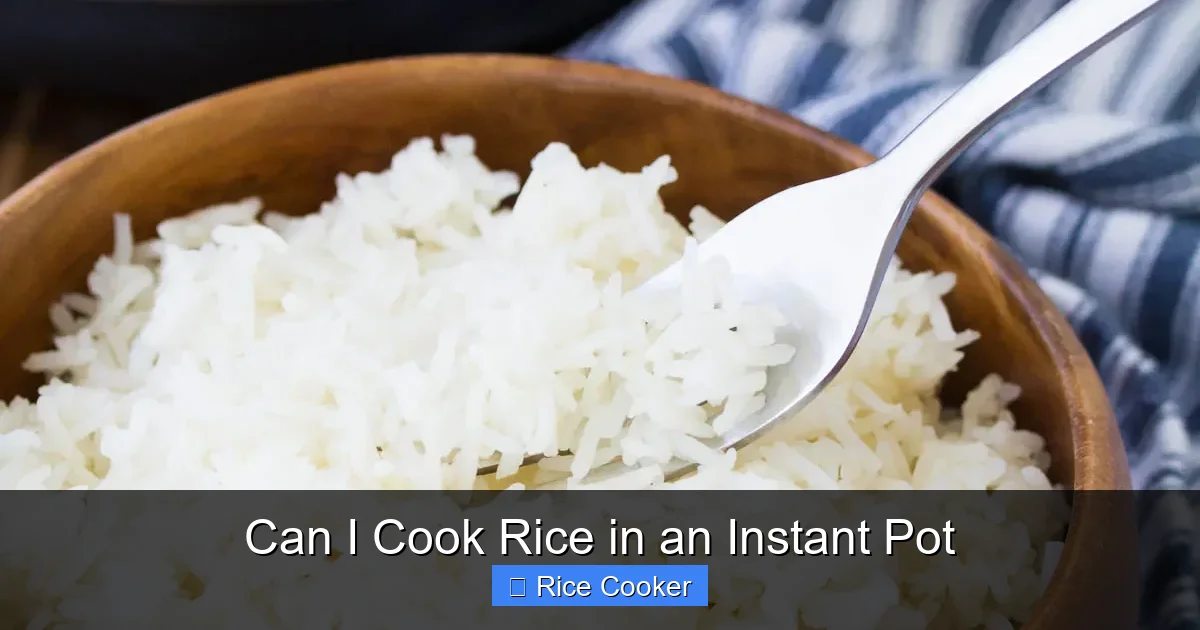
This is probably the most common type found in households. Varieties like Jasmine, Basmati, and American long-grain work beautifully in the Instant Pot. They tend to be lighter, fluffier, and less chewy than other grains.
Brown Rice
Higher in fiber and nutrients, brown rice requires more time and liquid due to its outer bran layer. While it may take longer, the end result is tender yet firm—perfect for grain bowls or pilafs.
Wild Rice
A bit trickier due to its unique shape and texture, wild rice benefits from soaking beforehand and slightly longer cooking times. However, once mastered, it yields a deliciously earthy side dish.
Sushi Rice
Made from short-grain Japanese rice, sushi rice sticks together nicely when cooked properly. Using rice vinegar, sugar, and salt during or after cooking enhances authenticity.
Instant Rice Mixes
If you prefer convenience, many brands sell instant rice mixes designed specifically for pressure cookers. These often include seasonings and shortcut instructions tailored for Instant Pot use.
Step-by-Step Guide: How to Cook Perfect Rice in an Instant Pot
Cooking rice in the Instant Pot doesn’t have to be complicated. Follow these easy steps for foolproof results:
Ingredients & Supplies Needed
- 1 cup uncooked rice (adjust based on servings)
- 1 cup water (for white rice) or 1¼ cups (for brown rice)
- Pinch of salt (optional)
- Instant Pot or similar pressure cooker
- Measuring cup
- Fine mesh strainer (if rinsing rice)
Preparation Tips
Before adding ingredients, make sure your Instant Pot is clean and ready. If using long-grain rice like basmati or jasmine, rinse it under cold water until the water runs clear. This removes excess starch and prevents clumping.
Adding Rice and Liquid
Add rinsed (or unrinsed—your preference!) rice and liquid to the inner pot. Stir gently to ensure even distribution. Don’t worry about mixing too much—just enough to coat everything lightly.
Sealing and Setting the Lid
Secure the lid and turn the valve to “Sealing.” Make sure nothing blocks the vent pipe at the back of the lid. This is crucial for proper steam release later.
Choosing the Right Setting
For most rices, select either “Manual” or “Pressure Cook” mode and set the timer according to the type:
- White rice: 3–5 minutes on high pressure
- Brown rice: 20–25 minutes on high pressure
- Wild rice: 30 minutes (with optional pre-soak)
Natural vs. Quick Release
After cooking, allow the pressure to release naturally for 10–15 minutes before doing a quick release with the vent. This helps prevent overcooking and keeps the rice fluffy. Avoid quick releases unless instructed otherwise.
Fluffing and Serving
Once depressurized, open the lid carefully (watch out for escaping steam). Use a fork to gently fluff the rice. Serve immediately or keep warm in the Instant Pot by switching to “Keep Warm” mode for up to 10 hours.
Troubleshooting Common Issues When Cooking Rice
Even experienced users sometimes run into hiccups. Here’s how to fix the most frequent problems:
Rice Is Too Dry or Crunchy
This usually means insufficient liquid or too-short cooking time. Next time, increase water by 1 tablespoon per cup or add 1 minute to the timer. Also, check that your Instant Pot seals properly—a faulty seal can cause uneven heating.
Rice Is Mushy or Sticky
Overcooked rice or too much liquid causes this issue. Reduce water slightly next time (try ½ cup less per batch) and avoid pressing “Cancel” mid-cycle unless necessary. Natural release helps prevent mushiness by stopping the cooking process gently.
Grains Stick Together
This happens when rice isn’t rinsed well or isn’t fluffed right away. Always rinse long-grain varieties thoroughly. After releasing pressure, wait 2 minutes then fluff immediately with a fork to separate clumps.
Steam Doesn’t Release Properly
If your Instant Pot won’t release pressure, double-check that the vent pipe isn’t blocked and that the sealing ring is intact. Sometimes food particles get stuck—clean the valve area gently with a toothpick if needed.
Uneven Cooking
Make sure rice and water are distributed evenly. Don’t overcrowd the pot—stick to recommended ratios. Also, avoid opening the lid during the cooking cycle unless absolutely necessary.
Tips for Flavorful Instant Pot Rice
Plain white rice gets the job done, but why settle when you can elevate it? Try these ideas to transform basic grains into gourmet sides:
Use Broth Instead of Water
Swap plain water for chicken, vegetable, or beef broth. The added flavor penetrates deep into each grain without requiring extra pots or pans.
Add Aromatics Before Cooking
Toss in garlic cloves, bay leaves, onion slices, or ginger chunks along with your rice and liquid. Remove them after cooking if desired, or leave them in for extra depth.
Dress It Up After Cooking
Stir in a pat of butter, a splash of olive oil, or a sprinkle of Parmesan cheese right after fluffing. A pinch of smoked paprika or turmeric adds color and complexity too.
Try Coconut Milk for Creaminess
For a richer version, replace half the water with coconut milk. Great for Thai-inspired dishes or creamy risottos (though note: risotto isn’t traditional in pressure cookers).
Infuse with Herbs and Spices
Add cumin seeds, coriander, or dried thyme before pressure cooking. Just remember to strain them out afterward unless you enjoy herb bits in every bite.
Cleaning and Maintaining Your Instant Pot After Cooking Rice
One of the best things about cooking rice in the Instant Pot is how easy it is to clean. Here’s how to keep your appliance in top shape:
- Unplug and cool down completely before cleaning.
- Remove the inner pot and wash it with warm, soapy water. Most are dishwasher-safe (check manufacturer guidelines).
- Wipe the lid with a damp cloth. Never submerge the lid in water—focus on the rim and steam release valve.
- Clean the sealing ring regularly to prevent odors. Hand-wash it separately and let it air-dry.
- Check the float valve** for blockages. Use a soft brush or toothpick to clear debris.
Regular maintenance ensures your Instant Pot lasts years and continues delivering perfect rice every time.
Frequently Asked Questions
Is cooking rice in an Instant Pot healthier than stovetop?
Not necessarily—both methods preserve nutrients similarly. However, the Instant Pot uses less water and energy, which some consider a minor health plus.
Can I cook frozen rice in the Instant Pot?
No, never cook frozen rice directly. Thaw it first or cook fresh rice—frozen grains won’t absorb liquid properly and may create safety risks.
What if my rice turns out gluey?
Gluey rice usually means too much starch wasn’t rinsed off or too much liquid was used. Next time, rinse thoroughly and reduce water by 1 tablespoon per cup.
Can I substitute broth for water in brown rice?
Absolutely! Using broth instead of water adds rich flavor. Just maintain the 1.25:1 water-to-rice ratio.
Will the Instant Pot burn rice like a stovetop?
Modern Instant Pots have safeguards against burning. If yours does burn rice, check the sealing ring condition and ensure adequate liquid is present.
Can I cook rice in the Instant Pot overnight?
Yes, but only after it’s fully cooked. Switch to “Keep Warm” mode and store in the fridge within 2 hours if not eating immediately.