
Can my Instant Pot cook rice? Absolutely! The Instant Pot is a fantastic tool for cooking rice, offering speed, consistency, and convenience. Whether you’re making jasmine, basmati, or brown rice, this multi-cooker delivers reliable results with minimal effort. In this guide, we’ll walk you through everything you need to know to master rice in your Instant Pot.
Key Takeaways
- Instant Pots are excellent rice cookers: Their pressure cooking and steam functions make them ideal for perfectly cooked rice every time.
- Different rice types require different settings: White rice, brown rice, and wild rice each have unique cooking times and water ratios.
- Proper rinsing and soaking improve texture: Rinsing removes excess starch, while soaking ensures even cooking and fluffiness.
- Natural release vs. quick release matters: Use natural release for sticky or dense grains like brown rice; quick release works well for fluffy white rice.
- Customization enhances flavor: Add broth instead of water, toss in herbs, or sauté onions for richer, more flavorful rice dishes.
- Troubleshooting common issues helps: Learn how to fix mushy rice, undercooked grains, or burnt bottoms to perfect your technique.
Key Takeaways
- Understanding can my instant pot cook rice: Provides essential knowledge
📑 Table of Contents
- Introduction: Why Your Instant Pot Is a Rice Lover’s Dream
- Understanding How Instant Pots Cook Rice
- Types of Rice and Their Instant Pot Requirements
- Step-by-Step Guide to Perfect Instant Pot Rice
- Tips and Tricks for Flavorful, Fluffy Rice Every Time
- Troubleshooting Common Rice Problems
- Beyond Plain Rice: Creative Instant Pot Recipes
- Cleaning and Maintaining Your Instant Pot for Rice Cooking
- Conclusion: Embrace the Versatility of Your Instant Pot
Introduction: Why Your Instant Pot Is a Rice Lover’s Dream
If you’ve ever wondered, “Can my Instant Pot cook rice?”—the answer is a resounding yes, and then some. This sleek, multi-functional kitchen gadget has revolutionized home cooking by combining pressure cooking, slow cooking, steaming, sautéing, and yogurt-making in one device. But perhaps its most beloved function is how reliably it transforms raw rice into tender, fluffy grains that rival—or even surpass—those made on a traditional stovetop or dedicated rice cooker. Whether you’re preparing a simple side dish or building a complete meal around rice, your Instant Pot delivers consistent results with minimal supervision.
Rice is one of the world’s most consumed staple foods, and mastering its preparation opens the door to countless cuisines—from fragrant Thai jasmine to hearty Spanish paella and savory Indian biryanis. Yet, many people struggle with mushy rice, unevenly cooked kernels, or dry, crumbly grains. That’s where the Instant Pot shines. Thanks to its precise temperature control and sealed environment, it cooks rice uniformly without burning the bottom or leaving the top underdone. Plus, it frees up your stove and hands during busy weeknight dinners.
In this comprehensive guide, we’ll explore everything you need to know about cooking rice in your Instant Pot, from basic techniques to advanced tips. You’ll learn which rice varieties work best, how to adjust recipes for different textures, and how to troubleshoot common mistakes. By the end, you’ll feel confident saying, “Of course my Instant Pot can cook rice—and it’s better than I expected!”
Understanding How Instant Pots Cook Rice
The magic behind Instant Pot rice lies in its dual cooking modes: pressure cooking and steam. When you add water and set the timer, the pot builds steam pressure, raising the internal temperature to around 240°F (116°C)—well above boiling point. This high heat rapidly penetrates the rice grains, cooking them evenly from the inside out. Once done, the pressure releases either quickly or gradually, depending on your setting, which affects the final texture.
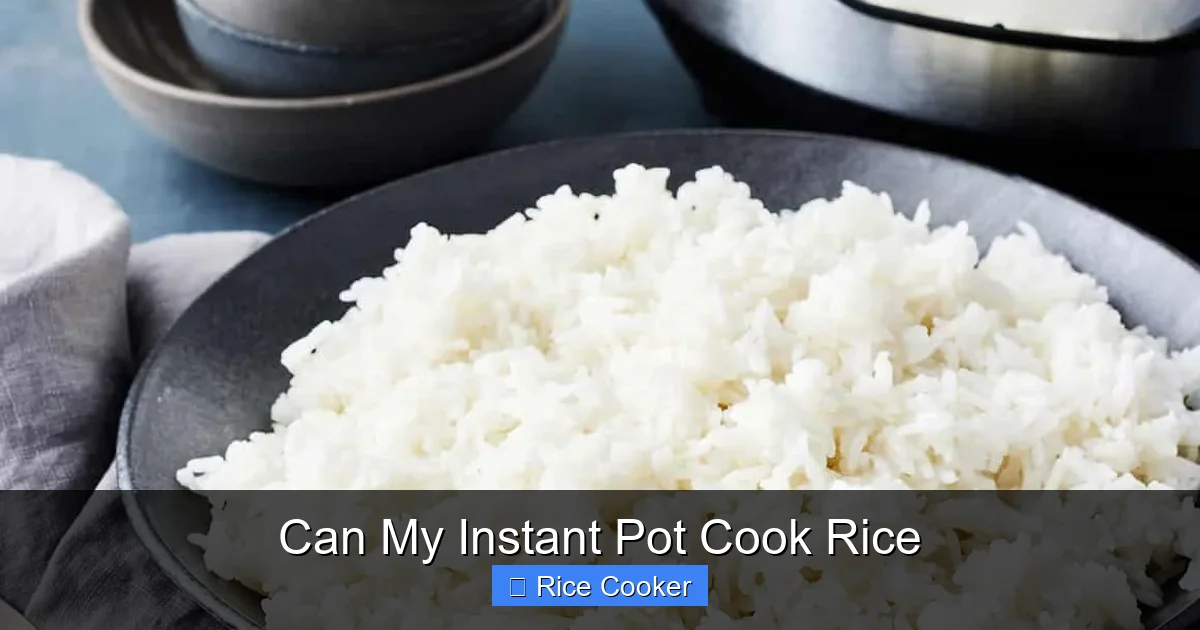
Visual guide about Can My Instant Pot Cook Rice
Image source: cdn.loveandlemons.com
The Science of Pressure Cooking
Pressure cooking shortens cooking time dramatically because the sealed environment traps steam, increasing both temperature and pressure. For rice, this means faster hydration of starch molecules, leading to quicker gelatinization—the process that gives rice its soft, slightly sticky texture. Unlike boiling rice on the stove (where water evaporates unevenly and heat fluctuates), the Instant Pot maintains steady conditions, reducing the risk of scorching or uneven doneness.
Why Steam Matters
After pressure cooking, residual steam continues to gently finish the process inside the pot. This secondary steaming phase ensures that even the last few grains absorb moisture fully, resulting in uniform tenderness. It also helps prevent the formation of hard, uncooked centers—a common issue when using a standard pot on the stove.
How Instant Pots Compare to Traditional Methods
Traditional rice cookers use electrical heating elements and sensors to monitor temperature and moisture, automatically switching between “warm” and “cook” modes. While effective, they often lack the speed and versatility of an Instant Pot. Meanwhile, stove-top rice requires constant attention to prevent burning and stirring to redistribute heat. The Instant Pot eliminates guesswork: you set it and forget it, returning to perfectly cooked rice without babysitting the pot.
Types of Rice and Their Instant Pot Requirements
Not all rice is created equal—and neither are their cooking needs. Different varieties contain varying amounts of starch, fiber, and moisture, so adjusting your method accordingly ensures optimal results. Below are the most common types you’ll encounter and how to handle them in your Instant Pot.
White Rice (Jasmine, Basmati, Long-Grain)
White rice is the easiest to cook and most forgiving in the Instant Pot. Jasmine rice, popular in Southeast Asian cuisine, is slightly sticky and aromatic, while long-grain basmati remains fluffy when cooked properly. These varieties typically require a 1:1.25 ratio of rice to water and cook in about 12–15 minutes under pressure.
Tip: Rinse jasmine rice thoroughly to remove excess starch, which prevents clumping. For basmati, soaking for 15–20 minutes before cooking improves separation and aroma.
Brown Rice
Brown rice has a chewier texture and nuttier flavor due to its intact bran layer, which slows down absorption. It needs more water (typically 1:1.5 ratio) and longer cooking time (22–28 minutes). Because brown rice retains more fiber, it also benefits from natural release—letting the pressure drop slowly keeps it tender rather than mushy.
Example: Try cooking brown rice with vegetable broth instead of water for added depth. Add a bay leaf or pinch of salt during sauté mode for extra flavor.
Wild Rice
Wild rice isn’t technically true rice but a grass seed. It’s denser and takes longer to cook (up to 45 minutes under pressure) due to its fibrous structure. A 1:1.75 water-to-rice ratio works best, and natural release is essential to avoid toughness.
Sushi Rice
Sushi rice is short-grain and highly sticky, requiring precise moisture control. Use a 1:1 ratio and rinse until the water runs clear. After cooking, let it rest for 10 minutes under natural release, then fluff gently with a fork—never stir vigorously.
Glutinous (Sticky) Rice
This rice is prized in East Asian desserts and savory dishes for its chewy texture. It absorbs very little liquid and cooks quickly (8–10 minutes). Stick to a 1:1.2 ratio and use quick release to maintain stickiness without overcooking.
Step-by-Step Guide to Perfect Instant Pot Rice
Ready to make flawless rice? Follow this foolproof method that works for most varieties:
- Rinse the rice: Place rice in a fine-mesh strainer and rinse under cold water until clear. This removes surface starch.
- Add liquid: Pour rinsed rice into the Instant Pot insert, then add water (or broth) using the correct ratio.
- Add seasonings (optional): Salt, butter, or garlic powder enhance flavor without affecting texture.
- Close and seal: Fit the lid securely, turn valve to sealing position.
- Select pressure cook: Set manual/pressure cook mode to desired time. Use 12 minutes for white rice, 25 for brown.
- Release pressure: For white rice, use quick release (turn valve to venting). For brown or wild rice, let it naturally release for 10–15 minutes.
- Fluff and serve: Open lid away from face, fluff gently with a fork, and enjoy!
Adjusting for Altitude
At higher elevations, water boils at lower temperatures, which can affect rice texture. Increase cooking time by 1–2 minutes per 1,000 feet above sea level, or add 1–2 tablespoons more water per cup of rice.
Cooking Multiple Batches
You can stack multiple cups of rice in one batch as long as they fit comfortably and the water level covers the top grain. Avoid overfilling—leave at least ½ inch of space below the rim to allow steam expansion.
Tips and Tricks for Flavorful, Fluffy Rice Every Time
Great rice isn’t just about technique—it’s also about creativity. Here are pro-level strategies to elevate your Instant Pot rice beyond the basics.
Use Broth Instead of Water
Substituting chicken, vegetable, or mushroom broth adds subtle umami and complexity. Just reduce added salt since broth already contains sodium. For risotto-style results, sauté Arborio rice briefly before adding liquid.
Sauté First for Depth
Turn on the sauté function and lightly toast rice in oil or butter before pressure cooking. This caramelizes starches, creating a nutty base flavor reminiscent of pilafs or biryanis.
Layer Herbs and Spices
Drop in a cinnamon stick, cardamom pods, or star anise while cooking for aromatic infusions. Remove solids before serving for clean flavor.
Rest Before Fluffing
Let cooked rice sit, covered, for 5–10 minutes after pressure release. This allows steam to redistribute moisture evenly, preventing gummy clumps.
Store and Reheat Smartly
Cooked rice stores well in the fridge for up to 5 days. To reheat, add a splash of water and microwave in 30-second intervals, stirring between bursts. Alternatively, steam it in the Instant Pot with a tablespoon of water for 2 minutes.
Troubleshooting Common Rice Problems
Even experienced cooks hit snags now and then. Here’s how to diagnose and fix the most frequent issues.
Mushy or Sticky Rice
This usually stems from too much water or insufficient rinsing. Measure carefully and always rinse white rice. If it happens anyway, try reducing water by 1–2 tbsp next time or switching to natural release for denser grains.
Undercooked or Hard Grains
Undercooked rice indicates either too little liquid or too short a cook time. Check your ratio and timer. Brown rice especially needs patience—don’t rush the process!
Burnt Bottom Layer
Burning occurs when rice sticks to the bottom due to insufficient liquid or preheating. Always add enough water, and consider lining the insert with parchment paper for easy cleanup.
Rice Sticking to the Lid
Steam condensation drips onto the lid, causing splatter. Ensure the sealing ring is clean and undamaged. Also, don’t open the lid immediately after cooking—wait until pressure fully releases.
Floating Rice
If rice floats during cooking, it may be contaminated with debris or over-hydrated. Always rinse thoroughly and discard any unsoaked grains before cooking.
Beyond Plain Rice: Creative Instant Pot Recipes
Once you’ve mastered basic rice, expand your culinary horizons with these delicious variations:
- Mexican Cilantro-Lime Rice: Cook white rice with lime zest, cumin, and fresh cilantro.
- Spanish Paella-Style Rice: Sauté diced chorizo and peppers, add saffron-infused broth, and finish with mussels or shrimp.
- Indian Biryani: Layer marinated meat (chicken or lamb) with spiced rice, cook under pressure, then rest to blend flavors.
- Fried Rice: After cooking rice, sauté it with soy sauce, scrambled eggs, peas, and carrots in the same pot.
- Rice Pudding: Combine rice, milk, sugar, cinnamon, and raisins. Cook slowly for 30 minutes for a comforting dessert.
Cleaning and Maintaining Your Instant Pot for Rice Cooking
Keeping your Instant Pot clean ensures longevity and consistent performance. After cooking rice, remove the inner pot and wash with warm, soapy water. Never submerge the base or electronics in water. Clean the sealing ring regularly—rice residue can cause odors or mold. Replace the ring if it shows signs of wear or discoloration. Wipe the exterior and lid with a damp cloth, and store with the vent needle pointing upward.
Conclusion: Embrace the Versatility of Your Instant Pot
So, can your Instant Pot cook rice? Without a doubt—and not just okay rice, but consistently excellent, restaurant-quality rice right in your own kitchen. Whether you’re feeding a family, meal-prepping for the week, or exploring global cuisines, this powerful appliance simplifies the process while elevating the outcome. With the right techniques, slight adjustments for different grains, and a few creative touches, your Instant Pot becomes more than a gadget—it becomes a trusted ally in the kitchen.
Remember: practice makes perfect. Don’t be discouraged if your first batch isn’t ideal. Keep experimenting with ratios, release methods, and flavor additions. Soon, you’ll find yourself reaching for the Instant Pot whenever rice is on the menu. From fluffy jasmine to chewy brown rice, it handles it all with ease. So go ahead—open that lid, fluff that grain, and savor the satisfaction of perfectly cooked rice made simple.
Frequently Asked Questions
Can my Instant Pot cook rice without a rice setting?
Yes, most Instant Pots don’t have a dedicated “rice” button. Instead, use the “Manual” or “Pressure Cook” function with the appropriate time and water ratio for your rice type. The key is adjusting cooking duration based on grain variety—white rice takes less time than brown.
How do I prevent rice from sticking to the bottom of my Instant Pot?
Ensure you’re using enough liquid and always rinse white rice before cooking. Adding a teaspoon of oil or butter to the water also helps create a barrier. If sticking persists, line the insert with parchment paper for easy removal.
Is it safe to leave rice in the Instant Pot on the “Keep Warm” setting?
Yes, but only for up to 10 hours. Prolonged keep-warm cycles can dry out rice or encourage bacterial growth. For best quality, transfer leftover rice to a sealed container and refrigerate within 2 hours.
Can I cook frozen rice in my Instant Pot?
No, never add frozen rice directly to the pot with cold water. It will steam instead of cook properly, leading to uneven results. Always use fresh or thawed rice.
What’s the difference between natural and quick release when cooking rice?
Quick release vents steam rapidly, ideal for fluffy white rice. Natural release allows gradual pressure drop, preventing mushiness—best for sticky or dense grains like brown or wild rice.
Can I cook rice in my Instant Pot using the yogurt or slow cook functions?
Not recommended. These functions don’t generate enough heat or steam for proper rice cooking. Always use the pressure cook function for reliable results.