
Can we make dal in a rice cooker? Absolutely! A rice cooker isn’t just for white or brown rice—it’s also a fantastic tool for cooking dal. With the right ratio of water to lentils and a few simple steps, you can prepare soft, creamy, and nutritious dal without constant stirring or watching the stove. Whether you’re using a pressure cooker-style rice cooker or an electric one, this method is beginner-friendly and hands-off. It’s perfect for busy days when you still want a wholesome, protein-rich meal. Plus, it helps retain nutrients and ensures even cooking every time.
Key Takeaways
- Yes, you can cook dal in a rice cooker: Most modern rice cookers are designed to handle grains and legumes, including lentils used in dal.
- Proper water-to-lentil ratio is essential: Use 2–3 times the volume of water compared to dry lentils for ideal texture.
- Soaking lentils shortens cooking time: A quick 15–30 minute soak improves digestibility and reduces cooking duration.
- Seasoning after cooking enhances flavor: Add spices, salt, and ghee at the end to preserve aroma and prevent mushiness.
- Different dal types may need adjustments: Split vs. whole lentils, red vs. green varieties, and pre-cooked mixes all behave differently.
- Crock-pot and pressure-style models work best: These offer consistent heat and moisture control ideal for dal.
- Cleanup is easier: Non-stick inner pots make scrubbing off dried dal residue much simpler than cast iron or stainless steel.
[FEATURED_IMAGE_PLACEHOLDER]
Making dal in a rice cooker might sound surprising at first—after all, rice cookers are often seen as glorified rice machines. But if you’ve ever wondered, “can we make dal in rice cooker?”—the answer is a confident yes. In fact, many home cooks swear by this method because it’s hands-off, consistent, and produces tender, evenly cooked lentils every time. Whether you’re preparing masoor dal, moong dal, chana dal, or a mix, your rice cooker can become your new go-to kitchen ally.
The beauty of using a rice cooker lies in its ability to regulate temperature and steam efficiently. Unlike traditional stovetop methods that require constant monitoring and stirring (which can lead to uneven cooking or scorching), the rice cooker does all the work for you. You simply add ingredients, press a button, and walk away. When it’s done, you’ll have fluffy, aromatic dal ready to be seasoned with onions, garlic, ginger, turmeric, and fresh cilantro—just like your favorite Indian restaurant version.
In this comprehensive guide, we’ll walk you through everything you need to know about making dal in a rice cooker: from choosing the right type of lentil to adjusting water ratios, seasoning tips, troubleshooting common issues, and even recipe variations. By the end, you’ll feel confident using your rice cooker for more than just plain white rice.
Key Takeaways
- Understanding can we make dal in rice cooker: Provides essential knowledge
📑 Table of Contents
- Why Use a Rice Cooker for Dal?
- Types of Lentils Suitable for Rice Cooker Dal
- Step-by-Step Guide: How to Make Perfect Dal in a Rice Cooker
- Common Mistakes and How to Fix Them
- Tips for Flavorful, Nutritious Dal Every Time
- Rice Cooker Dal Recipes to Try Today
- Frequently Asked Questions About Making Dal in a Rice Cooker
Why Use a Rice Cooker for Dal?
You might be thinking, “Isn’t dal usually cooked on the stove?” And you’re absolutely right—dal has traditionally been simmered slowly over low heat for hours until it reaches that creamy, comforting consistency. But here’s why switching to a rice cooker offers real advantages:
First, cooking time is significantly reduced. While traditional stovetop dal can take anywhere from 45 minutes to 2 hours depending on the variety, a rice cooker typically cuts that down to 20–40 minutes. That’s especially helpful if you’re using hard-to-cook varieties like tur dal or urad dal, which can take forever on the stove.
Second, even cooking prevents burning. Stovetop cooking relies heavily on your attention—too much heat causes sticking; too little leaves dal undercooked. Rice cookers maintain steady internal temperatures, ensuring uniform doneness throughout.
Third, energy efficiency matters. After the initial heat-up phase, rice cookers use minimal power while keeping food warm—perfect for those who want to save electricity without sacrificing quality.
Lastly, cleanup becomes a breeze. Most rice cookers come with removable non-stick inner pots that resist sticking far better than cast iron skillets or heavy-bottomed kadhai pans. No more scraping burnt-on dal residue!
Of course, not all rice cookers are created equal. If you have a basic model with only a “rice” setting, you may need to adjust timing slightly. But even then, it usually works fine—just keep an eye during the first few tries.
Types of Lentils Suitable for Rice Cooker Dal
Not all lentils behave the same way in a rice cooker. Some break down quickly into a soup-like consistency, others hold their shape better, and some require special preparation. Here’s a breakdown of popular dal types and how they perform:
Masoor Dal (Red Lentils)
Masoor dal is one of the easiest options for rice cooker cooking. It cooks rapidly—usually within 15–20 minutes—and breaks down into a smooth, orange-colored puree. Because it doesn’t require soaking, it’s great for quick meals. Just rinse thoroughly before adding to the cooker to remove any grit.
Moong Dal (Split Green Lentils)
Whole moong dal splits naturally during cooking, creating a light, airy texture. It takes about 25–30 minutes and benefits from a short soak (15 minutes) to reduce cooking time further. Avoid overcooking moong dal—it should remain slightly firm yet tender.
Chana Dal (Bengal Gram)
Chana dal holds its shape better than most dals and adds a nutty flavor. It needs longer cooking—around 30–40 minutes—and definitely requires soaking overnight or at least 2 hours before cooking. Without soaking, it can stay chewy and undercooked.
Urad Dal (Black Gram)
Both split (white) and whole black varieties work well, but split urad dal is faster. It becomes incredibly soft and sticky when cooked—ideal for dishes like dal makhani. Soak for at least 4 hours or use the quick-soak method (boil for 2 minutes, then rest 1 hour).
Mixed Dals
Many Indian households cook a blend of two or three types of lentils together. For example, a mix of moong and masoor dal creates a balanced protein source with complementary textures. Just remember that different dals cook at different rates—adding them together means finding a middle ground in timing.
Always check package labels carefully. Some commercial blends are pre-cooked or contain additives that affect cooking behavior. When in doubt, stick to whole or split lentils labeled “for dal” or “Indian cuisine.”
Step-by-Step Guide: How to Make Perfect Dal in a Rice Cooker
Ready to try it yourself? Follow these simple steps for foolproof dal every single time:
Step 1: Rinse and Prep Your Lentils
Start by placing your chosen dal in a fine-mesh strainer and running it under cold water. Swish gently to separate any debris or broken pieces. Discard floating husks or stones—they won’t cook properly and can ruin the texture. Drain well.
If you’re using hard-to-cook dals like chana or urad, give them a quick soak: cover with water, bring to a boil for 2 minutes, then let sit covered for 1 hour. Or just soak overnight in the fridge.
Step 2: Measure Water Accurately
Here’s the secret to avoiding soupy or dry dal: water ratio. As a general rule, use 2½ to 3 cups of water per cup of dry lentils. For softer dal (like masoor), lean toward 3 cups. For firmer dal (like chana), use closer to 2½ cups.
Adjust based on your desired consistency. If you prefer thicker dal for scooping with roti, go lower on water. If you like it soupier for dal tadka or khichdi, add more.
Step 3: Add Optional Ingredients
For extra flavor, toss in:
– ¼ tsp turmeric powder (prevents browning and adds earthiness)
– 1 bay leaf or pinch of asafoetida (optional, for digestive aid)
– Salt (add at the end—see next section)
Avoid adding oil or ghee before cooking—it interferes with the rice cooker’s ability to build foam and monitor starch release.
Step 4: Cook on Normal or White Rice Setting
Place everything in the inner pot. Close the lid and select either:
– “White Rice” mode (most reliable for dal)
– “Cook” or “Normal” cycle
– On newer models: “Porridge,” “Soup,” or “Legume” settings
Let it run its full cycle. Do not lift the lid frequently—this disrupts internal temperature.
Step 5: Season After Cooking
Once the cooker switches to “Keep Warm,” open the lid immediately. Stir gently to fluff up the dal. Now is the time to add:
– Salt to taste
– Ghee or butter for richness
– Freshly ground spices like cumin seeds (tempered in hot oil)
– Chopped tomatoes, onions, garlic, or ginger for depth
Never salt dal while it’s boiling—it draws out moisture and leads to a weaker flavor.
Step 6: Adjust Consistency if Needed
If dal is too thick, stir in a splash of water or vegetable stock and let it simmer (covered) for 5 minutes. If too thin, return to the cooker on “Warm” for 10 minutes to reduce excess liquid.
Common Mistakes and How to Fix Them
Even experienced cooks occasionally run into issues when making dal in a rice cooker. Here are the most common problems—and how to solve them:
Problem: Dal is too watery
This usually happens when too much water is added or the cooker runs too long. To fix: Return to “Keep Warm” mode and let it sit uncovered for 10–15 minutes. The steam will evaporate some moisture. Alternatively, transfer dal to a saucepan, simmer uncovered, and stir frequently until desired thickness.
Problem: Dal is lumpy or uneven
Improper rinsing or insufficient cooking causes clumping. Solution: Always rinse lentils thoroughly before cooking. If dal is already cooked but lumpy, mash a portion with a potato masher or blend partially in a blender before returning to the cooker on “Warm” for reheating.
Problem: Dal sticks to the bottom
This suggests either inadequate water or poor-quality inner pot coating. Prevention: Use the correct water ratio. If your rice cooker has a “burn” warning, stir once halfway through cooking (only if your model allows manual intervention). Consider upgrading to a high-quality cooker with anti-scratch coating.
Problem: Dal tastes bland
Spices lose potency when cooked with dal. Fix: Add salt, herbs, and fats after cooking. Temper cumin, mustard seeds, or curry leaves in ghee and pour over finished dal for instant flavor boost.
Problem: Dal doesn’t soften enough
Undercooked lentils often result from skipping the soak or using the wrong dal variety. Try again with soaked lentils or switch to a softer type like masoor. Also, ensure your rice cooker reaches full temperature—older models may need extended cooking times.
Tips for Flavorful, Nutritious Dal Every Time
Beyond basic cooking, small tweaks can elevate your dal from good to extraordinary:
Use Fresh Spices
Store whole spices in airtight containers away from light. Toasted cumin seeds, crushed fenugreek, or freshly grated ginger pack more punch than stale ones.
Add Greens Toward the End
Spinach, mustard greens, or chopped coriander can wilt into your dal during the last 5 minutes. This preserves their color and nutrients better than boiling them from the start.
Tempering (Tadka) Is Key
Heat ghee or oil in a small pan, add cumin seeds until they sizzle, then pour over dal. This technique unlocks aromatic oils and adds crunch.
Include Acidic Elements
A splash of lemon juice or tamarind paste balances richness and brightens flavors. Add it after cooking to avoid curdling.
Boost Protein with Peas or Beans
Stir in frozen peas, kidney beans, or chickpeas during the final 5 minutes for extra nutrition and heartiness.
Serve with Complementary Foods
Dal pairs beautifully with basmati rice, flatbreads (roti, naan, paratha), steamed vegetables, or yogurt. Don’t forget a side of pickles or raita!
Rice Cooker Dal Recipes to Try Today
Now that you understand the fundamentals, here are three delicious variations you can whip up in minutes:
Simple Masoor Dal
Ingredients:
– 1 cup red lentils
– 3 cups water
– Pinch of turmeric
– Salt to taste
– 1 tbsp ghee
– Cilantro for garnish
Instructions:
Rinse lentils, add all ingredients except ghee and cilantro to rice cooker. Cook on white rice setting. Stir in ghee and garnish before serving.
Moong Dal Khichdi (Rice + Lentil One-Pot Meal)
Ingredients:
– ½ cup moong dal (soaked 15 mins)
– ½ cup basmati rice
– 3 cups water
– Pinch of turmeric
– Salt
– 1 tsp ghee
– Cumin seeds for tempering
Instructions:
Combine dal, rice, and water in cooker. Cook on white rice setting. Temper cumin in ghee and pour over hot khichdi.
Dal Makhani-Inspired Version
Ingredients:
– 1 cup urad dal (split, soaked overnight)
– 2 cups water (initially)
– ½ cup tomato puree
– 1 tsp ginger-garlic paste
– ½ tsp garam masala
– 2 tbsp butter
– Kasuri methi (dried fenugreek leaves)
Instructions:
Drain soaked dal, add water, tomato, and ginger-garlic. Cook until very soft (~40 mins). Blend half the mixture lightly, then stir back in. Finish with butter, garam masala, and kasuri methi.
Frequently Asked Questions About Making Dal in a Rice Cooker
Can I make dal without soaking it first?
Yes! Most soft dals like masoor dal don’t need soaking and can be cooked directly. Harder dals like chana or urad benefit from soaking but aren’t impossible without—just expect longer cooking times. A quick 15-minute soak is always better than none.

Visual guide about Can We Make Dal in Rice Cooker
Image source: twosleevers.com
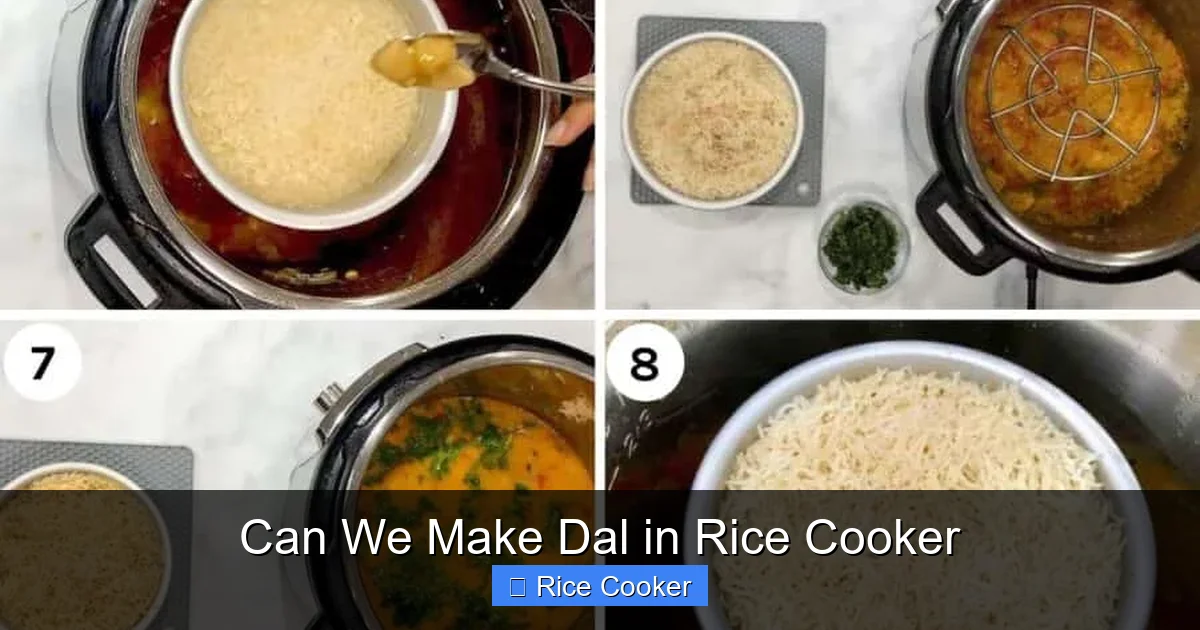
Visual guide about Can We Make Dal in Rice Cooker
Image source: twosleevers.com
How much water should I use for dal in a rice cooker?
Generally, use 2½ to 3 cups of water per cup of dry lentils. Soft dals like masoor need more water; firmer dals like chana need less. Start at 2½ and add more if needed after cooking.
Do I need to add oil or ghee before cooking?
No—avoid adding fat during cooking. It prevents proper starch gelatinization and makes cleanup harder. Add ghee, butter, or oil after cooking along with spices for best results.
Can I cook dal in a pressure cooker-style rice cooker?
Absolutely. In fact, pressure cooker models are ideal because they build steam pressure, which speeds up cooking and tenderizes tough legumes faster than standard electric models.
What if my rice cooker has only a “rice” setting?
That’s fine! Most “rice” cycles are calibrated for grains but work perfectly for dal. Just monitor the first time—if dal seems too wet, drain excess liquid and return to “Keep Warm” to reduce.
Is dal made in a rice cooker as nutritious as stovetop dal?
Yes, provided you use the same ingredients. The main difference is cooking method, not nutritional value. Both retain proteins, fibers, and minerals—though shorter cooking times may preserve more heat-sensitive vitamins like vitamin C.
In conclusion, answering the question “can we make dal in rice cooker?” is not just possible—it’s practical, efficient, and delicious. Once you master the basics, you’ll find yourself reaching for your rice cooker more often than your stove. Whether you’re feeding a family, meal-prepping for the week, or just craving comfort food with zero hassle, this method delivers consistent, tasty results every time. So go ahead—grab those lentils, turn on your rice cooker, and enjoy the magic of hands-off cooking. Your taste buds (and your schedule) will thank you!
Frequently Asked Questions
What is can we make dal in rice cooker?
can we make dal in rice cooker is an important topic with many practical applications.