You don’t need a rice cooker to make fluffy, delicious rice. Whether you’re using a pot on the stove or baking in the oven, traditional methods deliver consistent results with just a few simple steps. With the right technique and timing, cooking rice without a rice cooker is not only possible—it’s easy and reliable.
Key Takeaways
- Rice cookers aren’t essential: You can achieve perfectly cooked rice using basic kitchen tools like pots, pans, or even your oven.
- Stovetop method is most common: The absorption and water-boiling techniques are tried-and-true ways to cook rice on the stove.
- Oven-baking works too: For hands-off cooking, bake rice covered in a sealed dish for foolproof results.
- Water ratio matters: The standard 1:2 ratio (rice to water) applies to most types, but adjust slightly based on grain variety.
- Resting is crucial: Leting rice sit after cooking helps steam redistribute moisture, making it fluffier.
- Different grains need different care: Long-grain, short-grain, basmati, jasmine, and brown rice all have unique textures and cooking times.
- Common mistakes to avoid: Overfilling, skipping rinsing, and not measuring water precisely can ruin your rice.
📑 Table of Contents
- Can You Cook Rice Without a Rice Cooker?
- The Science Behind Cooking Rice
- Essential Tools You’ll Need
- Step-by-Step Guide: How to Cook Rice on the Stovetop
- Baking Rice in the Oven: A Hands-Off Alternative
- Cooking Different Types of Rice Without a Rice Cooker
- Troubleshooting Common Rice Problems
- Pro Tips for Restaurant-Quality Rice
- Conclusion: Mastering Rice Without a Machine
Can You Cook Rice Without a Rice Cooker?
Have you ever been in the middle of meal prep, only to realize your rice cooker is broken or out of commission? Or maybe you’re camping, traveling, or just don’t own one—yet you still want perfectly cooked, fluffy rice. The good news? Yes, you absolutely can cook rice without a rice cooker. In fact, many home cooks have been doing it for generations using nothing more than a pot, a lid, and a little patience.
Cooking rice without a rice cooker isn’t about compromise—it’s about mastering fundamental techniques that yield restaurant-quality results. Whether you’re using a heavy-bottomed pot on the stovetop, a Dutch oven, or even baking it in the oven, the principles remain the same: proper water-to-rice ratios, controlled heat, and letting the rice rest after cooking. With a bit of practice, you’ll find that stovetop and oven methods can be just as reliable as your electric rice cooker.
In this comprehensive guide, we’ll walk you through everything you need to know about cooking rice without a rice cooker. From choosing the right pot and measuring ingredients correctly to troubleshooting common issues, you’ll gain the confidence to make perfect rice anytime, anywhere. So grab your measuring cup, fill a kettle with water, and let’s get started!
The Science Behind Cooking Rice
How Rice Absorbs Water
At its core, cooking rice is a hydration process. Raw rice grains are dry and starchy, and they absorb water during cooking to become soft, tender, and edible. The starches inside the rice dissolve slightly when heated in water, creating a gel-like texture that transforms the grain. This is why the water-to-rice ratio is so critical—too little water and your rice stays hard; too much and it becomes mushy.
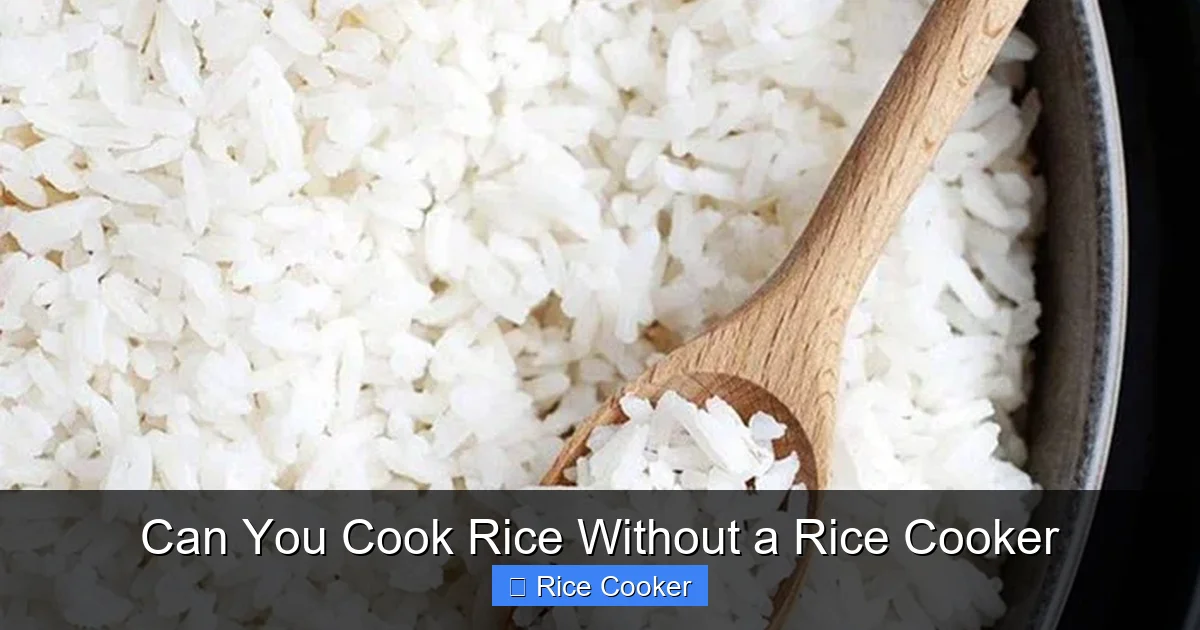
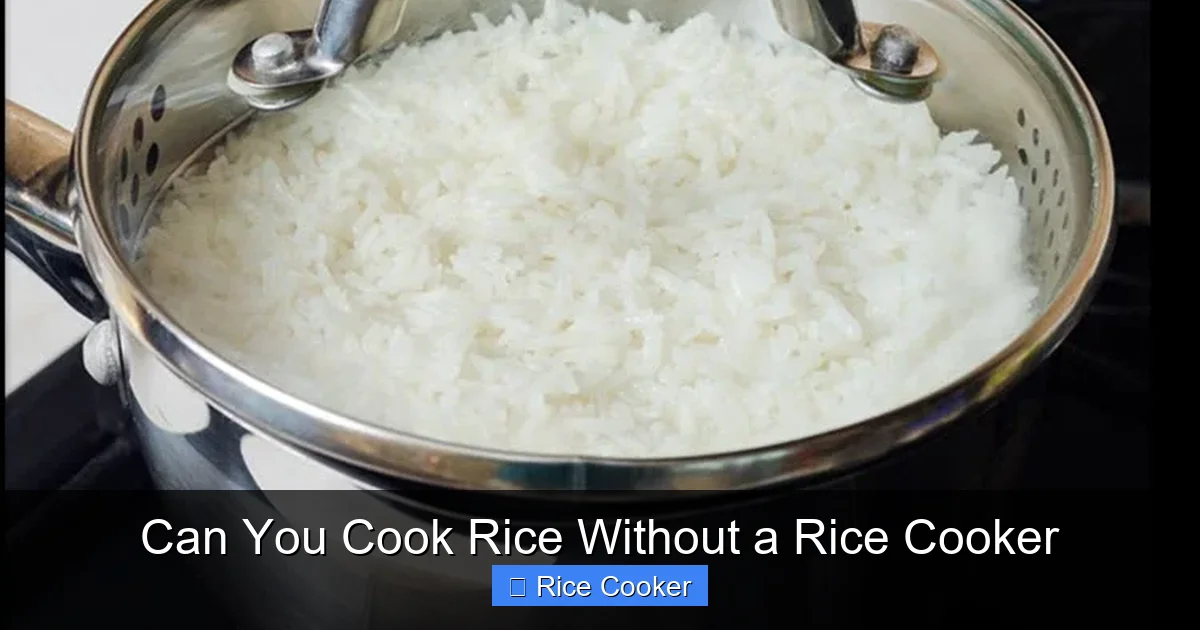
Visual guide about Can You Cook Rice Without a Rice Cooker
Image source: asian-recipe.com
Different types of rice have different starch compositions and absorption rates. For example, long-grain rice like jasmine or basmati contains less amylopectin (a sticky starch), which makes it easier to achieve separation and fluffiness. Short-grain rice, often used in sushi, has more amylose, leading to a chewier, stickier result. Understanding these differences helps you adjust your technique accordingly.
Why Resting Matters
After the rice finishes boiling and steaming, it’s tempting to fluff it immediately and serve. But here’s a pro tip: let it rest. Once the heat is turned off, the residual steam continues to hydrate the outer layers of the rice while allowing internal moisture to distribute evenly. This step is what separates good rice from great rice. Skipping it leads to uneven texture—some grains dry out while others stay wet.
A typical resting time is 5–10 minutes, depending on the recipe. Cover the pot during this phase to keep the steam in. Then, gently fluff with a fork to separate the grains without breaking them.
Essential Tools You’ll Need
Choosing the Right Pot
Not all pots are created equal when it comes to cooking rice. A heavy-bottomed pot with a tight-fitting lid is ideal because it distributes heat evenly and traps steam effectively. Stainless steel or enamel-coated pots work well, but avoid thin aluminum—they can cause hot spots and uneven cooking.
Make sure your pot is large enough to hold the rice without crowding. Crowded grains lead to uneven cooking and sticking. As a rule of thumb, use a pot with at least twice the volume of your total rice and water combined.
Measuring Tools
Precision matters when cooking rice. Use a dry measuring cup for rice (not liquid measuring cups unless specified). For water, a liquid measuring cup with clear markings ensures accuracy. Some recipes call for a specific amount of cold tap water, while others recommend boiling water—this affects cooking time and texture slightly.
If you’re new to cooking rice, investing in a small kitchen scale can take the guesswork out of portioning. One cup of uncooked white rice typically weighs around 180 grams, but weights can vary by brand. Weighing ensures consistency, especially if you’re scaling recipes up or down.
Lid and Spatula
A well-fitting lid is non-negotiable. If your pot doesn’t seal tightly, cover the top with a layer of foil before placing the lid on. This prevents steam from escaping and keeps the environment humid enough for proper steaming.
For fluffing, use a wooden or silicone spatula—metal can crush delicate grains. A fork works in a pinch, but a dedicated rice paddle or spatula makes the process smoother.
Step-by-Step Guide: How to Cook Rice on the Stovetop
Method 1: Boil and Drain (Best for Long-Grain Rice)
This method is quick and effective for rice varieties like jasmine, basmati, or American long-grain. It involves boiling the rice in excess water and then draining away the extra liquid once the rice is tender.
- Rinse the rice: Place rice in a fine-mesh strainer and rinse under cold water until the water runs clear. This removes surface starch, preventing clumping.
- Boil water: In a medium pot, bring 2 cups of water to a rolling boil. Add a pinch of salt if desired.
- Add rice: Stir in 1 cup of rinsed rice. Return to a boil.
- Simmer uncovered: Reduce heat to low and simmer for 15–18 minutes, stirring occasionally. The rice should be tender but still firm in the center.
- Drain excess water: Turn off the heat and drain the rice through a colander. Let it sit for 2 minutes, then fluff gently.
This method gives you light, separated grains—perfect for pilafs or side dishes.
Method 2: Absorption Method (Best for Most White Rices)
The absorption method is gentler and more hands-off. It’s ideal for short-grain rice like sushi rice or Arborio, and it mimics how rice cookers work by letting the rice absorb all the water gradually.
- Rinse and combine: Rinse 1 cup of rice, then add it to a pot with 2 cups of water (or follow package instructions). Stir once to prevent clumping.
- Bring to a boil: Heat over high heat until the water boils.
- Cover and simmer: Reduce heat to low, cover tightly, and simmer for 18–20 minutes. Do not lift the lid.
- Turn off heat and rest: After cooking, turn off the heat and let the rice rest, covered, for 10 minutes. This allows the steam to finish cooking the rice evenly.
- Fluff gently: Use a fork to separate the grains. Avoid pressing down—this compacts the rice.
This method produces moist, tender rice with a slightly clingy texture, ideal for risotto or Japanese-style meals.
Tips for Perfect Stovetop Rice
- Use a timer: Don’t rely on visual cues alone. Rice can go from undercooked to overcooked quickly.
- Adjust for altitude: At higher elevations, water boils at a lower temperature, so increase cooking time by 1–2 minutes.
- Try pre-soaking: Soak rice for 15–30 minutes before cooking to reduce cooking time and improve texture.
- Don’t peek while cooking: Every time you lift the lid, steam escapes, disrupting the cooking process.
Baking Rice in the Oven: A Hands-Off Alternative
When to Use the Oven Method
The oven method is excellent for multitasking. While your rice bakes unattended, you can chop vegetables, sear meat, or prep other parts of your meal. It’s also ideal when you want to free up your stovetop or cook larger batches.
How to Bake Rice Safely
- Preheat the oven: Set your oven to 375°F (190°C).
- Combine ingredients: In an oven-safe pot (with a lid), mix 1 cup of rinsed rice with 2 cups of water and a pinch of salt.
- Cover tightly: Seal the pot with its lid, or wrap the rim with foil to create an airtight seal.
- Bake for 40–45 minutes: Place the pot in the center of the oven. The rice should be tender and all water absorbed.
- Rest and fluff: Remove from oven, let sit for 10 minutes, then fluff with a fork.
For added flavor, substitute half the water with broth or add a bay leaf during cooking.
Safety Note:
Always use oven mitts when handling hot pots. Consider placing the pot on a trivet or heat-resistant surface to prevent damage to counters.
Cooking Different Types of Rice Without a Rice Cooker
White Rice (Long-Grain)
Basmati, jasmine, and American long-grain white rice cook best using the absorption or boil-and-drain methods. They yield light, fluffy grains that don’t clump.
Short-Grain Rice
Sushi rice and glutinous rice benefit from the absorption method. Their higher starch content creates a chewy, cohesive texture when cooked properly.
Brown Rice
Brown rice takes longer to cook due to its bran layer. Use the absorption method with a 1:2.5 ratio (1 cup rice to 2.5 cups water). Simmer for 40–45 minutes and rest for 10–15 minutes.
Packed or Instant Rice
Instant rice requires minimal effort—just follow package directions. Usually, it’s 1 cup rice to 1.5 cups water, boiled for 5–6 minutes. No soaking or draining needed.
Wild Rice
Wild rice is technically a grass seed, not true rice. It needs 45–60 minutes of boiling before switching to simmering. Use a 1:3 ratio and drain excess water.
Specialty Grains
- Arborio (for risotto): Toast in butter first, then add warm broth gradually while stirring.
- Black or purple rice: Similar to brown rice but cooks faster. Try 1:2.25 ratio.
- Red rice: Nutty flavor, chewy texture. Cook like brown rice but taste earlier for doneness.
Troubleshooting Common Rice Problems
Rice Is Too Dry or Crunchy
This usually means there wasn’t enough water or the heat was too high, causing rapid evaporation. Next time, increase water slightly or reduce heat. Also, ensure your pot lid fits tightly.
Rice Is Sticky or Gummy
Too much water or insufficient rinsing causes this. Always rinse long-grain rice, and don’t exceed the recommended water ratio. Fluffing immediately after resting helps separate grains.
Rice Sticks to the Bottom
This happens when heat is too high or the bottom of the pot gets scorched. Use medium-low heat and stir occasionally during the first few minutes. Adding a splash of oil or butter before cooking can prevent sticking.
Uneven Texture
Old rice absorbs water differently. Fresher rice tends to cook more evenly. Also, ensure uniform grain size—broken grains cook faster and may become mushy.
Cloudy Water After Cooking
This is normal! It’s caused by dissolved starches. Rinsing removes excess starch, but some remains—especially in short-grain rice. Just fluff and serve.
Pro Tips for Restaurant-Quality Rice
- Use room-temperature water: Cold water slows cooking; warm water helps heat transfer.
- Let rice come to room temp before cooking: Frozen rice can affect texture.
- Season the cooking water: Add a teaspoon of oil or butter for shine and flavor.
- Experiment with aromatics: Citrus zest, garlic, or herbs infuse subtle flavors.
- Store leftover rice properly: Cool completely, refrigerate in an airtight container, and reheat with a splash of water to revive moisture.
Conclusion: Mastering Rice Without a Machine
Cooking rice without a rice cooker isn’t just possible—it’s empowering. With the right tools, techniques, and a bit of attention to detail, you can produce consistently delicious rice using methods that have stood the test of time. Whether you prefer the control of the stovetop or the convenience of the oven, each method has its place in the kitchen.
Remember, practice makes perfect. Start with a simple white rice recipe, pay attention to your results, and tweak variables like water ratio or resting time based on your preferences. Soon, you’ll develop a feel for how your rice behaves—and that’s when real mastery begins.
So next time your rice cooker breaks or you’re craving something homemade, don’t panic. Grab a pot, measure your ingredients, and enjoy the satisfying process of turning raw grains into a nourishing staple. Your family and guests will never know you didn’t use a machine—because the rice will be that good.
Frequently Asked Questions
Can I cook rice without any water at all?
No, rice must be submerged in liquid to cook properly. Water is essential for hydration and heat transfer. However, you can use broth or stock instead for added flavor.
How do I store leftover rice safely?
Cool rice completely within two hours of cooking, then transfer to an airtight container and refrigerate for up to 4 days. Reheat with a damp paper towel covering to retain moisture.
Does rice need to be soaked before cooking?
Soaking isn’t required but helps reduce cooking time and improves texture, especially for brown rice. Soak for 15–30 minutes in cold water before cooking.
What’s the difference between rinsing and washing rice?
Rinsing refers to briefly running rice under cold water to remove surface starch. Washing implies longer soaking or scrubbing, which can leach nutrients—so stick to quick rinsing.
Can I freeze cooked rice?
Yes! Portion cooled rice into freezer bags or containers. Label with date and freeze for up to 1 month. Thaw overnight in the fridge before reheating.
Is it okay to cook rice in a slow cooker?
Yes, but it’s not ideal. Slow cookers cook rice slowly over several hours, which can make it mushy. If you must, use a 1:3 ratio and monitor closely—risks are higher for inconsistent results.