Making congee with cooked rice is not only possible—it’s simple and delicious! Whether you’re using leftover white rice or even brown rice, transforming it into a soothing bowl of congee requires just a few extra steps. This method works seamlessly in most rice cookers and gives you the same comforting texture you’d get from traditional congee. With minimal effort and maximum flavor, you can enjoy a nourishing meal anytime.
Key Takeaways
- Yes, cooked rice works perfectly for congee: Leftover rice absorbs liquid well and breaks down into a smooth, creamy consistency ideal for congee.
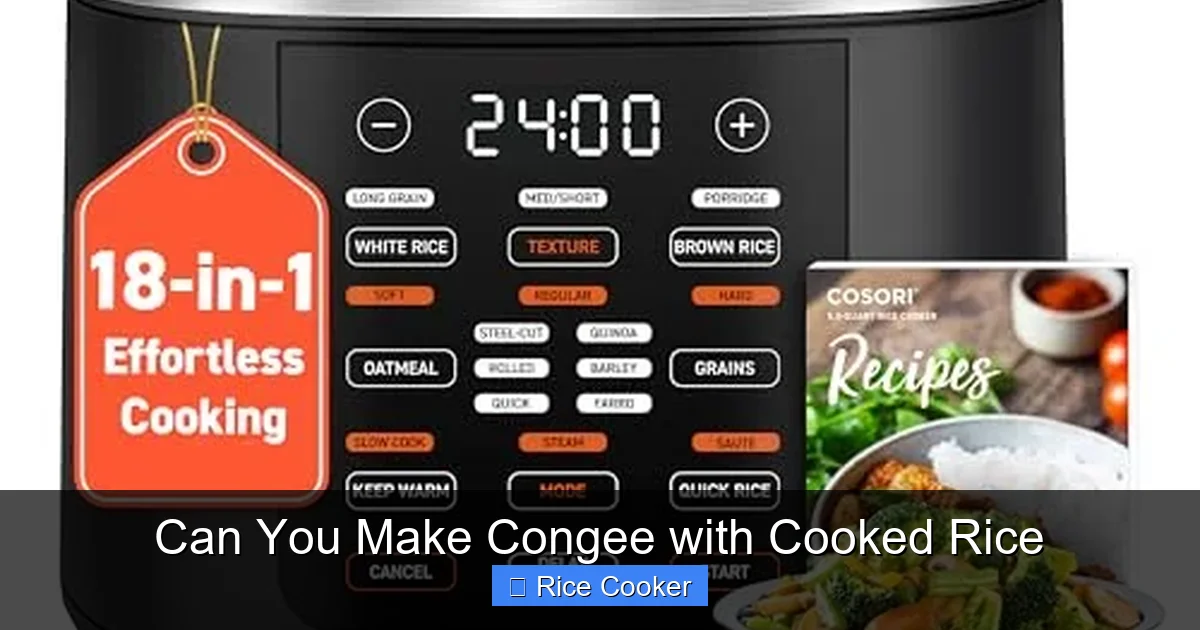
- Your rice cooker does the heavy lifting: Most modern rice cookers have a “porridge” or “congee” setting that adjusts heat and timing automatically.
- Adjust water-to-rice ratios carefully: Start with a 4:1 water-to-rice ratio and adjust based on desired thickness.
- Seasoning and flavor are key: Add salt, ginger, scallions, or broth early in cooking to infuse deep flavors.
- Texture control is essential: Stir occasionally during the first 10 minutes to prevent sticking and achieve the right creaminess.
- Storage and reheating work great: Congee made from cooked rice stores well and reheats beautifully in the microwave or stovetop.
📑 Table of Contents
- Can You Make Congee with Cooked Rice? The Simple Answer Is Yes!
- Why Choose Cooked Rice for Congee?
- The Science Behind Congee Texture
- Step-by-Step Guide: Making Congee with Cooked Rice in a Rice Cooker
- Stovetop Method: When Your Rice Cooker Isn’t Enough
- Flavor Variations and Toppings
- Common Mistakes and How to Fix Them
- Storing and Reheating Leftover Congee
- Tips for the Best Results Every Time
- Conclusion: Embrace the Versatility of Cooked Rice Congee
Can You Make Congee with Cooked Rice? The Simple Answer Is Yes!
Have you ever had leftover rice and wondered what to do with it? Instead of tossing it out, why not turn it into something warm, comforting, and delicious? That’s exactly what congee is—a beloved East Asian porridge made by simmering rice in water (or broth) until it breaks down into a thick, creamy consistency. And yes, you can absolutely make congee using cooked rice. In fact, it’s one of the easiest ways to repurpose last night’s dinner into a nourishing breakfast or light meal.
The beauty of making congee with already-cooked rice lies in its simplicity and adaptability. Whether you’re using plain steamed white rice, jasmine rice, basmati, or even brown rice, the process remains surprisingly straightforward. All you need is a good amount of liquid and a little patience. Plus, if you own a rice cooker (which most people do these days), you might be surprised at how well it handles this task—especially if it has a dedicated congee or porridge setting.
In this article, we’ll walk you through everything you need to know about making congee from cooked rice, including step-by-step instructions, tips for perfect texture, flavor ideas, and how to avoid common pitfalls. So grab your favorite bowl and let’s dive in!
Why Choose Cooked Rice for Congee?
Visual guide about Can You Make Congee with Cooked Rice
Image source: m.media-amazon.com
You might be thinking: “But isn’t congee usually made with raw rice soaked overnight?” That’s true for traditional versions, especially in Chinese cuisine where long-grain japonica rice is soaked and then slowly simmered for hours. However, using cooked rice skips the soaking step entirely and still delivers excellent results—especially when you’re short on time or just don’t feel like prepping rice the night before.
Cooked rice works because it’s already partially gelatinized (meaning the starches have started breaking down), so it softens faster and blends more easily with liquid. When you add hot water or broth to cooled rice and bring it to a boil while stirring, the grains begin to disintegrate quickly, creating that signature creamy texture we associate with congee.
Another advantage? You don’t need special equipment. A standard rice cooker—even an older model without fancy settings—can handle this conversion just fine. Modern rice cookers often include a “congee” or “porridge” function that maintains low, steady heat to prevent scorching while ensuring even cooking. But if yours doesn’t, fear not—you can still make great congee on the stove with a bit of attention.
The Science Behind Congee Texture
Before we get into recipes, let’s talk about why certain techniques yield better results than others. At its core, congee relies on starch breakdown. Raw rice contains tightly packed granules of starch that must be broken down through hydration and heat. Overnight soaking helps initiate this process, but cooked rice has already done half the work.
When you reheat cooked rice in liquid, two things happen:
– The residual moisture continues to penetrate the grain.
– Gentle, prolonged heating causes the starch molecules to swell and release amylose (the sticky component responsible for viscosity).
This is why congee made from cooked rice becomes so smooth and clingy—it’s essentially a mash of softened, blended grains held together by dissolved starches. The longer you cook it, the thinner and soupier it gets; shorter cooking yields a thicker, porridge-like consistency.
That said, overcooking can lead to a mushy texture. The trick is finding the sweet spot between creamy and chunky. Stirring regularly prevents clumping and ensures even heat distribution, especially important when using older rice cookers that may have hot spots.
Step-by-Step Guide: Making Congee with Cooked Rice in a Rice Cooker
Ready to try it yourself? Here’s a foolproof method for turning leftover rice into restaurant-quality congee using your rice cooker.
Gather Your Ingredients
- 2 cups cooked rice (white or brown)
- 6–8 cups water or low-sodium chicken/vegetable broth (start with 6, adjust later)
- Salt (about ½ teaspoon, plus more to taste)
- Optional flavor boosters: fresh ginger (grated), garlic (minced), scallions (chopped), soy sauce, sesame oil
Prepare the Rice Cooker
If your rice cooker has a dedicated “congee” or “porridge” setting, select it now. This mode typically runs for 30–60 minutes at a lower temperature than regular rice cooking, which mimics the gentle simmer needed for proper starch release.
If your machine only has a “cook” or “warm” setting, you’ll need to monitor the process closely—more on that below.
Add Rice and Liquid
Pour the cooked rice into the inner pot of the rice cooker. Then gradually add water or broth while stirring gently to break up any clumps. Aim for a starting ratio of about 4 parts liquid to 1 part rice. If you prefer thicker congee, use closer to 3:1; for soupier versions, go up to 5:1.
Don’t forget your seasonings! Add salt and any aromatics like grated ginger or minced garlic right away—they’ll infuse throughout the cooking process.
Cook and Stir
Close the lid and start the selected setting. During the first 10–15 minutes, open the lid occasionally and stir from the bottom upward to prevent sticking and promote even softening. After the initial phase, you can leave the lid closed—most rice cookers will maintain the right temperature automatically.
Total cooking time varies: around 20–30 minutes for most models, though some high-end units may take up to 45 minutes on their congee setting. The rice should become very soft and fully incorporated into a uniform mixture.
Taste and Adjust
Once done, give it a taste. Does it need more salt? A splash of soy sauce for umami? A drizzle of sesame oil for aroma? Feel free to customize to your liking.
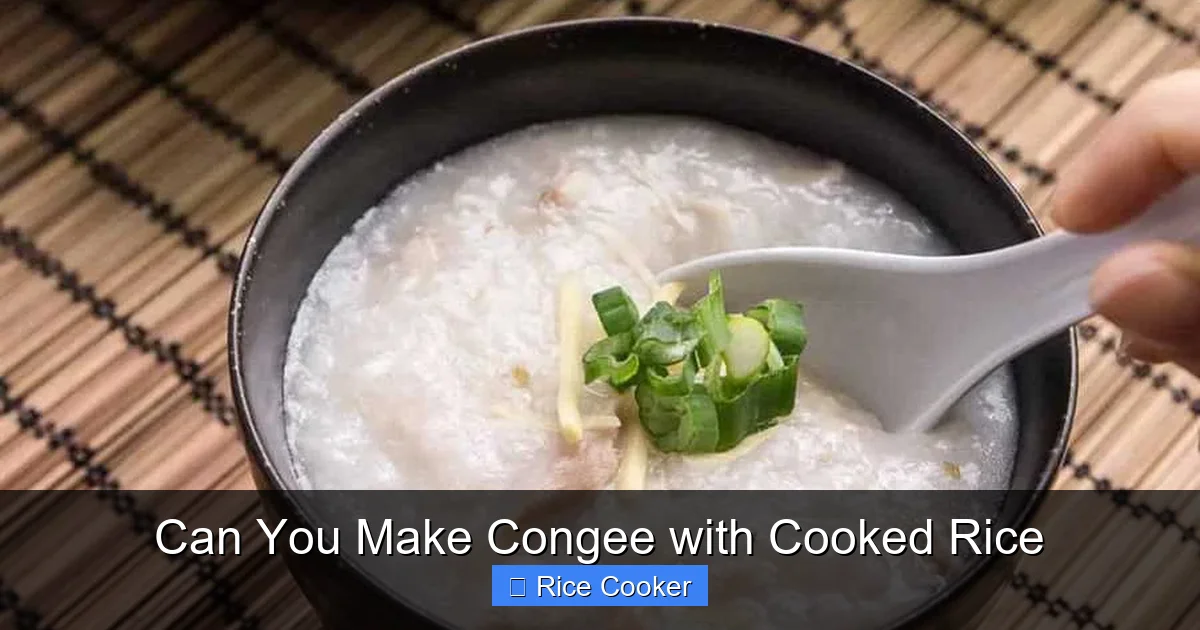
Serve hot, garnished with chopped scallions, a soft-boiled egg, nori strips, or a sprinkle of furikake (Japanese rice seasoning). It pairs wonderfully with pickled vegetables, kimchi, or a side of grilled fish.
Stovetop Method: When Your Rice Cooker Isn’t Enough
Not all rice cookers are created equal—some lack dedicated congee functions or simply can’t sustain the long, slow simmer required for perfect texture. If you find your machine isn’t delivering the results you want, consider finishing the job on the stovetop.
Here’s how:
Bring to a Boil First
In a medium saucepan, combine the cooked rice with 6 cups of water or broth over high heat. Bring to a rolling boil, scraping the bottom occasionally to prevent scorching.
Simmer Gently
Reduce heat to low-medium and let it simmer uncovered for 20–30 minutes, stirring every 5–7 minutes. The goal is gradual breakdown—not rapid boiling, which can cause uneven texture.
Check Consistency Often
Every 5 minutes, check the thickness. When the rice has lost its individual grains and forms a cohesive paste, you’re done. Add more liquid if needed.
This hybrid approach gives you the convenience of pre-cooked rice with the control of direct heat—perfect for customizing texture and flavor.
Flavor Variations and Toppings
One of the best things about congee is its versatility. Once you master the basics, you can experiment endlessly. Here are a few popular styles:
Classic Plain Congee
Keep it simple with just salt and maybe a pinch of white pepper. Traditional Chinese restaurants often serve this with preserved eggs (century eggs), pickled mustard greens, or dried shrimp.
Chicken Congee
Sauté diced chicken breast in a little oil until lightly browned. Add it to the pot along with stock instead of water. Cook until chicken is tender and rice is creamy. Finish with soy sauce and green onions.
Miso Congee
Warm miso paste in a small amount of broth, then stir into finished congee off the heat. Top with blanched spinach, shiitake mushrooms, and a poached egg.
Sweet Red Bean Congee
Use cooked adzuki beans mixed with rice and water. Sweeten with sugar or honey and top with roasted peanuts or sesame seeds.
No matter the variation, always add delicate ingredients (like herbs or soft cheeses) after cooking to preserve their flavor and texture.
Common Mistakes and How to Fix Them
Even experienced cooks run into hiccups when making congee. Here’s how to avoid (and fix) the most common issues:
Too-Thick or Clumpy
Cause: Not enough liquid or insufficient stirring early on.
Fix: Add warm water or broth gradually while whisking vigorously. If it’s too thick after cooking, thin it out with hot liquid and blend with an immersion blender.
Grainy Texture
Cause: Overcooked or undercooked rice, or not enough blending.
Fix: Use only fully cooked, fluffy rice. Blend halfway through cooking for smoother results. Avoid over-stirring late in the process, as it can reintroduce air and create foam.
Off-Flavors or Bitter Taste
Cause: Too much salt added too early, or burnt edges due to high heat.
Fix: Salt at the beginning is fine, but don’t oversalt. If burning occurs, immediately transfer to a clean pot and rinse briefly with cold water (this removes excess starch and stops further cooking).
Watery Result
Cause: Excess liquid or too much evaporation.
Fix: Simmer longer to reduce, or mix a slurry of cornstarch and water to thicken gently.
Storing and Reheating Leftover Congee
Congee actually improves with age—well-made congee develops richer flavors as it sits. Store it in an airtight container in the refrigerator for up to 5 days. To reheat, microwave in 30-second intervals with a splash of water to restore creaminess, or warm on the stove over low heat while stirring frequently.
Avoid freezing unless you plan to use it within a month. Thawed congee can become slightly grainy, but it’s still edible—just blend it briefly before serving.
Tips for the Best Results Every Time
– **Use room-temperature rice:** Cold rice won’t steam properly; let it sit at room temp for 15 minutes before adding liquid.
– **Don’t skip the initial stir:** Even if your rice cooker has a congee setting, give it a quick stir at the start to break up clumps.
– **Experiment with ratios:** Keep a log of water-to-rice amounts so you can replicate your favorite texture.
– **Add liquids gradually:** Especially if you’re unsure about consistency—better to add more than take away.
– **Respect the simmer:** Low, steady heat beats high heat every time. Patience pays off.
Conclusion: Embrace the Versatility of Cooked Rice Congee
So, can you make congee with cooked rice? Absolutely—and it might just become your new go-to technique for repurposing leftovers. Whether you’re using a modern smart rice cooker or a trusty old model, the process is forgiving, fast, and adaptable to your tastes. From savory broths to sweet fruit compotes, congee offers endless possibilities for comfort food lovers.
Plus, making congee this way saves time and reduces waste—two big wins for both your kitchen and the planet. Next time you have leftover rice, don’t pitch it. Transform it into a nourishing, soul-warming bowl that’s perfect for breakfast, lunch, or dinner. Your future self (and your taste buds) will thank you.
Frequently Asked Questions
Can I use any type of cooked rice for congee?
Yes, most types work well—white rice (like jasmine or basmati), brown rice, even glutinous rice. Brown rice takes longer to soften, so you may need to add more liquid and cook a bit longer. Just remember that different grains have varying starch content, which affects final texture.
How much water should I add per cup of cooked rice?
Start with 4 cups of liquid for every 1 cup of cooked rice. Adjust based on preference: 3:1 for thicker congee, 5:1 for soupier versions. Always add water gradually if you’re unsure—you can always thin it more, but it’s harder to make thicker again.
Do I need a special rice cooker for congee?
Nope! While newer models with dedicated “congee” or “porridge” settings make the process easier, even basic rice cookers can handle it. If your machine lacks those settings, finish the cooking on the stovetop for full control over texture and flavor.
Why does my congee turn out grainy?
Graininess usually comes from overcooked or undercooked rice not breaking down completely. Make sure you’re using fully cooked, fluffy rice and stir frequently during the first 10–15 minutes. Blending halfway through also helps.
Can I make congee ahead of time?
Absolutely! Well-made congee stores beautifully in the fridge for up to 5 days. Reheat gently on the stove or in the microwave with a splash of water to restore creaminess. It actually develops deeper flavors over time.
Is congee healthy?
Yes, especially when made with whole grains, lean proteins, and plenty of veggies. It’s easy to digest, hydrating, and rich in nutrients. Just watch added sugars or excessive sodium if you’re managing health conditions like diabetes or hypertension.