
Can an air fryer cook rice? Absolutely! With the right water-to-rice ratio and cooking time, your air fryer can produce tender, fluffy rice just like a rice cooker. Whether you’re making white, brown, or even sushi rice, the air fryer offers a quick, hands-off method that saves time and energy.
Key Takeaways
- Understanding can airfryer cook rice: Provides essential knowledge
📑 Table of Contents
- Can Air Fryer Cook Rice? The Surprising Truth
- The Science Behind Cooking Rice
- Which Types of Rice Work Best in an Air Fryer?
- Essential Tools and Ingredients
- Step-by-Step Guide: How to Cook Rice in an Air Fryer
- Pro Tips for Perfect Air-Fried Rice
- Common Mistakes and How to Avoid Them
- Air Fryer vs. Traditional Methods: A Quick Comparison
- Creative Ways to Serve Air-Fried Rice
- Frequently Asked Questions About Air Fryer Rice
- Final Thoughts: Why You Should Try Air-Frying Rice
Can Air Fryer Cook Rice? The Surprising Truth
Have you ever stood over a pot of boiling rice on the stove, worried about burning the bottom or guessing the perfect water ratio? Or maybe you’re short on counter space and don’t own a rice cooker? If so, you’ll be thrilled to know: yes, an air fryer can absolutely cook rice. In fact, it might just become your new favorite way to make it.
Air fryers are best known for crisping up chicken wings, roasting sweet potatoes, and reheating pizza. But beneath that crispy exterior lies a surprisingly capable cooking machine—one that can handle grains like rice with impressive results. With just a few adjustments to technique and timing, your air fryer can deliver fluffy, evenly cooked rice without the constant stirring or babysitting required on the stovetop.
In this comprehensive guide, we’ll walk you through everything you need to know about cooking rice in an air fryer—from choosing the right type of rice to mastering the water ratio, adjusting cook times, and even adding flavor. Whether you’re a busy parent, a college student living off instant meals, or simply someone who loves experimenting in the kitchen, you’ll find practical, easy-to-follow advice that makes air frying rice feel like second nature.
The Science Behind Cooking Rice
Before diving into the steps, let’s quickly cover why rice needs water—and how heat transforms it. Rice is essentially starchy seeds. When you add water and heat, the outer layer (the hull) softens. Then, as steam builds, the starches inside absorb moisture and begin to gelatinize, turning solid grain into tender, edible rice.
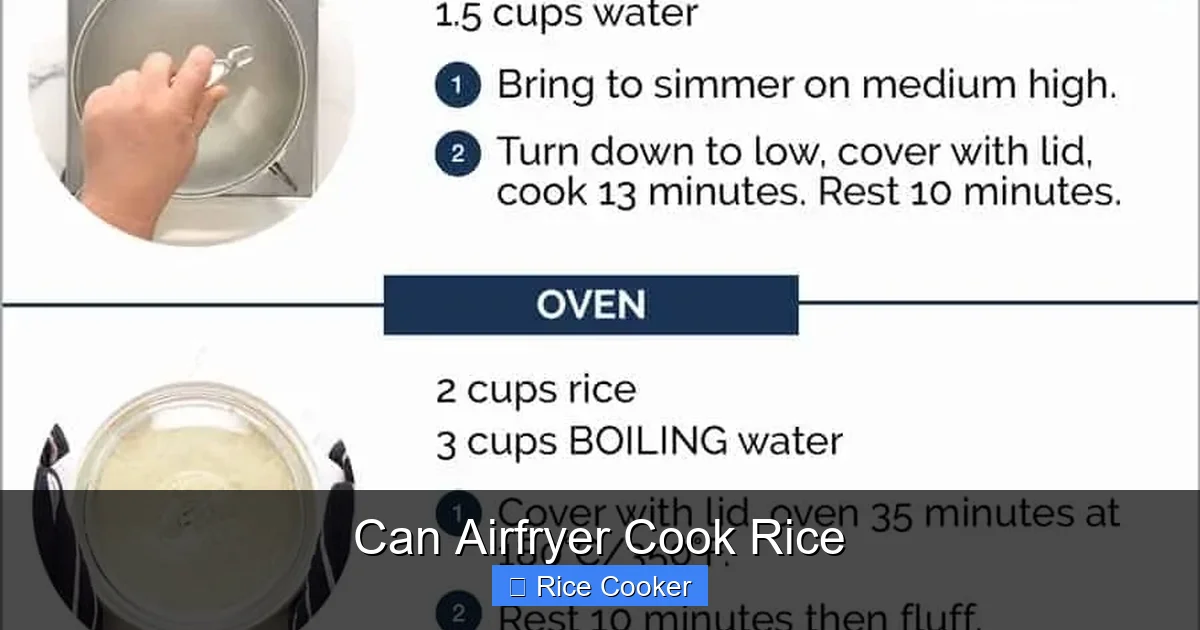
Visual guide about Can Airfryer Cook Rice
Image source: recipetineats.com
Why Water Is Essential
Water doesn’t just hydrate the rice—it enables the transformation of raw grain into something delicious. Without enough water, rice stays hard and chewy. Too much, and it becomes mushy. Finding the right balance is key, whether you’re using a rice cooker, stovetop, or air fryer.
How Heat Transforms Rice
Heat does two things: it evaporates excess water and helps the grains expand and soften. In a rice cooker, steam circulates evenly, creating consistent results. In an air fryer, hot, circulating air performs a similar function—though not identically, it gets close enough to yield great results.
Which Types of Rice Work Best in an Air Fryer?
Not all rice is created equal—and some types adapt better to air frying than others. Here’s what works (and what doesn’t):
- White rice — Short or medium-grain white rice (like Jasmine or Basmati) cooks beautifully in an air fryer. It absorbs water well and turns out fluffy.
- Brown rice — Yes, it’s possible! Brown rice takes longer due to its higher fiber content, but it can still work if you adjust the water and time.
- Sushi rice — Perfect for sushi lovers! Short-grain sticky rice comes out moist and clingy when air fried properly.
- Wild rice — Not recommended. Wild rice has a different texture and requires special handling that air fryers aren’t optimized for.
- Cooked leftover rice — You can reheat leftover rice in the air fryer for 3–4 minutes at 350°F (175°C) to restore crispness.
For beginners, start with white rice—it’s forgiving and widely available. As you gain confidence, experiment with brown or sushi rice.
Essential Tools and Ingredients
To cook rice in your air fryer successfully, you’ll need:
- Airtight or microwave-safe container (see note below)
- Measuring cup and spoon
- Fine-mesh strainer (optional, for rinsing)
- Non-stick cooking spray or oil (optional but helpful)
What Container Should You Use?
You can’t use the air fryer basket directly because rice needs to sit in liquid during cooking. Instead, choose a container that fits snugly inside your air fryer—ideally one that’s oven-safe and has a lid. Popular options include:
- Small glass baking dish with lid
- Microwave-safe bowl covered with foil
- Parchment-lined ceramic ramekin
- Dedicated rice-cooking insert (some air fryers come with these)
Make sure your container is large enough to allow steam to circulate slightly, but not so big that the rice spreads too thin.
Step-by-Step Guide: How to Cook Rice in an Air Fryer
Ready to try it? Follow these simple steps for foolproof rice every time.
Step 1: Measure Your Rice and Water
The golden rule: 1 cup dry rice : 1.25–1.5 cups water. Adjust based on rice type:
- White rice: 1 cup rice + 1.25 cups water
- Brown rice: 1 cup rice + 1.5 cups water (and longer cook time)
- Sushi rice: 1 cup rice + 1.1 cups water
- Aluminum foil (punctured with toothpick)
- Glass lid or plastic wrap secured with rubber band
- Steam vent cover (available online)
- White rice: 18–20 minutes
- Brown rice: 25–30 minutes
- Sushi rice: 15–17 minutes
- Use a timer — Air fryers can be noisy; set a phone alarm so you don’t overcook.
- Don’t overcrowd** — Stick to one cup of dry rice per batch for best results.
- Check halfway** — Lift the lid gently to peek. If water’s gone but rice isn’t tender, add 1 tablespoon of water and cook 2 more minutes.
- Fluff while warm** — Fluffing after resting gives fluffiest results.
- Clean immediately** — Starchy residue sticks easily. Rinse containers right after use.
- Fried rice**: Sauté diced veggies and protein in oil, then stir in cooled air-fried rice. Cook 5 minutes until heated through.
- Arroz con pollo**: Cook chicken thighs in the same container before adding rice and broth.
- Risotto-style**: Add warm broth gradually while stirring for creamy texture.
- Stuffed peppers**: Mix rice with beans, corn, and cheese, then stuff into bell peppers and air fry 15 minutes.
- Onigiri (Japanese rice balls)**: Shape cooled rice into triangles, wrap in nori, and air fry 3–4 minutes for crispy exterior.
Use a standard measuring cup—don’t pack the rice down.
Step 2: Rinse the Rice (Optional but Recommended)
Rinsing removes excess starch, which prevents clumping. Place rice in a fine-mesh strainer and rinse under cold water until the water runs clear. Drain well.
Step 3: Add Rice and Water to Container
Transfer rinsed rice and water into your chosen container. If desired, add a pinch of salt or a teaspoon of oil for flavor and texture.
Step 4: Cover the Container Securely
Lid options:
Securing the lid prevents water from splashing out during cooking.
Step 5: Preheat Your Air Fryer (Optional)
Preheating ensures even heat distribution. Set to 375°F (190°C) for 3–5 minutes before adding rice.
Step 6: Cook the Rice
Place the container in the air fryer basket. Close the door and cook:
Halfway through, gently lift the lid (carefully!) to check consistency. If water remains, return to air fryer for 2–3 more minutes.
Step 7: Let It Rest
Once done, remove the container and let rice rest for 5 minutes with the lid on. This allows residual steam to finish cooking the grains evenly.
Step 8: Fluff and Serve
Use a fork to fluff the rice. Serve immediately or store for later.
Pro Tips for Perfect Air-Fried Rice
Want to take your rice game to the next level? Try these expert tricks:
Common Mistakes and How to Avoid Them
Even seasoned air fryer users can run into issues. Here’s how to troubleshoot:
Mistake #1: Using Too Little Water
Result: Hard, undercooked rice.
Fix: Always follow the 1:1.25–1.5 water ratio. Err on the side of more water.
Mistake #2: Not Securing the Lid
Result: Water spills, scorched bottom, uneven cooking.
Fix: Use foil with a small hole or a proper lid. Test fit before cooking.
Mistake #3: Skipping the Resting Period
Result: Wet, gummy texture.
Fix: Always let rice rest 5 minutes after cooking.
Mistake #4: Overcooking
Result: Mushy, broken grains.
Fix: Start with shorter times and check halfway through.
Air Fryer vs. Traditional Methods: A Quick Comparison
Let’s compare how air fryer rice stacks up against other popular methods:
| Method | Time | Ease of Use | Texture | Cleanup |
|---|---|---|---|---|
| Stovetop | 20–30 min | Medium | Variable | High (burned bits) |
| Rice Cooker | 20–25 min | Very Easy | Consistent | Low |
| Instant Pot | 15 min (pressure) | Easy | Fluffy | Medium |
| Air Fryer | 18–30 min | Easy | Fluffy (with practice) | Low-Medium |
The air fryer sits between the Instant Pot and traditional stovetop methods—offering speed, consistency, and minimal active cooking time.
Creative Ways to Serve Air-Fried Rice
Plain rice is great—but here are fun ways to elevate it:
Frequently Asked Questions About Air Fryer Rice
Can I cook brown rice in an air fryer?
Yes! Brown rice takes longer due to its bran layer. Use 1.5 cups water per 1 cup rice and cook 25–30 minutes at 375°F (190°C). Let it rest 5 minutes before fluffing.
Do I need to soak rice before air frying?
No soaking required. Unlike stovetop methods, air fryers rely on direct heat and steam, so soaking isn’t necessary—just rinse first.
Can I cook rice directly in the air fryer basket?
Not recommended. Rice needs to sit in water during cooking, which would splash and create mess. Always use a covered container.
How do I prevent rice from sticking to the container?
Lightly spray the container with non-stick cooking spray before adding rice. Also, avoid moving the container during cooking.
Can I cook multiple types of rice at once?
Only if they have similar cook times. For example, white and sushi rice both cook around 18 minutes. Brown rice needs extra time, so cook separately.
Is air-fried rice safe to eat?
Absolutely. Just ensure the internal temperature reaches 165°F (74°C) and follow food safety guidelines. Leftovers should be refrigerated within 2 hours.
Final Thoughts: Why You Should Try Air-Frying Rice
If you’ve been hesitant to ditch your rice cooker, consider giving air frying rice a shot. It’s efficient, uses less energy than boiling, and frees up your stove for other dishes. Plus, the hands-off approach is perfect for busy days when you want a healthy, home-cooked meal without the hassle.
Remember: practice makes perfect. Your first batch might not be flawless—and that’s okay. Tweak the water ratio, check halfway through, and soon you’ll have restaurant-quality rice ready in under 20 minutes.
So go ahead—grab your air fryer, measure out some rice, and discover a whole new way to enjoy this kitchen staple. Who knew such a compact appliance could do so much?
Frequently Asked Questions
Can I cook brown rice in an air fryer?
Yes! Brown rice takes longer due to its bran layer. Use 1.5 cups water per 1 cup rice and cook 25–30 minutes at 375°F (190°C). Let it rest 5 minutes before fluffing.
Do I need to soak rice before air frying?
No soaking required. Unlike stovetop methods, air fryers rely on direct heat and steam, so soaking isn’t necessary—just rinse first.
Can I cook rice directly in the air fryer basket?
Not recommended. Rice needs to sit in water during cooking, which would splash and create mess. Always use a covered container.
How do I prevent rice from sticking to the container?
Lightly spray the container with non-stick cooking spray before adding rice. Also, avoid moving the container during cooking.
Can I cook multiple types of rice at once?
Only if they have similar cook times. For example, white and sushi rice both cook around 18 minutes. Brown rice needs extra time, so cook separately.
Is air-fried rice safe to eat?
Absolutely. Just ensure the internal temperature reaches 165°F (74°C) and follow food safety guidelines. Leftovers should be refrigerated within 2 hours.