
Cooking rice on the stove is not only possible—it’s simple and effective. With the right water-to-rice ratio and heat control, you can achieve perfectly fluffy or tender grains just like with an electric rice cooker. Whether you’re preparing a quick dinner or meal prepping for the week, stovetop cooking gives you full control over texture and flavor.
Key Takeaways
- Yes, you can cook rice on the stove – it’s one of the most traditional and accessible methods, requiring just a pot, water, and a heat source.
- Proper water-to-ratio is essential – typically 1:2 (rice to water), but adjustments depend on rice type and desired texture.
- Heat control makes all the difference – start high to boil, then reduce to low to simmer and absorb moisture evenly.
- Covering the pot properly helps – use a tight-fitting lid or vented cover to trap steam and prevent drying out.
- Resting time improves results – letting rice sit off-heat for 5–10 minutes allows steam to finish cooking and fluffs the grains.
- Cleaning is straightforward – rinsing before cooking removes excess starch; no need for special tools after cooking.
- It’s cost-effective and versatile – stovetop cooking uses common kitchen gear and works with any type of rice.
📑 Table of Contents
- Can I Cook Rice on the Stove? Absolutely—Here’s How
- Why Choose the Stovetop Method?
- Choosing the Right Equipment
- Selecting the Best Type of Rice
- Step-by-Step Guide to Cooking Rice on the Stove
- Common Mistakes and How to Fix Them
- Tips for Perfect Stovetop Rice Every Time
- Stovetop Rice vs. Rice Cooker: Which Is Better?
- How to Store and Reheat Leftover Stovetop Rice
- Creative Ways to Use Your Perfectly Cooked Stovetop Rice
- Conclusion: Master the Stovetop and Never Fear Rice Again
Can I Cook Rice on the Stove? Absolutely—Here’s How
If you’ve ever wondered whether cooking rice on the stove is a viable option, the short answer is yes—and it’s actually one of the oldest and most reliable ways to prepare this staple grain. Unlike electric rice cookers that rely on precise temperature sensors and timers, stovetop cooking gives you direct control over heat, water, and timing. While it may take a little more attention than tossing rice into a rice cooker, the payoff is fresh, aromatic, and perfectly textured rice every single time.
In this guide, we’ll walk through everything you need to know about cooking rice on the stove, from selecting the right pot to mastering water ratios and heat management. You’ll also discover pro tips to avoid common pitfalls like mushy or undercooked grains. Whether you’re new to cooking rice or just looking to expand your kitchen skills, this comprehensive guide will help you master the art of stovetop rice.
Why Choose the Stovetop Method?
While rice cookers are convenient and consistent, many home cooks still prefer the stovetop method for several reasons. First, it requires minimal equipment—just a heavy-bottomed pot with a lid. Second, it offers greater flexibility in adjusting water levels and cooking times based on rice variety. And third, stovetop cooking allows you to multitask: while rice simmers, you can chop vegetables, sauté proteins, or season sauces.
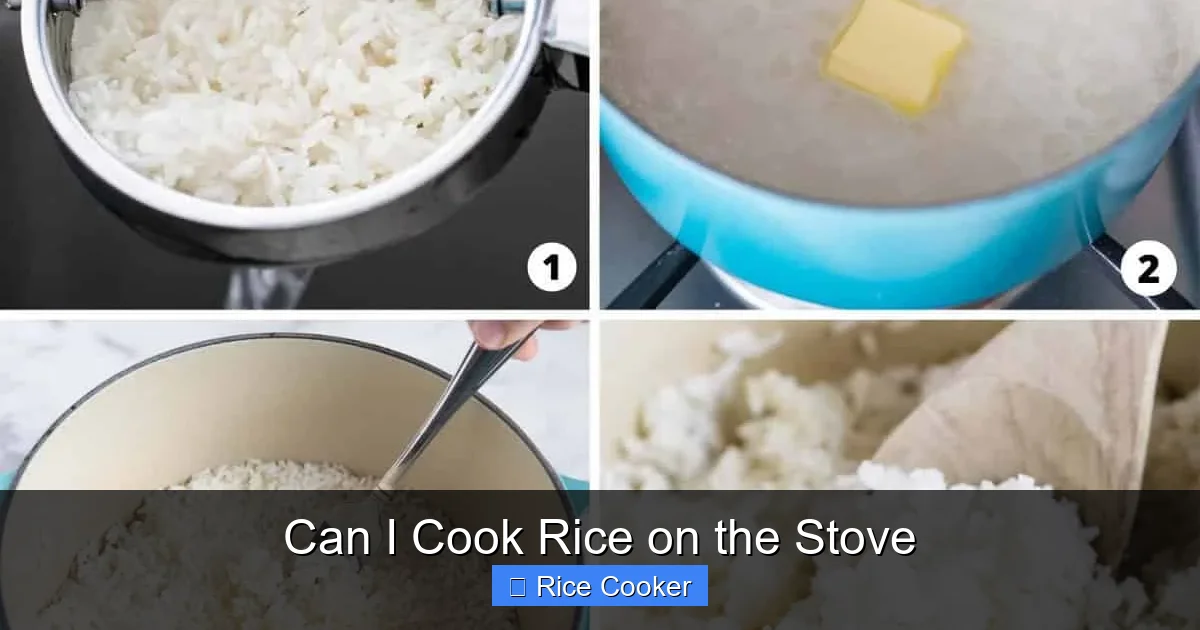
Visual guide about Can I Cook Rice on the Stove
Image source: iheartnaptime.net
Another advantage is taste. Because you’re actively monitoring the process, you can adjust seasonings, add herbs, or even toast the rice slightly before adding water for deeper flavor. Plus, there’s something satisfying about watching steam rise from a bubbling pot—a sensory cue that your meal is coming together.
Common Misconceptions About Stovetop Rice Cooking
Some people assume that stovetop rice always ends up either burnt at the bottom or soggy throughout. But with the right technique, these issues are easily avoidable. The key lies in understanding how heat interacts with rice and water, and making small, intentional adjustments as needed.
For example, using too much water or keeping the flame too high can lead to overcooked or mushy rice. Conversely, insufficient water or aggressive stirring can cause uneven cooking or sticking. By learning how to balance these factors, you’ll soon find that stovetop rice rivals—or even surpasses—rice cooker results in texture and aroma.
Choosing the Right Equipment
Before you begin, make sure you have the right tools. Not every pot works well for rice, especially if it has a thin bottom or doesn’t seal tightly when covered.
The Ideal Pot for Stovetop Rice
A heavy-bottomed saucepan or Dutch oven with a tight-fitting lid is ideal. The thick base distributes heat evenly, preventing hot spots that can burn the rice. A flat-bottomed pot also ensures maximum contact with the burner, improving efficiency.
Glass lids work fine, but metal ones tend to conduct heat better and seal more effectively. Avoid non-stick pans unless they’re labeled as safe for high-heat cooking—some coatings degrade when exposed to prolonged boiling temperatures.
Do You Need a Rice Cooker-Like Lid?
Not necessarily. While some advanced rice cookers feature specialized vents or pressure-release systems, standard pots work perfectly fine if used correctly. Just ensure your lid fits snugly so steam doesn’t escape prematurely, which could dry out your rice.
If your lid doesn’t seal tightly, you can improvise by placing a clean towel between the pot and lid to block gaps, or use a piece of foil to create a makeshift seal.
Selecting the Best Type of Rice
Different types of rice require slightly different techniques, but all can be successfully cooked on the stovetop. Here’s a quick overview:
Long-Grain White Rice (e.g., Jasmine, Basmati)
This is the most common type used in Western kitchens and works great on the stove. It’s light, fluffy, and pairs well with stir-fries, curries, and side dishes. For best results, rinse until the water runs clear to remove surface starch.
Medium- and Short-Grain Rice (e.g., Arborio, Calrose)
These varieties are stickier and creamier, often used in risotto or sushi. They absorb less water than long-grain rice and benefit from constant stirring during the last few minutes of cooking to develop that signature creamy consistency.
Brown Rice
Brown rice takes longer to cook because the bran layer slows down water absorption. Use a higher water ratio (about 1:2.5) and extend cooking time by 10–15 minutes. Soaking the rice overnight can also improve texture.
Pigmented or Wild Rice
Wild rice has a nutty flavor and chewy texture. It requires even more water (up to 4 parts water per 1 part rice) and longer cooking times (up to 45 minutes). Patience pays off here!
Step-by-Step Guide to Cooking Rice on the Stove
Now that you’ve got your ingredients and equipment ready, let’s dive into the actual process. Follow these steps for foolproof results every time.
Step 1: Rinse the Rice Thoroughly
Place your rinsed rice in a fine-mesh strainer and rinse under cold running water. Swirl the rice around gently and continue rinsing until the water runs clear. This removes excess starch, which prevents clumping and helps achieve fluffiness.
Note: Do not skip this step with white rice—it makes a noticeable difference in final texture.
Step 2: Measure Water Accurately
The classic rule is 1 cup of rice to 2 cups of water for most white rice varieties. However, this can vary:
- Long-grain white rice: 1:2 ratio
- Brown rice: 1:2.25 to 1:2.5
- Short-grain or sushi rice: 1:1.5
- Wild or black rice: 1:3 to 1:4
Use measuring cups specifically designed for dry ingredients (not liquid cups) for accuracy. Too much water = mushy rice; too little = hard, chalky grains.
Step 3: Combine Rice and Water in the Pot
Add rinsed rice and measured water to your heavy-bottomed pot. Stir once to combine, then bring to a rolling boil over medium-high heat.
At this stage, avoid covering the pot yet—you want to see the water come to a full boil so the rice can start absorbing moisture evenly.
Step 4: Bring to Boil, Then Reduce Heat
Once the water reaches a vigorous boil, immediately reduce the heat to low—just enough to maintain a gentle simmer. Cover the pot with its lid, making sure it fits snugly.
Let the rice simmer undisturbed for the recommended time. Most white rice takes 15–18 minutes; brown rice needs 35–45 minutes. Resist the urge to peek or stir—opening the lid lets precious steam escape, which can leave your rice undercooked.
Step 5: Turn Off Heat and Let Sit
After the timer goes off, turn off the heat but keep the pot covered. Allow the rice to rest for 5–10 minutes. This resting period allows residual heat to finish cooking the center of each grain and lets excess steam dissipate, resulting in fluffier rice.
Step 6: Fluff and Serve
Remove the lid carefully (watch for escaping steam!), then use a fork to gently fluff the rice. This breaks up any clumps and redistributes moisture evenly. Serve immediately while warm.
Common Mistakes and How to Fix Them
Even experienced cooks occasionally run into problems. Here are the most frequent issues—and how to fix them fast.
Mushy or Sticky Rice
This usually happens due to too much water or insufficient draining after rinsing. To fix it, scoop out extra water before boiling, or drain thoroughly after cooking and fluff vigorously to separate grains.
Rice Sticks to the Bottom
Thin-bottomed pots or excessive stirring can cause scorching. Switch to a heavier pot, avoid stirring once boiling begins, and consider adding a splash of oil or butter to the water to prevent sticking.
Undercooked or Gummy Center
If the middle of your rice is still firm or doughy, it likely didn’t get enough time or heat. Return the pot to low heat, add a tablespoon of water, cover, and simmer for another 3–5 minutes. Repeat if necessary.
Burnt Edges
This occurs when heat is too high or the pot isn’t heavy enough. Lower the flame immediately, add more water if needed, and transfer the rice to a fresh pot if burnt bits are extensive.
Tips for Perfect Stovetop Rice Every Time
Want to elevate your rice game? Try these expert-approved tricks.
Toast the Rice First
For extra depth of flavor, heat a bit of oil or butter in the pot before adding rice. Sauté for 1–2 minutes until fragrant, then add water and proceed as usual. This technique adds richness, especially good with brown or wild rice.
Use Broth Instead of Water
Swap plain water for chicken, vegetable, or bone broth to infuse subtle savory notes. Just remember to reduce salt in other parts of the meal since broth adds sodium.
Try the “Absorption” vs. “Boiling” Method
Most recipes recommend the absorption method (boil, then simmer covered). But for very delicate rice like basmati, you can try the “boiling” method: bring water to a boil, add rice, then return to boil for 1 minute. Drain excess water through a colander and steam covered for 10 minutes. This yields lighter, less sticky results.
Don’t Overfill the Pot
Never fill your pot more than halfway with rice and water combined. Rice expands as it cooks, so overcrowding leads to uneven texture and potential overflow.
Stovetop Rice vs. Rice Cooker: Which Is Better?
Both methods have their pros and cons. Let’s break them down side by side.
Convenience
Rice cooker: Set it and forget it—ideal for busy schedules.
Stovetop: Requires active attention during boiling phase but offers more hands-on control.
Consistency
Rice cooker: Very consistent results, especially for beginners.
Stovetop: Results depend on your skill level, but experienced cooks often prefer the nuanced control.
Taste and Texture
Rice cooker: Tends to produce uniformly soft grains; may lack slight browning or aroma from toasting.
Stovetop: Can develop richer flavors through toasting or broth infusion; texture varies slightly between batches.
Cost and Maintenance
Rice cooker: One-time purchase, easy to clean, but can malfunction or wear out.
Stovettop: Uses existing pots; no special maintenance, but requires more cleanup if rice sticks.
In short, choose a rice cooker for convenience and consistency, or go stovetop for customization and flavor depth.
How to Store and Reheat Leftover Stovetop Rice
Proper storage keeps leftover rice safe and tasty.
Cooling and Refrigeration
Spread cooked rice on a baking sheet to cool quickly within 1 hour of cooking. Once cooled, transfer to an airtight container and refrigerate for up to 5 days.
Freezing Tips
Portion rice into freezer-safe bags or containers. Label with date and use within 2 months. Thaw overnight in the fridge before reheating.
Reheating Without Drying Out
Steam is your friend! Place rice in a microwave-safe dish, sprinkle with a tablespoon of water, cover with damp paper towel, and heat on high for 30–60 seconds. Stir halfway through. Alternatively, reheat in a skillet over low heat with a splash of water or broth.
Creative Ways to Use Your Perfectly Cooked Stovetop Rice
Fluffy rice isn’t just for sides—it’s the foundation of countless global cuisines.
Bowl Bowls and Grain Bowls
Layer rice with roasted veggies, grilled protein, avocado, and a drizzle of tahini or soy-ginger sauce for a satisfying plant-based meal.
Fried Rice and Stir-Fries
Cook rice a day ahead so it’s slightly dry. Fry with eggs, shrimp, broccoli, and a savory sauce for restaurant-quality fried rice.
Sushi and Sashimi Rice
Short-grain rice works best here. Mix with seasoned rice vinegar, sugar, and salt while still warm. Cool completely before rolling.
Risotto
Simmer rice slowly with broth, stirring constantly, until creamy and al dente. Add Parmesan, mushrooms, or truffle oil for luxury.
Breakfast Rice Pudding
Cook rice with milk, cinnamon, and raisins. Simmer until thickened into a comforting dessert. Top with nuts or fruit.
Conclusion: Master the Stovetop and Never Fear Rice Again
So, can you cook rice on the stove? Absolutely. In fact, once you understand the basics—water ratios, heat control, and resting time—you’ll realize how empowering and flexible this method truly is. Whether you’re cooking for one or feeding a crowd, stovetop rice delivers reliable, delicious results without relying on gadgets.
While rice cookers offer undeniable convenience, the stovetop gives you the freedom to experiment, adapt, and truly connect with your food. From toasting grains for extra flavor to using homemade broth instead of plain water, every choice reflects your personal style.
Remember: practice makes perfect. Don’t be discouraged if your first few attempts aren’t flawless. Pay attention to textures, tastes, and what works best for your family. Soon enough, you’ll look forward to cooking rice—not just because it feeds you, but because it brings warmth, comfort, and deliciousness to your table.
Frequently Asked Questions
Is it okay to cook rice directly in the pot without rinsing?
While you can cook unrinsed rice, rinsing removes excess starch that causes stickiness. For fluffy results, especially with white rice, rinsing is recommended. Brown rice may retain more nutrients if rinsed lightly or skipped entirely.
Can I use any type of pot to cook rice on the stove?
Ideally, use a heavy-bottomed pot with a tight-fitting lid. Thin pots can create hot spots and burn rice. Non-stick pans work if they’re rated for high heat, but avoid metal utensils that might scratch the surface.
How do I know when my rice is done cooking?
Check after the recommended simmer time (usually 15–18 minutes for white rice). The water should be fully absorbed, and the rice should be tender with no hard centers. If still firm, cover and simmer 2–3 more minutes.
What if my rice is too wet or soupy?
Drain excess water through a fine-mesh strainer or spread rice on a baking sheet to dry slightly. Then return to a dry pan over low heat, uncovered, for a few minutes to evaporate moisture. Fluff with a fork afterward.
Can I cook rice in a slow cooker instead of on the stove?
Yes! Use a 1:2.5 water-to-rice ratio and cook on low for 6–7 hours or high for 3–4 hours. Stir once halfway through. Slow cookers produce softer, more uniform results but lack the initial browning or flavor development of stovetop methods.
Does adding salt or fat improve stovetop rice?
A pinch of salt enhances flavor, while a teaspoon of oil or butter prevents sticking and adds richness. For savory dishes, consider using broth instead of water for deeper taste.