
Can I make Rice-A-Roni in a rice cooker? Absolutely! With just a few simple steps, you can enjoy this classic side dish without the hassle of boiling water separately. A rice cooker does all the work—measuring, cooking, and timing—so your Rice-A-Roni turns out fluffy, tender, and delicious every time. It’s a game-changer for busy weeknights!
Making Rice-A-Roni in a rice cooker might sound surprising at first—after all, isn’t that what the box says to do on the stove? But trust us, your rice cooker is more than capable of handling this iconic blend of parboiled rice and vermicelli pasta. In fact, many home cooks swear by this method because it’s hands-off, consistent, and requires no constant attention. Whether you’re whipping up dinner after a long day or meal-prepping for the week, using your rice cooker for Rice-A-Roni is not only possible—it’s often better than traditional methods.
Rice-A-Roni has been a pantry staple since the 1960s, known for its convenience and comforting taste. Traditionally, it calls for boiling water, adding the mix, stirring, and waiting about 25 minutes. But with a rice cooker, you eliminate guesswork with precise temperature control and automatic shutoff. Plus, modern rice cookers come with multiple settings—white rice, brown rice, steam, and even delay timers—giving you flexibility depending on the recipe variation you choose. So yes, you absolutely can make Rice-A-Roni in a rice cooker, and we’re going to show you exactly how—plus some pro tips to make it foolproof.
Key Takeaways
- Yes, it works: You can successfully cook Rice-A-Roni in a rice cooker using the white rice setting or manual mode.
- No extra water needed: Rice-A-Roni comes pre-seasoned with rice and pasta, so follow package instructions but adjust liquid ratios slightly.
- Saves time: Skip the stovetop boil—just add ingredients and press “cook.”
- Perfect consistency: Stir once halfway through cooking to prevent clumping and ensure even texture.
- Great for meal prep: Cook a batch ahead of time and reheat for quick dinners all week.
- Customizable: Add veggies, chicken, or cheese for a full meal instead of just a side.
- Troubleshooting tips: If too dry, add broth; if too wet, simmer uncovered briefly.
Quick Answers to Common Questions
Can I make Rice-A-Roni in a pressure cooker instead?
Yes, but with adjustments. Use the “Manual” or “Pasta” setting on high pressure for 8–10 minutes. Let natural release for 5 minutes before quick-releasing steam. Monitor closely—overcooking makes pasta mushy.
How much water should I use for Rice-A-Roni in a rice cooker?
Use 2 cups of water per 1 cup of Rice-A-Roni. Some newer rice cookers may need slightly less due to improved insulation, so start here and adjust next time if needed.
Will Rice-A-Roni cook faster in a rice cooker than on the stove?
Generally no—both take about 20–25 minutes total. However, the rice cooker eliminates active monitoring, saving you time and effort.
Can I freeze leftover Rice-A-Roni?
Absolutely! Cool completely, portion into freezer-safe containers, and store up to 3 months. Reheat in microwave with a splash of broth or water to restore moisture.
Is Rice-A-Roni healthy?
Moderately. It provides carbs and some fiber, but lacks protein and nutrients compared to whole grains or legumes. Enjoy as part of a balanced diet with added veggies or lean meats.
📑 Table of Contents
The Science Behind Cooking Rice-A-Roni
Before diving into the steps, let’s talk about *why* this works. Rice-A-Roni combines two ingredients that each have their own cooking requirements: rice needs moisture to gelatinize its starch and become fluffy, while pasta requires enough heat and liquid to fully hydrate and soften. On the stovetop, achieving balance between the two can be tricky—too much water leads to mushy pasta; too little leaves gritty rice.
A rice cooker solves this problem through controlled heating. Once you add the correct amount of water (usually slightly less than standard rice recipes suggest), the cooker maintains a steady simmer without scorching or overcooking. The result? Both components cook evenly and reach ideal textures simultaneously. Most importantly, the rice cooker’s sealed environment traps steam, helping the flavors meld beautifully.
That said, not all rice cookers are created equal. High-end models with fuzzy logic sensors adapt to ingredient density automatically, while basic ones rely on fixed timers and temperatures. For Rice-A-Roni, even entry-level machines do fine—especially if you follow our guidelines below.
What You’ll Need: Equipment & Ingredients

Visual guide about Can I Make Rice a Roni in a Rice Cooker
Image source: 2.bp.blogspot.com
To make perfect Rice-A-Roni in your rice cooker, gather these essentials:
Equipment:
– Standard electric rice cooker (1–2 cups capacity recommended)
– Measuring cup (preferably rice-specific)
– Wooden spoon or spatula
– Optional: steamer basket (for adding vegetables)
Ingredients:
– 1 cup uncooked Rice-A-Roni mix (any variety—Italian-style, cheddar, broccoli, etc.)
– 2 cups water (adjust based on model and preference)
– Salt (optional, usually already included in mix)
– Butter or olive oil (optional, for richness)
Note: Always check your specific Rice-A-Roni packaging—some varieties include seasonings that may affect salt content. Also, if you’re making a cheesy version like Cheddar Garlic, skip added salt unless desired.
Choosing the Right Rice Cooker Setting
Most rice cookers have preset modes. For Rice-A-Roni, the safest bet is the “White Rice” setting. Here’s why:
– White rice mode uses higher heat initially to jumpstart cooking.
– It then switches to low heat to finish gently—perfect for delicate pasta.
– The cycle typically lasts 20–30 minutes, aligning well with Rice-A-Roni’s recommended time.
Avoid “Quick Cook” or “Brown Rice” settings unless your machine specifically recommends them for mixed grains. Brown rice takes longer due to bran layer resistance, and quick-cook functions may undercook the pasta.
If your rice cooker doesn’t have labeled buttons, simply use the default “Cook” function—it usually defaults to white rice parameters anyway.
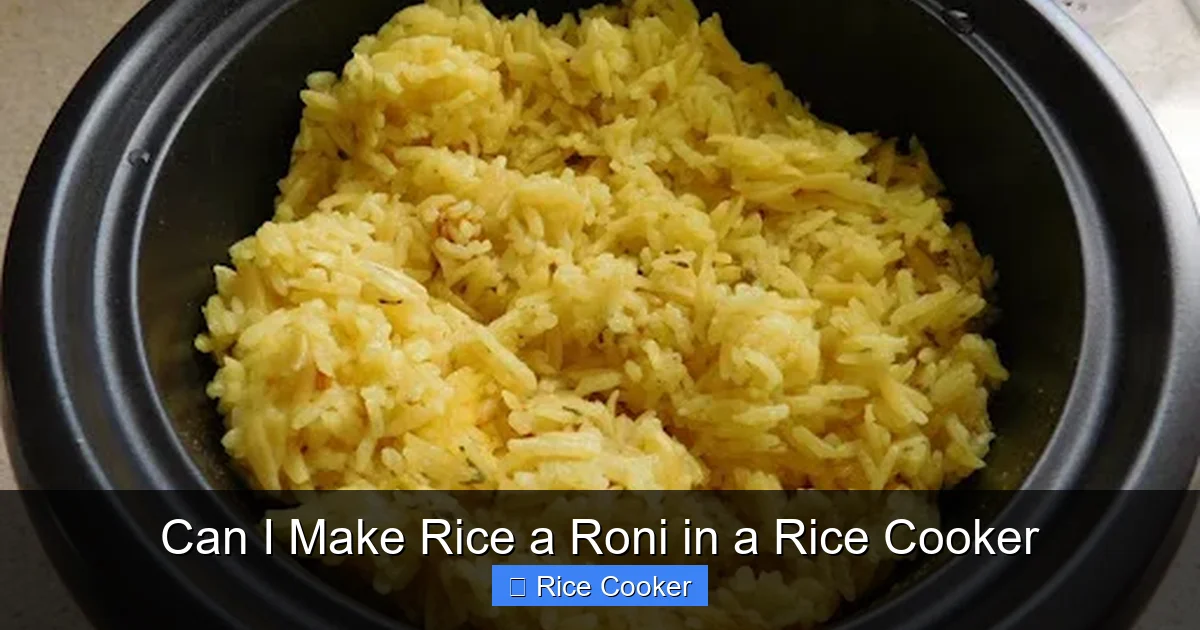
Step-by-Step Instructions: How to Make Rice-A-Roni in a Rice Cooker
Visual guide about Can I Make Rice a Roni in a Rice Cooker
Image source: lh3.googleusercontent.com
Follow these simple steps for foolproof results every time:
- Rinse the Mix (Optional): While not required, rinsing removes excess starch and prevents stickiness. Place Rice-A-Roni in a fine-mesh strainer and rinse under cold water until it runs clear.
- Add Water First: Pour 2 cups of water into the inner pot. This prevents burning if the mix sticks during preheating.
- Stir in Rice-A-Roni: Add the dry mix directly to the water. Gently stir once to distribute evenly.
- Start Cooking: Close lid securely and select “White Rice” mode. Press start.
- Stir Midway: About 10–12 minutes in, open the lid and stir gently from bottom to top. This prevents clumps and ensures uniform texture.
- Let It Rest: Once done, turn off the cooker and let sit 5 minutes before fluffing with a fork.
Pro Tip: If your rice cooker has a “Keep Warm” function, don’t leave Rice-A-Roni sitting too long—it can become soggy. Serve immediately or transfer to an airtight container for later.
Adjusting for Different Varieties
Different flavors of Rice-A-Roni require minor tweaks:
– Italian-Style: Add ½ tsp dried oregano or red pepper flakes before cooking for extra depth.
– Cheddar Garlic: Stir in ¼ cup shredded cheddar after cooking for gooey pockets.
– Broccoli & Cheddar: Steam broccoli separately and fold in at the end to retain crunch.
– Chicken & Wild Rice: Add diced cooked chicken during the last 5 minutes of cooking.
Always refer to the original package instructions first—they provide base guidelines tailored to each blend.
Common Mistakes and How to Avoid Them
Even experienced cooks hit snags now and then. Here’s how to dodge common pitfalls:
Mistake #1: Using Too Much Water
Overwatering leads to mushy pasta and gummy rice. Stick to 2:1 water-to-rice ratio unless your cooker manual specifies otherwise.
Mistake #2: Skipping the Stir
Without mid-cycle stirring, Rice-A-Roni can form dense clusters. Always give it a gentle mix halfway through.
Mistake #3: Opening Lid Frequently
Steam escapes each time you lift the lid, extending cook time and affecting texture. Only open when necessary (like during stir).
Mistake #4: Rushing the Rest Period
Skipping the 5-minute rest lets residual heat continue cooking unevenly. Patience pays off!
Mistake #5: Ignoring Drainage Issues
Some rice cooker models struggle with excess moisture. If yours drains poorly, tilt the pot slightly after cooking to pour off any leftover liquid.
By avoiding these errors, you’ll consistently achieve light, separated grains and al dente pasta.
Creative Twists: Elevating Your Rice-A-Roni
Why stop at plain old side dishes? Transform Rice-A-Roni into satisfying mains or party snacks:
Cheesy Bake: Layer cooked Rice-A-Roni with marinara, mozzarella, and Parmesan in a baking dish. Broil until bubbly.
Fried Rice Version: Sauté cooled Rice-A-Roni with soy sauce, scrambled eggs, peas, and diced carrots. Crisp it up in a nonstick pan.
Loaded Nachos Base: Spread Rice-A-Roni on tortilla chips, top with black beans, jalapeños, and sour cream.
Breakfast Bowls: Combine with sautéed mushrooms, spinach, and poached egg for brunch.
Veggie-Packed Upgrade: Toss in roasted bell peppers, corn kernels, or steamed broccoli before cooking.
These ideas turn a humble mix into gourmet fare—all while keeping the core method intact.
Cleaning and Maintenance Tips
After cooking Rice-A-Roni, cleanup is easy—but only if you act quickly. Starchy residue hardens fast!
– Immediately wipe the inner pot with a damp cloth while still warm.
– Soak stuck bits in warm, soapy water for 10 minutes before scrubbing.
– Never submerge the heating element or electronic parts in water.
– Clean the exterior with a microfiber cloth and mild detergent.
Regular maintenance extends your rice cooker’s lifespan and keeps it odor-free. A quick vinegar rinse monthly removes mineral buildup from hard water.
Frequently Asked Questions
Do I need to add extra salt to Rice-A-Roni?
Not usually—most mixes contain seasonings. Taste before salting, especially if using butter or cheese varieties. Too much salt can overpower the blend.
Why did my Rice-A-Roni turn out sticky?
Too much water or insufficient stirring causes clumping. Next time, reduce water by ¼ cup and stir at the 10-minute mark. Also, avoid opening the lid frequently during cooking.
Can I make vegetarian Rice-A-Roni?
Yes! All original varieties are plant-based. For extra flavor, add herbs like thyme or rosemary before cooking, or top with nutritional yeast post-cooking.
What if my rice cooker doesn’t have a “White Rice” setting?
Use the default “Cook” function. Most machines default to white rice parameters anyway. If unsure, consult your manual—many brands label it simply as “Rice.”
How do I fix Rice-A-Roni that’s too dry?
Add 1–2 tablespoons of broth, milk, or water at a time, mixing thoroughly after each addition. Heat gently if rewarmed, but avoid boiling to prevent splitting.
Can kids eat Rice-A-Roni?
Yes, it’s generally safe for children over 1 year old. Just watch portion sizes and pair with protein-rich foods like grilled chicken or beans for balanced meals.