
Making sushi rice in a rice cooker is not only possible—it’s one of the easiest ways to get perfectly cooked, sticky-perfect grains every time. With the right ingredients, technique, and timing, your rice cooker becomes a sushi-making powerhouse. Whether you’re preparing homemade nigiri, maki rolls, or onigiri, this method ensures consistent results without constant stirring or guesswork. Forget takeout—your favorite sushi rice starts right at home!
Key Takeaways
- Sushi rice can absolutely be made in a rice cooker – no need for a special appliance. Most standard rice cookers work just fine with the right technique.
- Short-grain Japanese rice is essential – long-grain varieties won’t give you the sticky, tender texture needed for sushi.
- Rinsing removes excess starch, which prevents mushiness and helps achieve that ideal cling without gummy results.
- Water-to-rice ratio matters – typically 1:1.1 or 1:1.2 (rice to water), slightly more than regular white rice due to higher absorption needs.
- Vinegar seasoning should be added after cooking – never during, or it can affect the cooking process and texture.
- Cooking time is usually 20–30 minutes, depending on your model, but most rice cookers handle it automatically once set.
- Proper cooling and folding technique prevents clumping and spreads vinegar evenly throughout the grains.
Quick Answers to Common Questions
Can any rice cooker make sushi rice?
Yes, most standard electric rice cookers can make sushi rice. As long as it has a “cook” function and holds heat afterward, it works perfectly. Even basic models produce great results when following proper technique.
How much water do I use per cup of sushi rice?
Use 1.1 to 1.2 cups of water per 1 cup of rice. Adjust based on desired texture—more water yields softer rice, less makes it firmer and chewier.
Do I really need to rinse sushi rice?
Absolutely. Rinsing removes excess surface starch that causes clumping. Run rice under cold water until the water runs clear, typically 3–5 times.
When do I add vinegar to sushi rice?
Add the vinegar mixture only after the rice is fully cooked. Fold it in gently while the rice is still warm but not steaming hot to avoid affecting the cooking process.
Can I reheat leftover sushi rice?
Yes, but do so carefully. Steam the rice for 2–3 minutes with a damp towel over the pot to restore moisture without turning it mushy. Avoid microwaving directly from fridge.
📑 Table of Contents
- Can I Make Sushi Rice in a Rice Cooker?
- Why Use a Rice Cooker for Sushi Rice?
- Choosing the Right Rice for Sushi
- Step-by-Step Guide: Making Sushi Rice in Your Rice Cooker
- Troubleshooting Common Issues
- Tips for Perfect Sushi Every Time
- Beyond Basic Sushi: Creative Uses for Your Rice Cooker Rice
- Conclusion: Why Rice Cookers Belong in Every Kitchen
Can I Make Sushi Rice in a Rice Cooker?
Imagine this: It’s Friday night, and you’re craving fresh sushi. But instead of ordering delivery or driving across town, you decide to roll up your sleeves and make it yourself. You head to the kitchen, open your pantry, and realize—you don’t have any sushi rice. No problem, right? Well… almost. Without the right type of rice, even the best recipe will fall flat. But here’s the good news: yes, you absolutely can make sushi rice in a rice cooker.
In fact, using a rice cooker might be one of the easiest and most reliable methods available. Gone are the days of babysitting a pot on the stove, constantly checking if the water’s boiled off, or risking burnt edges. Modern rice cookers do all the heavy lifting—measuring, heating, timing—and deliver consistently fluffy, tender grains every single time. All you need is the right rice, the proper water ratio, and a simple post-cooking seasoning step. Whether you’re a beginner rolling your first California roll or an experienced sushi chef looking for convenience, this method checks every box.
Why Use a Rice Cooker for Sushi Rice?
The Science Behind Perfect Texture
Sushi rice isn’t just about flavor—it’s about texture. The goal is to achieve individual, slightly sticky grains that hold together when shaped but still feel delicate in your mouth. This comes from short-grain Japanese rice (like Koshihikari or Calrose), which has high starch content and low protein. When cooked correctly, it becomes soft yet firm, moist but not soggy.
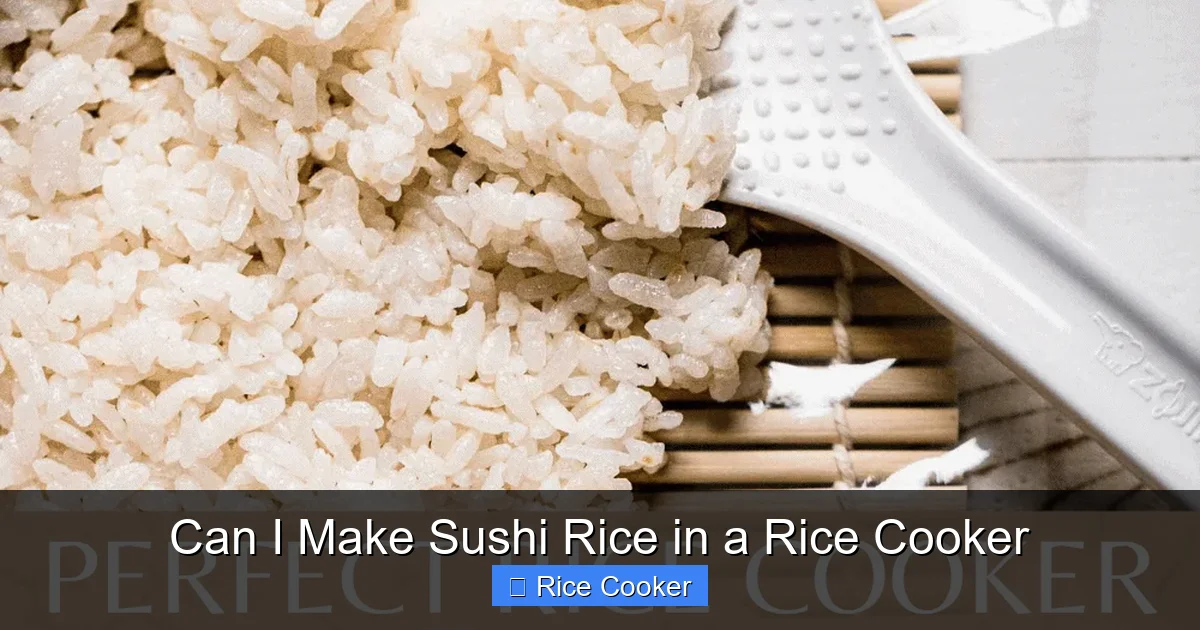
Visual guide about Can I Make Sushi Rice in a Rice Cooker
Image source: platingsandpairings.com
A rice cooker excels at controlling temperature and moisture precisely. Unlike boiling on the stovetop—where heat fluctuates and evaporation rates vary—a rice cooker maintains steady conditions. Once you add water and press start, the machine handles everything: heating to boiling point, simmering gently, and then switching to warm mode automatically. This consistency is why professional kitchens and home cooks alike swear by them.
Convenience Meets Precision
Let’s face it—life gets busy. Between work, school, and family responsibilities, finding time to stand over a pot for 45 minutes isn’t always realistic. A rice cooker lets you prep other ingredients while the rice cooks. Plus, cleanup is minimal: just one bowl and one measuring cup.
Many modern models also come with specialized settings—like “sushi” or “gluten-free” modes—though these aren’t necessary. Even basic white rice settings work perfectly fine when adjusted properly. Some advanced units even include steam baskets, so you can cook fish or veggies simultaneously while your rice finishes.
Choosing the Right Rice for Sushi
Short-Grain vs. Long-Grain: What’s the Difference?
Not all rices are created equal when it comes to sushi. Short-grain rice, specifically labeled as “Japanese rice” or “sushi rice,” is what you want. It’s grown in Japan and other parts of Asia, cultivated for its unique stickiness and ability to absorb flavors without becoming overly soft.
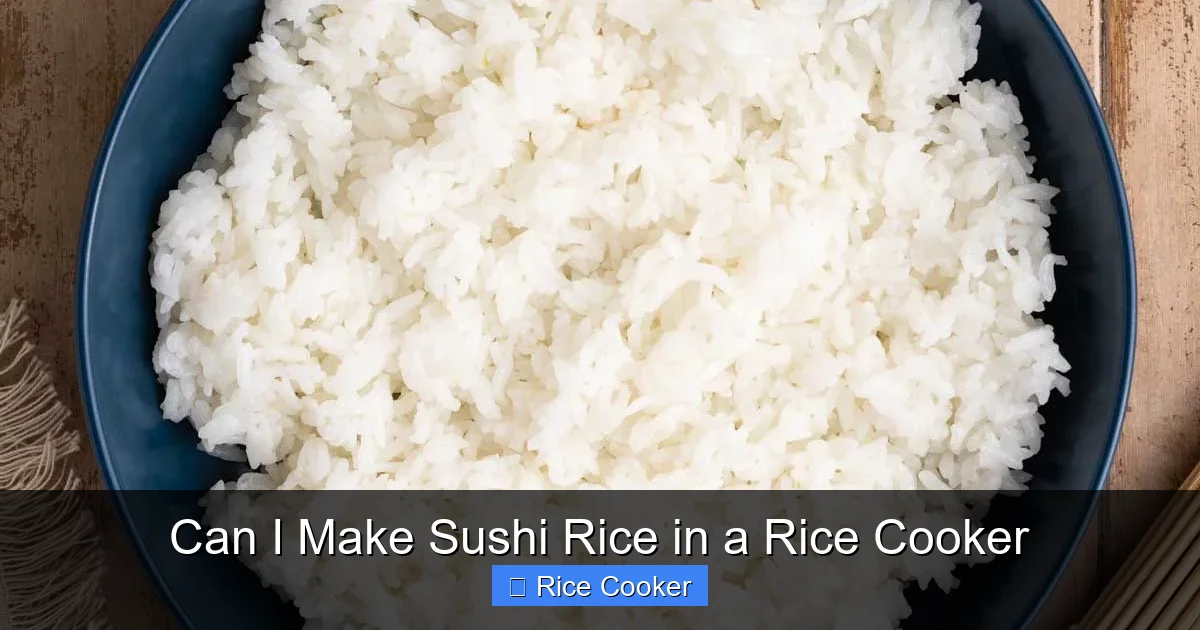
Visual guide about Can I Make Sushi Rice in a Rice Cooker
Image source: veganeverytime.com
Long-grain rice (like basmati or jasmine) lacks this quality. It tends to stay separate and dry, making it unsuitable for nigiri or hand rolls where adhesion is key. If you accidentally grab long-grain rice, your sushi will likely fall apart or feel chewy rather than tender.
Popular Varieties and Where to Buy Them
Some top choices include:
- Koshihikari: Often called the gold standard, known for sweetness and tenderness. Available at Asian grocery stores or online retailers like Amazon or Walmart.
- Calrose: Widely used in the U.S., slightly firmer than Koshihikari but still excellent. Found in most supermarkets under brands like Lundberg or Uncle Ben’s.
- Bundoong Rice: A Thai variety gaining popularity for its balance of stickiness and aroma. Great alternative if Japanese rice is hard to find.
If you live far from an Asian market, check local ethnic grocers or order via Instacart. Many stores now carry sushi-grade rice specifically packaged for use in raw dishes—always choose that over plain white rice unless otherwise noted.
Step-by-Step Guide: Making Sushi Rice in Your Rice Cooker
Gather Your Ingredients and Tools
Before you begin, assemble everything you’ll need:
- 1 cup short-grain sushi rice
- 1.1 to 1.2 cups filtered water
- Small bowl for rinsing
- Fine-mesh strainer or colander
- Measuring cup (preferably clear)
- Large mixing bowl
- Wooden spatula or paddle
- Paper towels (for drying)
Optional but helpful: a rice paddle designed for sushi (with slats to allow airflow during seasoning).
Step 1: Rinse the Rice Thoroughly
This is arguably the most important step. Rinsing removes surface starch, which causes clumping and ruins the texture. Here’s how:
- Place rice in a fine-mesh strainer.
- Rinse under cold running water, rubbing gently between fingers.
- Continue until the water runs clear—usually 3–5 rinses.
- Drain well; pat dry with paper towels if needed.
Skipping this leads to gummy, glue-like rice that won’t shape properly.
Step 2: Measure Water Accurately
Unlike regular white rice, sushi rice requires slightly more water because it absorbs more fully. Too little = hard, chalky grains. Too much = mushy mess.
For 1 cup rice, aim for:
- 1.1 cups (264 ml) for softer texture
- 1.2 cups (288 ml) for firmer, chewier result
- 2 tablespoons rice vinegar
- 1 tablespoon sugar
- ½ teaspoon salt
- 1 tablespoon warm water (optional, for smoother blend)
- Onigiri (Rice Balls): Shape cooled rice into triangles, wrap in nori, and press gently.
- Fried Rice: Sauté diced veggies, scramble eggs, mix in rice, and season with soy sauce and sesame oil.
- Miso Soup Base: Simmer dashi stock with cubed tofu and wakame, then stir in cooked sushi rice for heartier version.
- Donburi Bowls: Top rice with grilled salmon, beef teriyaki, or tempura shrimp for quick, satisfying meals.
- Sushi Burritos: Layer rice, avocado, cucumber, and crab sticks in nori sheets, roll tightly, and slice.
Adjust based on your preference and rice brand. Some cookers have markings indicating exact ratios—follow those if present.
Step 3: Add Rice and Water to the Cooker
Transfer rinsed rice and measured water into the inner pot of your rice cooker. Give it a gentle stir to distribute evenly. Close the lid securely—no gaps allowed, or steam escapes and affects cooking.
Press “Cook” or select the appropriate setting (“White Rice” works fine). Total cycle time is usually 20–30 minutes, including warming phase.
Step 4: Let It Rest
Once finished, let the rice sit, covered, for 10 minutes. This allows residual steam to finish cooking the center without drying out the edges. Don’t lift the lid early—it interrupts the process.
Step 5: Season with Sushi Vinegar Mixture
While resting, prepare your seasoning:
Heat mixture in microwave or small saucepan until sugar dissolves. Cool slightly before adding to rice.
Using a wooden paddle, fold vinegar mixture into rice in gentle upward motions. Avoid pressing down—this crushes grains. Instead, lift and turn until glossy and evenly coated.
Step 6: Cool and Store Properly
Spread seasoned rice on a large tray or cutting board lined with damp cloth. Fan lightly with a paper fan or electric fan to cool rapidly—this prevents fermentation and keeps grains separate.
Store covered at room temp for up to 2 hours, or refrigerate for later use (up to 3 days). Always bring chilled rice to room temp before serving.
Troubleshooting Common Issues
Too Sticky or Mushy Rice?
This usually means too much water or insufficient rinsing. Try reducing water by ¼ cup next time and rinse longer. Also, avoid opening the lid during cooking.
Rice Sticks to the Pot?
Ensure the inner pot is clean and non-stick coating intact. Never use metal utensils inside. If stuck, soak briefly in warm water before scrubbing gently.
Grains Are Hard or Undercooked?
Check age of rice—old rice loses moisture faster. Use within 1 year of purchase. Also verify water level; measure accurately each time.
Flavor Is Off? Too Salty or Vinegary?
Balance seasoning by adjusting proportions. Start with less salt and taste as you go. Sugar counteracts acidity, so don’t skimp on that either.
Tips for Perfect Sushi Every Time
Use Fresh Ingredients
Sushi rice shines when paired with high-quality fillings. Choose sushi-grade fish from reputable suppliers, wash vegetables thoroughly, and keep everything chilled until assembly.
Practice Knife Skills
If slicing fish or veggies, use a sharp, wet knife. Dry blades tear tissue; wet ones cut cleanly. Cut perpendicular to grain for best texture.
Keep Hands Wet While Rolling
Damp hands prevent rice from sticking during shaping. Wipe excess water between each roll to maintain grip.
Invest in Quality Tools
A bamboo mat, plastic wrap, and a sharp knife make a huge difference. Cheap tools lead to messy cuts and uneven shapes.
Don’t Overfill Rolls
Limited filling keeps rolls tight and easier to eat. Aim for ⅓ to ½ full—enough to enjoy, not overwhelm.
Beyond Basic Sushi: Creative Uses for Your Rice Cooker Rice
Once you master sushi rice, you’ll find endless applications:
Each dish leverages the sticky, flavor-absorbing nature of sushi rice—making it incredibly versatile beyond traditional rolls.
Conclusion: Why Rice Cookers Belong in Every Kitchen
Making sushi rice in a rice cooker isn’t just convenient—it’s transformative. It democratizes access to restaurant-quality sushi at home, reduces waste, and simplifies meal prep. No more guessing games, no more burnt bottoms, no more lumpy batches. Just consistent, delicious results every single time.
Whether you’re feeding a crowd, meal-prepping for the week, or simply treating yourself to something special, mastering this technique empowers you to create memorable meals with confidence. And honestly? There’s nothing quite like biting into a hand-rolled piece of nigiri made from rice you cooked yourself—warm, fragrant, and full of pride.
So next time you crave sushi, skip the drive-thru. Head straight to your rice cooker, grab that bag of short-grain rice, and start cooking. Your taste buds—and your wallet—will thank you.
Frequently Asked Questions
What kind of rice is best for sushi?
Short-grain Japanese rice like Koshihikari or Calrose is ideal. These varieties have the right starch content to become slightly sticky yet tender—essential for sushi rolls and nigiri.
Can I use long-grain rice for sushi?
No, long-grain rice doesn’t develop the stickiness needed for sushi. It remains separate and dry, causing rolls to fall apart. Stick to short-grain types labeled “sushi rice.”
How do I store homemade sushi rice?
Cover and store at room temperature for up to 2 hours, or refrigerate for up to 3 days. Bring refrigerated rice to room temperature before using to ensure even texture.
Why does my sushi rice turn out sticky or mushy?
This usually happens from too much water, insufficient rinsing, or overmixing after seasoning. Reduce water slightly, rinse thoroughly, and fold gently instead of stirring aggressively.
Can I make sushi rice in a pressure cooker?
Yes, but timing differs. Use the same water-to-rice ratio and cook on high pressure for 4 minutes, then natural release for 10 minutes. Results may vary slightly from rice cooker output.
Is it safe to eat sushi rice raw?
No—raw rice isn’t digestible and poses health risks. Always cook thoroughly before consuming, even for dishes like onigiri or fried rice.