
The Ninja Multi Cooker is not just a pressure cooker or air fryer—it’s also an excellent tool for cooking rice. With its precise temperature control and multiple cooking functions, it delivers consistently fluffy, tender grains whether you’re making white rice, brown rice, or even sushi rice. You don’t need a separate appliance to enjoy restaurant-quality rice at home.
Key Takeaways
- Rice Cooking Capability: The Ninja Multi Cooker can cook all types of rice—white, brown, jasmine, basmati, and more—using preset programs or manual settings.
- Versatility: Beyond rice, it air fries, pressure cooks, slow cooks, sautés, and keeps food warm—making it a true kitchen multitasker.
- Consistent Results: Thanks to smart sensors and adjustable settings, it ensures even heat distribution and proper water-to-rice ratios for perfect texture.
- Time-Saving: Use the “Rice” preset for hands-off cooking, or combine steps—like sautéing aromatics before adding rice—to reduce total meal prep time.
- Easy Cleanup: Most models come with a non-stick ceramic-coated pot that’s dishwasher-safe, simplifying post-meal chores.
- Customizable Settings: Adjustable doneness levels (e.g., softer or firmer rice) and delay timers let you tailor results to your taste and schedule.
- No Extra Equipment Needed: Eliminate the need for a standalone rice cooker by leveraging the Ninja’s built-in functions and accessories.
📑 Table of Contents
- Can Ninja Multi Cooker Cook Rice?
- How Does the Ninja Multi Cooker Work for Rice?
- Types of Rice You Can Cook
- Step-by-Step: Cooking Rice in Your Ninja Multi Cooker
- Comparing Ninja vs. Dedicated Rice Cookers
- Common Mistakes to Avoid
- Beyond Basic Rice: Creative Uses
- Maintenance & Longevity Tips
- Final Thoughts: Is the Ninja Worth It?
Can Ninja Multi Cooker Cook Rice?
Let’s be honest—rice is the backbone of so many meals: stir-fries, curries, grain bowls, sushi, and even comforting side dishes like risotto or pilaf. But what if you don’t own a dedicated rice cooker? Or worse, your old one broke and you’re stuck using a pot on the stove? Enter the Ninja Multi Cooker: a powerhouse appliance that does everything from air frying chicken to simmering soups… and yes, it absolutely cooks rice.
In this deep dive, we’ll explore exactly how the Ninja Multi Cooker handles rice—whether you’re a beginner or a seasoned home chef—and why this might be the last kitchen gadget you ever buy.
How Does the Ninja Multi Cooker Work for Rice?
Unlike stovetop methods that require constant stirring and monitoring, the Ninja Multi Cooker uses advanced technology to automate the entire process. Most models feature multiple cooking modes—including a dedicated “Rice” setting—that precisely control temperature, timing, and steam release to mimic traditional rice cookers.
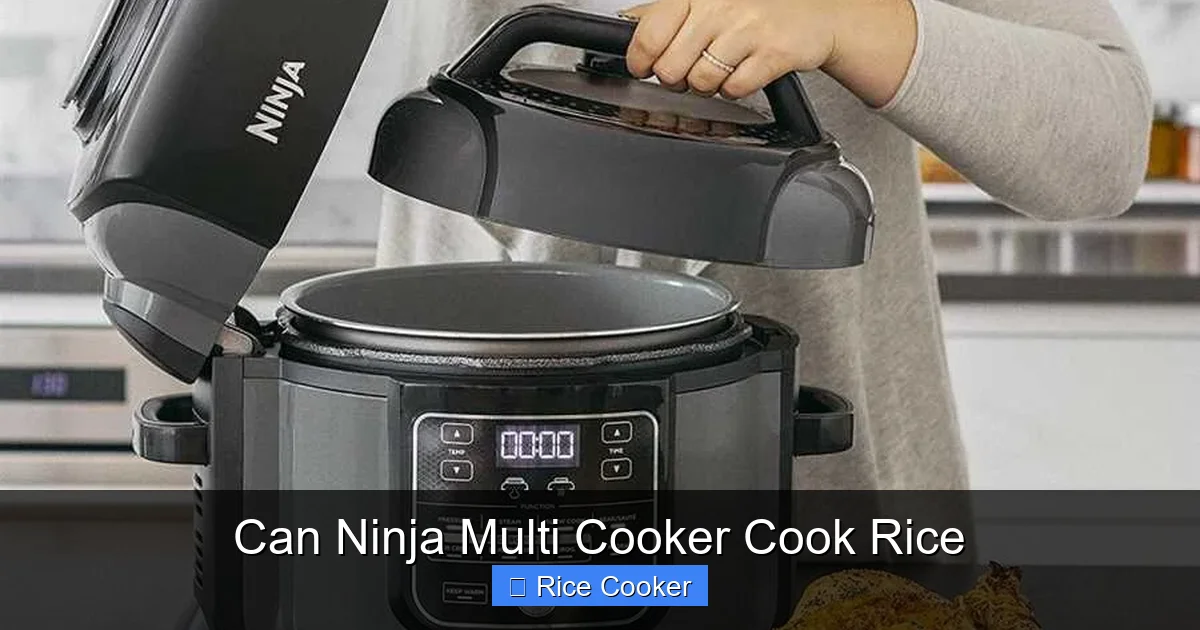
Visual guide about Can Ninja Multi Cooker Cook Rice
Image source: metrocookingdallas.com
Built-In Smart Technology
The secret lies in its intelligent sensors. When you select the “Rice” program, the unit automatically heats water to boiling, then switches to a gentle simmer to absorb moisture evenly. It monitors internal temperature and adjusts as needed, ensuring no burnt bottoms or undercooked centers. Some high-end models even have dual baskets, letting you cook rice while steaming veggies or proteins simultaneously—maximizing efficiency without extra appliances.
Water-to-Rice Ratios Made Simple
Getting the right ratio is crucial. For most white rice, use 1 cup of rice to 1.25 cups of water. Brown rice needs slightly more: about 1 cup rice to 1.5 cups water. The Ninja’s preset programs handle these calculations automatically, but if you’re using manual settings (like “Pressure Cook” or “Sauté + Pressure Cook”), you’ll still get great results when following trusted ratios.
Types of Rice You Can Cook
The Ninja Multi Cooker isn’t limited to just one variety. Whether you love fragrant long-grain jasmine or nutty whole-grain brown rice, here’s how each type performs:
White Rice
Perfectly fluffy and separate every time—ideal for Chinese takeout-style fried rice or Japanese donburi. The default “White Rice” setting works flawlessly, though you can tweak the timer slightly (usually 20–25 minutes depending on model) for extra tenderness.
Brown Rice
Often tricky on the stovetop due to longer cook times, brown rice shines in the Ninja. Its extended simmer phase helps soften the bran layer without turning mushy. Pro tip: Let it rest for 5–10 minutes after cooking to finish hydrating naturally.
Sushi & Sticky Rice Varieties
For sushi rice, rinse short-grain rice thoroughly until water runs clear, then cook using the “White Rice” function. Add a splash of rice vinegar, sugar, and salt once done. The sticky texture comes from precise moisture control—something Ninja handles beautifully.
Specialty Grains
Try arborio (for risotto), quinoa, or wild rice too! Many users report success with quinoa using the “Grain” setting, though soaking beforehand reduces cook time and improves digestibility.
Step-by-Step: Cooking Rice in Your Ninja Multi Cooker
Ready to make your first batch? Follow these simple steps for foolproof results every time:
- Measure & Rinse: Use a measuring cup rated for dry ingredients. Rinse rice under cold water until clear (removes excess starch).
- Add Liquid: Place rinsed rice and correct water amount into the inner pot. Stir gently if using brown or wild rice.
- Select Program: Choose “Rice” mode. For customized textures, use “Manual” and set timer/temperature accordingly.
- Start Cooking: Close lid securely. Press start. Total time varies by grain—typically 15–40 minutes.
- Rest & Fluff: Once cycle ends, let sit 5–10 minutes. Then fluff with a fork before serving.
Pro Tips for Best Results
- Never open the lid during cooking—it releases steam and disrupts the cycle.
- Use filtered water if your tap has strong mineral content; it affects flavor and texture.
- For extra aroma, sauté rice briefly in oil before adding liquid (great for fried rice bases).
- Clean the inner pot immediately after use to prevent dried-on residue.
Comparing Ninja vs. Dedicated Rice Cookers
You might wonder: “If I already have a Ninja Multi Cooker, do I really need a rice cooker?” Great question! While dedicated units offer ultra-specialized features (like fuzzy logic algorithms or induction heating), the Ninja holds its own—and often wins in versatility.
| Feature | Ninja Multi Cooker | Dedicated Rice Cooker |
|---|---|---|
| Cooking Methods | Air fry, pressure cook, slow cook, sauté, keep warm, rice | Rice only (some add steam/slow cook) |
| Presets | Multiple (rice, soup, yogurt, etc.) | Usually just rice varieties |
| Capacity | 6–7 quarts (enough for families) | Often smaller (3–5 cups max) |
| Price Point | $150–$300 | $50–$200+ |
| Cleanup | Non-stick, dishwasher-safe pot | Varies by model |
Bottom line: If you value multi-functionality and space-saving design, Ninja is superior. If you cook rice dozens of times weekly and want the absolute finest texture, a premium rice cooker may edge it out—but for 95% of home cooks, Ninja delivers excellence.
Common Mistakes to Avoid
Even with smart tech, mistakes happen. Here’s how to dodge them:
Using Too Much Water
Over-hydration = soggy rice. Stick to tested ratios. If you’re unsure, start with less water and add more during the resting phase if needed.
Skipping the Resting Period
Resist the urge to eat immediately after cooking! Letting rice sit allows residual steam to finish cooking grains evenly—critical for fluffy results.
Not Cleaning the Lid Seal
Dried food particles in the rubber gasket can cause steam leaks. Wipe it monthly with warm, soapy water.
Picking the Wrong Mode
Don’t use “Pressure Cook” for delicate rice unless your model supports it (most don’t). Stick to “Rice” or “Manual” for best outcomes.
Beyond Basic Rice: Creative Uses
The Ninja doesn’t stop at plain white rice. Think outside the box:
Fried Rice Base
Sauté diced onions and garlic, add cold cooked rice, scramble eggs, toss with soy sauce. Done in 10 minutes!
Risotto
Use the “Slow Cook” function with arborio rice, stock, and Parmesan. Stir occasionally for creamy perfection.
Stuffed Peppers
Combine cooked rice with ground meat, tomatoes, and spices. Fill bell peppers, cook under air fry mode, or use “Steam” function.
Breakfast Bowls
Cook steel-cut oats or quinoa in the Ninja, top with fruit, nuts, and honey. Warm up overnight oats using the “Keep Warm” setting.
Maintenance & Longevity Tips
To keep your Ninja running smoothly for years:
- Always unplug before cleaning.
- Avoid abrasive scrubbers on the inner pot.
- Descale monthly if you see mineral buildup (use vinegar solution).
- Check vent tube regularly for blockages.
Most Ninja models carry a 1-year warranty, but proper care extends lifespan significantly.
Final Thoughts: Is the Ninja Worth It?
If you’ve ever dreamed of having a kitchen that does it all—without buying a dozen gadgets—the Ninja Multi Cooker is your answer. And yes, it absolutely cooks rice better than most people realize. Whether you’re feeding a family of four or meal-prepping for the week, this appliance saves time, reduces clutter, and delivers reliable, delicious results.
So next time you reach for a pot and a timer, remember: your Ninja is ready to step in. Just measure, rinse, press “Rice,” and let technology do the rest. Happy cooking!
Frequently Asked Questions
Can the Ninja Multi Cooker replace a rice cooker entirely?
Absolutely! With dedicated presets and precise controls, the Ninja Multi Cooker handles all standard rice types as well as or better than most standalone rice cookers—plus adds tons of extra functionality.
What’s the difference between “Rice” and “Manual” settings for rice?
The “Rice” preset automates timing and temperature for foolproof results. “Manual” gives you full control over duration and heat level, useful for experimenting with textures or combining steps (e.g., sautéing before cooking).
Does the Ninja Multi Cooker keep rice warm?
Yes! After cooking completes, it enters “Keep Warm” mode—perfect for holding rice until guests arrive or other dishes finish cooking.
Can I cook rice and vegetables together in a Ninja with dual baskets?
Models like the Ninja Foodi XL Pro Air Fry feature stacked baskets. You can cook rice in the lower pot while steaming broccoli or dumplings above—all in one go.
Is it safe to leave rice in the Ninja overnight?
While the “Keep Warm” function is designed for hours of safe holding, USDA guidelines recommend consuming perishable foods within 2 hours of cooking. For safety, reheat leftovers promptly.
How do I clean the inner pot after cooking rice?
Most inner pots are dishwasher-safe and non-stick. Rinse while warm, then wash with mild soap. Never use metal utensils that could scratch the coating.