
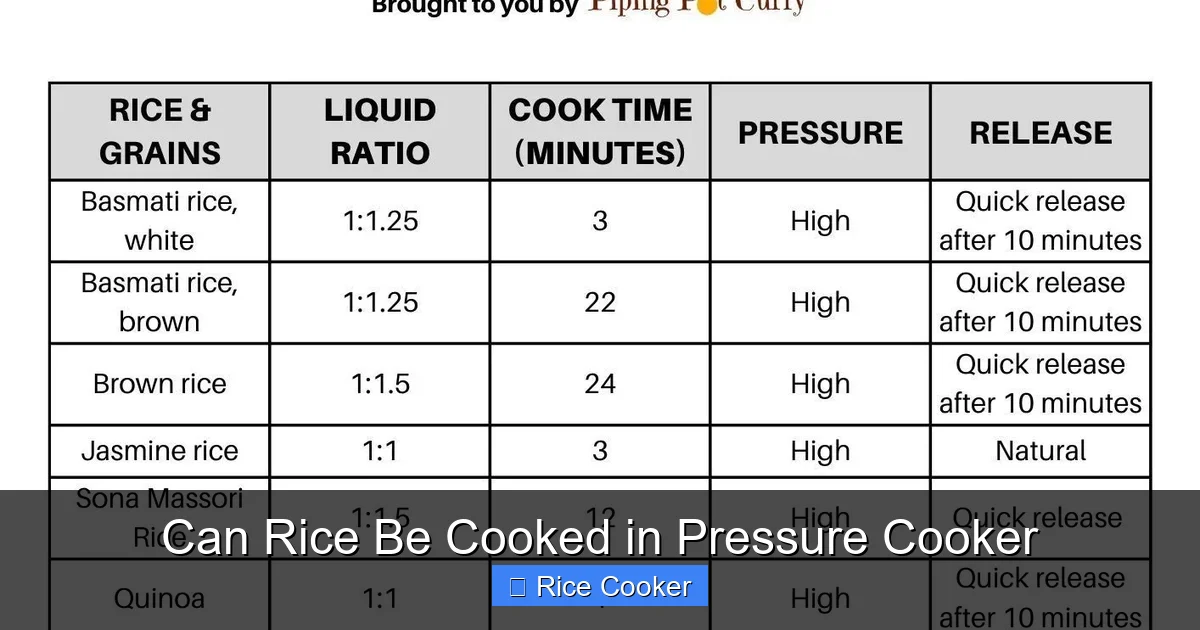
Cooking rice in a pressure cooker is not only possible but also one of the easiest and fastest methods. With the right water-to-rice ratio and timing, you can achieve perfectly fluffy or sticky grains every time. Whether you’re using white rice, brown rice, or even specialty varieties, a pressure cooker delivers consistent, tender results with minimal effort.
Key Takeaways
- Rice cooks quickly: Pressure cooking reduces rice cooking time from 20–30 minutes (boiled) to just 5–10 minutes, making it ideal for busy meals.
- Consistent results: The sealed environment ensures even heat distribution, preventing burnt or undercooked spots.
- Versatile for all rice types: Works well with white rice, brown rice, basmati, jasmine, arborio, and more—each with slightly different settings.
- Energy efficient: Uses less electricity or gas than boiling on the stove, saving both time and money.
- Easy cleanup: Most parts are dishwasher-safe, and there’s no constant stirring needed.
- Customizable texture: You can adjust pressure levels and cooking times to get chewy, soft, or fluffy rice based on your preference.
📑 Table of Contents
- Can Rice Be Cooked in a Pressure Cooker? Absolutely—Here’s How!
- Why Use a Pressure Cooker for Rice?
- Types of Rice You Can Cook in a Pressure Cooker
- Step-by-Step Guide: Cooking Rice in a Pressure Cooker
- Common Mistakes and How to Fix Them
- Tips for Perfect Pressure-Cooked Rice Every Time
- Cleaning and Maintenance Tips
- Frequently Asked Questions About Pressure-Cooked Rice
- Conclusion: Why Pressure Cooking Rice Is a Game-Changer
Can Rice Be Cooked in a Pressure Cooker? Absolutely—Here’s How!
You’ve probably heard that pressure cookers are great for stews, beans, and tough cuts of meat. But what about something as simple as rice? Can rice be cooked in a pressure cooker? The short answer is yes—and it’s actually one of the most popular uses for this kitchen appliance. In fact, many home cooks swear by pressure-cooked rice because it turns out fluffy, evenly cooked, and ready in a fraction of the time.
Unlike boiling rice on the stove—which requires constant attention, stirring, and careful monitoring of water levels—a pressure cooker does all the work for you. Once you set the timer, you can focus on chopping vegetables or preparing other sides. And the best part? No more lumpy grains or dry, overcooked batches. With the right technique, pressure cooking rice is not just possible—it’s superior.
In this complete guide, we’ll walk you through everything you need to know: from basic ratios and timing to troubleshooting common issues and tips for perfect rice every time. Whether you’re new to pressure cooking or a seasoned pro, you’ll find practical advice that makes rice preparation effortless.
Why Use a Pressure Cooker for Rice?
The Science Behind Fluffy Rice
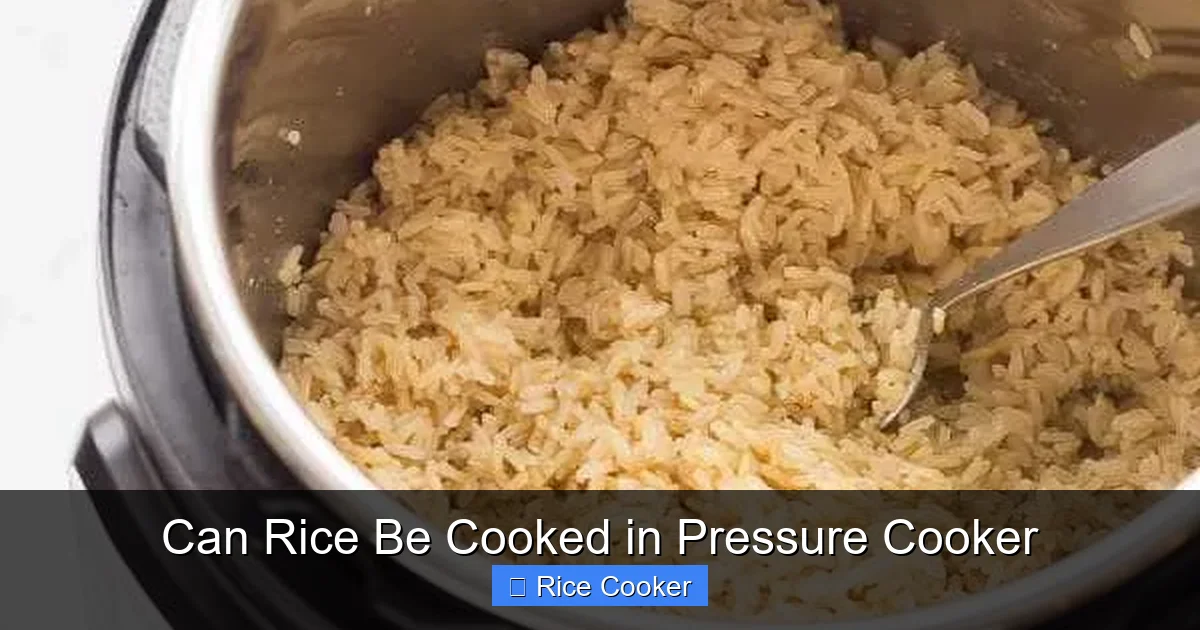
Rice is made up of starch granules that absorb water and swell when heated. On the stovetop, uneven heat can cause some grains to overcook while others stay hard. But in a pressure cooker, the sealed environment builds up steam, creating high pressure and temperature inside. This forces the water deep into each grain, ensuring uniform cooking from the inside out.
Visual guide about Can Rice Be Cooked in Pressure Cooker
Image source: metrocookingdallas.com
Additionally, the rapid heating prevents excess evaporation, so your rice stays moist and tender. Unlike boiling, where water constantly bubbles away, the pressure cooker locks in moisture—resulting in perfectly balanced, non-gummy rice every time.
Time and Energy Savings
If you’re cooking rice for dinner tonight, you don’t want to spend 25 minutes watching the pot. A pressure cooker cuts that time down to just 5–7 minutes for white rice. That’s a huge time saver, especially on busy weeknights.
And since pressure cookers use less energy than keeping a pot of water simmering, they’re also more eco-friendly. Think about it: instead of running the stove for 30 minutes, you press a button and walk away. It’s fast, efficient, and convenient.
Consistency Across Batches
One of the biggest complaints about stovetop rice is inconsistency. One day it’s too wet; another day it’s dry. With a pressure cooker, you get reliable results every single time. As long as you follow the same steps—same rice type, same water ratio, same pressure level—you won’t have to guess or adjust mid-cook.
Types of Rice You Can Cook in a Pressure Cooker
White Rice
White rice is the most common type and works beautifully in a pressure cooker. Varieties like jasmine, basmati, and regular long-grain white rice all respond well to pressure cooking. They come out light, fluffy, and separate nicely—perfect for stir-fries, fried rice, or side dishes.
Visual guide about Can Rice Be Cooked in Pressure Cooker
Image source: canfoodgobad.com
For example, if you’re making Thai jasmine rice, pressure cooking gives it a delicate aroma and tender texture without becoming mushy. Just make sure to rinse the grains first to remove excess starch.
Brown Rice
Brown rice has a chewier texture and higher fiber content, which means it needs more water and longer cooking time. But yes—you can definitely cook brown rice in a pressure cooker. It usually takes about 22–28 minutes at high pressure, depending on your model.
Because brown rice isn’t polished like white rice, it retains its bran layer, giving it a nuttier flavor and firmer bite. Pressure cooking helps break down the tough outer layers efficiently, resulting in fully cooked, digestible grains.
Sushi Rice
Sushi rice requires precise moisture control to achieve that sticky-but-not-clumpy consistency. Fortunately, pressure cookers excel here too. When done right, pressure-cooked sushi rice has the ideal balance of stickiness and individual grain structure.
Just remember to soak the rice for 30 minutes before cooking. This helps the grains absorb water evenly and prevents them from breaking during the high-pressure cycle.
Arborio and Risotto Rice
Traditional risotto is stirred constantly on the stovetop, but you can make creamy risotto in a pressure cooker too—though it’s slightly different. Instead of gradual liquid addition, you add all the broth at once and let the pressure do the work.
The result? A creamy, rich risotto with minimal effort. However, it won’t have the same layer-by-layer texture as traditional risotto. Still, it’s a game-changer for busy cooks who love Italian comfort food.
Specialty and Gluten-Free Options
You can also cook quinoa, wild rice, black rice, and even millet in a pressure cooker. Each has unique requirements, but the principles remain the same: proper rinsing, correct water ratio, and appropriate timing.
For instance, black rice takes longer than white rice due to its dense structure—usually around 25 minutes. But the payoff is worth it: deep color, nutty flavor, and chewy texture that pairs beautifully with curries or salads.
Step-by-Step Guide: Cooking Rice in a Pressure Cooker
Gather Your Ingredients and Tools
Before you start, make sure you have:
- Your chosen type of rice (rinsed)
- Fresh or filtered water
- A pressure cooker with a sealing lid
- A fine-mesh strainer (for rinsing)
- A measuring cup
Step 1: Rinse the Rice
Washing rice removes excess starch, which prevents clumping. Place the rice in a bowl, cover it with cold water, swirl it gently, then drain. Repeat 2–3 times until the water runs clear.
Note: Don’t skip this step! Unrinsed rice tends to stick together in the cooker.
Step 2: Measure Water and Rice Ratio
The magic number varies slightly by rice type:
- White rice: 1:1.25 ratio (1 cup rice to 1.25 cups water)
- Brown rice: 1:1.75 ratio (1 cup rice to 1.75 cups water)
- Jasmine/Basmati: 1:1 ratio (soak for 30 min first)
- Sushi rice: 1:1.1 ratio
- Black/quinoa/wild rice: 1:2 ratio
Use a standard measuring cup—don’t eyeball it. Accuracy matters!
Step 3: Add to the Pressure Cooker
Pour the rinsed rice and measured water into the inner pot. Stir once to ensure even distribution. Close the lid and make sure the pressure release valve is set to “Sealing.”
Step 4: Set the Timer and Pressure Level
For most white rice, set high pressure for 4–6 minutes. After the cook cycle ends, allow natural release for 10 minutes, then quick-release the remaining pressure.
Brown rice needs longer: high pressure for 22–28 minutes, followed by natural release for 10 minutes.
Step 5: Open and Fluff
Once the float valve drops, carefully open the lid away from your face. Use a fork to fluff the rice gently—don’t mash it. Serve immediately or keep warm in a covered container.
Common Mistakes and How to Fix Them
Mistake #1: Not Rinsing the Rice
Result: Sticky, clumpy rice.
Fix: Always rinse until water is clear. This removes surface starch and ensures separation.
Mistake #2: Wrong Water Ratio
Result: Dry rice or soup-like consistency.
Fix: Double-check ratios using a measuring cup. Adjust slightly based on altitude—higher elevations may require more water.
Mistake #3: Skipping Soaking for Long-Grain Varieties
Result: Inconsistent cooking.
Fix: Soak jasmine, basmati, and sushi rice for 30 minutes before cooking. This improves texture and fragrance.
Mistake #4: Using Low Pressure for Brown Rice
Result: Undercooked center.
Fix: Always use high pressure for brown rice. Low pressure won’t generate enough heat to penetrate the dense grain.
Mistake #5: Opening the Lid Too Soon
Result: Steam burns or uneven cooling.
Fix: Wait for full natural release before quick-releasing. Never force the lid open.
Tips for Perfect Pressure-Cooked Rice Every Time
Use a Good-Quality Rice Cooker Pot
Not all pots are created equal. Choose one that fits snugly in your pressure cooker and has a non-stick coating for easy cleanup. Avoid pots that wobble or slide around.
Preheat the Pot (Optional)
Some recipes recommend preheating the inner pot with a splash of oil before adding rice. This can help prevent sticking, especially with brown rice. But it’s not necessary—just make sure the pot is clean and dry.
Let It Rest After Cooking
After turning off the pressure cooker, let the rice sit for 5–10 minutes with the lid closed. This allows residual steam to finish cooking the grains evenly. Then fluff and serve.
Experiment with Salt and Oil
Add a pinch of salt or a teaspoon of oil to the water for extra flavor and shine. Some chefs even toast the rice lightly in oil before adding water for nuttier taste.
Keep Extra Rice Warm
If you’re serving a crowd, transfer cooked rice to a thermal carafe or insulated bowl. It will stay warm for up to an hour without drying out.
Cleaning and Maintenance Tips
Cleaning your pressure cooker after cooking rice is simple:
- Unplug and cool completely before washing.
- Remove the inner pot and wash with warm soapy water. Most are dishwasher-safe.
- Wipe the lid gasket and valve with a damp cloth—avoid submerging the entire lid.
- Store with the lid slightly ajar to prevent mold.
Regular maintenance extends the life of your appliance and keeps it working safely. Check the rubber seal annually for wear and tear.
Frequently Asked Questions About Pressure-Cooked Rice
How much water do I use per cup of rice?
It depends on the rice type. For white rice, use 1.25 cups of water per cup of rice. Brown rice needs more—about 1.75 cups. Always refer to your specific rice variety for best results.
Can I cook rice directly in the pressure cooker without a pot?
Yes, some modern pressure cookers have built-in inner pots that double as cooking vessels. If yours doesn’t, always use a compatible pot to avoid damaging the appliance.
What if my rice is still hard after pressure cooking?
This usually means insufficient cooking time or too little water. Try increasing the water by ¼ cup and extending the pressure time by 1–2 minutes next time.
Can I freeze pressure-cooked rice?
Absolutely! Let it cool completely, portion it into containers, and freeze for up to 3 months. Reheat in the microwave or on the stovetop with a splash of water.
Is pressure-cooked rice healthier than boiled rice?
Nutritionally, there’s little difference. However, pressure cooking preserves more vitamins and minerals due to shorter cooking time and reduced exposure to heat.
Do I need to add oil to the rice?
Not required, but adding ½–1 teaspoon of oil per cup of rice can improve texture and prevent sticking. It’s optional and mostly a matter of personal preference.
Conclusion: Why Pressure Cooking Rice Is a Game-Changer
So, can rice be cooked in a pressure cooker? Without a doubt—yes. It’s faster, more consistent, and easier than traditional methods. Whether you’re making fluffy white rice for fried rice, chewy brown rice for pilafs, or sticky sushi rice for rolls, the pressure cooker delivers reliable results with minimal effort.
With the right techniques and a few simple adjustments, you’ll never go back to boiling rice on the stove. Plus, the time saved adds up over the course of a year—imagine having more time for family meals, hobbies, or just relaxing.
Ready to try it? Grab your favorite rice, measure the water, press start, and enjoy perfectly cooked grains every time. Your future self will thank you.
Frequently Asked Questions
How much water do I use per cup of rice in a pressure cooker?
For white rice, use 1.25 cups of water per cup of rice. Brown rice requires more—about 1.75 cups. Always check your rice type’s specific guidelines for best results.
Can I cook rice directly in the pressure cooker without a pot?
Yes, if your pressure cooker has a built-in inner pot. Otherwise, always use a compatible, non-reactive pot designed for pressure cooking to ensure safety and performance.
What if my rice is still hard after pressure cooking?
This often happens due to insufficient water or cooking time. Increase water by ¼ cup and extend pressure time by 1–2 minutes next time. Also, ensure you’re using high pressure for brown rice.
Can I freeze pressure-cooked rice?
Absolutely. Cool rice completely, divide into portions, and freeze for up to 3 months. Thaw in the refrigerator and reheat with a splash of water or steam.
Is pressure-cooked rice healthier than boiled rice?
There’s minimal nutritional difference, but pressure cooking reduces total cooking time, which helps preserve heat-sensitive nutrients. It’s also more energy-efficient.
Do I need to add oil to the rice when pressure cooking?
No, it’s optional. Adding a small amount of oil (½–1 tsp per cup) can reduce sticking and improve texture, but plain water works perfectly fine for most rice types.