
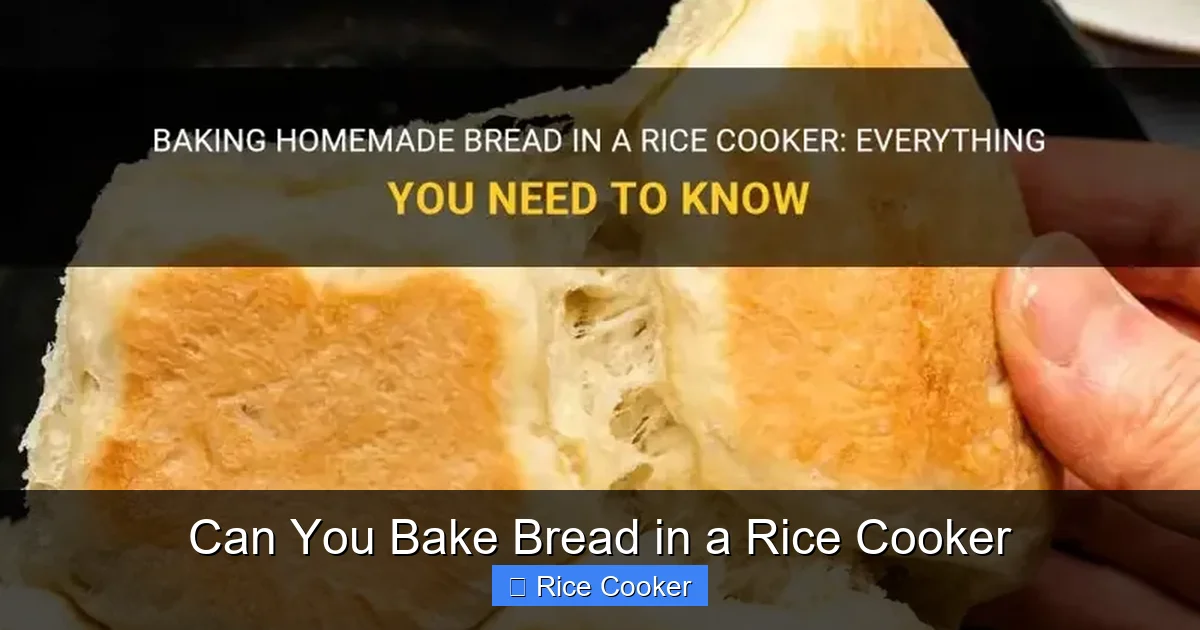
Can you bake bread in a rice cooker? Absolutely! With the right ingredients and technique, your rice cooker can become a surprisingly effective bread machine. You don’t need special equipment or baking experience—just a few basic supplies and a little patience. Whether you’re looking to save time, cut costs, or simply try something new, making bread in a rice cooker is an easy and rewarding kitchen hack.
Key Takeaways
- Rice cookers can bake bread: Many standard rice cookers have a “bake” or “cake” function that works well for bread.
- No oven required: Baking bread in a rice cooker saves energy and is perfect for small kitchens or when your oven is occupied.
- Simple recipe: Basic bread requires flour, water, yeast, salt, and sugar—no stand mixer or special tools needed.
- Consistent results: Once you master the process, you can make soft, fluffy loaves with minimal effort.
- Customizable: Add herbs, cheese, nuts, or seeds to create flavored breads like garlic herb or cinnamon swirl.
- Clean-up is easy: Most rice cookers use non-stick inner pots, so cleaning up after baking is quick and simple.
- Great for beginners: The automated timer and heating system make rice cooker bread baking beginner-friendly.
📑 Table of Contents
- Can You Bake Bread in a Rice Cooker? The Ultimate Guide
- How Does Baking Bread Work in a Rice Cooker?
- Essential Ingredients for Rice Cooker Bread
- Step-by-Step: How to Bake Bread in a Rice Cooker
- Creative Variations: Beyond Plain Bread
- Troubleshooting Common Issues
- Cleaning and Maintenance
- Is Baking Bread in a Rice Cooker Worth It?
- Final Thoughts: Embrace the Possibility
Can You Bake Bread in a Rice Cooker? The Ultimate Guide
Have you ever stood in your kitchen staring at a loaf of fresh-baked bread, wondering if you could make it yourself—but thought it was too complicated or required an oven you didn’t own? The good news is: yes, you can absolutely bake bread in a rice cooker. In fact, this kitchen gadget has quietly become one of the most versatile tools for homemade baking.
Whether you’re a college student living in a dorm room, someone without an oven, or just someone who loves experimenting with kitchen hacks, a rice cooker offers a surprisingly effective way to make soft, golden, delicious bread. It’s not just a substitute for a bread machine—it’s a clever workaround that uses the same basic principles of heat and steam to create a perfectly risen loaf.
In this complete guide, we’ll walk you through everything you need to know about baking bread in a rice cooker. From understanding how the magic happens to choosing the right model, mastering the dough, and even adding creative twists to your recipes, we’ve got you covered. By the end, you’ll be ready to turn your everyday rice cooker into a bread-making powerhouse.
How Does Baking Bread Work in a Rice Cooker?
Before diving into recipes, it’s helpful to understand why bread bakes successfully in a rice cooker. Unlike traditional ovens, which circulate hot air and rely on convection, a rice cooker uses direct radiant heat from the bottom plate to warm the contents inside. But here’s the secret: the lid traps steam, creating a moist environment that mimics the humidity found in professional bakeries.
Visual guide about Can You Bake Bread in a Rice Cooker
Image source: shungrill.com
The Science Behind the Steam
When yeast ferments the sugars in your dough, it produces carbon dioxide gas. These tiny bubbles expand when heated, causing the dough to rise. In a rice cooker, the trapped steam keeps the surface of the dough moist, preventing it from drying out while allowing the gases to expand fully. This results in a tender crumb and a beautifully blistered crust—just like oven-baked bread!
Most modern rice cookers come with multiple cooking modes: white rice, brown rice, porridge, slow cook, and sometimes even a “cake” or “bake” setting. The cake setting is particularly useful for bread because it applies steady, moderate heat over a longer period, giving the dough time to rise and set properly.
What Makes a Rice Cooker Suitable for Baking?
Not all rice cookers are created equal when it comes to baking bread. Here’s what to look for:
- Non-stick inner pot: Makes cleanup easier and prevents the bread from sticking.
- Steam-sealing lid: Ensures moisture stays inside during cooking.
- Adjustable temperature settings: Especially helpful if you’re using a manual model.
- Size capacity: A 5- to 6-cup rice cooker (about 1.2 to 1.5 liters) is ideal for a single loaf.
- Cake/bake mode: While not essential, this setting simplifies the process significantly.
If your rice cooker doesn’t have a bake function, don’t panic. Many people successfully bake bread using just the “cook” or even the “keep warm” setting—though timing and technique become more important.
Essential Ingredients for Rice Cooker Bread
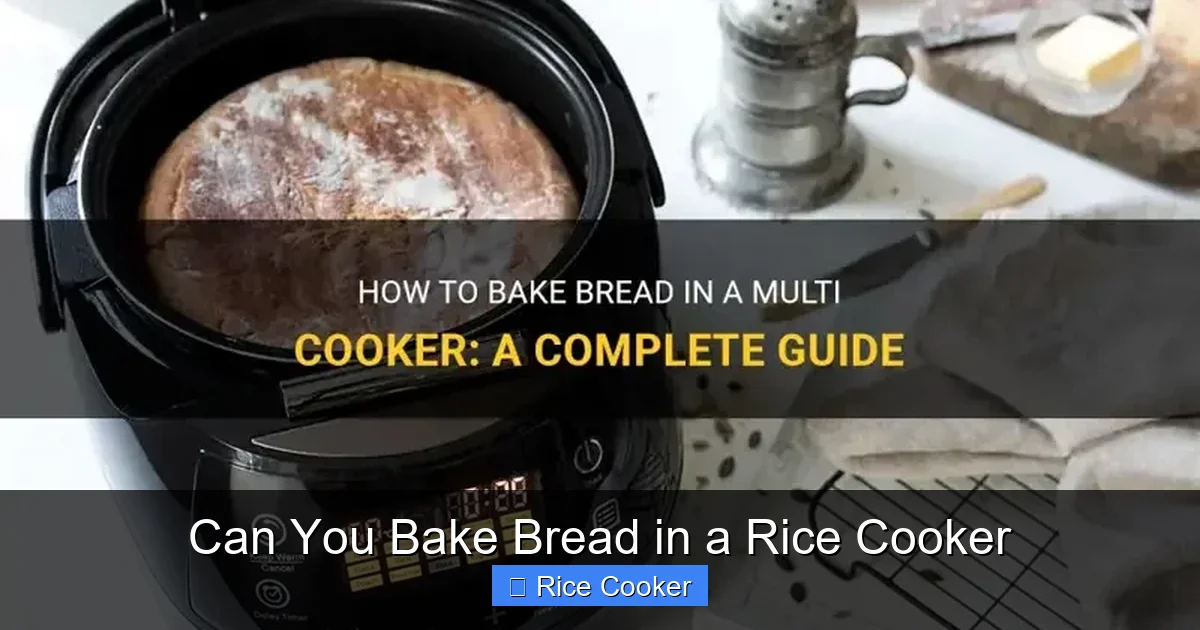
One of the best things about rice cooker bread is how simple the ingredients list is. You don’t need specialty flours or expensive additives. Just four basic components:
Visual guide about Can You Bake Bread in a Rice Cooker
Image source: shungrill.com
- All-purpose flour: Provides structure and gluten development.
- Warm water: Activates the yeast; around 100–110°F (38–43°C) is ideal.
- Active dry yeast: Turns your dough into a bubbly masterpiece.
- Salt: Enhances flavor and controls yeast activity.
- Sugar or honey: Feeds the yeast and adds tenderness.
- Oil or butter (optional): Keeps the bread soft and adds richness.
For a basic white bread, you might use 2 cups flour, 3/4 cup warm water, 1 packet (2¼ tsp) yeast, 1 tbsp sugar, 1 tsp salt, and 1 tbsp oil. That’s it!
Tips for Choosing Your Flour
While all-purpose flour works great for beginners, you can experiment with different types as you gain confidence:
- Whole wheat flour: Adds fiber and nutrition but requires more liquid due to higher absorption.
- Cake flour: Produces a finer, softer crumb—great for delicate loaves.
- Pizza dough flour (high-gluten): Creates chewier, denser breads with better structure.
If you’re unsure, start with all-purpose. You can always adjust next time based on texture preferences.
Step-by-Step: How to Bake Bread in a Rice Cooker
Ready to get your hands messy? Follow this foolproof method for a soft, fluffy loaf every time.
Ingredients (Basic White Bread)
- 2 cups all-purpose flour
- 1 packet (2¼ tsp) active dry yeast
- 1 tbsp granulated sugar
- 1 tsp salt
- 3/4 cup warm water (about 105°F / 40°C)
- 1 tbsp unsalted butter or vegetable oil
Instructions
- Activate the yeast: In a small bowl, mix warm water, sugar, and yeast. Let sit for 5–10 minutes until foamy. If it doesn’t foam, your yeast may be expired.
- Mix the dough: In the inner pot of your rice cooker, combine flour and salt. Make a well in the center and pour in the yeast mixture and oil. Stir with a spoon or spatula until a shaggy dough forms.
- Knead by hand: Turn the dough onto a lightly floured surface and knead for 5–7 minutes until smooth and elastic. Alternatively, use a stand mixer with dough hook attachment.
- First rise: Place dough back in the inner pot (lightly greased if desired). Cover with a damp cloth or plastic wrap. Let rise in a warm place for 1–1.5 hours, or until doubled in size.
- Shape the loaf: Gently punch down the dough to release air bubbles. Shape into a round or oval loaf and place seam-side down in the pot.
- Second rise: Cover again and let rise for another 30–45 minutes.
- Bake: Switch rice cooker to “Cake” or “Bake” mode. Cook for 30–40 minutes. If your model doesn’t have these settings, use “Cook” mode and monitor closely.
- Test for doneness: Tap the top—it should sound hollow. Insert a toothpick; it should come out clean.
- Cool completely: Remove bread and let cool on a wire rack for at least 30 minutes before slicing. Resist the urge to cut into it while still warm!
Pro Tips for Success
- Preheat the pot: For better browning, heat the inner pot (without water) on low for 2 minutes before adding dough.
- Use a towel under the lid: Fold a dry kitchen towel and place it under the lid to absorb excess condensation and prevent sogginess.
- Don’t overload the pot: Leave enough space for the dough to expand. Overfilling leads to dense, misshapen loaves.
- Check early: Some rice cookers finish faster than others. Start checking at 25 minutes.
Creative Variations: Beyond Plain Bread
Once you’ve mastered the basics, the fun begins. Rice cooker bread is incredibly adaptable. Here are five delicious variations to try:
Garlic Herb Bread
Add 2–3 cloves minced garlic, 1 tbsp chopped fresh rosemary or thyme, and a pinch of red pepper flakes to your dough. Perfect for dipping with olive oil or serving alongside soups.
Cheese Loaf
Fold in ½ cup shredded cheddar or mozzarella during the final mixing stage. The cheese melts beautifully and creates pockets of gooey goodness.
Banana Nut Bread
Mash 1 ripe banana, add ½ cup chopped walnuts, and replace ¼ cup of water with banana puree. Sweet, moist, and full of flavor.
Whole Wheat Bread
Substitute half the all-purpose flour with whole wheat. Increase water slightly (start with 1 cup) and let the dough rest longer to hydrate fully.
Sweet Brioche-Style
Add 2 eggs, ¼ cup melted butter, and 2 tbsp milk to your recipe. This richer dough yields a tender, slightly sweet loaf ideal for breakfast.
Each variation follows the same core steps—just swap or add ingredients before the first rise. Experimentation is part of the joy!
Troubleshooting Common Issues
Even experienced bakers run into problems now and then. Here’s how to fix them:
Dense or Flat Bread
This usually means the dough didn’t rise properly. Check your yeast’s expiration date, ensure water wasn’t too hot (above 120°F kills yeast), and give the dough enough time to double. Also, avoid opening the lid too often during rising—it releases heat and disrupts fermentation.
Burnt Bottom
If the bottom is charred, your rice cooker may be too powerful or the pot too thin. Try placing a small oven-safe dish with water on the heating plate to diffuse heat. Or reduce cooking time by 5 minutes and cover the top loosely with foil.
Dough Sticks to the Pot
Always grease the inner pot lightly with oil or butter before adding dough. If it still sticks, dust the pot with flour just before shaping.
Too Wet or Gummy
Overmixing or too much liquid causes this. Measure accurately and avoid adding more flour once the dough comes together—it makes the bread tough.
Crust Too Thick
Cover the top of the loaf with a piece of foil halfway through baking to prevent excessive browning.
Cleaning and Maintenance
After baking, cleaning your rice cooker is straightforward. Most inner pots are removable and dishwasher-safe (check manufacturer instructions). Wipe the exterior with a damp cloth. Never submerge the base in water—it’s electrical and shouldn’t get wet.
For stubborn residue, fill the pot with warm, soapy water and let it soak for 15 minutes before scrubbing gently. Avoid metal utensils that could scratch the non-stick coating.
Is Baking Bread in a Rice Cooker Worth It?
Let’s be honest: traditional ovens give the best results for artisan-style bread with crispy crusts and complex flavors. But for convenience, speed, and accessibility, a rice cooker wins hands down. You can make fresh bread in under two hours—no preheating, no waiting for the oven to cool, no special pans required.
Plus, it’s cost-effective. A single loaf costs pennies compared to store-bought versions, especially if you buy ingredients in bulk. And there’s nothing quite like the smell of fresh bread wafting through your home while you relax nearby.
If you live off-campus, rent an apartment without a full kitchen, or simply want to expand your culinary skills without investing in another appliance, a rice cooker is a smart, multi-use tool. It’s not just for rice anymore—it’s your new go-to for pancakes, steamed dumplings, yogurt, and yes, even bread.
Final Thoughts: Embrace the Possibility
Baking bread in a rice cooker isn’t just a clever trick—it’s a gateway to greater confidence in the kitchen. Once you see how easy it is, you’ll find yourself reaching for your rice cooker more often, trying new recipes, and impressing friends and family with homemade treats.
Remember: every great baker started exactly where you are—with curiosity and a willingness to learn. Don’t worry about perfection. Missed a step? Adjust next time. Want it sweeter? Add more sugar. Craving cheesy goodness? Go for it.
The beauty of rice cooker bread lies in its simplicity and adaptability. So grab your ingredients, fire up that trusty appliance, and enjoy the delicious journey ahead.
Frequently Asked Questions
Can any rice cooker bake bread?
Most modern rice cookers with non-stick pots and a sealed lid can bake bread, especially those with a “cake” or “bake” setting. Older models may require manual timing and monitoring.
Do I need a special type of flour for rice cooker bread?
All-purpose flour works best for beginners. As you gain experience, you can try whole wheat, cake flour, or high-gluten flour to achieve different textures.
How long does it take to bake bread in a rice cooker?
From start to finish, including rising time, it takes about 2–2.5 hours. Active prep is minimal, making it ideal for busy schedules.
Why is my rice cooker bread flat?
A flat loaf usually indicates inactive yeast or insufficient rising time. Check yeast freshness, water temperature, and give the dough enough warmth to double in size.
Can I freeze rice cooker bread?
Yes! Let the bread cool completely, slice it, wrap tightly in plastic, and store in the freezer for up to 3 months. Reheat slices in a toaster or oven.
Is rice cooker bread healthier than store-bought?
Homemade bread allows control over ingredients—no preservatives, less sodium, and no added sugars. Opt for whole grains and natural sweeteners for a healthier option.