
You absolutely can cook rice in a Ninja pressure cooker—and it’s easier than you think! With the right water-to-rice ratio and cooking technique, your Ninja Foodi or Ninja OP301 can deliver perfectly fluffy or tender rice with minimal effort. Whether you’re making jasmine, basmati, brown rice, or even sushi rice, this versatile kitchen gadget handles it all with consistent results.
Key Takeaways
- Ninja pressure cookers are excellent for rice: Models like the Ninja Foodi and Ninja OP301 offer both pressure and slow cook functions that make rice cooking simple and reliable.
- Use the right water-to-ratio: A 1:1.2 to 1:1.5 ratio (rice to water) works best for most white and brown rice varieties.
- Pre-soaking improves texture: Soaking rice for 20–30 minutes before cooking can lead to more uniform, fluffier grains.
- Quick release vs. natural release matters: For fluffier rice, use quick release; for tender brown rice, natural release is often better.
- Customize for rice type: Adjust cooking times and settings based on grain variety—jasmine, basmati, arborio, and wild rice each have unique needs.
- Cleaning is easy: Most Ninja models have removable parts that are dishwasher-safe for hassle-free cleanup.
- Beyond basic rice: You can also cook quinoa, risotto, pilafs, and even steamed vegetables using the same techniques.
📑 Table of Contents
- Can You Cook Rice in the Ninja Pressure Cooker?
- The Science Behind Cooking Rice in a Pressure Cooker
- Step-by-Step Guide: How to Cook White Rice in a Ninja Pressure Cooker
- Cooking Different Types of Rice in Your Ninja Pressure Cooker
- Pro Tips for Perfect Rice Every Time
- Troubleshooting Common Rice Issues
- Beyond Plain White Rice: Creative Uses for Your Ninja Pressure Cooker
- Cleaning and Maintaining Your Ninja Pressure Cooker for Best Results
- Final Thoughts: Why Ninja Is Your New Rice BFF
Can You Cook Rice in the Ninja Pressure Cooker?
Have you ever wondered if your Ninja Foodi or Ninja OP301 pressure cooker can do more than just sear meat or simmer soups? The short answer is yes—you can absolutely cook rice in a Ninja pressure cooker, and the results are often better than traditional stovetop methods. In fact, pressure cooking rice in your Ninja appliance is one of its most underappreciated features. It saves time, uses less energy, and produces consistently fluffy or tender grains depending on how you set it up.
Whether you’re a busy parent trying to meal-prep for the week or a home cook who simply loves perfectly cooked grains, learning to cook rice in your Ninja pressure cooker opens up a world of culinary possibilities. From aromatic jasmine rice to nutty brown rice and even creamy risotto-style dishes, this multi-functional kitchen tool can handle it all. Plus, once you master the basics, you’ll find yourself relying on your Ninja less for boiling pasta and more for creating complete, one-pot meals.
The Science Behind Cooking Rice in a Pressure Cooker
How Pressure Cooking Affects Rice Grains
Rice cooks when starch granules absorb water and swell, then gelatinize under heat and pressure. Traditional stovetop methods rely on constant stirring and careful monitoring to prevent sticking or burning. But in a pressure cooker like the Ninja, steam builds rapidly, creating intense heat that penetrates the grains quickly and evenly. This sealed environment allows rice to cook faster while retaining moisture—resulting in less evaporation and more consistent texture.
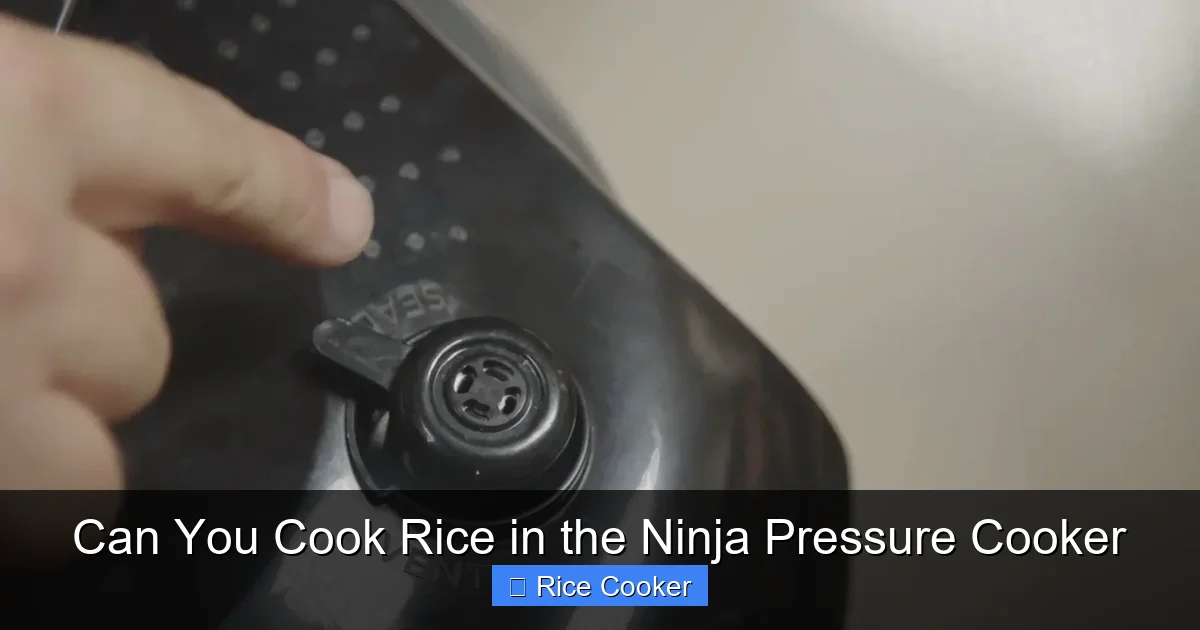
Visual guide about Can You Cook Rice in the Ninja Pressure Cooker
Image source: homechefninja.com
Because the Ninja locks in steam, there’s also less chance of scorching at the bottom of the pot. That means you can walk away after sealing the lid and come back to perfectly cooked rice without any babysitting. The pressure setting also helps break down tough cell walls in brown rice, making it softer and more palatable than when boiled on the stove.
Why Ninja Models Are Ideal for Rice
Not all pressure cookers are created equal when it comes to rice. Some struggle with uneven heating or require manual adjustments mid-cycle. But Ninja models—especially the Foodi and OP301 lines—come equipped with smart controls, pre-programmed settings, and even dedicated rice functions on newer firmware updates. These features help automate the process so you don’t have to guess timings or ratios every time.
Additionally, many Ninja units include a non-stick inner pot, which makes cleaning up sticky rice residue a breeze. The ability to switch between pressure cook, slow cook, sauté, and even air fry modes means you can build flavor into your rice before it even starts cooking. Imagine searing onions and garlic first, then adding rice and broth to make a savory pilaf—all in the same pot!
Step-by-Step Guide: How to Cook White Rice in a Ninja Pressure Cooker
Gather Your Ingredients and Tools
Before you begin, make sure you have:
Visual guide about Can You Cook Rice in the Ninja Pressure Cooker
Image source: m.media-amazon.com
- 1 cup long-grain white rice (e.g., basmati or jasmine)
- 1.2 to 1.5 cups water or broth (depending on desired tenderness)
- A fine-mesh strainer (optional but recommended)
- A measuring cup designed for rice (or standard measuring cup)
- Your Ninja pressure cooker with inner pot
Rinse and Soak the Rice (Optional but Recommended)
While not always necessary, rinsing removes excess starch and prevents clumping. Place rice in a bowl, add cold water, swirl gently, and drain. Repeat 2–3 times until the water runs clear. Then, let the rinsed rice soak for 20–30 minutes. Soaking helps grains expand uniformly during cooking, leading to fluffier results.
Measure Water Correctly
The golden rule is: more water = softer rice. For most white rice varieties, use 1.25 cups of liquid per 1 cup of dry rice. If you prefer slightly firmer grains (like for fried rice later), go with 1.2 cups. For extra fluffy rice, try 1.5 cups—but avoid overdoing it, or your rice may become mushy.
Add Rice and Liquid to the Inner Pot
Transfer the soaked (or unsoaked) rice to the Ninja’s inner pot along with your measured water or broth. Stir lightly to distribute evenly. Avoid packing the rice down—let it sit loosely so steam can circulate freely.
Select the Right Setting
If your Ninja model has a dedicated “Rice” setting (check your manual), use that. Otherwise, choose “Pressure Cook” or “Manual” and set the timer to 4 minutes on high pressure. Remember: white rice cooks fast under pressure!
Seal the Lid and Begin Cooking
Lock the lid securely and ensure the valve is in the sealed position. Start the cycle. Once cooking completes, allow for a quick release by turning the valve to venting mode. Wait until all pressure drops visibly before opening.
Fluff and Serve Immediately
Once opened, use a fork to gently fluff the rice. Don’t mash it—just lift and separate. Let it rest covered for 5 minutes to finish steaming. Then serve hot with your favorite protein or side dish.
Cooking Different Types of Rice in Your Ninja Pressure Cooker
Jasmine and Basmati Rice
These fragrant long-grain varieties benefit from soaking and slightly less water than short-grain types. Use 1.25 cups water per 1 cup rice, cook on high pressure for 4 minutes, then quick release. The result is aromatic, light, and separate—perfect for Thai curries or biryanis.
Brown Rice
Brown rice takes longer due to its bran layer. Increase water to 1.5 cups per 1 cup rice and extend cooking time to 18–22 minutes on high pressure. Use natural release for the best texture—it allows residual heat to finish cooking without shocking the grains.
Arborio (Risotto Rice)
For creamy risotto, start by sautéing Arborio rice in butter until translucent. Add 1 cup broth gradually while stirring—but in a pressure cooker, you can shortcut this by adding all liquid at once and using the “Sauté” function briefly before switching to pressure cook for 6 minutes. Natural release, then stir vigorously to activate starches.
Wild Rice and Mixed Grain Blends
Wild rice requires 30–40 minutes on high pressure with 2 cups water per 1 cup rice. Mixed grains may need adjusted times—start with the longest grain’s recommended duration and check doneness halfway through if possible.
Sushi Rice
Sushi rice needs precise water absorption. Rinse thoroughly until water is almost clear, then soak for 30 minutes. Use 1 cup sushi rice + 1.1 cups water. Cook on high pressure for 4 minutes, then natural release for 10 minutes before fluffing. Season with rice vinegar after cooking.
Pro Tips for Perfect Rice Every Time
Invest in a Rice Measuring Cup
Standard U.S. measuring cups aren’t accurate for rice. A dedicated rice cup holds exactly 180ml—which equals about ¾ cup of dry rice. Using the right tool ensures consistent ratios.
Don’t Skip the Soak
Even if you’re short on time, a quick 10-minute soak makes a noticeable difference in texture. It’s especially helpful for brown rice and instant varieties.
Season While Cooking When Possible
Add salt, bay leaves, or even a splash of olive oil to the water/broth to infuse flavor. Herbs like thyme or rosemary work great in pilafs.
Let Rice Rest After Cooking
Cover the pot immediately after opening and let it sit for 5–10 minutes. This finishes the cooking process and redistributes moisture evenly.
Clean the Inner Pot Promptly
Starchy residue hardens if left too long. Wash the inner pot while still warm with mild soap and water—or pop it in the dishwasher if labeled safe.
Avoid Opening During Cooking
Never peek or open the lid before the cycle ends. Releasing pressure prematurely disrupts the cooking process and can leave rice undercooked or uneven.
Troubleshooting Common Rice Issues
Rice Stuck to the Bottom
This usually happens if the inner pot wasn’t properly greased or if too little liquid was used. Always use enough water, and consider spraying the pot with cooking oil before adding rice—especially for pilafs or flavored dishes.
Mushy or Soupy Rice
Overcooked or too much water causes this. Next time, reduce water by ¼ cup and shorten cooking time by 1 minute. Quick release helps prevent overcooking compared to natural release.
Rice Too Dry or Hard
Undercooked rice often results from insufficient soaking or too little liquid. Try increasing water by ¼ cup and extending cooking time by 2 minutes. Natural release gives the grains more time to absorb remaining moisture.
Uneven Texture
If some grains are soft and others hard, the rice may not have been distributed evenly in the pot. Always give rice a gentle stir after adding liquid and before sealing.
Burnt Smell
This suggests scorching at the bottom. Clean the inner pot thoroughly, ensure it’s not warped, and never cook without sufficient liquid. Adding a tablespoon of oil can also prevent sticking.
Beyond Plain White Rice: Creative Uses for Your Ninja Pressure Cooker
One-Pot Meals and Grain Bowls
Cook rice first using the steps above, then add diced tomatoes, black beans, corn, and spices to create a hearty grain bowl. Finish with avocado, salsa, and a squeeze of lime.
Rice-Based Desserts
Make coconut rice pudding by combining rice, coconut milk, sugar, cinnamon, and raisins. Cook on high pressure for 15 minutes with natural release for a creamy, comforting dessert.
Infused Rice Dishes
Try lemon-herb rice by adding zest and fresh herbs to the cooking liquid. Or make garlic confit rice by sautéing minced garlic until golden, then adding rice and broth.
Gluten-Free and Ancient Grains
Quinoa, millet, teff, and amaranth all adapt well to pressure cooking. Follow similar ratios: 1:1.5 for most ancient grains, cook 6–8 minutes on high pressure with quick release.
Steamed Vegetables Over Rice
After cooking rice, keep it covered and place steamed broccoli or carrots in the basket above it. The residual heat will finish them gently while keeping the rice warm.
Cleaning and Maintaining Your Ninja Pressure Cooker for Best Results
Keeping your Ninja in top shape ensures reliable performance every time. After each use, remove the inner pot and wash it with warm, soapy water. Most models are dishwasher-safe except for the sealing ring and control panel. Replace the silicone seal annually if it shows wear or cracking.
Check the float valve and vent pipe regularly for blockages—especially if you notice steam escaping unevenly. A clogged vent can compromise safety and cooking efficiency. Wipe down the exterior with a damp cloth and store in a dry place.
Also, calibrate your water measurements using a kitchen scale for precision. Weighing ingredients eliminates guesswork and guarantees consistency across batches.
Final Thoughts: Why Ninja Is Your New Rice BFF
If you thought your Ninja pressure cooker was just for tough cuts of meat or quick soups, think again. Cooking rice in a Ninja is not only possible—it’s one of the easiest, most reliable ways to prepare perfect grains at home. With just a few tweaks to your routine and an understanding of how different rice varieties behave under pressure, you’ll be serving restaurant-quality rice in minutes.
So next time you’re planning dinner, skip the pot on the stove and reach for your Ninja instead. Whether you’re whipping up a family-friendly stir-fry base or experimenting with exotic grains, your Ninja pressure cooker has got your back. And honestly? There’s something deeply satisfying about knowing that one appliance can simplify so many parts of your cooking life.
Now go forth and rice like a pro—with confidence, creativity, and a perfectly fluffed bowl every single time.
Frequently Asked Questions
Can you cook rice in a Ninja Foodi?
Yes, the Ninja Foodi is excellent for cooking rice. It offers both pressure cook and slow cook functions that make preparing fluffy or tender rice simple and efficient. Just follow the correct water ratio and timing for your rice type.
What’s the best water-to-rice ratio for Ninja pressure cooker rice?
For most white rice, use 1.2 to 1.5 cups of water per 1 cup of dry rice. Brown rice typically needs more water—about 1.5 cups—and longer cooking time. Adjust based on desired texture.
Do I need to soak rice before cooking in a Ninja?
Soaking isn’t mandatory but highly recommended. It helps grains cook evenly and results in fluffier rice. Soak for 20–30 minutes before cooking for best outcomes.
Should I use quick release or natural release for rice?
Use quick release for fluffier white rice and natural release for softer, more tender brown rice. Quick release stops cooking immediately, while natural release lets residual heat finish the process gently.
Can I cook other grains in my Ninja besides rice?
Absolutely! Quinoa, barley, millet, and ancient grains all work well in a Ninja pressure cooker. Adjust water and time accordingly—usually 1:1.5 ratio and 6–10 minutes on high pressure.
Is the inner pot of a Ninja pressure cooker dishwasher safe?
Most Ninja inner pots are dishwasher safe, but always check your user manual. Avoid washing the sealing ring or control panel in the dishwasher to preserve functionality.