
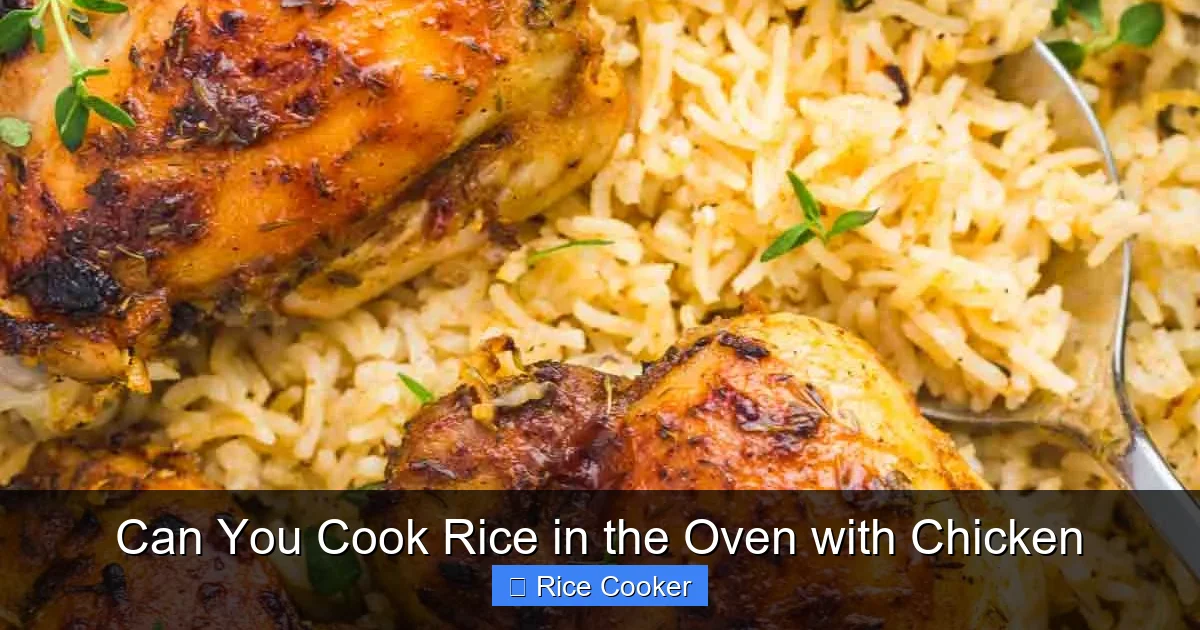
Yes, you can absolutely cook rice in the oven with chicken—it’s a one-pot wonder that delivers tender, juicy chicken and fluffy rice without constant stirring. This method uses steam and slow heat to lock in moisture, creating a balanced, delicious meal with minimal effort. Whether you’re meal prepping or feeding a crowd, baking rice with chicken is efficient, foolproof, and packed with flavor.
Have you ever stared at a pot of overcooked rice or dry, tough chicken and wondered, “Is there a better way?” If so, you’re not alone. Many home cooks struggle with getting rice perfectly cooked while keeping chicken moist and flavorful. But what if we told you that the answer might be as simple as using your oven? Yes—you can cook rice in the oven with chicken, and the results are surprisingly delicious.
This method isn’t just a clever trick—it’s a game-changer for busy weeknights, meal preppers, and anyone who wants to reduce kitchen stress. By combining rice and chicken in a single oven-safe dish, you create a self-contained meal that bakes to perfection without constant attention. The steam from the liquid keeps everything tender, while the dry heat ensures the chicken gets nicely browned. Plus, it frees up your stovetop for other tasks. In this article, we’ll walk you through everything you need to know about cooking rice in the oven with chicken—from choosing the right ingredients to mastering timing and seasoning. Let’s get started!
Key Takeaways
- Oven-baked rice and chicken cook evenly together: The moist environment helps keep both ingredients tender and flavorful without drying out.
- You don’t need a rice cooker: This technique works perfectly without special appliances, using just an oven and a baking dish.
- Flavor infusion is enhanced: Cooking rice with chicken allows spices and herbs to meld beautifully into both proteins.
- Perfect for meal prep: Bake a large batch of chicken and rice ahead of time for quick lunches or dinners all week.
- Customizable and versatile: Swap in different grains, vegetables, or seasonings to suit your taste.
- Saves time on cleanup: One pan means fewer dishes to wash after dinner.
- Great for beginners: Simple steps make this method accessible even if you’re new to home cooking.
📑 Table of Contents
- Why Oven-Baking Rice with Chicken Works So Well
- What You’ll Need: Ingredients and Equipment
- Step-by-Step Guide: How to Cook Rice in the Oven with Chicken
- Variations and Creative Twists
- Meal Prep Made Easy: Batch Cooking Tips
- Troubleshooting Common Issues
- Healthy Eating and Nutrition Insights
- Final Thoughts: Why This Method Belongs in Every Kitchen
Why Oven-Baking Rice with Chicken Works So Well
Cooking rice and chicken together in the oven may sound unconventional, but it actually makes a lot of sense when you think about how heat and moisture interact. Unlike boiling rice on the stove, where water evaporates quickly, baking in the oven traps steam inside the dish. That steam does the work of cooking the rice evenly while keeping the chicken from drying out. It’s like a cozy little oven-powered stew.
Another advantage is control. On the stovetop, rice can easily become mushy if overcooked or undercooked if the heat is too low. But in the oven, the temperature stays steady, giving both ingredients time to cook slowly and absorb flavors naturally. You also avoid the risk of scorching or burning, which often happens when rice simmers unattended. And let’s not forget convenience—once you set it and forget it, you can focus on preparing sides or cleaning up.
The Science Behind Steam and Flavor
When you combine rice with chicken in a sealed environment (like a covered baking dish), the chicken releases moisture as it cooks. That moisture rises as steam, gently cooking the rice from above. This method mimics how paella is made—a Spanish dish where rice absorbs broth slowly while surrounded by protein and aromatics. The result? Each grain stays separate and fluffy, yet infused with subtle chicken flavor.
Additionally, the Maillard reaction—the chemical process that creates rich, golden-brown crusts on meat—happens beautifully in the oven. So your chicken won’t just be juicy; it’ll also have that irresistible texture and depth of flavor that comes from proper browning.
Benefits Over Traditional Stovetop Methods
If you’ve ever tried to cook rice alongside chicken on the stove, you know the challenges: constant stirring, risk of sticking, and uneven cooking. With oven-baked rice and chicken, you eliminate those problems. Here’s how it stacks up:
– Even heat distribution: No hot spots or uneven simmering.
– Less hands-on time: Just prep, bake, and enjoy.
– Better flavor integration: Ingredients meld together naturally.
– Fewer dishes: One pot, one pan—easy cleanup.
– Ideal for large batches: Perfect for family dinners or meal prep.
Whether you’re cooking basmati, jasmine, brown rice, or even quinoa, this method adapts easily. And since you’re not limited to specific pots or pans, you can use any oven-safe dish you have on hand.
What You’ll Need: Ingredients and Equipment
Before you start, gather these essentials. Don’t worry—everything is common household stuff!
Essential Ingredients
For a basic chicken and rice dish, you’ll need:
– 1½ cups long-grain white rice (or brown rice for a heartier option)
– 1 lb boneless, skinless chicken thighs or breasts (cut into bite-sized pieces)
– 2½ cups chicken broth (low-sodium preferred)
– 1 tablespoon olive oil or butter
– Salt and pepper to taste
– Optional add-ins: garlic, onion, carrots, peas, thyme, paprika, or lemon zest
Using broth instead of water adds incredible flavor. You can also swap in vegetable broth if you prefer a lighter taste.
Recommended Equipment
– An oven-safe baking dish (9×13 inches works well)
– Tongs or spatula
– Measuring cups and spoons
– Cutting board and knife
– Wooden spoon or heat-resistant spatula
Make sure your baking dish has high sides to prevent overflow as the rice absorbs liquid. Glass or ceramic works best, but metal is fine too.
Tips for Choosing Rice
Not all rice types are created equal when it comes to oven cooking. Long-grain varieties like Jasmine or Basmati hold their shape best because they don’t get mushy when exposed to steam. Short-grain rice (like sushi rice) can work, but monitor closely to avoid stickiness. Brown rice takes longer to cook—usually 45–50 minutes—so adjust timing accordingly.
Step-by-Step Guide: How to Cook Rice in the Oven with Chicken
Now for the fun part—actually making it! Follow these steps for foolproof results every time.
Step 1: Prep Your Ingredients
Start by cutting your chicken into uniform pieces so it cooks evenly. Season generously with salt, pepper, and any spices you like (paprika, garlic powder, oregano). Heat oil or butter in your baking dish over medium-high heat (if using a stovetop before transferring to oven). Sear the chicken for 2–3 minutes per side until golden. This locks in moisture and boosts flavor.
Next, add diced onions, garlic, or other veggies if desired. Sauté for 1–2 minutes until fragrant. Then, stir in your rinsed rice and toast it for about 1 minute—this helps prevent clumping.
Step 2: Add Liquid and Simmer Briefly
Pour in the chicken broth and bring everything to a gentle boil on the stovetop (about 3–4 minutes). Stir once or twice to combine. Taste the mixture—does it need more salt? Adjust now, since you won’t stir much during baking.
Step 3: Transfer to the Oven
Preheat your oven to 375°F (190°C). Carefully transfer the entire contents of the pan to your baking dish. Smooth the top with a spatula, then cover tightly with aluminum foil or a lid.
Place the dish in the center rack of the oven. Bake for 30 minutes if using white rice, or 45 minutes for brown rice. The rice is done when it’s tender and most of the liquid is absorbed. A fork should slide easily between grains.
Step 4: Rest and Fluff
Remove the dish from the oven and let it rest, covered, for 10 minutes. This allows the rice to finish steaming and firms up slightly. Then fluff with a fork and serve immediately.
Pro Tips for Success
– Don’t peek too early: Opening the oven door lets steam escape, which can delay cooking.
– Use a kitchen thermometer: Check chicken internal temp—it should reach 165°F (74°C).
– Add veggies midway: Toss in carrots or broccoli during the last 15 minutes of baking.
– Double the recipe easily: Just increase all ingredients proportionally.
Variations and Creative Twists
Once you master the basics, the possibilities expand! Try these tasty variations:
Herb-Roasted Chicken and Wild Rice
Swap white rice for wild rice mix (which includes wild rice, barley, and oats). Add fresh thyme, rosemary, and a splash of white wine to the broth. Serve with a squeeze of lemon for brightness.
Spicy Mexican-Inspired Dish
Use cumin, chili powder, and smoked paprika. Dice bell peppers and corn with the chicken. Finish with shredded cheese and sour cream on top.
Creamy Parmesan Chicken and Rice
After baking, stir in ¼ cup grated Parmesan and a splash of heavy cream for richness. Garnish with parsley.
One-Pan Mediterranean Style
Add cherry tomatoes, olives, and feta cheese. Use lemon juice and oregano for a fresh, tangy flavor.
These variations show how flexible this method is. You can tailor the dish to any diet—gluten-free, paleo, vegetarian (with extra veggies), or keto (skip the rice and double the chicken).
Meal Prep Made Easy: Batch Cooking Tips
Want to save time all week? Bake a big tray of chicken and rice on Sunday. Store portions in airtight containers in the fridge for up to 4 days or freeze for 3 months. Reheat in the microwave or oven until warm throughout.
To reheat, add a splash of broth or water to prevent drying out. Stir occasionally to redistribute moisture.
Freezing Guidelines
Label containers clearly with date and contents. When freezing, leave ½-inch headspace in jars or containers so the food expands safely.
Troubleshooting Common Issues
Even experienced cooks run into hiccups. Here’s how to fix them:
Too Much Water Left After Baking
If some liquid remains, uncover the dish and bake for 5–10 more minutes. Keep an eye on it—rice can go from wet to dry quickly.
Rice Is Mushy or Sticky
This usually means too much liquid or overcooking. For future batches, reduce broth by ¼ cup and check doneness halfway through.
Chicken Is Dry
Use bone-in, skin-on thighs—they stay juicier. Also, avoid opening the oven too often.
Rice Doesn’t Cook Through
Ensure broth is hot before adding rice. Cold liquid slows cooking. Also, stir once halfway through (only if needed).
Healthy Eating and Nutrition Insights
This dish can be nutritious when balanced right. Chicken provides lean protein, while rice offers complex carbohydrates and fiber (especially with brown rice). Adding veggies increases vitamins and minerals.
To make it lighter, choose skinless chicken, rinse rice to reduce starch, and limit added fats. You can also substitute cauliflower rice for a low-carb version.
Nutritional Breakdown (per serving)
– Calories: ~450 (varies by ingredients)
– Protein: 30g
– Carbohydrates: 50g
– Fat: 15g
– Fiber: 2g (with brown rice)
Pair with a green salad for a complete meal.
Final Thoughts: Why This Method Belongs in Every Kitchen
Cooking rice in the oven with chicken isn’t just practical—it’s transformative. It turns a potentially stressful cooking session into a calm, rewarding experience. No more babysitting a pot, no more burnt bottoms, no more uneven textures. Just set it up, pop it in the oven, and enjoy the aroma filling your home.
Whether you’re new to cooking or a seasoned home chef, this method proves that simplicity often leads to greatness. And the best part? It tastes amazing. The chicken is tender, the rice is light and fragrant, and every bite feels like comfort.
So next time you’re wondering what to make for dinner, skip the complicated recipes. Grab some chicken, rice, and broth—and let the oven do the work.
Frequently Asked Questions
Can I use any type of rice for oven cooking?
Long-grain white rice works best for oven methods because it stays fluffy and doesn’t turn mushy. Brown rice is possible but requires longer cooking times (around 45–50 minutes). Avoid very short-grain rice like sushi rice unless you’re careful about moisture levels.
Do I need to pre-cook the chicken before adding rice?
Yes, it’s recommended to sear or partially cook the chicken first. This creates a flavorful base and ensures the chicken finishes cooking properly without overcooking the rice. Browning also helps lock in juices.
How do I prevent the rice from turning sticky?
Use the right amount of liquid—too much causes stickiness. Rinse the rice before adding it to remove excess starch. Also, avoid stirring during baking, as this breaks apart the grains.
Can I add vegetables to the dish?
Absolutely! Add soft vegetables like peas, carrots, or bell peppers during the last 15–20 minutes of baking so they don’t become mushy. Harder veggies like potatoes can go in earlier.
How long does it take to cook brown rice with chicken in the oven?
Brown rice takes longer to absorb liquid and soften. Expect 45–50 minutes total, covered, at 375°F (190°C). Check halfway through to ensure it’s not drying out.
Can I make this dish ahead of time?
Yes! Cooked rice and chicken can be stored in the fridge for up to 4 days or frozen for up to 3 months. Reheat with a splash of broth to restore moisture.