
You absolutely can cook rice with cold water, and doing so is actually preferred by many home cooks and professionals alike. Cold water helps absorb moisture evenly, resulting in fluffier, more consistent results compared to starting with hot water. Whether you’re using a stovetop, rice cooker, or Instant Pot, beginning with cold water ensures better control over the cooking process and delivers superior texture.
Key Takeaways
- Yes, you can cook rice with cold water – it’s not only possible but often recommended for optimal results.
- Cold water allows gradual heat transfer, helping grains cook more evenly and preventing mushiness.
- Using cold water improves absorption, letting each grain fully hydrate for a better texture.
- Rice cookers are designed to work with cold water, automatically adjusting temperature and timing.
- Stovetop methods benefit from cold water because it gives you full control over heat levels.
- Hot or boiling water isn’t necessary and may lead to uneven cooking or overcooked edges.
- Consistency is key – always measure water and rice properly, regardless of starting temperature.
📑 Table of Contents
- Can You Cook Rice with Cold Water? The Simple Truth Explained
- The Science Behind Cooking Rice with Cold Water
- How to Cook Rice with Cold Water on the Stovetop
- Using Cold Water in a Rice Cooker
- Common Myths About Cooking Rice with Hot Water
- Tips for Perfect Rice Every Time
- Special Considerations: Brown Rice and Wild Rice
- Troubleshooting Common Rice Problems
- Advanced Techniques: Steaming and Absorption Methods
- Environmental and Health Considerations
- Final Thoughts: Why Cold Water Wins
Can You Cook Rice with Cold Water? The Simple Truth Explained
Have you ever wondered whether it matters if you use hot or cold water when cooking rice? You might have seen recipes that call for boiling water or even steaming rice over hot liquid. But what about the classic method—just adding cold tap water to your rice before cooking? Surprisingly, yes, you absolutely can cook rice with cold water, and doing so is often the most reliable way to get fluffy, tender grains every time.
Many people assume that starting with hot water speeds up the cooking process or makes rice softer. But here’s the thing: rice doesn’t need pre-boiled water to cook properly. In fact, using cold water gives you more control, helps distribute heat evenly, and ensures that every grain absorbs moisture at a steady pace. Whether you’re using a traditional pot on the stove or a modern electric rice cooker, beginning with cold water is not just fine—it’s ideal.
The Science Behind Cooking Rice with Cold Water
Understanding how rice cooks helps explain why cold water works so well. Rice is made mostly of starch, and when it comes into contact with water and heat, the starch granules absorb moisture and begin to swell. This process is called gelatinization, and it’s what turns raw rice into soft, edible grains. If you start with hot water, the outer layer of the rice grain can absorb too much moisture too quickly, leading to uneven cooking. Some grains may become mushy while others stay hard.
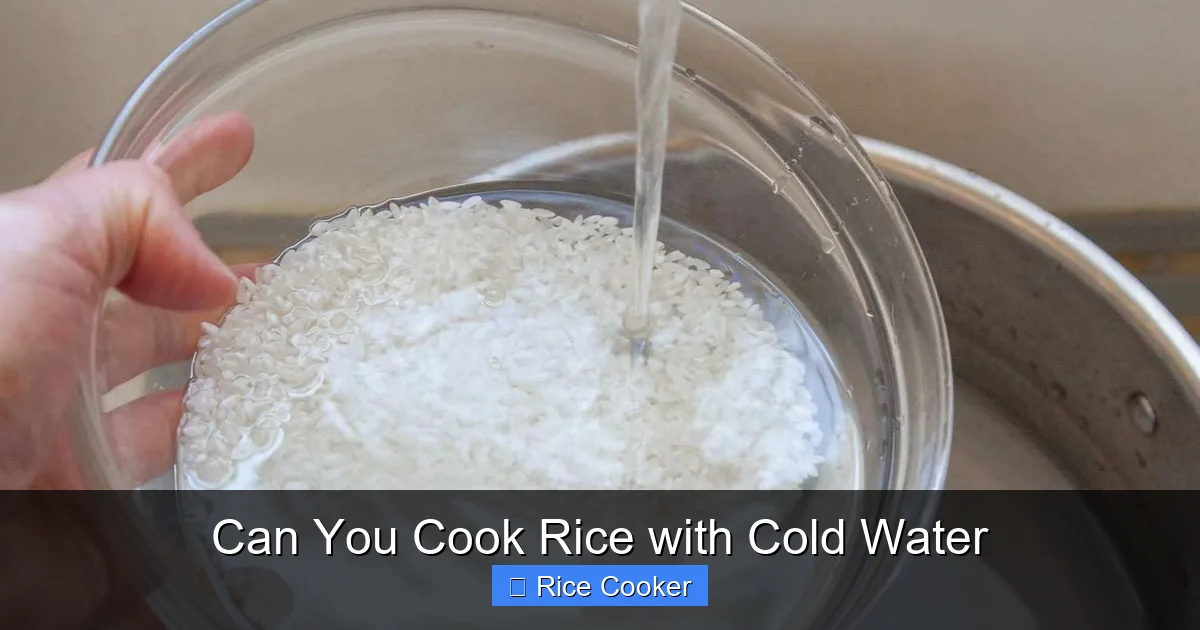
Visual guide about Can You Cook Rice with Cold Water
Image source: simplyrecipes.com
Why Even Heat Distribution Matters
When you add cold water to rice and gradually increase the heat, the water warms up slowly. This allows the heat to penetrate the rice grains more evenly. As the water heats, the rice begins to cook gently, ensuring that all grains reach the same level of tenderness. Think of it like baking bread—starting with cold ingredients in an oven allows for a more controlled rise and better structure.
Absorption Is Key
Rice absorbs water as it cooks. Starting with cold water means the grains have time to soak up moisture steadily. If you begin with boiling water, the surface of the rice may harden slightly, creating a barrier that prevents deeper absorption. Over time, this can result in undercooked centers or overly firm exteries.
How to Cook Rice with Cold Water on the Stovetop
If you’re cooking rice on the stovetop, using cold water is not only acceptable—it’s the standard method used in most kitchens. Here’s a simple step-by-step guide to help you master the process:
Visual guide about Can You Cook Rice with Cold Water
Image source: i.pinimg.com
Step 1: Rinse Your Rice (Optional but Recommended)
Before adding any water, rinse your rice under cool running water. Use a fine mesh strainer and gently swish the rice around with your fingers. This removes excess starch and any debris, which helps prevent clumping and results in fluffier rice. For long-grain varieties like basmati or jasmine, rinsing is especially important.
Step 2: Measure Water and Rice Accurately
A general rule of thumb is a 1:2 ratio—one part rice to two parts water. So for one cup of rice, use two cups of cold water. However, this can vary depending on the type of rice. Short-grain rice (like sushi or arborio) may need slightly less water, while brown rice often requires more due to its bran layer absorbing extra moisture.
Step 3: Combine and Bring to a Boil
Add the rinsed rice and cold water to a pot. Stir once to combine, then bring the mixture to a rolling boil over medium-high heat. Once boiling, reduce the heat to low and cover the pot tightly with a lid. Let it simmer for the recommended time—usually 15–20 minutes for white rice, up to 45 minutes for brown rice.
Step 4: Let It Rest
After the cooking time is up, turn off the heat and let the rice sit, covered, for 5–10 minutes. This allows the steam to finish cooking the rice and makes it easier to fluff with a fork. Fluff gently to avoid breaking the grains.
Using Cold Water in a Rice Cooker
Rice cookers are designed to handle cold water effortlessly. In fact, most rice cookers automatically detect when the water has reached the right temperature and begin the cooking cycle. You don’t need to preheat or boil the water—just add cold water and rice, press the button, and let the machine do the work.
Benefits of Using Cold Water in a Rice Cooker
- Even Cooking: The rice cooker maintains a consistent internal temperature, ensuring uniform heat distribution.
- Automated Timing: No guesswork involved—just set it and forget it.
- Fluffy Results: The sealed environment traps steam, creating light, airy rice.
Whether you’re making plain white rice, sushi rice, or even risotto-style dishes, cold water is the go-to choice. Just remember to rinse the rice first and follow the water-to-rice ratio suggested by your rice cooker’s manual or the manufacturer’s guidelines.
Common Myths About Cooking Rice with Hot Water
Despite evidence supporting cold water, some myths persist. Let’s debunk a few of them:
Myth 1: Hot Water Makes Rice Cook Faster
While hot water does start the cooking process faster, the difference is minimal. More importantly, hot water can cause the outer layer of the rice to harden before the inside fully cooks. This leads to inconsistent textures. Slow, steady heating with cold water is far more effective.
Myth 2: Cold Water Makes Rice Gummy or Undercooked
This is a common concern, but it usually stems from improper ratios or insufficient cooking time. If you use too much water or don’t let the rice rest after cooking, it may seem underdone. However, following proper techniques ensures perfect results every time.
Myth 3: Only Certain Types of Rice Can Be Cooked with Cold Water
Actually, all types of rice—white, brown, wild, basmati, jasmine, arborio—can be cooked with cold water. The method remains the same across varieties; only the cooking time and water ratio change slightly.
Tips for Perfect Rice Every Time
No matter which method you use, these tips will elevate your rice game:
Use a Heavy-Bottomed Pot
A pot with thick walls distributes heat more evenly and reduces the risk of scorching. This is especially helpful when using the stovetop method.
Don’t Lift the Lid During Cooking
Every time you lift the lid, steam escapes, lowering the temperature inside. This can extend cooking time and affect texture. Wait until the timer goes off.
Let Rice Rest After Cooking
Resting allows residual steam to finish cooking the rice and makes it easier to separate individual grains. Skipping this step can result in sticky or clumpy rice.
Store Leftover Rice Properly
Refrigerate cooked rice within two hours of cooking. Store it in an airtight container and reheat with a splash of water to restore moisture. Never leave rice at room temperature for extended periods.
Experiment with Flavored Waters
Instead of plain cold water, try using broth, coconut milk, or infused water (like ginger and lemon) for added flavor. Just adjust salt levels accordingly.
Special Considerations: Brown Rice and Wild Rice
Brown and wild rice require different handling due to their unique structures. Both still benefit from cold water, but they need longer cooking times and sometimes more water.
Brown Rice
Brown rice has a tough outer bran layer that slows down absorption. Use a 1:2.5 ratio (one cup rice to two and a half cups water). Cook for 40–45 minutes on the stovetop or until tender. A rice cooker with a “brown rice” setting works wonders here.
Wild Rice
Wild rice takes the longest to cook—up to 60 minutes. It also expands significantly during cooking, so don’t overcrowd your pot. Start with cold water, bring to a boil, then simmer uncovered until tender. Drain any excess water afterward.
Troubleshooting Common Rice Problems
Even experienced cooks run into issues occasionally. Here’s how to fix them:
Rice Is Too Dry
If your rice is crunchy or dry, you likely used too little water or didn’t cook it long enough. Next time, increase the water slightly or add more cooking time. You can also steam it with a bit of water in a covered dish after the initial cook.
Rice Is Too Wet or Mushy
This happens when there’s too much water or the heat was too high. Always follow the recommended ratio, and keep the lid on while simmering. If the rice is already cooked and wet, spread it out on a baking sheet and let it dry slightly in the oven at 200°F (95°C) for 10–15 minutes.
Rice Sticks to the Bottom
This usually indicates scorching due to high heat or lack of stirring. Use medium-low heat and stir occasionally during the first few minutes. A non-stick pot helps, but even stainless steel can work well with proper technique.
Advanced Techniques: Steaming and Absorption Methods
There are two main ways to cook rice: the absorption method and the steaming method. Both can be done with cold water, but they differ slightly in approach.
The Absorption Method
This is the most common method, where rice and water are combined in a pot, brought to a boil, then simmered until all water is absorbed. It’s ideal for white rice and works great with cold water.
The Steaming Method
In this method, you bring water to a boil in a pot with a steaming basket, then place uncooked rice in the basket above the water. This keeps the rice separate from direct contact with boiling water. While effective, it’s less common at home and typically used for special dishes.
Environmental and Health Considerations
Using cold water is also more environmentally friendly than constantly boiling water. It saves energy and reduces your carbon footprint. Plus, since you’re not altering the water’s mineral content, you preserve its natural properties—something that can subtly influence taste and texture.
Some people worry about chlorine or heavy metals in tap water, but unless you live in an area with known contamination, filtered water isn’t necessary. The impact on rice flavor is negligible compared to other factors like rice quality and cooking technique.
Final Thoughts: Why Cold Water Wins
At the end of the day, cooking rice with cold water is not just possible—it’s the most reliable, consistent, and energy-efficient method available. It gives you full control over the process, works with all types of rice and appliances, and produces better results than shortcuts involving hot water.
Whether you’re preparing a simple side dish or crafting a gourmet meal, mastering the basics of rice cooking—especially starting with cold water—sets the foundation for success. So next time you’re ready to cook rice, grab that cold tap water and trust the process. Your taste buds (and rice-loving guests) will thank you.
Frequently Asked Questions
Can I cook rice with hot water instead of cold?
Yes, you can cook rice with hot water, but it may lead to uneven cooking and a less desirable texture. Cold water allows for gradual, even heat absorption, resulting in fluffier, more consistent rice.
Does using cold water make rice cooker rice worse?
No, using cold water in a rice cooker is perfectly fine—in fact, it’s the standard method. Rice cookers are designed to handle cold water and automatically regulate temperature for optimal results.
Why should I rinse my rice before cooking?
Rinsing removes excess starch and impurities, preventing clumping and improving the final texture. It’s especially beneficial for long-grain varieties like basmati and jasmine.
How much water should I use for 1 cup of rice?
For most white rice, use 2 cups of water per 1 cup of rice. Brown rice typically needs 2.5 cups. Adjust based on your preferred consistency and rice variety.
Can I reuse leftover rice water?
It’s not recommended. Rice water may contain bacteria and lacks nutritional value after cooking. Dispose of it safely and always store cooked rice in clean containers.
Is it safe to cook rice with cold water every time?
Absolutely. Cooking rice with cold water is safe, healthy, and widely practiced. It’s the method used in professional kitchens and home cooking alike for its reliability and simplicity.