
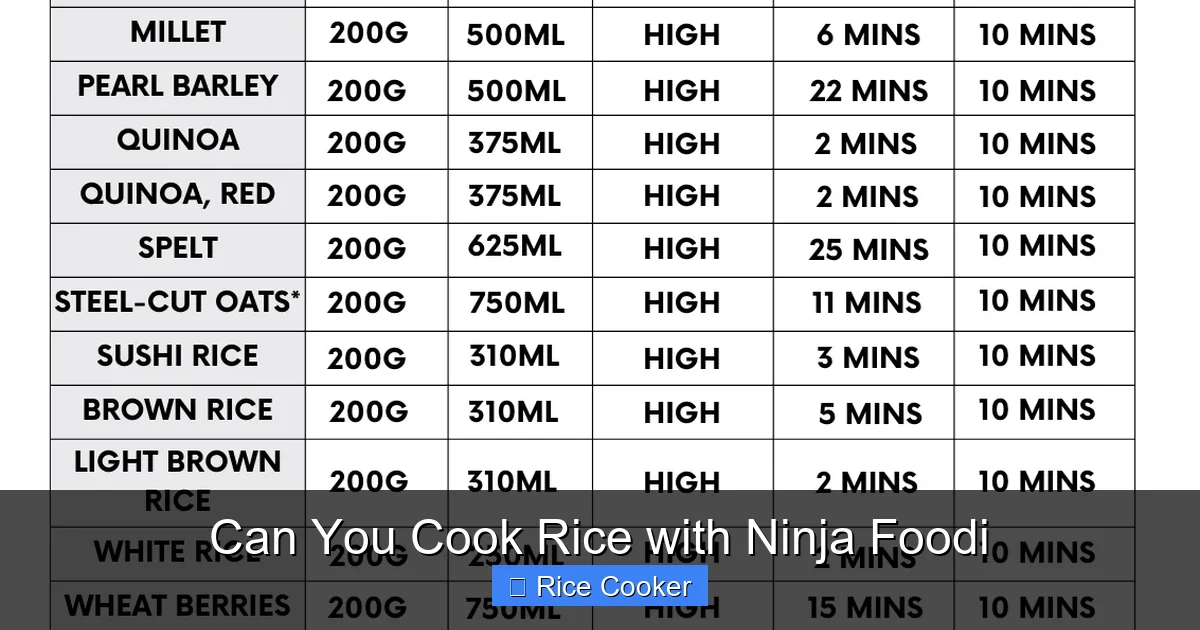
You absolutely can cook rice in a Ninja Foodi, and it’s easier than you think! Whether you use the pressure cooker or air fryer setting, your Ninja Foodi delivers consistent, fluffy rice without constant stirring. With just a few simple steps, you’ll master this kitchen staple and unlock even more cooking possibilities.
Key Takeaways
- Rice cooks perfectly in Ninja Foodi: The pressure cooker function mimics traditional rice cookers by maintaining steady heat and steam.
- Air fryer option available: Use the crisp air fryer mode for golden, slightly chewy rice—ideal for fried rice or sushi prep.
- No need for a separate appliance: Save counter space by using one machine for multiple tasks: rice, beans, stews, and more.
- Customizable results: Adjust water ratios and cook times based on rice type (white, brown, jasmine, etc.).
- Easy cleanup: Most Ninja Foodi models have non-stick inner pots that make washing up a breeze.
- Versatile beyond basics: Once you master rice, explore recipes like risotto, porridge, or even steamed dumplings.
📑 Table of Contents
- Can You Cook Rice with Ninja Foodi? Absolutely—and It’s Amazing!
- The Short Answer: Yes, You Can Cook Rice in Your Ninja Foodi
- Which Ninja Foodi Models Work Best for Cooking Rice?
- Cooking Rice Using the Pressure Cook Function
- Cooking Rice Using the Air Fryer Function
- Best Rice Types to Cook in Ninja Foodi
- Common Mistakes When Cooking Rice in Ninja Foodi
- Tips for Perfect Every Time
- Beyond Basic Rice: Creative Recipes Using Your Ninja Foodi
- Troubleshooting: What If My Rice Is Mushy or Undercooked?
- Cleaning and Maintenance After Cooking Rice
- Final Thoughts: Why Your Ninja Foodi Belongs in Every Kitchen
Can You Cook Rice with Ninja Foodi? Absolutely—and It’s Amazing!
Let’s get real: we all love rice. Whether it’s fluffy white rice to go with stir-fries, hearty brown rice for salads, or fragrant jasmine rice for Thai dishes, rice is a kitchen MVP. But what if you don’t own a dedicated rice cooker? Don’t panic—your Ninja Foodi is here to save the day! This multi-cooker has become a game-changer in modern kitchens, blending pressure cooking, air frying, slow cooking, and more into one sleek device. And yes—you can absolutely cook rice in your Ninja Foodi. In fact, many home chefs say it produces some of the best rice they’ve ever tasted.
But before you start dumping water and rice into your Foodi, let’s break down everything you need to know: which settings work best, how to avoid mushy or undercooked rice, and pro tips to make every batch foolproof. Whether you’re a beginner or a seasoned cook looking to simplify meal prep, this guide will show you exactly how to turn your Ninja Foodi into a rice-making powerhouse.
The Short Answer: Yes, You Can Cook Rice in Your Ninja Foodi
Without diving too deep yet—yes! Your Ninja Foodi can cook rice beautifully, whether you’re using the pressure cooker or air fryer function. While not all models are created equal (more on that later), most Ninja Foodi variants—like the DT200 Series, MAX XL, and Indoor Grill—come equipped with features that handle rice effortlessly. The key is understanding how each cooking method interacts with rice grains and adjusting accordingly.
Visual guide about Can You Cook Rice with Ninja Foodi
Image source: kitchenably.com
Think of your Foodi as a Swiss Army knife for cooking. Instead of buying a separate rice cooker, you’re already halfway there. Plus, because the Foodi uses precise temperature control and consistent steam release, you get evenly cooked, non-sticky rice every time. No more guessing games or burnt bottoms. Ready to learn how?
Which Ninja Foodi Models Work Best for Cooking Rice?
Not every Ninja Foodi model handles rice the same way. Some rely solely on pressure cooking, while others offer hybrid functions. Let’s look at the top contenders and their rice-cooking capabilities.
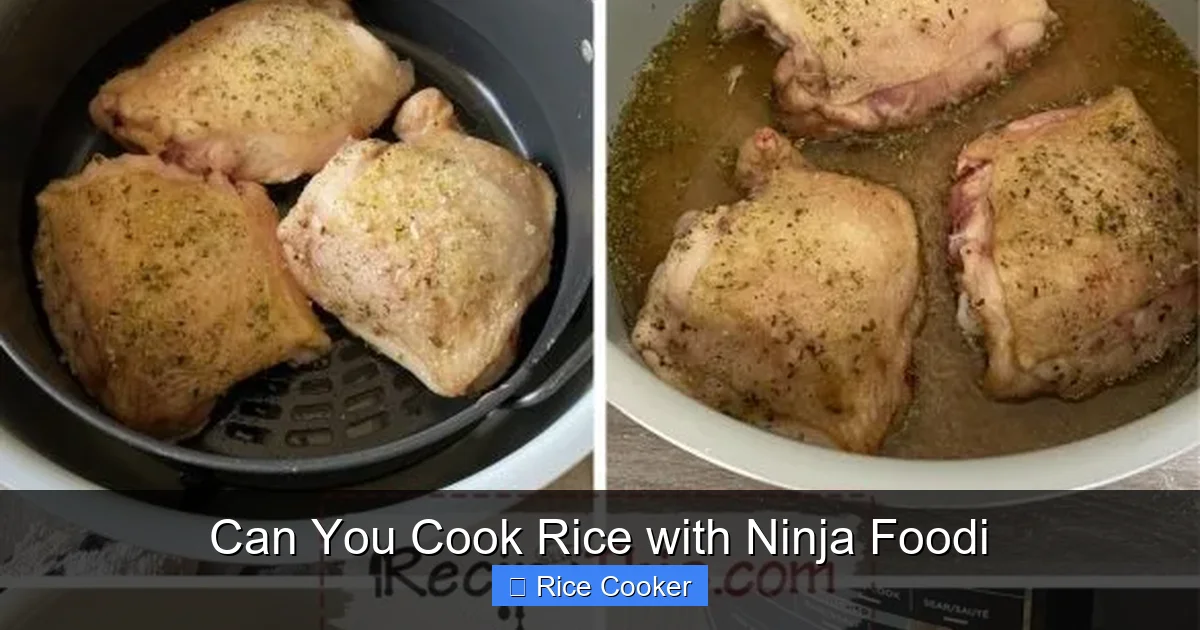
Visual guide about Can You Cook Rice with Ninja Foodi
Image source: recipethis.com
Ninja Foodi DT200 Series (Original Multi-Cooker)
This classic model includes six preset programs: Pressure Cook, Air Crisp, Steam, Slow Cook, Sauté, and Bake. For rice, the Pressure Cook function works best—it mimics how traditional rice cookers operate by sealing in steam and cooking rice uniformly. Just add rice, water, hit “Pressure Cook,” and let the magic happen.
Ninja Foodi MAX XL (DT251 Series)
With larger capacity and dual-zone technology (one side pressure cooks, the other air fries), the MAX XL is ideal for families. You can even cook two types of rice simultaneously—say, brown rice on one side and white rice on the other. The preset “Rice” button makes this especially easy.
Ninja Foodi Indoor Grill (OF400UK / OF401UK)
If you own an Indoor Grill, don’t worry—it still has a pressure cook function! Use the “Pressure Cook” mode (not the grill) to prepare rice. The grates won’t interfere, but make sure you place a trivet or steamer basket underneath to keep the pot clean.
Models to Avoid or Modify
Some older or entry-level Foodi models lack dedicated pressure cooking or may overheat. Always check your manual, but generally, if your Foodi has a “Pressure Cook” or “Rice” preset, you’re good to go.
Cooking Rice Using the Pressure Cook Function
The pressure cooker setting is the most reliable way to cook rice in your Ninja Foodi. It locks in moisture, prevents scorching, and ensures every grain is tender. Here’s how to do it step-by-step.
Step 1: Measure Your Ingredients
Use a 1:1.25 ratio for most rice types. That means:
- 1 cup white rice + 1.25 cups water
- 1 cup brown rice + 1.5–1.75 cups water (brown rice takes longer)
- Adjust slightly based on altitude or desired texture (slightly firmer = less water).
Step 2: Add Rice and Water to the Inner Pot
Wash rice briefly under cold water to remove excess starch (optional but helps prevent stickiness). Pour into the non-stick inner pot along with water. Stir gently once, then smooth the surface.
Step 3: Close Lid and Set Valve
Lock the lid securely and turn the pressure release valve to “Seal.” This traps steam inside, building pressure needed for even cooking.
Step 4: Select the Right Setting
Press “Pressure Cook” and set timer:
- White rice: 3 minutes high pressure
- Brown rice: 6–8 minutes high pressure
- Jasmine or basmati: 2–3 minutes
For most models, use “Manual” mode if no rice preset exists. If your Foodi has a “Rice” button, use that—it auto-adjusts time and pressure.
Step 5: Natural Release vs. Quick Release
After cooking, allow a natural release for 10 minutes before doing a quick release. This stops cooking gradually and prevents mushiness. For white rice, natural release is almost essential.
Step 6: Fluff and Serve
Open the valve carefully (watch for steam!), remove the lid, and fluff rice with a fork. Done!
Cooking Rice Using the Air Fryer Function
Want crispy-edged, nutty-flavored rice? Try the Air Crisp function! This method dries out the exterior slightly, creating a texture similar to fried rice or pilaf. Perfect for repurposing leftover rice or making sushi bases.
How to Make Air-Fried Rice
- Prepare rice using standard boiling method until mostly done (about 70% cooked).
- Drain excess water and spread rice in a thin layer on parchment paper.
- Place tray in Foodi’s air fryer basket and select “Air Crisp” at 350°F (175°C) for 10–15 minutes, shaking halfway through.
- Check for golden spots and dryness—no liquid should remain.
Pro tip: This method works best with short-grain rice like sushi or arborio for risotto-like results.
Best Rice Types to Cook in Ninja Foodi
Different rice varieties behave differently under heat and pressure. Here’s what works best—and why.
White Rice (Long-Grain, Medium-Grain)
Most common in Western kitchens. Cooks quickly in pressure cooker (3 mins) and stays separate when done. Ideal for sides, casseroles, and kids’ meals.
Brown Rice
Higher fiber, chewier texture. Requires longer cook time (6–8 mins) due to bran layer slowing absorption. Use extra water and consider soaking beforehand for better results.
Jasmine & Basmati Rice
Aromatic and slightly sticky. Jasmine benefits from shorter cook time; basmati needs fluffing post-cook. Both shine with natural release.
Sushi Rice
Paste-like when properly cooked. Requires careful water ratio (~1:1.1) and gentle handling after cooking. Best made ahead and chilled.
Glutinous (Sticky) Rice
Common in Asian desserts. Use minimal water (1:1) and cook slowly. May need adjustment depending on model.
Common Mistakes When Cooking Rice in Ninja Foodi
Even with perfect instructions, things can go wrong. Here’s how to avoid the pitfalls.
Mistake #1: Not Rinsing the Rice
Skipping rinsing leaves excess starch, leading to gummy rice. A quick rinse removes surface starches and improves texture.
Mistake #2: Wrong Water Ratio
Too much water = soupy rice. Too little = dry, hard grains. Stick to tested ratios, but taste test small batches first.
Mistake #3: Forgetting to Allow Natural Release
Quick release too soon causes uneven cooking. Always do partial natural release for white and brown rice.
Mistake #4: Overfilling the Pot
Ninja Foodi pots usually hold 6–8 cups uncooked rice max. Going beyond risks overflow during pressure build-up.
Mistake #5: Not Cleaning the Sealing Ring
Dried food residue on the rubber seal affects pressure levels. Clean weekly with warm soapy water.
Tips for Perfect Every Time
Master these tricks and you’ll never doubt your Foodi again.
Tip 1: Pre-Heat the Pot (Optional)
Lightly sauté rinsed rice for 1 minute in oil before adding water. This enhances flavor and creates separation—great for pilaf-style rice.
Tip 2: Use the Trivet for Extra Height
Place a trivet above the base when steaming rice to prevent condensation dripping back down. Keeps rice drier.
Tip 3: Keep a Rice Timer Handy
Set phone alarms or use a kitchen timer. Ninja Foodi beeps when done, but timing varies by model and altitude.
Tip 4: Store Leftovers Properly
Refrigerate within 2 hours. Reheat with a splash of water and steam function for moist results.
Tip 5: Experiment Beyond Plain Rice
Add herbs, broth instead of water, or mix in vegetables during final minutes for flavor-packed sides.
Beyond Basic Rice: Creative Recipes Using Your Ninja Foodi
Once you’ve nailed plain rice, open the door to endless possibilities.
Cheesy Garlic Rice
Sauté minced garlic in butter, add rice, pour in broth, pressure cook 3 mins. Stir in grated Parmesan and cream before serving.
Red Beans and Rice (One-Pot Wonder)
Inspired by Creole cuisine. Brown sausage, add kidney beans, rice, chicken broth—pressure cook 10 mins. Simmer off liquid, serve hot.
Sweet Rice Pudding
Combine rice, milk, sugar, cinnamon, and raisins. Pressure cook 8 mins, then let sit 15 mins. Chill overnight for creamy pudding.
Fried Rice (From Scratch)
Cook rice separately, cool completely. Heat oil in Foodi, scramble eggs, push to side, add veggies and rice. Air crisp 5 mins for wok hei flavor.
Troubleshooting: What If My Rice Is Mushy or Undercooked?
Don’t panic—adjustments are easy.
Problem: Mushy Rice
Caused by too much water or quick release. Next time, reduce water by 10%, extend natural release to 15 mins, or try air crisp mode.
Problem: Hard or Gritty Texture
Usually due to old rice or insufficient soaking (especially brown rice). Fresh rice and proper hydration fix this.
Problem: Burnt Bottom
Foodi’s non-stick pot rarely burns—but if it does, ensure you’re not overcrowding and use a trivet under the pot if stacking items.
Problem: No Rise During Cooking
Check sealing ring placement. If loose, pressure won’t build, leading to boiled-rather-than-pressure-cooked results.
Cleaning and Maintenance After Cooking Rice
Your Foodi makes cleanup surprisingly simple.
- Inner pot: Wash immediately with warm soapy water. Starchy residue sticks less if cleaned right away.
- Lid: Remove sealing ring and wash separately. Soak rubber part in vinegar-water mix monthly to prevent odor.
- Basket/accessories: Dishwasher safe on top rack unless marked otherwise.
- Exterior: Wipe with damp cloth—never submerge electronics.
Pro tip: Line the pot with parchment paper next time—makes cleanup even faster!
Final Thoughts: Why Your Ninja Foodi Belongs in Every Kitchen
Cooking rice in your Ninja Foodi isn’t just possible—it’s convenient, efficient, and delivers restaurant-quality results. By mastering the pressure cook function (or experimenting with air frying), you eliminate the need for multiple appliances, save time, and reduce cleanup. Plus, once you see how versatile your Foodi truly is, you’ll reach for it for everything from stews to desserts.
So go ahead—grab your rice, measure your water, and trust your multi-cooker. Whether you’re feeding a family or prepping for meal prep, your Ninja Foodi has got your back. And who knows? You might just discover your new favorite way to cook rice—without ever touching another rice cooker again.
Frequently Asked Questions
Can I cook instant rice in my Ninja Foodi?
Yes! Instant rice typically only needs 1–2 minutes in the pressure cooker. Check package instructions first, but most brands work well with quick release.
Do I need to soak brown rice before cooking?
Soaking isn’t required but helps reduce cook time and improve texture. Soak brown rice for 30 minutes–1 hour before pressure cooking.
What if my Foodi doesn’t have a “Rice” preset?
Use the “Pressure Cook” function manually. Set timer based on rice type: 3 mins for white, 6–8 for brown. Adjust if needed after first try.
Can I cook frozen rice in Ninja Foodi?
It’s possible, but not recommended. Frozen rice often contains ice crystals that disrupt even heating. Thaw first or cook plain rice and reheat later.
Is Ninja Foodi rice healthier than stove-top rice?
Both methods preserve nutrients well. Pressure cooking may retain slightly more vitamins due to sealed environment, but differences are minimal.
How much rice can my Foodi cook at once?
Most models hold 6–8 cups uncooked rice. Check your manual—capacity varies by model. Never exceed ⅔ full for safety.