
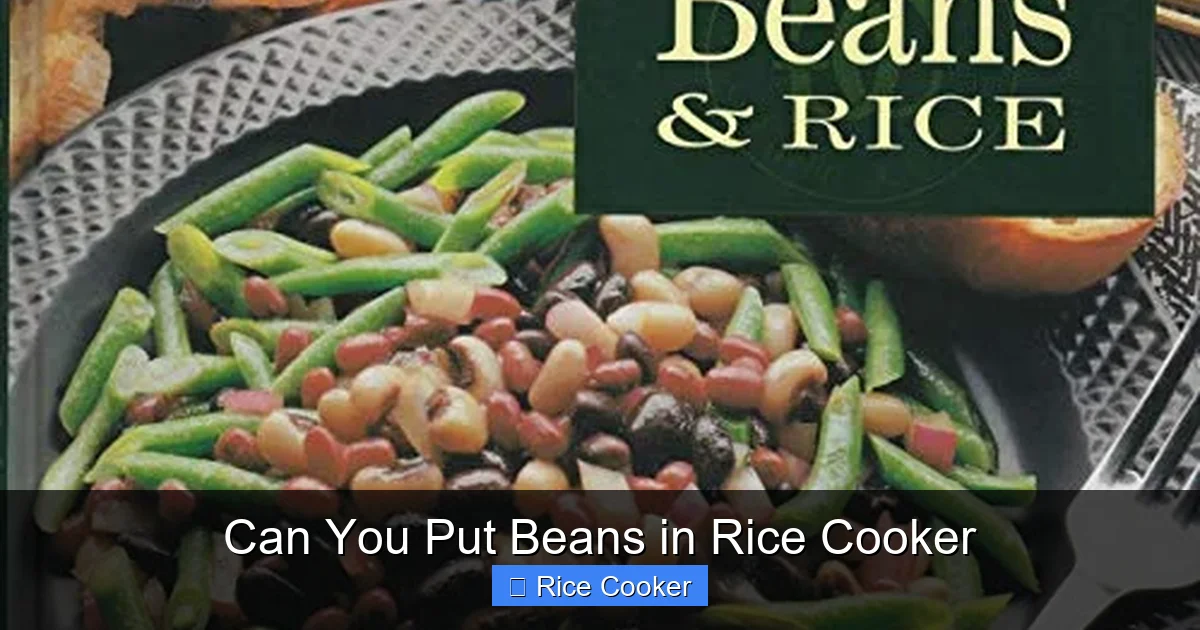
You can definitely cook beans in a rice cooker! This convenient kitchen appliance makes preparing beans simple and hands-off. With the right water ratio and cooking time, your rice cooker turns dried beans into tender, flavorful staples for soups, salads, and more.
Key Takeaways
- Yes, it’s possible: Most rice cookers can cook beans, though results vary by model and bean type.
- Pre-soaking is optional: While soaking speeds up cooking, many modern rice cookers can handle unsoaked beans.
- Water ratio matters: Use 3 cups of water per 1 cup of beans for best texture and prevent overflow.
- Cooking time differs: Beans take longer than rice—expect 60–90 minutes depending on variety.
- Pressure settings help: High-pressure rice cookers reduce cooking time significantly compared to regular models.
- Safety first: Always use a lid and avoid opening during cooking to maintain pressure and heat.
- Versatile uses: Cooked beans store well and work great in chili, tacos, dips, and grain bowls.
[FEATURED_IMAGE_PLACEHOLDER]
Introduction: The Rice Cooker Bean Revolution
Have you ever stood over a pot of boiling water, stirring beans that might stick to the bottom or turn mushy? You’re not alone. Cooking beans the traditional way takes patience, constant attention, and sometimes a few failed batches. But what if there was an easier way? Enter the humble rice cooker—a kitchen workhorse designed to do one job exceptionally well: cook grains perfectly. Yet, surprisingly, this little machine can also transform dried beans into creamy, nutritious meals with minimal effort.
So, can you put beans in a rice cooker? Absolutely. In fact, using your rice cooker to prepare beans is one of its most underappreciated functions. Not only does it free up your stove and save energy, but it also delivers consistently tender beans without burning or sticking. Whether you’re making pinto beans for burritos, black beans for tacos, or lentils for soup, your rice cooker can handle it all—no babysitting required.
In this guide, we’ll walk through everything you need to know about cooking beans in a rice cooker. From choosing the right beans and measuring water correctly to troubleshooting common issues and storing leftovers, we’ve got you covered. Let’s dive into the world of bean-cooking convenience!
Understanding Your Rice Cooker: Is It Right for Beans?
Types of Rice Cookers and Their Capabilities
Not all rice cookers are created equal. Before tossing those dry beans into your appliance, it’s important to understand what kind you have and whether it’s suitable for legumes.
Most basic electric rice cookers—especially older or lower-end models—are designed primarily for rice. These typically lack the extended heating cycles needed for beans. However, newer digital models often include “multi-grain” or “bean” settings that adjust temperature and timing automatically. If your rice cooker has such a setting, you’re in luck!
Then there are pressure rice cookers (like Japanese-style donabe or Instant Pot-style devices). These pressurized environments dramatically reduce cooking time by raising the boiling point of water. For beans, this means faster softening without sacrificing texture. A high-pressure setting can cut bean cooking time from over an hour down to just 30–45 minutes.
Bean Varieties That Work Best
Some beans respond better to rice cooker cooking than others. Here’s a quick rundown:
- Pinto beans: Great for refried beans, burritos, and Mexican dishes. Medium-sized and fast-cooking.
- Black beans: Ideal for tacos, salads, and soups. Dense and hold shape well when cooked.
- Navy beans: Perfect for baked beans or white bean spreads. Small and creamy.
- Lentils: Cook quickly and break down easily—great for dals or thick stews.
- Chickpeas (garbanzo beans): Take longer but become fluffy and ideal for hummus.
- Kidney beans: Heavily used in chili; require long simmering but yield excellent results in a rice cooker.
Avoid soybeans or fava beans unless specifically labeled as suitable for pressure cooking—they can be tricky even with proper prep.
Why People Love Cooking Beans in a Rice Cooker
There are several compelling reasons to switch to rice cooker beans:
- Hands-off cooking: Once you press start, forget about it.
- Energy efficient: Rice cookers use less electricity than stovetop pots.
- Consistent results: No more guessing if beans are done or if they stuck to the pan.
- Frees up stove space: Perfect when you’re already simmering sauce or boiling pasta.
- Flavor infusion: Cooking with spices directly in the cooker allows flavors to meld beautifully.
Plus, since you’re not constantly stirring, there’s less chance of scorching—even if you forget to check occasionally.
Step-by-Step Guide: How to Cook Beans in a Rice Cooker
Preparing Your Beans Properly
Before adding beans to your rice cooker, proper preparation ensures success. Start by rinsing dried beans thoroughly under cold running water. Then inspect them carefully—remove any shriveled, discolored, or damaged beans. These may not cook evenly or could harbor debris.
Next comes soaking. While optional, soaking reduces cooking time and helps beans soften more uniformly. There are two main methods:
- Overnight soak: Place beans in a bowl, cover with water (at least 3 inches above the beans), and let sit for 8–12 hours. Drain and rinse before cooking.
- Quick soak: Bring beans and water to a boil, then remove from heat and let sit for 1 hour. Drain and rinse.
If you skip soaking (which many people do with modern rice cookers), just add extra water and allow slightly longer cooking time.
Choosing the Right Water Ratio
This is arguably the most critical step. Too little water leads to dry beans; too much creates a soggy mess or overflows the cooker.
The general rule is 3 cups of water per 1 cup of dried beans. This accounts for expansion during cooking. For example, if you’re cooking 2 cups of dried pinto beans, use 6 cups of water.
Note: If you plan to freeze the beans later, leave a little extra space at the top of the inner pot—water expands as it heats, so overfilling risks spilling during cooking.
Seasoning and Flavor Enhancements
Rice cooker beans absorb flavor beautifully. Add aromatics before starting:
- 1 bay leaf
- Half an onion (quartered)
- 2 garlic cloves (smashed)
- A teaspoon of cumin, smoked paprika, or chili powder
- Pinch of salt (add more after cooking if needed—salt toughens beans)
You can also toss in a ham hock, bacon slice, or vegetable broth instead of plain water for richer taste. Just remember to drain and rinse beans before using in recipes where clean flavor matters (like salads).
Setting the Correct Mode
If your rice cooker has a dedicated “Bean” or “Multi-Grain” setting, use it. These modes run longer cycles (60–90 minutes) with intermittent heating to mimic slow simmering.
For standard rice-only models, simply press “Cook” and let science do the rest. The internal thermostat will cycle on and off to maintain gentle heat until beans reach tenderness.
Timing Expectations
Cooking times vary by bean type and moisture content:
- Pinto & Black beans: 70–85 minutes
- Navy & Cannellini: 60–75 minutes
- Lentils: 30–45 minutes (watch closely—they can overcook quickly)
- Chickpeas: 90+ minutes (or use pressure cooker mode)
After the cycle ends, let beans rest in the cooker with the lid on for 10–15 minutes. This final steam softens them further and improves texture.
Troubleshooting Common Issues
Beans too hard? Undercooked beans usually mean insufficient water or short cycle. Try again with extra water and double-check your cooker’s timer.
Beans too mushy? Overcooking happens with lentils or when pressure builds too high. Reduce water slightly next time and monitor closely.
Overflow? Too much liquid or insufficient ventilation. Use less water and ensure the vent isn’t blocked.
Sticking to the pot? Non-stick rice cooker inserts should prevent this, but scrubbing with baking soda can help clean stubborn residue.
Beyond Basic Beans: Creative Uses for Your Rice Cooker
Meal Prep Mastery
One of the biggest advantages of rice cooker beans is their versatility in meal prep. Cook a large batch at the start of the week and repurpose throughout:
- Breakfast: Add beans to scrambled eggs or breakfast burritos.
- Lunch: Mix with quinoa, corn, and avocado for a filling grain bowl.
- Dinner: Layer in taco meat, salsa, and cheese for instant nachos or enchiladas.
- Snacks: Blend with tahini and lemon for homemade hummus.
Store cooled beans in airtight containers in the fridge for up to 5 days or freeze for 3 months.
International Flavors Made Easy
Want to try Ethiopian doro wat or Indian masoor dal? Your rice cooker can handle global cuisine too. Simply swap in spices and liquids:
- Mexican: Cumin, oregano, diced tomatoes, and jalapeño.
- Indian: Turmeric, cumin seeds, ginger-garlic paste, and coconut milk.
- Middle Eastern: Lemon juice, parsley, garlic, and olive oil.
These additions create complex flavors without extra steps—just dump ingredients in and let the machine work its magic.
Gluten-Free and Plant-Based Perfection
Beans are naturally gluten-free and packed with plant protein. Using your rice cooker streamlines vegan cooking by replacing labor-intensive stovetop methods. Try making black bean burgers, lentil loaf, or chickpea curry—all from scratch in one appliance.
Comparing Rice Cooker vs. Stovetop: Pros and Cons
Ease of Use
Rice Cooker: Set it and forget it. Ideal for busy schedules or multitasking.
Stovetop: Requires monitoring, stirring, and adjusting heat—more active involvement.
Energy Efficiency
Rice Cooker: Uses ~300–600 watts; shuts off automatically.
Stovetop: Electric burners use more power continuously; gas stoves vary.
Texture Control
Rice Cooker: Gentle, consistent heat yields uniform results but offers less control over doneness.
Stovetop: High heat searings or rapid boils allow customization (e.g., firmer beans for salads).
Cleanup
Rice Cooker: Non-stick pot + removable parts = easy wipe-down.
Stovetop: Pot stays on burner; sticky residues may require scrubbing.
Cost and Longevity
Rice Cooker: One-time purchase; lasts years with care.
Stovetop: No added cost, but risk of scorched pans shortening lifespan.
Ultimately, rice cooker beans win for convenience and consistency—but stovetop still has its place for specialty techniques like reducing sauces or searing.
Expert Tips for Perfect Rice Cooker Beans Every Time
Always Rinse First
Even if you buy pre-washed beans, give them a quick rinse. Dirt and debris hide in crevices.
Add Salt After Cooking
Adding salt early makes beans tough. Wait until the end and adjust to taste.
Use Fresh Water
Don’t reuse water from previous bean batches—it can harbor bacteria or alter flavor.
Check Doneness Mid-Cycle (If Possible)
Some smart rice cookers let you peek. If yours doesn’t, trust the timer but keep an eye out for overflow.
Repurpose Leftovers Creatively
Purée for dips, chop for salads, or blend into soups. Frozen beans reheat beautifully in a saucepan.
Avoid Cross-Contamination
If you’ve cooked allergens (like soy) in your rice cooker, clean thoroughly before using for other foods.
Experiment with Soaking Times
Shorter soaks (4–6 hours) work fine for most people. Longer soaks aren’t always necessary.
Conclusion: Embrace the Bean-Boosted Convenience
So, can you put beans in a rice cooker? Without a doubt—yes. This unassuming kitchen gadget opens up a world of possibilities for home cooks who want wholesome, flavorful meals with zero stress. Whether you’re feeding a family, meal prepping for the week, or exploring international cuisines, your rice cooker is ready to deliver.
The key lies in understanding your appliance, respecting water ratios, and embracing flexibility. Don’t fear mistakes—each trial teaches you something new. Soon enough, you’ll be recommending rice cooker beans to friends like they’re a secret superpower.
Next time you open the pantry and see a bag of dried beans staring back at you, don’t groan about the hassle. Grab your rice cooker, add water, season, and press start. In under two hours, you’ll have tender, delicious beans ready to elevate any dish. Welcome to the future of simple, sustainable cooking.
This is a comprehensive guide about can you put beans in rice cooker.
Key Takeaways
- Understanding can you put beans in rice cooker: Provides essential knowledge
Frequently Asked Questions
Can I cook canned beans in a rice cooker?
No, never cook canned beans in a rice cooker. They’re already fully cooked and will become mushy or explode. Use dried beans for best results.
Do I need to soak beans before putting them in the rice cooker?
Soaking isn’t mandatory but helps speed up cooking and ensures even texture. Many modern rice cookers handle unsoaked beans just fine—just add extra water and time.
How much water do I use for beans in a rice cooker?
Use 3 cups of water for every 1 cup of dried beans. Adjust slightly based on your cooker’s size and desired consistency.
Can I cook different types of beans together in the same batch?
It’s possible, but not recommended. Different beans cook at different rates. Stick to similar varieties (e.g., all black beans) for best results.
Will my rice cooker overflow with beans?
Yes, if overfilled or using too much water. Always leave room at the top and follow the 3:1 water-to-bean ratio. Keep the lid on tightly.
How long does it take to cook beans in a rice cooker?
Expect 60–90 minutes depending on the bean type. Pressure cooker models can reduce this to 30–45 minutes. Always check for tenderness before serving.