

Cooking beans in a rice cooker is not only possible but also incredibly efficient. This method eliminates the need for constant monitoring and reduces soaking times significantly. Whether you’re making pinto beans, black beans, or lentils, your rice cooker can handle it all with consistent heat and moisture control.
Have you ever opened your pantry, grabbed a bag of dried beans, and wondered, “Is there an easier way than boiling them for hours?” You’re not alone. Cooking beans traditionally requires patience—overnight soaking followed by slow simmering for 1–2 hours. But what if we told you that your trusty rice cooker could do the job faster and with less hands-on effort? Yes, you can absolutely cook beans in your rice cooker! In fact, many home cooks swear by this method for its simplicity and reliability.
Modern rice cookers are designed to maintain steady temperatures and manage steam buildup efficiently, making them ideal for legume preparation. Whether you’re meal prepping for the week or whipping up a side dish alongside your stir-fry, using your rice cooker opens up a world of convenience without sacrificing nutrition or taste. Plus, since everything happens inside one sealed unit, cleanup is a breeze. No more splattered stovetops or endless stirring. Just add ingredients, press a button, and let science (and electricity) do the rest.
In this comprehensive guide, we’ll walk you through everything you need to know about cooking beans in your rice cooker—from choosing the right model and selecting beans, to mastering water ratios, timing, and flavor enhancement. We’ll also share pro tips, troubleshooting advice, and creative recipe ideas so you never look back at old-school bean-boiling again.
Key Takeaways
- Yes, you can safely cook most types of dried beans in a rice cooker. Models with a “beans” or “manual” setting work best, but even basic ones function well with the right technique.
- Soaking isn’t always required. While traditional stovetop cooking benefits from overnight soaking, rice cookers often allow for quick-soak or no-soak methods that still yield great results.
- Water ratios matter more than timing. Using about twice the volume of water as beans ensures proper hydration without overflowing during cooking.
- Different beans need different settings. Black beans, chickpeas, and adzuki beans may require slightly longer cook times compared to lentils or kidney beans.
- Cleanup is easier than ever. A rice cooker means one pot to clean—no more scrubbing bubbling pots on the stove.
- You can add flavor directly into the cooker. Herbs, garlic, onion, and spices infuse beautifully during the entire cooking process.
- Meal prep becomes super simple. Cook large batches at once and freeze portions for easy weeknight meals.
📑 Table of Contents
- Why Use a Rice Cooker for Beans?
- Which Rice Cooker Models Work Best?
- Step-by-Step Guide: How to Cook Beans in a Rice Cooker
- Pro Tips for Perfect Bean Results
- Troubleshooting Common Issues
- Cooking Beans in Different Rice Cooker Types
- Creative Recipe Ideas Using Rice-Cooker Beans
- Safety Considerations and Storage Tips
- Environmental and Economic Benefits
- Final Thoughts: Embrace the Convenience
Why Use a Rice Cooker for Beans?
Before diving into step-by-step instructions, let’s talk about why this kitchen hack deserves a spot in your routine. Traditional boiling has several drawbacks: it consumes significant energy, demands constant attention, and often leads to overcooked or mushy beans if left unattended. Rice cookers solve these problems naturally.
First, they operate at low, consistent heat—perfect for breaking down complex sugars in dried beans without scorching. Second, their insulated design traps steam, creating a moist environment that softens even the densest varieties like adzuki or black-eyed peas. Third, modern models include programmable timers and preset functions like “pressure cook” or “soak,” giving you flexibility based on your schedule.
Moreover, cooking beans in a rice cooker allows for passive cooking. Once you set it up, you can go about other tasks—fold laundry, chop vegetables, or even take a short nap (just kidding… maybe not). The result? Tender, evenly cooked beans every single time, with minimal effort and maximum flavor infusion.
Which Rice Cooker Models Work Best?
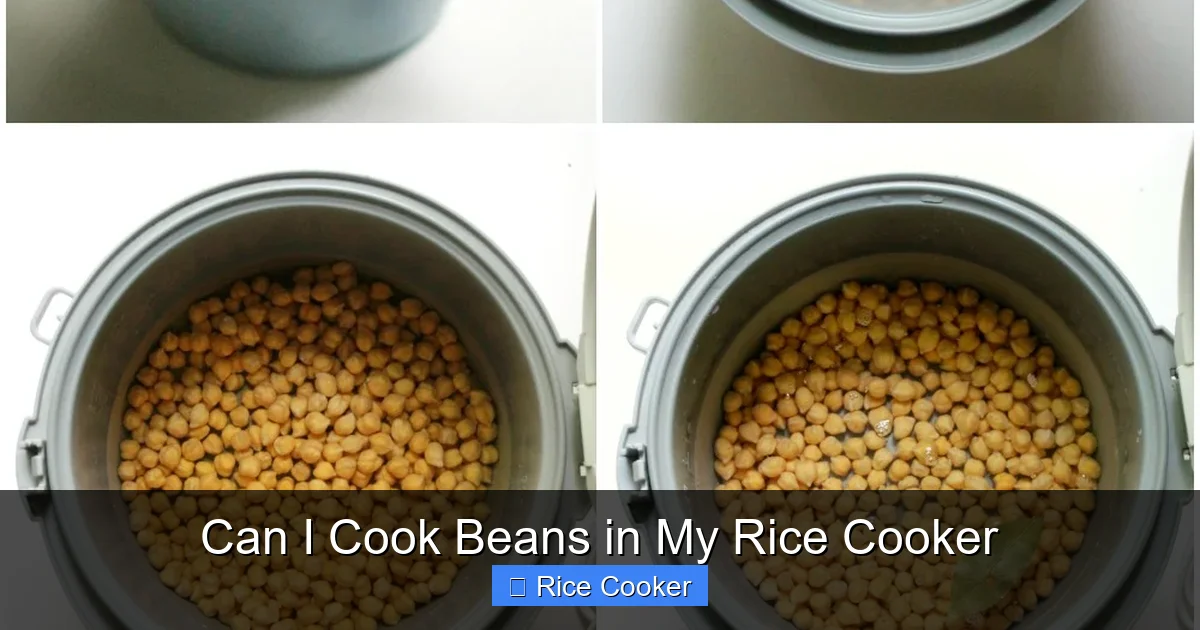
Visual guide about Can I Cook Beans in My Rice Cooker
Image source: strengthandsunshine.com
Not all rice cookers were created equal when it comes to bean-cooking performance. While any functioning rice cooker can technically handle dried legumes, certain features make the process smoother and more reliable.
Look for models with at least a 6-cup capacity if you plan to cook larger batches. Smaller units may struggle with heat distribution or overflow issues, especially with high-water recipes like refried beans or chili. Also, consider machines equipped with:
- A “Manual” or “Custom” setting—this lets you adjust cook time beyond the default rice cycle.
- A keep-warm function—useful for holding beans until serving.
- A non-stick inner pot—makes cleaning effortless and prevents sticking.
- An optional steam vent or pressure release valve—helps regulate internal pressure during extended cook times.
Top brands like Zojirushi, Panasonic, and Instant Pot offer excellent bean-compatible models. Even budget-friendly options from Oster or Cuisinart get the job done when used correctly. The key is understanding your machine’s behavior—some require preheating; others don’t. Always refer to the manual first!
Can All Types of Beans Be Cooked in a Rice Cooker?
Most common dried beans adapt well to rice cooker cooking, but preparation varies slightly by type. Here’s a quick breakdown:
- Lentils & Split Peas: These cook fastest—usually under 25 minutes—and benefit from minimal soaking. They’re great for soups and dals.
- Kidney, Pinto, Navy, and Black Beans: Require longer cook times (45–70 minutes) and usually benefit from quick-soaking (30 mins in hot water) to reduce gas-producing oligosaccharides.
- Chickpeas (Garbanzo): Dense and starchy, so they need extra time—about 90 minutes—and thorough soaking beforehand.
- Adzuki & Red Lentil Beans: Very small and quick-cooking, ideal for sweet dishes or Asian-inspired recipes.
Avoid soybeans or fava beans unless your model supports pressure cooking—they’re tougher and may not break down properly without higher pressure.
Step-by-Step Guide: How to Cook Beans in a Rice Cooker
Ready to give it a try? Follow this foolproof method for success every time.
1. Choose Your Beans and Measure Accurately
Start by measuring out your desired quantity. A good rule of thumb: use about 1 cup of dry beans per person, plus a bit extra for leftovers. Rinse thoroughly under cold water to remove debris.
2. Decide on Soaking Method
You have three options:
- No-soak method: Add beans directly with fresh water. Best for lentils or if you’re short on time.
- Quick soak: Boil beans for 2 minutes, then let sit covered for 30–60 minutes. Reduces cooking time and cuts down on flatulence-causing compounds.
- Overnight soak: Submerge beans in water (2–3 inches above) and refrigerate overnight. Then drain and rinse before cooking.
For beginners, we recommend the quick soak—it’s fast and effective.
3. Add Water and Optional Flavor Enhancers
Use roughly double the volume of water compared to beans (e.g., 2 cups water for 1 cup beans). Too little water risks burning; too much dilutes flavor. Add salt after beans are tender—adding it early can toughen them.
To boost taste, toss in:
- 1 bay leaf
- 1 clove garlic
- Sliced onion or shallot
- A pinch of cumin or smoked paprika
- Diced carrots or celery (for soups/stews)
Remember: no metal utensils near the heating element—opt for wood or silicone instead.
4. Select the Right Setting and Timer
If your rice cooker has a “Beans” preset, use it! Otherwise, switch to “Manual” and set between 45–90 minutes depending on bean type. After cooking, let the unit sit undisturbed for 10 minutes before opening—this helps settle the beans and prevents sudden steam release.
5. Check Doneness and Adjust
After the cycle ends, test a bean: it should be tender but still hold its shape. If undercooked, return to manual mode for another 15 minutes. Overcooked beans will fall apart when mashed—great for hummus, but not for salads.
Pro Tips for Perfect Bean Results
Even seasoned cooks make mistakes sometimes. Here are insider secrets to elevate your game:
Prevent Overfilling
Never exceed ⅔ full—water expands during cooking. For 1 cup beans, start with 2 cups water, knowing some will evaporate.
Skim Foam Early On
During the first 10 minutes, bubbles may appear on top—scoop them off gently. This removes impurities and excess indigestible sugars.
Season Strategically
Add acidic ingredients (tomatoes, vinegar) after beans soften to avoid toughness. Herbs like thyme or oregano infuse better when added mid-cycle.
Repurpose Leftovers Creatively
Mash cooled beans into spreads, blend into sauces, or fold into grain bowls. Freeze in portion-sized containers for grab-and-go meals.
Clean Immediately After Use
Legume starches tend to stick. Rinse the inner pot right away with warm, soapy water—don’t wait.
Troubleshooting Common Issues
Mash cooled beans into spreads, blend into sauces, or fold into grain bowls. Freeze in portion-sized containers for grab-and-go meals.
Clean Immediately After Use
Legume starches tend to stick. Rinse the inner pot right away with warm, soapy water—don’t wait.
Troubleshooting Common Issues
What if your beans turn out wrong? Don’t panic—here’s how to fix it:
Beans Are Still Hard After Full Cycle?
Increase cook time in 15-minute increments until tender. Some dense beans like chickpeas simply need patience.
Rice Cooker Overflowed?
This happens with too much water or vigorous boiling. Next time, reduce initial water by ¼ cup and ensure the lid fits snugly.
Beans Taste Bland?
Add salt late in cooking, and consider finishing with a splash of olive oil or squeeze of lime. Garlic or onion skins release flavor gradually.
Inner Pot Stuck or Scorched?
Always use a non-metallic spatula. If residue remains, soak the pot in hot water with dish soap for 20 minutes before scrubbing.
Cooking Beans in Different Rice Cooker Types
Your specific model might behave differently. Let’s break it down:
Crock-Pots vs. Electric Rice Cookers
Traditional slow cookers lack precise temperature control but work acceptably for beans—just expect longer cook times (~60–90 mins). Rice cookers excel due to their rapid heating and sealing lids.
Pressure Cooker Rice Combos
Instant Pot-style units offer a “Pressure Cook” setting perfect for beans—cut cook time by half! Just follow manufacturer guidelines for liquid levels and natural pressure release.
Microwave Rice Cookers
These ultra-compact devices aren’t ideal for beans—limited capacity and poor heat retention make them risky. Stick to stovetop methods here.
Creative Recipe Ideas Using Rice-Cooker Beans
Once you master the basics, the possibilities explode!
Black Bean & Sweet Potato Chili
Combine black beans, diced sweet potatoes, tomatoes, and chili powder. Cook on manual for 60 minutes. Serve with cornbread.
White Bean & Kale Soup
Add navy beans, kale, carrot, and vegetable broth. Simmer 70 mins. Finish with lemon zest and Parmesan.
Spicy Refried Beans
Cook pinto beans with onion, garlic, cumin, and chipotle peppers. Drain, mash, and fry in butter. Top tacos or burritos.
Red Lentil Dal
Simmer red lentils with turmeric, ginger, and coconut milk. Blend partially for creamy texture. Pair with rice or roti.
Hummus Base
Cook chickpeas with tahini, lemon juice, and garlic. Blend until smooth. Store in fridge up to 5 days.
Safety Considerations and Storage Tips
Cook pinto beans with onion, garlic, cumin, and chipotle peppers. Drain, mash, and fry in butter. Top tacos or burritos.
Red Lentil Dal
Simmer red lentils with turmeric, ginger, and coconut milk. Blend partially for creamy texture. Pair with rice or roti.
Hummus Base
Cook chickpeas with tahini, lemon juice, and garlic. Blend until smooth. Store in fridge up to 5 days.
Safety Considerations and Storage Tips
Cook chickpeas with tahini, lemon juice, and garlic. Blend until smooth. Store in fridge up to 5 days.
Safety Considerations and Storage Tips
While rice cookers are generally safe, keep these precautions in mind:
- Avoid metal utensils near the heating plate—they can cause sparks or damage.
- Don’t leave unattended during long cycles—check occasionally for overflow.
- Store cooked beans within 2 hours if room temp; otherwise refrigerate immediately.
- Use within 4–5 days refrigerated or freeze for up to 6 months.
- Reheat gently on the stove or microwave—avoid microwaving frozen beans directly.
Also, note that raw beans contain lectins and phytohaemagglutinin—toxic if not fully cooked. Always ensure thorough heating, especially for soy-based recipes.
Environmental and Economic Benefits
Beyond convenience, cooking beans in a rice cooker offers sustainability perks. Rice cookers use less energy than stovetop boiling—especially electric coil burners. One 45-minute cycle uses roughly 0.3 kWh, comparable to a laptop charger. Plus, buying dried beans in bulk is far cheaper than canned versions (and free of BPA concerns).
Furthermore, reducing food waste matters. By mastering batch cooking, you minimize spoilage and maximize nutrient retention. Frozen bean soups stay fresh longer than canned alternatives prone to oxidation.
Final Thoughts: Embrace the Convenience
Cooking beans in your rice cooker isn’t just a shortcut—it’s a smarter way to eat. It empowers you to prepare wholesome, protein-rich meals with zero stress. Whether you’re vegan, vegetarian, or simply trying to eat healthier, legumes belong in your rotation. And now, thanks to this humble kitchen appliance, there’s no excuse not to enjoy them regularly.
Experiment with flavors, tweak timings, and find your rhythm. Soon enough, you’ll wonder how you ever lived without it. So next time you open that bag of dried beans, remember: your rice cooker is ready, willing, and able to help. Happy cooking!
Frequently Asked Questions
Can I cook canned beans in my rice cooker?
No, you shouldn’t—canned beans are already cooked and may become mushy. The rice cooker’s heat will overprocess them. Save your cooker for dried beans only.
How long does it take to cook beans in a rice cooker?
It depends on the bean type and whether you soaked them. Generally, expect 45–90 minutes for most dried beans after soaking or 25–60 minutes for no-soak methods.
Do I need to soak beans before cooking them in a rice cooker?
Not always! Quick-soak or no-soak methods work well in rice cookers due to their controlled heat. However, soaking reduces cook time and gas production.
Can I cook beans and rice together in the same rice cooker?
Yes! This combo is classic—try 1:2 ratio of rice to beans with extra water. Just ensure both reach tenderness; rice cooks faster, so add beans later.
Will my rice cooker overflow if I cook beans?
Only if overfilled or if the lid doesn’t seal properly. Use ⅔ max fill level and ensure the lid clicks shut. Some models have anti-overflow vents.
Are there any beans I should avoid cooking in a rice cooker?
Soybeans and fava beans typically require pressure cooking to break down properly. Regular rice cookers may not provide enough force, leading to undercooked results.