

Can I cook bulgur wheat in a rice cooker? Absolutely! With the right water-to-grain ratio and a few simple steps, your rice cooker can produce tender, fluffy bulgur just like rice. This method saves time, reduces cleanup, and opens up creative cooking possibilities. Whether you’re meal-prepping or whipping up a side dish, using a rice cooker makes bulgur easier than ever.
Key Takeaways
- Rice cookers work great for bulgur: Most models handle bulgur well with minimal adjustments, thanks to its similar texture to cracked wheat.
- Use the right ratio: A general guideline is 2 parts water to 1 part bulgur (by volume), but fine-tuning may be needed based on grain type.
- Pre-soaking is optional: While soaking speeds up cooking, it’s not required—just add a bit more liquid if skipping this step.
- Fluffing matters: Let bulgur rest after cooking to allow steam to distribute evenly and prevent clumping.
- Customize your dish: Add herbs, lemon juice, olive oil, or broth to elevate flavor without extra effort.
- Clean-up is simple: Non-stick rice cooker bowls make serving and cleaning a breeze.
- Safety first: Always check your rice cooker’s manual—some older models may not have settings ideal for bulgur.
📑 Table of Contents
- Introduction: The Rice Cooker Revolution
- Understanding Bulgur Wheat
- Why Use a Rice Cooker for Bulgur?
- How to Cook Bulgur Wheat in a Rice Cooker
- Flavor Enhancements and Recipe Ideas
- Comparing Methods: Stovetop vs. Rice Cooker
- Tips for Different Rice Cooker Models
- Storage and Reheating
- Frequently Asked Questions About Cooking Bulgur in a Rice Cooker
- Conclusion: Your New Go-To Grain Method
Introduction: The Rice Cooker Revolution
Imagine standing at your kitchen counter, tired from a long day, wanting a healthy, warm side dish that’s both satisfying and easy to make. You reach for bulgur wheat—a whole grain packed with fiber, protein, and nutrients—but realize you don’t have time for the traditional stovetop method. What do you do? Enter the humble rice cooker.
That’s where this article comes in. We’re answering one of the most common questions among home cooks: can I cook bulgur wheat in a rice cooker? The short answer? Yes—and not only is it possible, but it might just become your new favorite way to prepare this ancient grain. Whether you’re feeding a family or meal-prepping for the week, using a rice cooker simplifies the process, reduces active cooking time, and ensures consistent results every single time.
Bulgur, made from parboiled, crushed wheat kernels, has been a staple in Middle Eastern, Mediterranean, and Middle Eastern cuisines for centuries. It’s known for its nutty flavor, chewy texture, and quick cooking time. Traditionally cooked on the stove by boiling water, adding bulgur, and letting it simmer, the process is straightforward—but requires attention. That’s where modern kitchen appliances shine. With a rice cooker, you set it and forget it (almost), enjoying hands-off convenience without sacrificing quality.
Understanding Bulgur Wheat
What Is Bulgur?
Bulgur is essentially pre-cooked, dried wheat that’s been cracked into small pieces. Unlike regular wheat berries, which need hours to soak and cook, bulgur is partially cooked during processing, making it ready to eat in minutes. It’s available in different sizes—fine (smallest), medium, coarse, and extra-coarse—each suited to different dishes. Fine bulgur works best for tabbouleh, while coarse pieces are ideal for pilafs or stuffing.
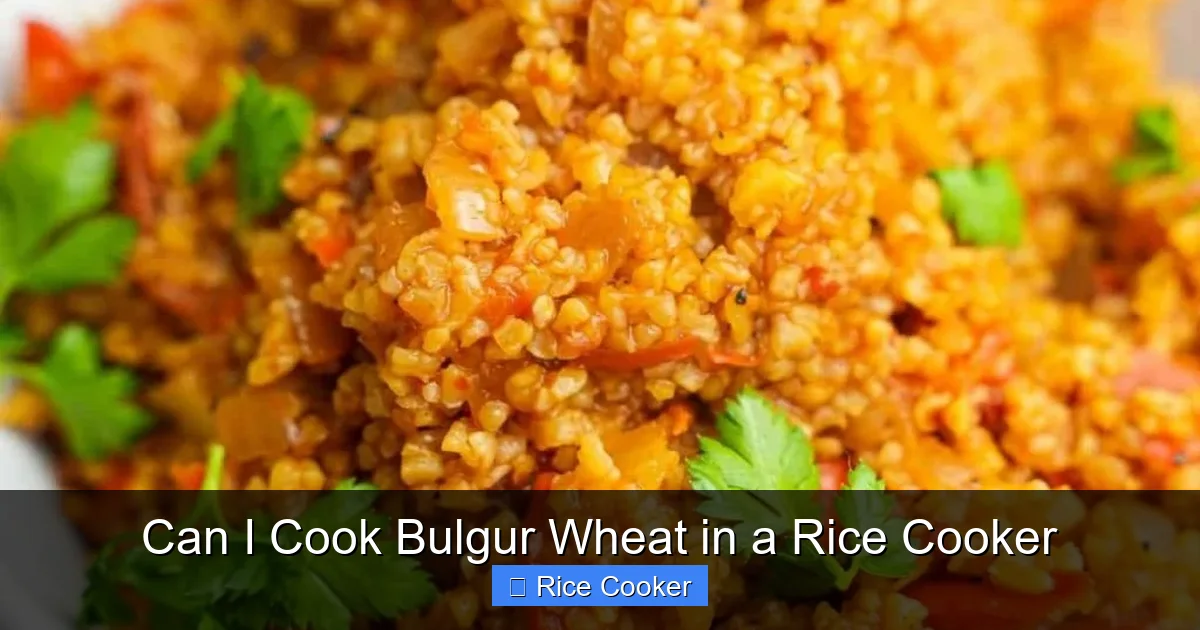
Visual guide about Can I Cook Bulgur Wheat in a Rice Cooker
Image source: recipes.net
Nutritional Benefits
One cup of cooked bulgur provides about 150 calories, 6 grams of protein, and 4 grams of fiber. It’s rich in B vitamins, magnesium, iron, and manganese. Because it’s a whole grain, it helps regulate blood sugar, supports digestion, and keeps you full longer. Plus, it’s naturally gluten-free only if certified—always check labels if avoiding gluten.
Common Uses in Cooking
From classic Middle Eastern salads like tabbouleh to hearty breakfast porridges and even baked goods, bulgur adds texture and nutrition wherever it’s used. Its ability to absorb flavors makes it a versatile ingredient in soups, stews, and grain bowls. Now, imagine doing all of this with the push of a button—welcome to the world of rice cooker cooking.
Why Use a Rice Cooker for Bulgur?
Convenience at Its Best
No more babysitting a pot on the stove. Just measure, pour, press, and relax. Rice cookers maintain steady temperatures and automatically switch to “warm” once cooking is done—perfect for bulgur, which benefits from gentle, even heat.
Consistent Results
Unlike stovetop methods that can lead to unevenly cooked grains or scorched bottoms, rice cookers deliver uniform texture every time. This consistency is especially helpful when cooking large batches or meal-prepping.
Time-Saving Efficiency
The entire process—from prep to finished dish—can take as little as 20 minutes. That includes rinsing, measuring, and letting the machine do the work. For busy weekdays, that’s a game-changer.
Easy Cleanup
Most rice cooker inner pots are non-stick and dishwasher-safe. No scrubbing burnt-on bits off a heavy pot. Just rinse and go.
Energy-Efficient Option
Rice cookers use less energy than stovetops over time, making them an eco-friendly choice for everyday cooking.
How to Cook Bulgur Wheat in a Rice Cooker
Step-by-Step Guide
Ready to give it a try? Follow these simple steps:
- Measure your bulgur: Start with 1 cup of dry bulgur. Adjust based on how much you need—use a measuring cup for accuracy.
- Rinse the bulgur: Place it in a fine-mesh strainer and run under cold water for 30 seconds. This removes excess starch and prevents gummy results.
- Add water: Pour 2 cups of water (or broth for added flavor) into the rice cooker pot. If your bulgur is coarse, consider using 2.25 cups.
- Add bulgur: Gently stir in the rinsed bulgur until fully submerged.
- Cook: Close the lid and select the “Cook” or “White Rice” setting. Some models have a “Porridge” or “Grains” option—use that if available.
- Let it rest: Once the cycle ends, let it sit for 5–10 minutes with the lid closed. This allows moisture to distribute evenly.
- Fluff and serve: Use a fork to gently fluff the bulgur before serving. Add salt, herbs, or lemon juice if desired.
Water Ratios Explained
The standard ratio is 2:1 water to bulgur, but this can vary slightly depending on your preferences and bulgur type:
- Fine bulgur: 2 cups water per 1 cup bulgur (ideal for tabbouleh).
- Medium bulgur: 2.1 cups water per 1 cup (great for pilafs).
- Coarse bulgur: 2.25–2.5 cups water per 1 cup (best for soups or stuffing).
If you prefer softer bulgur, increase water by ¼ cup. For firmer texture, reduce by ¼ cup.
Troubleshooting Tips
- Gummy bulgur? You used too much water or didn’t rinse it. Next time, reduce water slightly and always rinse.
- Undercooked center? Let it rest longer or add a splash of water and cook for 5 more minutes on “Warm.”
- Too dry? Mix in a tablespoon of olive oil or a splash of broth after cooking.
Flavor Enhancements and Recipe Ideas
Bouillon for Depth
Instead of plain water, use vegetable, chicken, or beef bouillon. This infuses subtle savory notes into your bulgur—perfect for grain bowls or side dishes.
Fresh Herbs Galore
Add chopped parsley, mint, dill, or cilantro during the last minute of cooking. These brighten up the flavor and make it perfect for Mediterranean meals.
Lemon Zest and Juice
A squeeze of fresh lemon juice after cooking adds acidity that balances the earthy taste of bulgur. Try it in tabbouleh or as a base for stuffed peppers.
Dairy-Free Creaminess
Stir in a dollop of tahini, Greek yogurt, or silken tofu for richness without dairy. Great for vegan or lactose-sensitive diets.
Spiced Up Version
Toast the bulgur lightly in the rice cooker with a teaspoon of cumin, coriander, or smoked paprika before adding water. This deepens the flavor profile.
Breakfast Bulgur Porridge
Swap water for almond milk, top with cinnamon, maple syrup, and nuts. Cook for 25 minutes on the “porridge” setting for a warm, comforting breakfast.
Meal Prep Power-Up
Cook a big batch on Sunday. Divide into containers, store in the fridge for up to 5 days, and reheat with a splash of water or broth. Perfect for salads, wraps, or grain bowls throughout the week.
Comparing Methods: Stovetop vs. Rice Cooker
| Method | Time | Effort | Texture Control | Best For |
|---|---|---|---|---|
| Stovetop | 15–20 minutes | High (needs stirring) | Moderate (depends on attention) | Traditional recipes, large batches |
| Rice Cooker | 20–25 minutes | Low (set-and-forget) | High (consistent) | Busy cooks, beginners, meal prep |
When to Choose Each Method
- Choose stovetop if: You want full control over texture, are making a dish that requires constant stirring (like risotto-style bulgur), or don’t own a rice cooker.
- Choose rice cooker if: You value speed, consistency, and low maintenance. Ideal for daily use or when cooking multiple dishes simultaneously.
Tips for Different Rice Cooker Models
Standard Electric Rice Cookers
These are the most common type. They work excellently with bulgur as long as they have a “Cook” function. Avoid older models without temperature regulation, as they may burn the bottom.
Micom or Fuzzy Logic Models
These advanced models adjust cooking time and temperature automatically based on grain type. Select the “Mixed Grain” or “Quinoa” setting for best results.
Multi-Cookers (Instant Pot, etc.)
Use the “Manual” or “Pressure Cook” setting with a 3-minute cook time and natural release. Note: Pressure cooking isn’t recommended for fine bulgur, as it can turn mushy.
Non-Stick vs. Stainless Steel Pots
Non-stick pots are easier to clean and prevent sticking. Stainless steel lasts longer but may require occasional scrubbing. Both work fine with bulgur.
Capacity Matters
For 1–2 people, a 3-cup capacity suffices. For families or meal prep, opt for a 6–8 cup model. Always leave room for expansion—bulgur absorbs liquid and swells.
Storage and Reheating
Refrigeration
Store cooked bulgur in an airtight container in the fridge for up to 5 days. It holds up well in salads, wraps, or reheated as a side.
Freezing
Portion into freezer bags or containers. Frozen bulgur stays good for up to 3 months. Thaw overnight in the fridge before reheating.
Reheating Tips
- Add a splash of water or broth to revive dryness.
- Steam in the microwave for 1–2 minutes with a damp paper towel cover.
- Warm through in a skillet with a drizzle of olive oil.
Frequently Asked Questions About Cooking Bulgur in a Rice Cooker
Do I need to soak bulgur before cooking it in a rice cooker?
Not necessarily. Soaking reduces cooking time by about 5 minutes, but it’s optional. If you skip soaking, increase water slightly (by ¼ cup) to compensate. Either way, your rice cooker will handle it.
Can I cook other grains in the same rice cooker?
Absolutely! Quinoa, farro, barley, and millet all work well. Just adjust water ratios and cooking times accordingly. Many rice cookers even have dedicated settings for these grains.
Will bulgur stick to my rice cooker pot?
Only if you don’t rinse it first or use too much water. Rinsing removes excess starch, preventing sticking. Also, avoid overcrowding the pot—cook in batches if needed.
How do I fix overcooked or mushy bulgur?
Mix it with a fork immediately after cooking. If still too soft, spread it out on a baking sheet and dry in the oven at 200°F (95°C) for 10–15 minutes to restore texture.
Is bulgur safe for gluten-free diets?
No, unless labeled certified gluten-free. Regular bulgur contains gluten. Always check packaging if you have celiac disease or severe sensitivity.
Can I add vegetables or protein while cooking?
Yes! Add diced tomatoes, spinach, chickpeas, or cooked chicken during the last 5 minutes of cooking. The residual heat will warm them through without overcooking.
Conclusion: Your New Go-To Grain Method
Cooking bulgur wheat in a rice cooker isn’t just possible—it’s practical, efficient, and delicious. Whether you’re making tabbouleh for a summer dinner, a spiced pilaf for a holiday meal, or a hearty breakfast porridge, this appliance simplifies every step. With the right water ratio, a little rinsing, and a five-minute rest, you’ll end up with perfectly fluffy, nutritious bulgur every time.
This method shines especially for those juggling work, family, and healthy eating. No more watching the clock or worrying about burning the bottom of the pan. Just measure, pour, press, and enjoy. Plus, the versatility doesn’t stop at plain bulgur—add flavors, swap liquids, experiment with spices, and transform it into countless dishes.
So next time you open your pantry and see that bag of bulgur, remember: your rice cooker isn’t just for rice anymore. It’s a powerhouse for whole grains, legumes, and so much more. Give it a try—you might just fall in love with this quiet kitchen revolution.
Frequently Asked Questions
Do I need to soak bulgur before cooking it in a rice cooker?
Not necessarily. Soaking speeds up cooking but isn’t required. If you skip it, increase water slightly. Your rice cooker will still produce great results.
Can I cook other grains in the same rice cooker?
Yes! Quinoa, farro, barley, and millet all work well. Just adjust water ratios and use appropriate settings for best texture.
Will bulgur stick to my rice cooker pot?
Only if you skip rinsing or use too much water. Always rinse bulgur first to remove excess starch and prevent sticking.
How do I fix overcooked or mushy bulgur?
Spread it on a baking sheet and dry in a low oven (200°F/95°C) for 10–15 minutes. This restores firmness and fluffiness.
Is bulgur safe for gluten-free diets?
No, unless labeled certified gluten-free. Regular bulgur contains gluten. Check packaging if avoiding gluten.
Can I add vegetables or protein while cooking?
Yes! Add ingredients like spinach, chickpeas, or diced tomatoes in the last few minutes so they warm through without overcooking.