
Yes, you absolutely can cook rice in your air fryer! It’s faster than stovetop methods and requires less monitoring. With the right technique and timing, you’ll get fluffy, evenly cooked grains without any mess. Whether you’re meal-prepping or craving a side dish in a hurry, your air fryer is ready to help.
Key Takeaways
- Air fryers can cook rice effectively: With proper water ratios and heat settings, you can achieve fluffy, consistent results.
- Time savings: Air fryer rice cooks faster than traditional boiling or steaming methods—often in under 30 minutes.
- Minimal cleanup: Using a lined or parchment-lined basket reduces sticking and makes cleanup a breeze.
- Best rice types: Short-grain white rice works best; long-grain may absorb too much moisture and become mushy.
- Prevent overcooking: Stir halfway through and monitor closely—air fryers circulate hot air, which can dry out rice if left unattended.
- Versatility: You can add flavors like soy sauce, garlic, or herbs directly into the rice for infused dishes.
- Safety first: Always use heat-safe containers and avoid metal utensils inside the air fryer basket.
📑 Table of Contents
- Can I Cook Rice in the Air Fryer?
- Why Choose an Air Fryer for Cooking Rice?
- What Kind of Rice Works Best in an Air Fryer?
- How to Cook Perfect Air Fryer Rice: Step-by-Step Guide
- Common Mistakes and How to Avoid Them
- Flavor Variations and Creative Uses
- Comparing Air Fryer vs. Traditional Methods
- Tips for Different Air Fryer Models
- Storing and Reheating Air Fryer Rice
Can I Cook Rice in the Air Fryer?
You’ve probably heard that air fryers are great for crispy fries, golden chicken wings, and even reheating pizza. But here’s a question many home cooks wonder about: Can I cook rice in the air fryer? The short answer? Absolutely! In fact, cooking rice in an air fryer might just become your new favorite kitchen hack. Not only does it save time, but it also delivers consistently fluffy results with minimal effort. Plus, you don’t need a separate rice cooker—your trusty air fryer can do the job beautifully.
Before we dive into step-by-step instructions, let’s clear up a common myth: air fryers aren’t just for frying. They excel at even heat distribution using rapid air circulation, making them surprisingly effective for steaming-like applications—like cooking rice. While they don’t generate steam the way a rice cooker or pot does, the enclosed space traps moisture, allowing grains to absorb water and cook through efficiently. With a little know-how, you’ll be serving up restaurant-quality rice right from your countertop appliance.
Why Choose an Air Fryer for Cooking Rice?
If you’re on the fence about trying this method, here’s why so many people are making the switch:
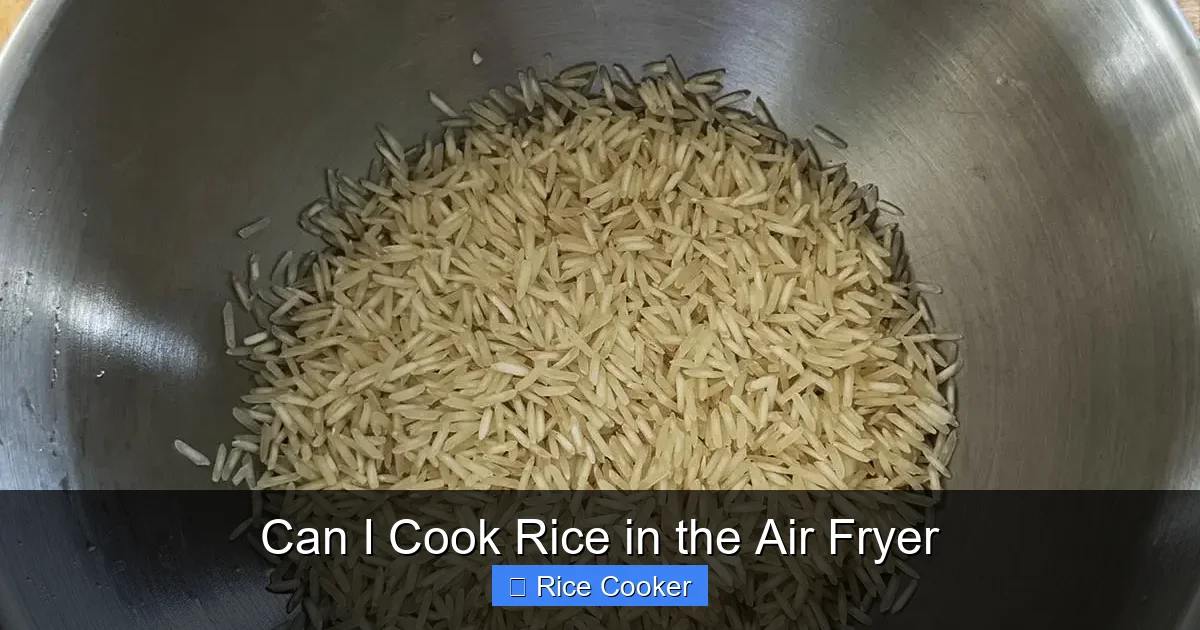
Visual guide about Can I Cook Rice in the Air Fryer
Image source: greatcurryrecipes.net
- Speed: Most air fryer rice recipes take between 15–25 minutes—much quicker than boiling on the stove (which often takes 18–20 minutes plus standing time).
- Hands-off convenience: Unlike stovetop cooking, you don’t have to stand over a pot, stir constantly, or worry about burning.
- Energy efficiency: Air fryers use less energy than ovens or large pots of boiling water.
- Fluffy texture: When done right, air-fried rice comes out light, separate, and tender—just like the kind you’d make in a high-end rice cooker.
And let’s be real—who doesn’t love a one-pan solution? Whether you’re cooking for one or feeding a family, preparing rice in your air fryer means fewer dishes to wash later. Just line the basket, toss in ingredients, set the timer, and relax while your kitchen fills with the aroma of freshly cooked grains.
What Kind of Rice Works Best in an Air Fryer?
Not all rice is created equal when it comes to air frying. While technically any type *can* be cooked this way, some perform better than others based on grain length, starch content, and moisture retention.
Short-Grain White Rice
This is the gold standard for air fryer rice. Varieties like Calrose, Japonica, or Japanese short-grain rice have higher starch levels, which help bind the grains together without becoming gummy. Their compact shape allows them to absorb water evenly and maintain structure during the cooking process. If you’re buying plain white rice at the grocery store, chances are it’s ideal for this method.
Medium-Grain Rice
Rounding out the middle ground, medium-grain options like Arborio (used in risotto) or Texmati can work too—but they tend to be stickier and may require slightly adjusted ratios. Use caution and keep an eye on them during cooking to prevent clumping.
Avoid Long-Grain Varieties
Rice like Basmati, Jasmine, or American long-grain tends to break apart more easily and absorbs too much liquid in the dry heat environment of an air fryer. This often leads to dry, crumbly results unless you compensate with extra water and careful stirring.
Brown Rice? Maybe Not…
Brown rice has a hard outer bran layer that makes it difficult to soften fully in an air fryer without specialized techniques. While possible with extended cooking times and high moisture, it usually ends up undercooked or overly chewy. For best results, stick to white rice.
In summary: grab a bag of short-grain white rice, and you’re set. No need for exotic imports—your local supermarket aisle has everything you need.
How to Cook Perfect Air Fryer Rice: Step-by-Step Guide
Ready to give it a try? Follow these simple steps for foolproof results every time.
What You’ll Need
- 1 cup uncooked short-grain white rice
- 1¼ cups water (or broth for extra flavor)
- Pinch of salt
- Non-stick spray or oil (optional)
- Lined air fryer basket (parchment paper or silicone liner)
- Heat-safe container (glass or ceramic works best)
Step 1: Rinse the Rice
Place the rice in a fine-mesh strainer and rinse under cold running water until the water runs clear. This removes excess surface starch, preventing mushiness and helping grains stay separate.
Step 2: Combine Ingredients
In a microwave-safe bowl or oven-safe dish, mix rinsed rice, water, and salt. Stir gently to combine. If using, lightly coat the bottom of your container with non-stick spray to prevent sticking.
Step 3: Prepare the Air Fryer Basket
Line the air fryer basket with parchment paper or a silicone mat. This creates a barrier between the hot metal and your food, reducing the risk of scorching and making cleanup effortless. Secure the liner so it doesn’t shift during cooking.
Step 4: Transfer and Seal
Carefully place your rice mixture into the lined basket. Cover loosely with foil or a lid if your air fryer has one—this helps trap steam and ensures even cooking. If no cover is available, leave the basket open but monitor closely.
Step 5: Set the Temperature and Time
Preheat your air fryer to 325°F (165°C). Cook for 15–20 minutes. After 10 minutes, pause and stir the rice gently with a fork to redistribute moisture and prevent sticking.
Step 6: Check for Doneness
Open the basket and check the rice. It should be tender with no visible grains of water. Fluff with a fork before serving. If still crunchy, close the basket and cook in 2-minute increments until done.
Pro Tip:
For extra flavor, add a teaspoon of butter or olive oil along with the rice and water. Or infuse your liquid with garlic cloves, bay leaves, or a splash of soy sauce before combining with rice.
Common Mistakes and How to Avoid Them
Even experienced cooks run into hiccups when trying new techniques. Here’s how to sidestep the most frequent pitfalls when making air fryer rice.
Mistake #1: Using Too Much Water
Too much liquid = soggy, gluey rice. Stick to a 1:1.25 ratio (rice to water). Too little = dry, hard clumps. Adjust based on your specific air fryer model—some retain moisture better than others.
Mistake #2: Skipping the Liner
Cooking rice directly on the air fryer tray causes sticking and makes cleanup a nightmare. Always use a parchment or silicone liner. Trust us—you’ll thank yourself later.
Mistake #3: Not Stirring Midway
Air fryers circulate hot, dry air, which can unevenly cook rice if left undisturbed. Stir once around the 10-minute mark to ensure all grains get equal exposure to heat and moisture.
Mistake #4: Opening the Basket Too Often
Each time you open the drawer, heat escapes and cooking slows down. Only peek near the end of the cycle to check doneness.
Mistake #5: Using Metal Utensils
Never use metal spatulas or forks in the air fryer basket—they can scratch surfaces or damage coatings. Opt for wooden or silicone tools instead.
Flavor Variations and Creative Uses
Once you master basic white rice, the possibilities expand! Your air fryer isn’t just for plain grains—it’s a flavor lab waiting to happen.
Garlic Herb Rice
Add 2 minced garlic cloves, ½ tsp dried thyme, and ¼ tsp black pepper to the water before cooking. The gentle steam infuses subtle, aromatic notes throughout each grain.
Savory Soy-Ginger Glaze
After cooking, toss warm rice with 1 tbsp low-sodium soy sauce, ½ tsp grated ginger, and 1 tsp sesame oil for an Asian-inspired twist perfect over grilled meats or veggies.
Fried Rice Leftovers
Use day-old cooked rice (store in the fridge overnight) in your air fryer at 375°F for 5 minutes to revive it, then scramble with beaten egg, peas, carrots, and teriyaki sauce for instant fried rice.
Coconut Milk Rice (Pilaf Style)
Replace half the water with coconut milk for a rich, creamy base. Add diced onions sautéed in butter before mixing with rice. Season with turmeric or curry powder for a fragrant pilaf.
These variations show how versatile air fryer rice really is. Once you see the potential, you’ll find endless ways to customize your meals without extra appliances.
Comparing Air Fryer vs. Traditional Methods
Let’s put air fryer rice head-to-head with other popular cooking styles to see where it stands.
| Method | Time | Texture | Cleanup | Equipment Needed |
|---|---|---|---|---|
| Stovetop Boiling | 18–22 min | Fluffy, reliable | Moderate (pot + strainer) | Pot, stove, strainer |
| Rice Cooker | 15–20 min | Consistently perfect | Easy (non-stick bowl) | Electric rice cooker |
| Instant Pot | 8–12 min | Tender, slightly softer | Very easy | Pressure cooker |
| Air Fryer | 15–20 min | Fluffy if monitored well | Very easy (with liner) | Air fryer + container |
As you can see, air fryer rice sits comfortably between traditional boiling and modern appliances like Instant Pots. Its main advantage lies in simplicity and speed—especially useful when you don’t own a dedicated rice cooker.
Tips for Different Air Fryer Models
Not all air fryers are the same. Brands like Ninja, Cosori, Philips, and Breville vary slightly in size, airflow, and temperature accuracy. Here’s how to adapt your technique accordingly.
Small-Capacity Fryers (Under 3 Quarts)
Use smaller containers and reduce water by 10–15% to account for faster evaporation. Cook in batches if needed, and always stir carefully to avoid breaking delicate grains.
Large-Capacity Fryers (4+ Quarts)
You can scale up recipes safely. For example, 2 cups rice with 2½ cups water works well. Ensure even heating by placing the container in the center of the basket.
Models Without Non-Stick Coatings
Double-line with parchment paper or use a stainless steel steamer insert if available. These models often handle moisture better but require gentler handling.
Digital vs. Analog Controls
Digital fryers allow precise temperature control—great for consistency. Analog models may fluctuate more, so keep an eye on early stages and adjust timing as needed.
When in doubt, consult your user manual. Some manufacturers even provide recipe guides specifically for cooking grains in their units.
Storing and Reheating Air Fryer Rice
Made too much? No problem. Proper storage keeps your rice fresh and safe to eat for days.
Refrigeration
Store cooled rice in an airtight container for up to 5 days. Always refrigerate within two hours of cooking to prevent bacterial growth.
Freezing
Portion into freezer-safe bags or containers. Label with date and freeze for up to 3 months. Thaw overnight in the fridge before reheating.
Reheating Tips
Place frozen or chilled rice back in the air fryer at 350°F for 3–5 minutes, sprinkled with a splash of water to restore moisture. Avoid microwaving unless necessary—it can make rice rubbery.
Proper reheating ensures every bite tastes as good as the first.
Frequently Asked Questions
Can I cook brown rice in an air fryer?
It’s possible but not recommended for beginners. Brown rice requires longer cooking times and higher moisture levels due to its fibrous bran layer. Even then, results may be uneven or undercooked. For best outcomes, stick to white rice.
Do I need to soak the rice before air frying?
No soaking is required. Rinsing the rice thoroughly is sufficient to remove excess starch and improve texture. Soaking can actually make rice gummier when exposed to dry heat.
What if my rice turns out too dry?
Add 1–2 tablespoons of water to the container, cover loosely, and continue cooking for 2–3 minutes. Monitor closely to avoid oversteaming.
Can I cook rice directly in the air fryer basket?
Not recommended. Cooking without a liner increases the risk of sticking, scorching, and damaging your appliance. Always use parchment paper or a silicone mat.
How do I prevent rice from sticking to the container?
Lightly coat the bottom of your cooking vessel with non-stick spray or oil. Also, avoid overcrowding and ensure even water distribution by stirring once midway through cooking.
Is air fryer rice healthier than boiled rice?
Nutritionally, there’s little difference—both methods preserve most vitamins and minerals. However, air fryer rice uses less added fat (if any), potentially making it a slightly lighter option depending on preparation style.