
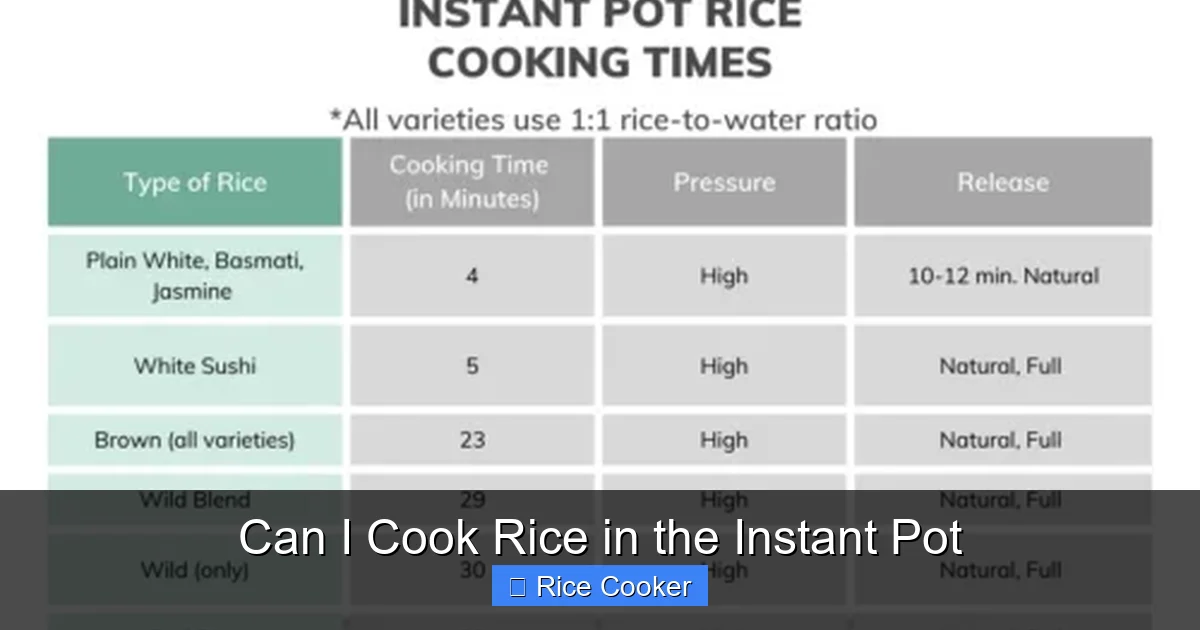
Can I cook rice in the Instant Pot? Yes—and it’s easier than you think! This all-in-one pressure cooker delivers perfectly cooked rice every time with minimal effort. Whether you’re making jasmine, brown, or wild rice, the Instant Pot handles it all with consistent results.
Key Takeaways
- Yes, you can cook rice in the Instant Pot—it’s one of the most common and reliable uses for this appliance.
- The Instant Pot transforms from a pressure cooker to a rice cooker, saving space and reducing cleanup.
- For best results, use a 1:1 water-to-rice ratio for white rice and slightly more water for brown or wild rice.
- The Manual/pressure setting works best for most rice varieties, with natural release for fluffier texture.
- Pro tip: Rinse your rice first to remove excess starch and prevent clumping.
- You can add flavorings like broth, herbs, or garlic while cooking for extra taste.
- Always let the pressure release naturally for 10–15 minutes before quick-release to avoid mushy rice.
📑 Table of Contents
- Can I Cook Rice in the Instant Pot? Absolutely—Here’s How!
- Why Choose the Instant Pot for Cooking Rice?
- How to Cook Rice in the Instant Pot: Step-by-Step Guide
- Best Types of Rice to Cook in the Instant Pot
- Common Mistakes and How to Avoid Them
- Tips for Perfect Rice Every Time
- Can You Cook Other Grains in the Instant Pot?
- FAQs
- Conclusion: Why the Instant Pot Is Your New Best Friend for Rice
Can I Cook Rice in the Instant Pot? Absolutely—Here’s How!
Imagine coming home after a long day, tossing some rice into your Instant Pot, and walking away. When you return, you’ve got perfectly cooked, tender grains ready to pair with anything from stir-fries to grilled chicken. Sounds too good to be true? It’s not—because yes, you can cook rice in the Instant Pot, and it’s one of the most popular ways people use their multi-cookers.
The Instant Pot has become a kitchen staple for busy families, meal prep enthusiasts, and anyone who wants foolproof meals without the fuss. And when it comes to rice? It delivers consistent, restaurant-quality results with just one touch of a button. Whether you’re cooking white, brown, jasmine, basmati, or even wild rice, the Instant Pot handles it all. In this guide, we’ll walk you through everything you need to know—from basic setup to flavor-boosting hacks—so you can master rice cooking in your Instant Pot like a pro.
Why Choose the Instant Pot for Cooking Rice?
If you’re wondering whether the Instant Pot is worth it just for rice cooking, let’s break down why so many people swear by it.
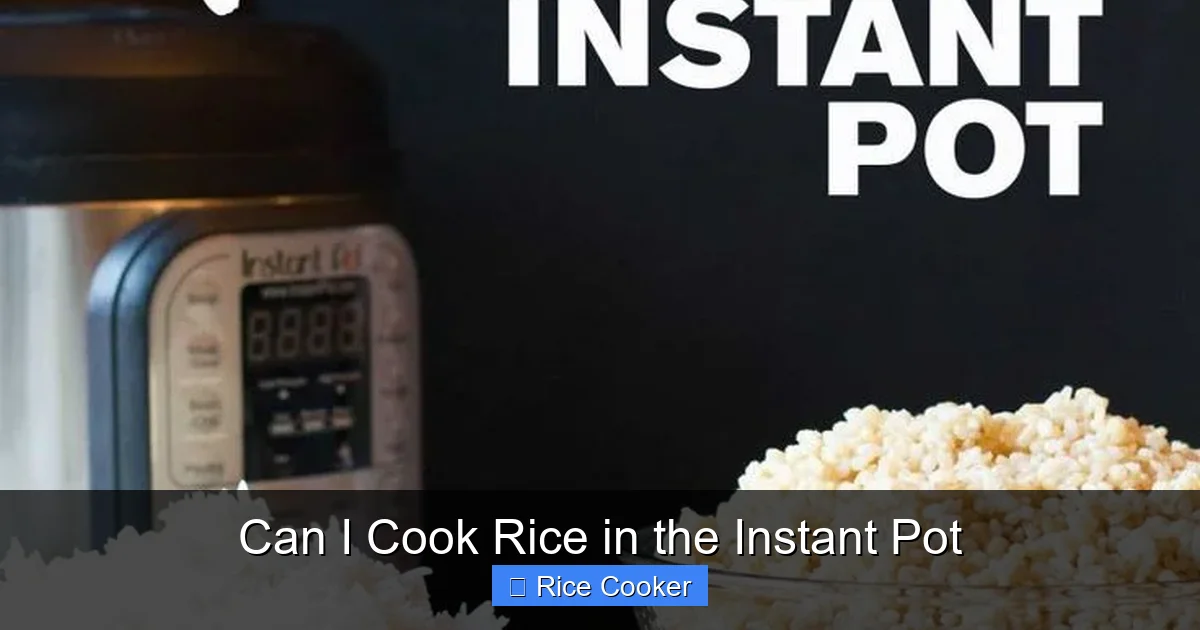
Visual guide about Can I Cook Rice in the Instant Pot
Image source: i.pinimg.com
A True Multi-Function Appliance
Instead of buying a separate rice cooker, you get a device that does it all—pressure cook, slow cook, sauté, steam, and now, cook rice. That means fewer appliances on your countertop and less cleaning up after meals. For small kitchens or dorm rooms, this is a game-changer.
Consistency You Can Count On
Unlike stovetop rice, which depends on your attention and stove temperature, the Instant Pot uses precise pressure and timing to cook rice evenly every time. No more burnt bottoms or soggy tops. Just plug it in, add ingredients, press a button, and relax.
Faster Than Boiling on the Stove
Cooking rice on the stove takes about 20–30 minutes of active monitoring. In the Instant Pot, it’s usually under 15 minutes total—including pressure build-up and release. That’s a huge time-saver, especially during weeknight dinners.
Fluffy, Separated Grains
With the right technique—especially using natural release—you’ll get rice that’s light, fluffy, and individual grains intact. No more mushy rice disasters.
Customizable Flavor
Want garlic-infused rice? Add a clove while cooking. Prefer coconut rice? Swap water for coconut milk. The Instant Pot lets you infuse flavors directly into the grains, something hard to do on the stove.
How to Cook Rice in the Instant Pot: Step-by-Step Guide
Ready to make your first pot of rice in the Instant Pot? Follow these simple steps for perfect results every time.
Step 1: Measure Your Rice and Water
Start by measuring your dry rice. A good rule of thumb is:
- White rice (jasmine, basmati): 1 cup rice to 1 cup water
- Brown rice: 1 cup rice to 1.25 cups water
- Wild rice: 1 cup rice to 2.5 cups water
- Porridge-style rice (like oats or grits): 1 cup rice to 3 cups liquid
Use a standard measuring cup—not the one that came with the rice package. Those are often inaccurate.
Step 2: Rinse the Rice (Optional but Recommended)
Place your rice in a fine-mesh strainer and rinse under cold water until the water runs clear. This removes surface starch, which helps prevent clumping and sticky rice. Skip this step if you prefer a creamier texture (like risotto), but for fluffy rice, rinsing is key.
Step 3: Add Rice and Liquid to the Inner Pot
Put the rinsed (or unrinsed) rice into the Instant Pot inner pot. Pour in the measured water (or broth). If adding flavorings like garlic, bay leaves, or a splash of soy sauce, toss them in now.
Step 4: Close the Lid and Set the Valve
Secure the lid and turn the pressure release valve to the sealed position. Make sure the sealing ring is clean and properly placed.
Step 5: Select the Right Setting
Press Manual (or Pressure Cook) and set the timer based on your rice type:
- White rice (jasmine, basmati): 3 minutes at high pressure
- Brown rice: 22–25 minutes at high pressure
- Wild rice: 30–35 minutes at high pressure
- Quick-cooking rice (like quinoa or millet): 1–2 minutes
Note: These are general guidelines. Some models have preset rice buttons—if yours does, use those for even better results.
Step 6: Let It Naturally Release
After cooking ends, let the pressure release naturally for 10–15 minutes before doing a quick release. This prevents sudden bursts of steam that can mash the rice. After 10–15 minutes, carefully turn the valve to venting to release remaining pressure.
Step 7: Open, Fluff, and Serve
Once fully depressurized, open the lid away from your face. Use a fork to gently fluff the rice—don’t stir aggressively or you’ll break the grains. Serve immediately or keep warm on the “Keep Warm” function for up to 10 minutes.
Best Types of Rice to Cook in the Instant Pot
Not all rice is created equal—and the Instant Pot excels with certain varieties. Here’s what works best.
Jasmine Rice
Fragrant, slightly sticky, and tender—jasmine rice is a Southeast Asian favorite. In the Instant Pot, it becomes even more aromatic and fluffy. Use a 1:1 water ratio and 3 minutes of pressure cooking. The result? A fragrant, non-sticky grain perfect for Thai or Vietnamese dishes.
Basmati Rice
Known for its long grains and nutty flavor, basmati rice can sometimes get mushy on the stove. The Instant Pot keeps each grain separate and elongates them beautifully. Cook with 1:1 water for 3 minutes, then let it rest. Ideal for biryanis or pilafs.
Brown Rice
Higher in fiber and nutrients, brown rice takes longer to cook. The Instant Pot cuts the usual 40+ minute stovetop time down to just 22–25 minutes. Because of its bran layer, it needs more water—about 1.25 cups per cup of rice. Still slightly chewy but very nutritious.
Wild Rice
Technically not rice but a grass seed, wild rice is dense and requires lots of water and time. The Instant Pot handles it well with 2.5 cups of water per cup of rice and 30–35 minutes of pressure cooking. The result is a nutty, earthy grain with a pleasant chew.
Black Rice (Forbidden Rice)
Rich in antioxidants and deep purple when cooked, black rice is gaining popularity. It needs extra water (about 1.5 cups per cup of rice) and longer cooking time (28–30 minutes). The Instant Pot makes it tender without turning to paste.
Quinoa and Other Pseudocereals
Yes—you can cook quinoa, amaranth, and teff in the Instant Pot too! Use a 1:1.25 water ratio and 1–2 minutes of pressure cooking. Rinse well first to remove bitter saponins. Perfect for gluten-free or protein-packed sides.
Common Mistakes and How to Avoid Them
Even with the right recipe, mistakes happen. Here’s how to fix common rice issues in the Instant Pot.
Mushy or Sticky Rice
This usually happens when you skip the natural release or don’t rinse the rice. Starch builds up during cooking, especially if you rush the process. Always let it sit 10–15 minutes after cooking, and rinse uncooked rice unless you want a creamy texture.
Undercooked Center
Overfilling the pot can prevent proper heat circulation. Never exceed the max fill line (usually two-thirds full for liquids, half for solids). Also, avoid opening the lid during cooking—this disrupts pressure and timing.
Burning at the Bottom
This happens when there’s not enough liquid or the pot isn’t preheated. Always use the minimum recommended water amount. If you notice a burnt smell, turn off the Instant Pot immediately and clean the bottom thoroughly.
Uneven Texture
Different rice brands vary in moisture content. If your rice is consistently overdone or underdone, adjust the water slightly next time. Start with the standard ratio and tweak by 1 tablespoon at a time.
Lid Won’t Seal
Make sure the sealing ring is clean and undamaged. Also, check that the float valve rises freely. A stuck valve means the pot isn’t pressurizing, which ruins rice cooking.
Grains Sticking Together
Starchy rice (like sushi or glutinous) tends to clump. Rinsing helps, but also try cooking in a thin layer and avoiding stirring after cooking. Adding a teaspoon of oil to the water can also prevent sticking.
Tips for Perfect Rice Every Time
Want to level up your rice game? Try these pro tips.
Use Broth Instead of Water
Replace water with chicken, vegetable, or beef broth for extra flavor. This is especially great for risottos or grain bowls. Just make sure the liquid still covers the rice properly.
Add Aromatics While Cooking
Toss in a garlic clove, a sprig of thyme, or a bay leaf during cooking. Remove them before fluffing if you don’t want visible bits, or leave them in for subtle flavor.
Try Coconut Milk for Creaminess
For Thai-inspired rice, replace half the water with coconut milk. Cook as usual—you’ll get a rich, creamy texture perfect with curries or tropical dishes.
Let It Rest Before Fluffing
Resist the urge to open the lid right after cooking. Let it sit 10 minutes—this allows steam to distribute evenly and prevents condensation from making the rice soggy.
Store Leftovers Properly
Cool rice quickly in an airtight container. Reheat with a splash of water or broth in the microwave or on the stove to restore moisture. Don’t microwave straight from the fridge—it dries out fast.
Experiment with Salt and Spices
Add a pinch of salt, smoked paprika, or turmeric while cooking. These infuse color and flavor directly into the grains. Turmeric turns rice golden—great for visual appeal in dishes.
Clean the Inner Pot Immediately
Rice residue can harden and stick if left. Wash the inner pot while it’s still warm with soap and water. Avoid abrasive scrubbers that can damage the nonstick coating.
Can You Cook Other Grains in the Instant Pot?
Absolutely! The Instant Pot isn’t just for rice. Here are other grains you can cook with similar techniques.
Oats and Quinoa
Both work great in the Instant Pot. Cook oats with 2 cups water per cup of oats for 10 minutes. Quinoa needs only 1–2 minutes at high pressure with 1.25 cups water. Both benefit from rinsing first.
Millet and Sorghum
These ancient grains cook quickly—about 2 minutes for millet, 3 for sorghum. They’re nutritious and gluten-free options. Use a 1:1.5 water ratio and rinse before cooking.
Barley and Farro
These hearty grains take longer—around 20–25 minutes. They’re excellent in soups or as a side dish. Soak them overnight to reduce cooking time and improve digestibility.
Polenta and Grits
Yes, even polenta! Use a 3:1 liquid-to-grain ratio and cook for 15–20 minutes with natural release. Stir occasionally during cooking to prevent lumps.
Legume-Based Grains (Like Amaranth)
Amaranth and teff are tiny but mighty. Cook them like rice—rinse, add water, and pressure cook for 2–3 minutes. They’re high in protein and minerals.
Couscous (Instant or Regular)
Regular couscous can be cooked in the Instant Pot with 1 cup water per cup of couscous for 5 minutes. Instant couscous just needs steaming—add boiling water, cover, and let sit 5 minutes. No pressure needed!
FAQs
How much water do I use for 1 cup of rice in the Instant Pot?
For white rice like jasmine or basmati, use 1 cup of water per cup of rice. Brown rice needs 1.25 cups, and wild rice needs 2.5 cups. Adjust slightly based on your preferred texture.
Do I need to rinse the rice before cooking in the Instant Pot?
Yes, rinsing removes excess starch and prevents clumping. Rinse until the water runs clear. Only skip rinsing if you want a creamier, stickier texture like risotto.
Can I cook rice in the Instant Pot without a natural release?
Yes, but natural release (10–15 minutes) produces fluffier rice. Quick release can cause uneven cooking or mushiness, especially for brown rice. Use natural release for best results.
What’s the difference between cooking rice in the Instant Pot vs. a regular rice cooker?
They’re similar, but the Instant Pot uses pressure to cook faster and more evenly. Rice cookers rely on steam and conduction. The Instant Pot also offers more functions beyond rice cooking.
Can I cook frozen rice in the Instant Pot?
No—always cook with dry rice. Frozen rice introduces extra moisture and can cause pressure buildup issues. Thaw and rinse dry first if needed.
How do I keep rice warm in the Instant Pot?
Use the “Keep Warm” function after cooking. It maintains rice at a safe temperature for up to 10 minutes. Don’t leave it longer, as prolonged warming dries out the rice.
Conclusion: Why the Instant Pot Is Your New Best Friend for Rice
So, can you cook rice in the Instant Pot? The answer is a resounding yes—and once you try it, you’ll wonder how you ever lived without it. This versatile appliance turns a tedious, hands-on task into a simple, automated process. Whether you’re feeding a family, meal prepping for the week, or just craving a perfectly cooked bowl of jasmine rice, the Instant Pot delivers.
From white to wild, short to long grain, and even alternative grains like quinoa and millet, the Instant Pot handles them all with precision and ease. With the right water ratio, a bit of patience during release, and a few flavor upgrades, you’ll never go back to stovetop rice again.
And the best part? It’s not just for rice. Once you’ve mastered this one recipe, you’ll start exploring soups, stews, beans, and even desserts in your Instant Pot. But let’s be honest—perfect rice is a solid place to start. So go ahead, measure out your grains, add your liquid, press a button, and enjoy the magic of modern kitchen convenience. Your future self will thank you.
Frequently Asked Questions
How much water do I use for 1 cup of rice in the Instant Pot?
For white rice like jasmine or basmati, use 1 cup of water per cup of rice. Brown rice needs 1.25 cups, and wild rice needs 2.5 cups. Adjust slightly based on your preferred texture.
Do I need to rinse the rice before cooking in the Instant Pot?
Yes, rinsing removes excess starch and prevents clumping. Rinse until the water runs clear. Only skip rinsing if you want a creamier, stickier texture like risotto.
Can I cook rice in the Instant Pot without a natural release?
Yes, but natural release (10–15 minutes) produces fluffier rice. Quick release can cause uneven cooking or mushiness, especially for brown rice. Use natural release for best results.
What’s the difference between cooking rice in the Instant Pot vs. a regular rice cooker?
They’re similar, but the Instant Pot uses pressure to cook faster and more evenly. Rice cookers rely on steam and conduction. The Instant Pot also offers more functions beyond rice cooking.
Can I cook frozen rice in the Instant Pot?
No—always cook with dry rice. Frozen rice introduces extra moisture and can cause pressure buildup issues. Thaw and rinse dry first if needed.
How do I keep rice warm in the Instant Pot?
Use the “Keep Warm” function after cooking. It maintains rice at a safe temperature for up to 10 minutes. Don’t leave it longer, as prolonged warming dries out the rice.