
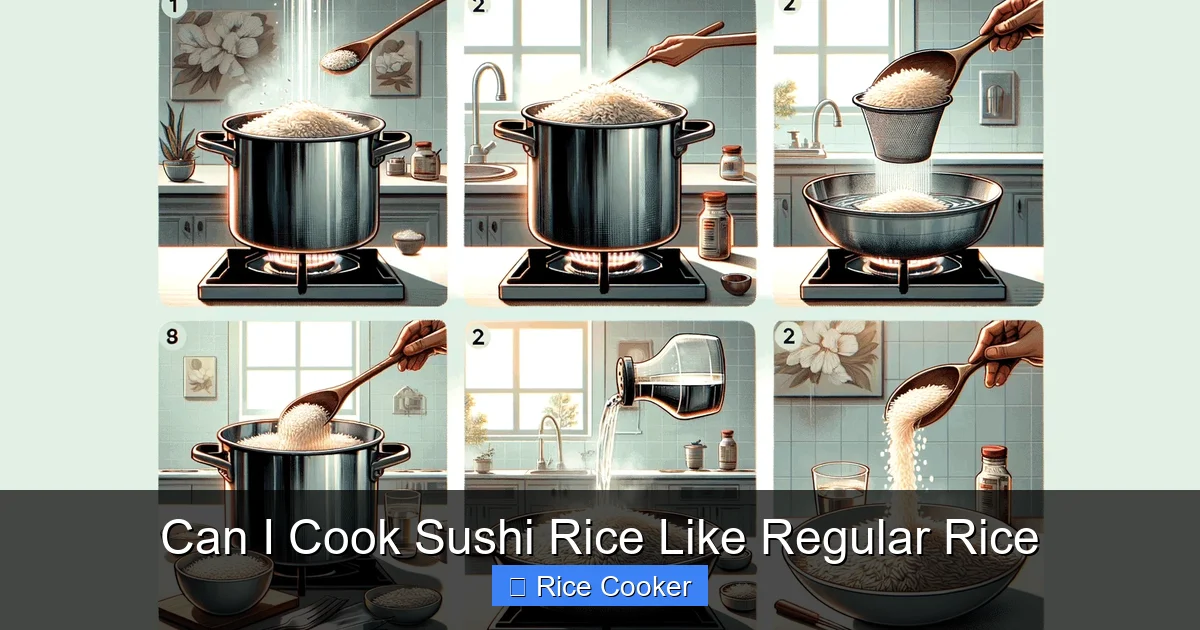
Yes, you can cook sushi rice in a rice cooker, but it’s not as simple as using regular white rice. Sushi rice requires specific steps—like soaking, exact water ratios, and vinegar seasoning—to get that sticky, tender texture needed for rolls and nigiri. While both use similar grains, the preparation makes all the difference in flavor and consistency.
Key Takeaways
- Soaking is essential: Sushi rice must soak for 30–60 minutes before cooking to ensure even hydration and fluffy grains.
- Water ratio matters: Use less water than with regular rice—typically 1:1.1 or 1:1.2 rice to water—to prevent mushiness.
- Season after cooking: Mix in seasoned rice vinegar, sugar, and salt only after the rice is done to avoid altering cooking dynamics.
- Rice cooker settings vary: Some models have a “sushi” setting; if not, use the standard white rice setting and adjust timing slightly.
- Cooling and fluffing: Let rice cool slightly, then gently fluff with a wooden paddle—don’t press down or mash the grains.
- Storage affects quality: Cooked sushi rice keeps best for 1–2 days refrigerated; reheat gently without overcooking.
- Practice makes perfect: Even small adjustments in soaking time or water amount can improve texture significantly.
Have you ever stood at your kitchen counter, rice cooker humming softly, wondering if the same method you use for jasmine or basmati will work for sushi rice? You’re not alone. Many home cooks—especially beginners—ask: **Can I cook sushi rice like regular rice?** The short answer is yes, but with caveats. Sushi rice (also called sushi-meshi or Japanese short-grain rice) behaves differently from regular long-grain varieties due to its unique starch structure and moisture needs. While both are cooked in boiling water and absorbed into rice, the devil is in the details. Getting sushi rice right means achieving a balance of stickiness, firmness, and delicate flavor—qualities essential for perfect rolls, nigiri, and chirashi. For safety tips, see our guide on leaving a rice cooker unattended.
Cooking sushi rice properly isn’t just about technique—it’s about understanding the science behind the grain. Short-grain rice contains more amylopectin, a type of starch that becomes sticky when cooked, unlike the amylose-dominant long-grain rice used in American-style dishes. This is why sushi rice clings together just enough to hold shapes but doesn’t turn gummy. And while a rice cooker makes life easier, not all models treat sushi rice the same. Some have dedicated settings, others don’t. So whether you’re aiming to make homemade sushi for a dinner party or just want perfectly seasoned rice every time, this guide walks you through everything—from soaking and water ratios to post-cook seasoning—so you can skip the takeout and enjoy restaurant-quality results at home.
Key Takeaways
- Understanding can i cook sushi rice like regular rice: Provides essential knowledge
📑 Table of Contents
- Understanding Sushi Rice vs. Regular Rice
- Can You Use a Rice Cooker for Sushi Rice?
- How to Cook Sushi Rice in a Rice Cooker (Step-by-Step)
- Common Mistakes and How to Fix Them
- Storing and Reheating Sushi Rice
- Alternatives to Rice Cooker Methods
- Final Thoughts: Mastery Through Practice
Understanding Sushi Rice vs. Regular Rice
Before diving into the how-to, let’s clear up what sets sushi rice apart from the kind you might buy in a supermarket bag labeled “white rice.” Most people assume all rice is created equal, but that’s far from true—especially when it comes to Japanese cuisine. Sushi rice specifically refers to short-grain Japanese rice (often labeled “sushi-grade”), which has a higher starch content and absorbs water differently than long-grain varieties like jasmine or basmati.
The key difference lies in the grain’s shape and starch composition. Short-grain rice is plumper, rounder, and denser, which allows it to absorb liquid thoroughly without falling apart. When cooked correctly, each grain remains separate yet slightly tacky—perfect for rolling or shaping by hand. In contrast, regular long-grain rice tends to be drier and more fluffy after cooking, making it ideal for pilafs, stir-fries, or side dishes, but terrible for sushi.
Another important distinction is how the rice is processed. Authentic sushi rice undergoes a special polishing process called *seimai-buai*, where the outer bran layers are removed, leaving only the inner endosperm. This gives it a smoother texture and milder flavor, reducing bitterness and enhancing the ability to absorb seasonings like rice vinegar. Not all short-grain rice sold in stores is polished to this standard, so look for brands like Koshihikari, Calrose, or Nishiki on the label.
The Role of Starch in Texture
Starch is the secret ingredient in great sushi rice. During cooking, heat breaks down the starch granules, releasing amylopectin into the surrounding water. As the rice cools, these starches recrystallize, creating that signature cling between grains. But if too much water is used or the rice is overcooked, the starches become overly saturated, turning the rice mushy and unworkable.
That’s why soaking plays such a crucial role. Before cooking, sushi rice sits in water for 30 to 60 minutes. This allows the grains to absorb moisture evenly, preventing some parts from being undercooked while others burst open. Think of it like marinating meat—it ensures every bite is consistent. Without soaking, you risk uneven texture, and your sushi will fall apart the moment you try to roll it.
Can You Use a Rice Cooker for Sushi Rice?
Visual guide about Can I Cook Sushi Rice Like Regular Rice
Image source: recipeofbangladesh.com
Absolutely! In fact, a rice cooker is one of the most reliable tools for cooking sushi rice at home. Unlike stovetop methods that require constant attention and monitoring, a rice cooker automates the process, delivering consistent results every time. Whether you have a basic model or a high-tech smart unit, the principles remain the same: proper water ratio, soaking, and gentle handling after cooking.
Most modern rice cookers come with multiple settings, including a dedicated “sushi” or “short-grain” option. These programs typically adjust temperature and timing to mimic traditional steaming methods, ensuring the rice cooks evenly without drying out. If your machine doesn’t have a specific sushi setting, don’t worry—the standard white rice mode works well enough, provided you follow the correct water-to-rice ratio.
Choosing the Right Water Ratio
One of the biggest mistakes new sushi makers make is using too much water. Regular white rice often calls for a 1:2 ratio (one cup rice to two cups water), but sushi rice needs less. Too much water leads to soggy, glue-like grains that won’t hold their form. Instead, aim for a ratio between **1:1.1 and 1:1.2**. For example, if you’re using 2 cups of uncooked sushi rice, measure out 2.2 to 2.4 cups of water.
Why does this matter? Because sushi rice is meant to be slightly firmer and more cohesive than regular rice. Over-hydrating defeats the purpose. To test your ratio, pour the rice and water into the cooker, give it a quick stir to remove excess starch (this prevents stickiness to the pot), then start the cycle. Once done, let it sit for 10 minutes off-heat—this final steam helps finish cooking evenly.
Soaking: The Secret Step No One Talks About
Here’s where many recipes go wrong: skipping the soak. Sushi rice must sit in cold water for **30 to 60 minutes** before cooking. This step is non-negotiable. It allows the grains to absorb water slowly, ensuring uniform texture. Imagine trying to boil an uncooked noodle—it would crack and split. Same principle applies here.
During soaking, change the water once if possible, especially if using tap water high in minerals. Filtered or bottled water yields cleaner-tasting rice. After soaking, drain the rice thoroughly through a fine-mesh sieve or colander—do not rinse afterward, as this washes away surface starch that helps bind the grains.
How to Cook Sushi Rice in a Rice Cooker (Step-by-Step)
Ready to put theory into practice? Follow these simple steps to cook perfect sushi rice in your rice cooker:
1. **Measure and Rinse**: Start with high-quality short-grain sushi rice. Measure according to your recipe (usually 1 cup per person). Place the rice in a bowl and cover with cold water.
2. **Rinse Until Clear**: Swirl the rice gently with your fingers, letting cloudy water run off. Repeat until the water runs almost clear. This removes excess starch and prevents gumminess.
3. **Soak**: Drain the rinsed rice and return it to the bowl. Cover with fresh cold water and let sit for 30–60 minutes. This step is critical for soft, fluffy grains.
4. **Drain Again**: After soaking, drain the rice completely. Any remaining water can dilute the flavor and affect texture.
5. **Add Water and Cook**: Transfer the drained rice to the rice cooker pot. Add water according to your ratio (e.g., 1 cup rice + 1.1 cups water). Stir once gently to remove air pockets.
6. **Start Cooking**: Press the “Cook” button. If your model has a “Sushi” setting, select it. Otherwise, use the standard white rice program.
7. **Let It Rest**: Once the cycle ends, let the rice sit for 10 minutes with the lid closed. This allows residual heat to finish steaming and equalize temperature.
8. **Fluff Gently**: Open the lid and use a wooden paddle or rice scraper to fluff the rice. Avoid mashing—gentle lifting preserves individual grains.
9. **Season While Warm**: While still warm, mix in a glaze made of rice vinegar, sugar, and salt. Fold carefully to coat without crushing the rice.
Seasoning Your Sushi Rice Correctly
This is arguably the most overlooked step. Seasoning should happen **after** cooking, not before. Adding vinegar, salt, and sugar during cooking alters the starch behavior and can result in uneven absorption or mushy rice.
Instead, prepare a simple glaze: Combine ½ cup rice vinegar, 2 tablespoons sugar, and 1 teaspoon salt in a small saucepan. Heat gently until dissolved (do not boil), then cool slightly. Pour over the warm cooked rice and fold in using a figure-eight motion with your paddle. Work quickly but calmly—warm rice absorbs seasoning faster.
For extra flavor, consider adding a splash of mirin or a drop of sesame oil, though these are optional and depend on personal taste.
Common Mistakes and How to Fix Them
Even experienced cooks slip up sometimes. Here are common pitfalls and how to avoid them:
– **Mushy Rice**: Caused by too much water or overcooking. Fix: Reduce water slightly and ensure proper draining after soaking.
– **Gummy Texture**: Often due to insufficient rinsing or lack of soaking. Fix: Rinse until water runs clear and always soak the rice.
– **Grains Falling Apart**: Happens when rice is over-fluffed or cooled too long before use. Fix: Fluff gently and use immediately or store properly covered.
– **Too Much Stickiness**: Sometimes the rice cooker lid leaks steam. Fix: Check seals regularly and avoid opening the lid during cooking.
– **Lack of Flavor**: If rice tastes bland, it’s likely under-seasoned. Fix: Increase vinegar-sugar mixture next time—start with small amounts and adjust.
Pro tip: Keep your rice cooker clean! Residue from previous meals can alter taste and affect future batches. Wipe the inner pot and lid after each use.
Storing and Reheating Sushi Rice
Freshly cooked sushi rice is best eaten within 1–2 hours. However, you can store it properly for later use:
– Cool the rice to room temperature first (never refrigerate hot rice—it draws out moisture).
– Spread it out on a tray or shallow container to speed cooling.
– Once cooled, transfer to an airtight container and refrigerate for up to 2 days.
When ready to use again, reheat gently in a microwave with a damp paper towel over the top to retain moisture. Or steam it over boiling water for 5–7 minutes, checking frequently to avoid drying out.
Avoid microwaving in bursts longer than 30 seconds at a time—overdoing it turns rice rubbery.
Tips for Batch Cooking and Meal Prep
If you love sushi but don’t want to cook rice daily, consider batch cooking. Make a large portion on Sunday, season it, and store in portions. Label containers clearly with dates. This saves time and ensures consistency across meals. For longer storage, you can keep cooked rice in the freezer.
Just remember: seasoned sushi rice loses its optimal texture faster than plain cooked rice. Use within 24–48 hours for best results.
Alternatives to Rice Cooker Methods
While we’ve focused on rice cookers, other methods exist—though they require more hands-on attention:
– **Stovetop Method**: Bring water to a boil, add drained rice, reduce heat to low, cover tightly, and simmer for 15–18 minutes. Turn off heat and rest 10 minutes. This mimics traditional Japanese techniques but demands vigilance to prevent scorching.
– **Instant Pot**: Use the “Steam” or “Manual” setting with the same water ratio. Natural release for 10 minutes, then let sit another 5. Great for multi-taskers!
– **Steamed Bamboo Mat**: Traditionalists swear by steaming rice in a cloth-lined basket over boiling water. Results in lighter, fluffier grains—but takes longer and needs special equipment.
Each method has pros and cons. A rice cooker offers convenience and reliability, while stovetop gives greater control. Choose based on your comfort level and available tools.
What About Brown Sushi Rice?
Yes, you can make brown sushi rice, though it’s less common. Brown rice has a nuttier flavor and chewier texture, which some prefer. However, it requires longer soaking (up to 2 hours) and a higher water ratio (1:1.5). Cooking times also increase. If attempting, adjust your rice cooker settings or use the stovetop method for better control.
Keep in mind: brown rice doesn’t stick together as well as white sushi rice, so rolling may be trickier. Still, it’s a healthy alternative worth exploring!
Final Thoughts: Mastery Through Practice
Cooking sushi rice isn’t rocket science—but it does require mindfulness and a few precise steps. Unlike regular rice, which thrives on simplicity, sushi rice rewards patience, attention to detail, and gentle handling. From soaking to seasoning, every action influences the outcome.
With a good rice cooker, quality short-grain rice, and a willingness to experiment, you’ll soon find yourself confidently preparing sushi at home—no chef’s license required. Remember: perfection comes with practice. Don’t be discouraged if your first batch isn’t flawless. Adjust water ratios, soaking times, and seasoning gradually until you find what works for your palate and equipment.
And hey—if you mess up? That’s part of the journey. Even professional sushi chefs tweak their recipes daily. What matters is enjoying the process and sharing delicious food with loved ones.
Frequently Asked Questions
Can I substitute regular rice for sushi rice?
No, not effectively. Regular long-grain rice lacks the starch content and texture needed for sushi. It will be too dry and crumbly. Always use short-grain Japanese rice labeled “sushi-grade.”
Do I need a special rice cooker for sushi rice?
No, but a high-quality model with adjustable settings helps. Some rice cookers have a dedicated “sushi” setting, but standard white rice mode works fine if you follow correct ratios and soaking times.
How long should I soak sushi rice before cooking?
Soak for 30 to 60 minutes. This ensures even hydration and prevents uneven cooking. Never skip this step—it’s essential for fluffy, non-gummy grains.
Can I make sushi rice ahead of time?
Yes, but best within 1–2 days. Store seasoned rice in an airtight container, refrigerated. Reheat gently in a steamer or microwave with a damp cloth to restore moisture.
Why is my sushi rice too sticky?
Usually caused by too much water or insufficient rinsing/soaking. Try reducing water by 10%, rinse rice thoroughly, and always soak. Also, avoid pressing or mashing after cooking.
Is it okay to use tap water for soaking?
Yes, but filtered or bottled water produces cleaner-tasting rice. Tap water can contain minerals that affect flavor, especially if hard or chlorinated.