
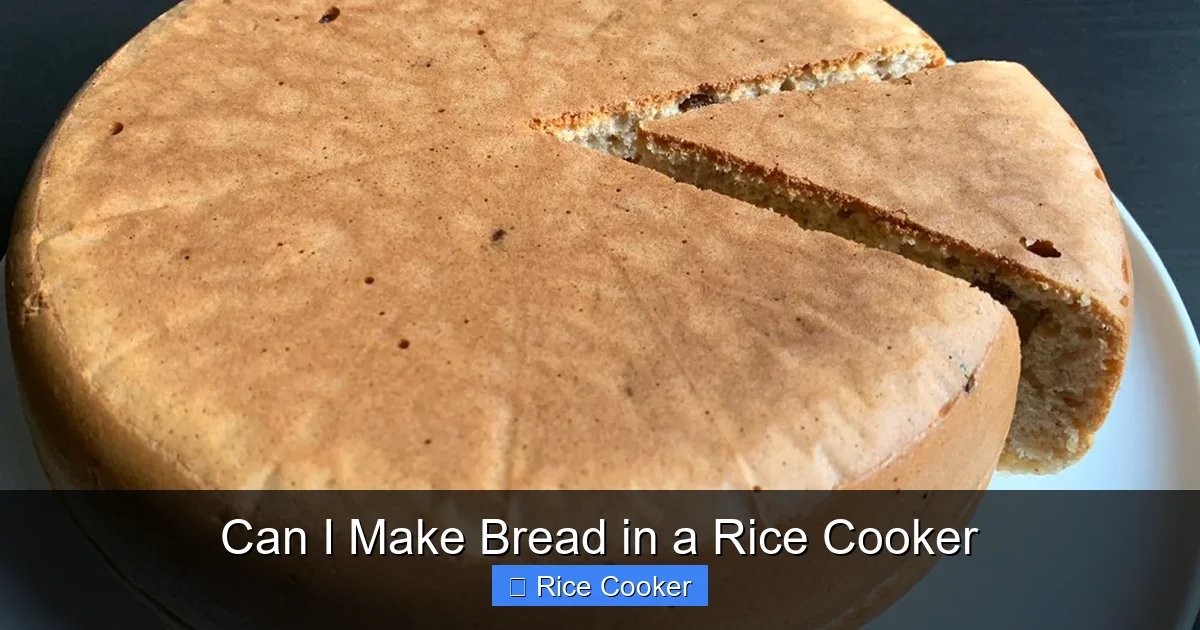
Making bread in a rice cooker is not only possible—it’s simple and surprisingly effective. With just flour, yeast, water, and a pinch of salt, you can create fresh, homemade bread using your kitchen’s most versatile appliance. No oven? No problem. The rice cooker does the heavy lifting with consistent heat and steam.
Have you ever stood in front of your kitchen counter, staring at a bag of flour and thinking, “I really want fresh bread… but I don’t have an oven”? Or maybe your oven’s broken, and you’re craving that warm, crusty loaf straight from the kitchen—without waiting for delivery? If so, you’re in luck. You can actually make delicious, soft, even fluffy bread using a rice cooker. Yes, the humble appliance that wakes up every morning with a warm bowl of rice? It can do more than that.
Making bread in a rice cooker isn’t just a clever trick—it’s a game-changer for anyone who wants homemade bread without the hassle of traditional baking. Whether you’re a busy parent, a college student living off instant ramen, or someone who just loves experimenting in the kitchen, this method is quick, affordable, and shockingly effective. In this article, we’ll walk through everything you need to know: from the science behind why it works, to step-by-step instructions, recipe ideas, and pro tips to make your first (and second, and third!) loaf a success.
Key Takeaways
- Rice cookers are perfect for baking bread: Their ability to maintain steady heat and create steam makes them ideal for dough rising and baking.
- You don’t need special tools: A standard rice cooker works just fine—no stand mixer or oven required.
- Ingredients matter: Use high-protein bread flour, active dry yeast, warm water, and a touch of sugar for best results.
- Timing is key: Most rice cooker bread recipes take 1–2 hours from start to finish, including proofing and baking.
- Customize your loaf: Add herbs, seeds, chocolate chips, or nuts to personalize your bread.
- Cleanup is easy: Use non-stick spray and line the inner pot for effortless removal.
- Experiment with flavors: Try whole wheat, gluten-free, or sweet banana bread variations using the same basic method.
📑 Table of Contents
- Why a Rice Cooker Makes Great Bread
- What You’ll Need to Make Rice Cooker Bread
- Step-by-Step Guide: How to Make Bread in a Rice Cooker
- Tips for Perfect Rice Cooker Bread Every Time
- Creative Variations: Sweet, Savory, and Specialty Breads
- Troubleshooting Common Issues
- Is Rice Cooker Bread as Good as Oven Bread?
- The Future of Kitchen Appliances: More Than Just Rice
Why a Rice Cooker Makes Great Bread
At first glance, a rice cooker might seem like an unlikely candidate for baking bread. After all, it’s designed for boiling grains, not creating oven-like conditions. But here’s the secret: rice cookers are engineered to maintain precise temperatures and manage moisture—two things essential for bread making.
When you activate the “cook” cycle, the rice cooker heats up quickly and then switches to a “warm” setting to prevent overcooking. This cycle mimics the gentle, sustained heat needed for yeast activation and dough proofing. Many modern rice cookers also have a “keep warm” function that lasts for hours, which is perfect for letting your dough rise slowly and evenly.
Plus, the enclosed space traps steam, creating a humid environment that keeps bread moist and tender—just like a professional oven’s convection system. And because the pot is non-stick and easy to clean, there’s very little mess involved. So whether you’re using a basic model or a high-end Japanese brand like Zojirushi or Tiger, you’re working with a kitchen appliance that’s already doing a lot of the hard work for you.
What You’ll Need to Make Rice Cooker Bread
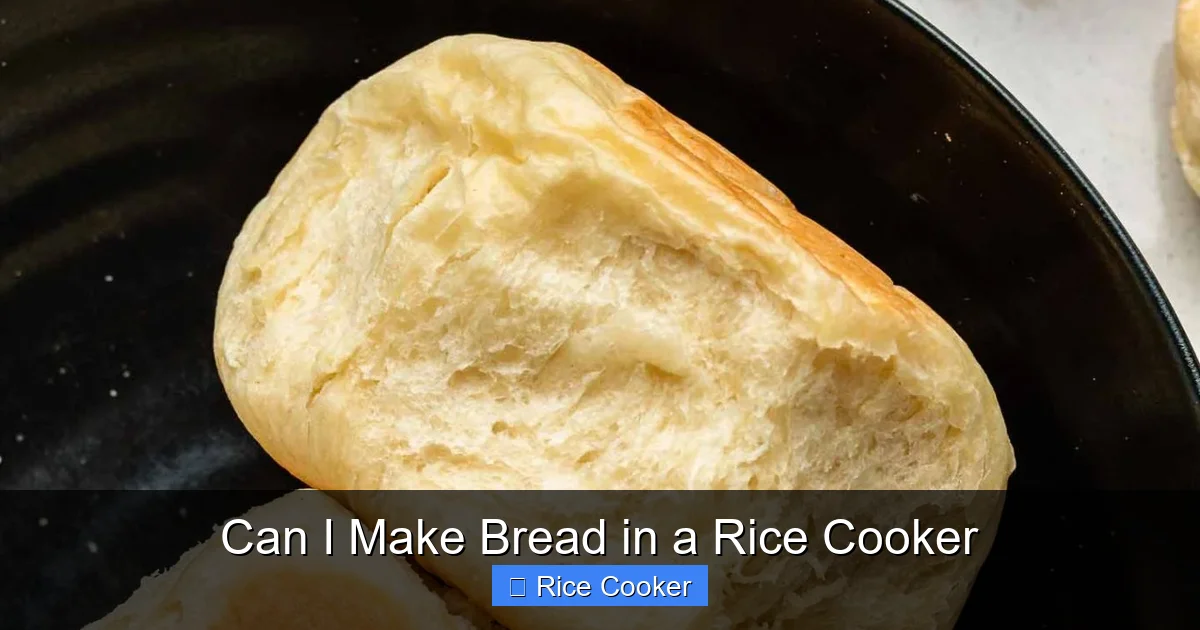
Visual guide about Can I Make Bread in a Rice Cooker
Image source: okonomikitchen.com
Before you dive in, gather these simple ingredients and tools. Don’t worry—you probably already have most of them!
Basic Ingredients
- All-purpose or bread flour: Bread flour has a higher protein content (around 12%) which helps create gluten and gives your bread structure. If you only have all-purpose, that’s okay—it will still work.
- Active dry yeast: This is the magic ingredient that makes your dough rise. Make sure it’s not expired—check the expiration date on the package.
- Warm water: Around 105°F to 110°F (40°C to 43°C). Too hot kills the yeast; too cold won’t activate it.
- Sugar or honey: Feeds the yeast and adds flavor. One tablespoon of sugar per cup of flour works well.
- Salt: Enhances flavor and controls yeast activity. Use about 1 teaspoon per loaf.
- Butter or oil: Adds richness and softness. Unsalted butter is preferred so you can control the salt level.
Tools & Equipment
- A standard rice cooker: Any brand or size works. Just make sure it has a removable inner pot.
- Measuring cups and spoons: Accuracy matters in baking, so use a kitchen scale if you have one.
- A mixing bowl: For combining ingredients before transferring to the rice cooker.
- Wooden spoon or spatula: To stir the dough.
- Parchment paper or silicone mat (optional): Helps with cleanup and prevents sticking.
With these basics, you’re ready to start. No stand mixer, no oven, no kneading machine—just your rice cooker and a few minutes of prep time.
Step-by-Step Guide: How to Make Bread in a Rice Cooker
Follow these steps closely, and you’ll have a golden, soft loaf ready in under two hours.
Step 1: Activate the Yeast
In a small bowl, combine warm water (about 1/2 cup), 1 tablespoon of sugar, and 1 packet (2¼ teaspoons) of active dry yeast. Stir gently and let sit for 5 to 10 minutes. You should see bubbles forming—this means the yeast is alive and ready to go. If nothing happens after 10 minutes, your yeast may be dead, and you’ll need a fresh batch.
Step 2: Mix the Dough
In a large bowl, combine 3 cups of flour, 1 teaspoon of salt, and 2 tablespoons of softened butter (or oil). Pour in the yeast mixture and stir until a shaggy dough forms. Use a wooden spoon or your hands to mix everything together.
Step 3: Let the Dough Rise
Transfer the dough into the rice cooker’s inner pot. Cover it loosely with a clean kitchen towel or plastic wrap. Turn the rice cooker to the “warm” setting and let it rise for 30 to 45 minutes, or until the dough doubles in size. The “warm” setting keeps the temperature stable, which encourages fermentation.
Step 4: Shape and Rest
Once risen, press down on the dough gently to release air bubbles. Shape it into a rough rectangle or oval inside the pot. Cover again and let rest for another 10 minutes. This final proof helps the bread hold its shape during baking.
Step 5: Bake the Bread
Turn the rice cooker to the “cook” setting. The dough will begin to bake immediately, and you’ll hear the familiar bubbling sound as the yeast finishes its job. After about 30 to 35 minutes, the bread should be golden brown and firm to the touch. The internal temperature should read around 190°F to 200°F (88°C to 93°C).
Step 6: Cool and Enjoy
Carefully remove the pot using oven mitts. Let the bread cool completely on a wire rack for at least 30 minutes before slicing. This allows the crumb to set and makes cutting easier.
And that’s it! You’ve just made real bread from scratch—no oven, no kneader, no stress.
Tips for Perfect Rice Cooker Bread Every Time
Even though this method is forgiving, a few small tweaks can make a big difference in texture and flavor.
Use a Non-Stick Spray
Lightly coat the inner pot with non-stick cooking spray or brush it with oil before adding dough. This prevents sticking and makes cleanup a breeze. Some bakers even line the bottom with parchment paper for extra insurance.
Don’t Overmix
Overworking the dough develops too much gluten, leading to a dense, chewy loaf. Mix just until the ingredients come together—even if it looks lumpy. The dough will smooth out during rising.
Check Your Yeast Temperature
Yeast is sensitive to temperature. If your water feels too hot when you dip your finger in, it’s too warm for the yeast. Test it with a thermometer if you’re unsure.
Adjust for Altitude
If you live above 3,000 feet, your yeast may rise faster due to lower atmospheric pressure. Reduce the initial rise time by 10 to 15 minutes to prevent over-proofing.
Let the Bread Cool Completely
Resist the urge to slice right away. Warm bread is softer but harder to cut neatly. Cooling allows the starches to set, giving you a cleaner slice and better texture.
Store Properly
Wrap leftover bread in a cloth or place it in a paper bag. Avoid plastic bags, which trap moisture and cause the crust to soften. For longer storage, freeze slices individually and thaw as needed.
Creative Variations: Sweet, Savory, and Specialty Breads
The beauty of rice cooker bread is its versatility. Once you master the basic recipe, you can experiment with flavors, textures, and ingredients.
Banana Bread
Mash 2 ripe bananas and add them to the dough along with 1/4 cup of melted butter and 1/2 teaspoon of vanilla extract. Add 1/2 cup of chopped walnuts for crunch. Bake as usual—the result is moist, fragrant, and perfect for breakfast.
Garlic Herb Focaccia
After mixing the dough, press it into the pot and drizzle with olive oil. Sprinkle with minced garlic, rosemary, thyme, and sea salt. Press your fingers into the surface to create dimples. Bake until golden. Serve warm with soup or salad.
Whole Wheat Bread
Substitute half of the all-purpose flour with whole wheat flour. You may need to add a little extra liquid since whole wheat absorbs more moisture. The bread will be denser but richer in nutrients.
Chocolate Chip Loaf
Fold in 1 cup of semi-sweet chocolate chips after the dough has risen. The rice cooker’s gentle heat melts the chocolate slightly, creating pockets of sweetness throughout the loaf.
Gluten-Free Option
Use a gluten-free flour blend labeled for bread-making. Add 1 teaspoon of xanthan gum per cup of flour to help bind the dough. Be prepared for a lighter, cake-like texture—but still delicious!
Sweet Cinnamon Swirl
Roll the risen dough into a rectangle, spread softened butter mixed with cinnamon and sugar, then roll it tightly and slice into rounds. Place them side by side in the rice cooker and bake. The result? A bakery-style cinnamon bun in minutes.
Each variation takes the same core process but transforms the outcome. The possibilities are endless.
Troubleshooting Common Issues
Even experienced bakers run into hiccups. Here’s how to fix the most common problems.
Dense or Flat Bread
This usually means the yeast didn’t activate properly or the dough didn’t rise enough. Check your yeast’s expiration date and water temperature. Also, avoid opening the lid too often during rising—it lets heat escape.
Burnt Bottom
Some rice cookers have hot spots or uneven heating. To prevent burning, place a small dish of water in the outer tray (if your model has one) to help distribute heat more evenly. Alternatively, rotate the pot halfway through baking if possible.
Sticky or Gummy Texture
Too much liquid or insufficient flour can cause this. Measure carefully, and don’t add more water unless the dough is extremely dry. Also, ensure your flour is fresh—old flour loses its gluten-forming ability.
Bread Doesn’t Brown
Most rice cookers don’t get as hot as ovens. For a darker crust, transfer the loaf to a preheated oven broiler for 2 to 3 minutes at the end of baking. Watch it closely to avoid burning.
Dough Won’t Rise
Cold rooms slow yeast activity. If your kitchen is below 70°F (21°C), try placing the rice cooker near a warm appliance or in a slightly heated oven (turned off). You can also use the rice cooker’s “warm” setting for longer.
Off-Smelling or Sour Taste
This indicates over-proofing or old yeast. Proof your dough for no more than 45 minutes, and always check yeast freshness. Fresh yeast smells slightly nutty; old yeast may smell sour or flat.
With a little patience and practice, these issues become learning moments rather than setbacks.
Is Rice Cooker Bread as Good as Oven Bread?
Short answer: It’s different—and often just as good. While traditional oven-baked bread develops a crispier crust and more complex flavor through Maillard reactions and caramelization, rice cooker bread tends to be softer and moister on the inside with a tender, slightly chewy crust.
But here’s the thing: many people prefer rice cooker bread precisely because of its soft texture. It’s ideal for sandwiches, toast, or simply slathering with butter. Plus, it’s faster, requires less equipment, and uses minimal energy.
If you’re comparing it to artisanal sourdough or French baguette, no—it won’t match that level of complexity. But for everyday homemade bread? It’s incredibly close—and for many, that’s more than enough.
Think of it this way: if you could have fresh, warm bread every day without turning on your oven, would you do it? Most people say yes.
The Future of Kitchen Appliances: More Than Just Rice
Rice cookers are quietly becoming multi-functional kitchen heroes. Beyond steaming vegetables, making porridge, or keeping food warm, they’re proving themselves as viable alternatives for baking bread, cakes, even cookies. As appliances become smarter—with timers, delay functions, and multiple settings—they’re expanding their culinary roles.
Some high-end models now include “bake” modes specifically for bread. But even basic models work well with the right technique. It’s a reminder that innovation doesn’t always come from new gadgets—sometimes, it comes from seeing the potential in what you already own.
So next time you reach for your rice cooker, remember: it’s not just for rice. It’s your ticket to fresh, homemade bread—anytime.
Frequently Asked Questions
Can I use a regular rice cooker to make bread?
Yes, any standard rice cooker with a removable inner pot works perfectly for making bread. The key is using the “warm” setting for rising and the “cook” setting for baking.
Do I need a special type of flour?
For best results, use bread flour, which has a higher protein content. But all-purpose flour works too—just expect a slightly different texture.
How long does rice cooker bread take to make?
From start to finish, it usually takes about 1.5 to 2 hours, including rising and baking time.
Can I make gluten-free bread in a rice cooker?
Yes! Use a gluten-free flour blend made for bread and add xanthan gum. Results will be lighter but still delicious.
Why is my rice cooker bread flat?
This is usually due to inactive yeast, incorrect water temperature, or not allowing enough time for rising. Always test your yeast first.
Can I reheat rice cooker bread?
Absolutely. Wrap it in foil and warm it in the oven at 300°F (150°C) for 10–15 minutes, or microwave a slice for 10 seconds.