
You absolutely can cook rice in a Ninja Foodi, and it’s easier than you think. Whether you use the pressure cooker function or stovetop method, your Ninja Foodi delivers fluffy, consistent results—no dedicated rice cooker needed. With the right technique, water ratio, and timing, you’ll never miss your old appliance again.
Can you cook rice in a Ninja Foodi? The short answer is yes—and surprisingly well. If you’ve ever wondered whether your all-in-one kitchen gadget can replace your trusty rice cooker, you’re not alone. Many home cooks rely on their Ninja Foodi for everything from searing steaks to slow-simmering stews, but rice? That’s a new frontier. The good news? With the right approach, your Ninja Foodi can produce fluffy, perfectly cooked grains every single time.
Unlike traditional stovetop cooking, which requires constant attention and guesswork, the Ninja Foodi uses pressure and temperature control to cook rice evenly and efficiently. Whether you’re making plain white rice for a side dish or experimenting with jasmine or basmati, this versatile machine handles it all—especially when you follow a few key guidelines. In this guide, we’ll walk you through everything you need to know: from the best settings and ratios to troubleshooting common issues. By the end, you’ll feel confident cooking rice in your Ninja Foodi like a pro.
Key Takeaways
- Yes, you can cook rice in a Ninja Foodi. Its pressure cooking and sauté functions work great for rice when used correctly.
- The secret is the right water-to-rice ratio. A 1:1 ratio works best for white rice; adjust slightly for brown or wild rice.
- Pre-soaking brown rice improves texture. Soak for 30 minutes to reduce cook time and prevent mushiness.
- Use the Instant Pot (IP) setting for foolproof results. This mimics traditional rice cookers with precise temperature control.
- Always let the pressure release naturally for fluffier rice. Quick release can make rice gummy or unevenly cooked.
- Cleaning is simple—just rinse the inner pot and wipe the lid. Avoid abrasive cleaners on non-stick coatings.
- Experiment with flavors by adding broth instead of water. Chicken or vegetable broth adds richness and depth.
📑 Table of Contents
- Why People Love Using the Ninja Foodi for Rice
- Choosing the Right Type of Rice for Your Ninja Foodi
- Step-by-Step Guide: How to Cook Perfect Rice in a Ninja Foodi
- Troubleshooting Common Rice Problems
- Pro Tips for Flavorful, Restaurant-Quality Rice
- Can You Cook Other Grains in the Ninja Foodi?
- Cleaning and Maintaining Your Ninja Foodi After Cooking Rice
- Final Thoughts: Why Your Rice Cooker Might Be Sitting in the Drawer Now
Why People Love Using the Ninja Foodi for Rice
The Ninja Foodi has become a kitchen staple for good reason. It combines the speed of pressure cooking with the versatility of air frying, slow cooking, and even yogurt making. But what makes it so effective for rice? First, its sealed environment locks in moisture and heat, ensuring even cooking without scorching. Second, the ability to maintain consistent temperatures helps achieve that ideal “al dente” texture—not too soft, not too hard.
Another perk? Time savings. Traditional stovetop rice can take up to 45 minutes, while Ninja Foodi pressure cooking cuts that down to under 15 minutes for white rice. Plus, once it’s done, there’s no babysitting required. Just press a button, walk away, and come back to perfectly cooked grains ready to serve.
Choosing the Right Type of Rice for Your Ninja Foodi
Not all rice is created equal—and not all types respond the same way to pressure cooking. Here’s how different varieties stack up:
White Rice
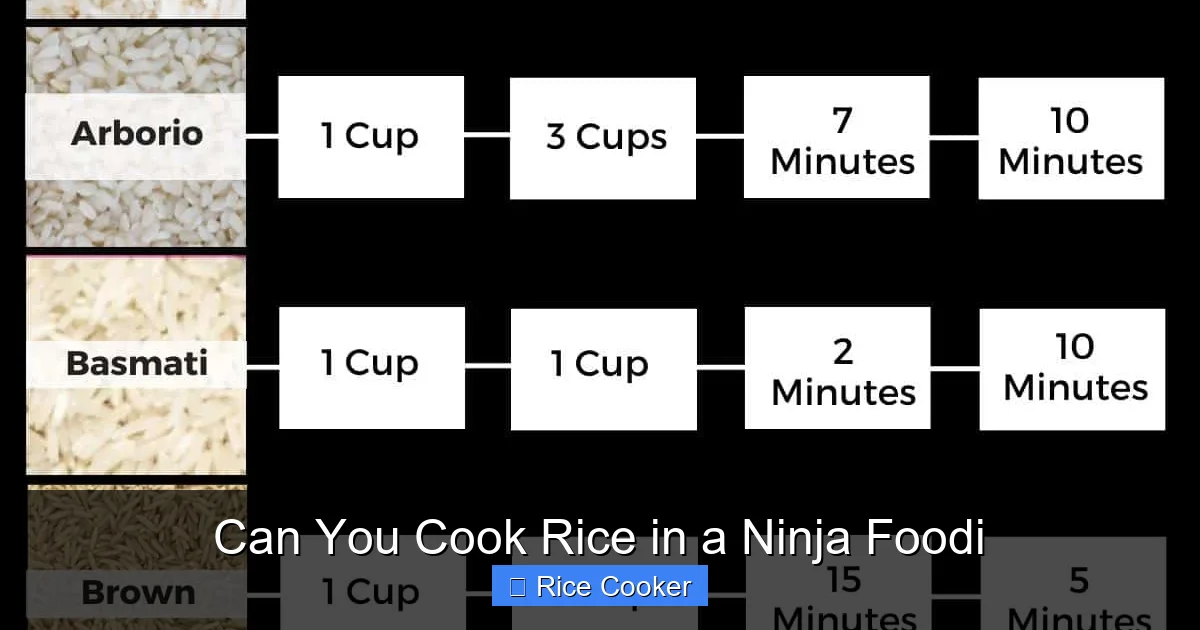
Short-grain or long-grain white rice is the easiest to master in a Ninja Foodi. Because it’s polished and starchy, it absorbs water quickly and cooks uniformly. Jasmine and basmati are popular choices for their fragrant aroma and light texture. For these, stick to a 1:1 water-to-rice ratio and use the Instant Pot (IP) mode for best results.
Visual guide about Can You Cook Rice in a Ninja Foodi
Image source: thetastytravelers.com
Brown Rice
Brown rice takes longer due to its bran layer, which slows down absorption. You’ll need about 1½ cups of water per cup of rice and should pre-soak it for at least 30 minutes before cooking. This step prevents gumminess and ensures even tenderness. Use the Slow Cook setting if available, or opt for the IP mode with extended cook time.
Wild Rice
Wild rice is trickier because it contains multiple grain types that cook at different speeds. To avoid undercooked kernels, soak it overnight or use the Slow Cook function. A 1:2 ratio (rice to water) usually works well, but taste test halfway through to check doneness.
Porridge or Congee
For creamy rice porridge, switch to the Slow Cook or Yogurt setting. Add extra liquid—about 3–4 cups per cup of rice—and stir occasionally during the first half of cooking to prevent sticking.
Step-by-Step Guide: How to Cook Perfect Rice in a Ninja Foodi
Ready to give it a try? Follow this simple process for foolproof results every time.
Gather Your Ingredients and Tools
You’ll need:
- 1 cup of rinsed rice (any variety)
- 1–1½ cups of water or broth (adjust based on rice type)
- A measuring cup and spoon
- The inner cooking pot (make sure it’s clean and dry)
- Optional: salt, butter, or oil for flavor
Step 1: Rinse the Rice
Washing removes excess starch, which can lead to clumpy rice. Place your rice in a fine-mesh strainer and rinse under cold water until the water runs clear. Drain thoroughly—excess moisture can throw off the ratio.
Step 2: Add Rice and Liquid to the Pot
Transfer the rinsed rice to the Ninja Foodi’s inner pot. Pour in the appropriate amount of liquid. For white rice, start with 1 cup water per 1 cup rice. For brown rice, go with 1¼ to 1½ cups. If using broth, swap out water for added flavor.
Step 3: Season and Stir
Add a pinch of salt, a teaspoon of olive oil or butter if desired, and give everything a quick stir. This helps distribute seasoning and prevents sticking during cooking.
Step 4: Select the Correct Setting
Press the “Manual” or “Pressure Cook” button and set the timer:
- White rice: 6–8 minutes high pressure
- Brown rice: 15–20 minutes high pressure
- Wild rice: 20–25 minutes high pressure (with pre-soak)
Make sure the valve is sealed and the lid is locked.
Step 5: Natural Pressure Release
This is crucial! After cooking, turn off the heat and let the pressure release naturally for 10–15 minutes. Then perform a quick release for any remaining steam. Never force the lid open immediately—it can burn you and ruin your rice.
Step 6: Fluff and Serve
Once fully depressurized, carefully open the lid. Use a fork to gently fluff the rice. Let it rest for 2–3 minutes before serving. Fluffing separates the grains and gives you that restaurant-quality texture.
Troubleshooting Common Rice Problems
Even with the best techniques, mistakes happen. Here’s how to fix them:
Rice Is Too Dry or Crunchy
This usually means too little water or an insufficient cook time. Next time, increase the liquid by 1–2 tablespoons and extend the pressure cook time by 1–2 minutes. Also, ensure you’re using the correct rice-to-water ratio for your variety.
Rice Is Mushy or Sticky
Too much water or overcooking causes this. Try reducing the liquid next time and avoid stirring after cooking—it breaks up the grains. Natural release also helps prevent mushiness by stopping the cooking process gently.
Grains Are Unevenly Cooked
This happens with wild rice or when not soaking properly. Always pre-soak wild rice overnight, and consider using the Slow Cook setting for more even heat distribution.
Lid Won’t Open After Cooking
Don’t panic! This just means there’s still internal pressure. Wait another 5–10 minutes for it to drop. Never use a tool to pry the lid—it could damage the seal.
Pro Tips for Flavorful, Restaurant-Quality Rice
Want your rice to taste amazing? Try these tricks:
Use Broth Instead of Water
Sauté onions or garlic in the pot first (use the Sauté function), then add rice and broth. This builds layers of flavor from the start. Great for pilafs or savory sides.
Add Aromatics During Sauté
Before adding liquid, cook sliced shallots, ginger, or bay leaves in the pot with a bit of oil. Remove them before pressure cooking if they’re delicate, or leave them in for subtle infusion.
Try the “Keep Warm” Feature
After cooking, switch to the “Keep Warm” setting for up to 10 hours. This maintains temperature without drying out your rice—perfect for meal prep.
Infuse with Herbs or Spices
Add a cinnamon stick, cardamom pods, or a strip of kombu seaweed to the pot while cooking. These infuse gentle, natural flavors without overpowering the dish.
Double the Batch for Meal Prep
Cooking extra rice is easy. Store it in an airtight container in the fridge for up to 5 days or freeze portions for up to 3 months. Reheat with a splash of water in the microwave or on the stovetop.
Can You Cook Other Grains in the Ninja Foodi?
Absolutely! While rice gets all the glory, your Ninja Foodi excels with other whole grains too:
Quinoa
Use a 2:1 water-to-quinoa ratio and cook on Manual for 7–9 minutes. Rinse beforehand to remove bitterness.
Oats
For instant oatmeal, use the Slow Cook setting with milk or water. Cook for 20–30 minutes, stirring occasionally.
Couscous
No boiling needed! Just mix couscous with hot broth, cover, and let sit for 5 minutes. The Ninja Foodi’s residual heat does the job.
Barley
Soak barley for 1 hour, then cook with 3 cups water per cup of barley on Manual for 25–30 minutes.
Each grain has its own sweet spot, but the principles remain the same: proper hydration, correct timing, and patience during release.
Cleaning and Maintaining Your Ninja Foodi After Cooking Rice
Keeping your appliance in top shape is essential for longevity. Here’s how to clean up easily:
Wash the Inner Pot Immediately
Rinse it with warm, soapy water while the rice is still warm—grains loosen faster. Avoid steel wool or harsh scrubbers on non-stick surfaces.
Remove Rice Residue from the Lid
Use a damp cloth or sponge to wipe the sealing ring and lid interior. Some models have removable rings—check your manual before washing.
Deep Clean Monthly
Run a cycle with vinegar and water (1:1 ratio) to remove mineral buildup from hard water. This keeps seals flexible and performance optimal.
Store Properly
Always store with the lid slightly ajar to allow airflow and prevent odors from lingering in the sealing area.
With regular care, your Ninja Foodi will keep delivering perfect rice year after year.
Final Thoughts: Why Your Rice Cooker Might Be Sitting in the Drawer Now
If you’ve been hesitant to ditch your old rice cooker, it’s time to reconsider. The Ninja Foodi doesn’t just replicate its function—it enhances it with speed, consistency, and multi-functionality. Whether you’re feeding a crowd or prepping meals for the week, this kitchen hero simplifies the process without sacrificing quality.
And honestly? There’s something satisfying about knowing one appliance can handle breakfast, lunch, dinner, and dessert. Plus, fewer dishes mean less cleanup—win-win!
So next time you reach for instant ramen or skip dinner because “cooking rice takes forever,” remember: your Ninja Foodi is ready to save the day. With just a few minutes of prep and minimal effort, you’ll have tender, flavorful rice that pairs perfectly with everything from grilled chicken to curry.
Give it a try tonight. You might just wonder why you ever lived without it.
Frequently Asked Questions
Can I cook instant rice in a Ninja Foodi?
Yes, but it’s not necessary—instant rice already cooks quickly. Stick to regular rice for better texture and absorption. If you do use instant, reduce water slightly and cut cook time in half.
Do I need to add oil or butter to rice in the Ninja Foodi?
Not required, but a small amount (like 1 tsp) can improve flavor and prevent sticking. It’s optional—many users skip it for healthier options.
What if my rice is still crunchy after pressure cooking?
Let it sit covered for 5–10 minutes after depressurizing—residual heat finishes the job. If not, add a splash of water, re-seal, and cook for 2 more minutes on low pressure.
Can I cook frozen rice in the Ninja Foodi?
It’s not recommended. Frozen rice can cause uneven heating and increase the risk of bacterial growth. Always use fresh or thawed rice.
Is the Ninja Foodi better than a dedicated rice cooker?
For most people, yes—it saves counter space and offers more versatility. However, high-end rice cookers offer specialized modes (like sushi or congee) that may yield slightly superior results for specific dishes.
How do I stop my rice from sticking to the bottom?
Use enough liquid, don’t stir after cooking, and ensure the pot isn’t damaged. A thin layer of oil at the bottom before adding rice also helps prevent adhesion.