Can you cook rice in an Instant Pot? Absolutely! This powerful pressure cooker makes perfectly cooked rice faster and easier than traditional methods, with consistent results every time. Whether you’re using white, brown, or specialty grains, the Instant Pot delivers fluffy, tender rice with minimal effort—no babysitting required.
Key Takeaways
- Instant Pots are excellent rice cookers: Their pressure cooking function mimics professional rice cookers, producing evenly cooked grains.
- Perfect water-to-rice ratio is key: Use 1:1 for white rice, 1.5:1 for brown rice to avoid mushy or undercooked results.
- Quick release vs. natural release matters: Natural release helps prevent overcooking; quick release works best for softer textures.
- Soaking improves texture: Soaking brown rice for 30 minutes ensures even cooking and reduces cooking time.
- Customization is easy: Add herbs, spices, broth, or vegetables to infuse flavor into your rice instantly.
- Cleanup is simple: The non-stick inner pot means minimal scrubbing—just rinse and wipe.
- Time-saving benefits: Cook a full meal (rice + protein + veggies) in under 30 minutes from start to finish.
Key Takeaways
- Understanding can you cook rice in instant pot: Provides essential knowledge
Quick Answers to Common Questions
Can you cook rice in an Instant Pot?
Yes, you can absolutely cook rice in an Instant Pot. It’s one of the most popular uses for this versatile appliance, delivering perfectly cooked, fluffy rice every time with minimal effort.
What’s the best water-to-rice ratio for Instant Pot rice?
The ideal ratio is 1:1 for white rice and 1.5:1 for brown rice. Always measure dry rice with a dry measuring cup and adjust slightly based on your preferred texture.
Should I rinse rice before cooking in an Instant Pot?
Yes, rinsing removes excess starch and prevents clumping. Rinse white and jasmine rice until the water runs clear, but skip rinsing for arborio rice used in risotto.
How long does it take to cook rice in an Instant Pot?
White rice cooks in about 3–4 minutes under high pressure, while brown rice takes 6–7 minutes. Include a 10-minute natural release for best results.
Can I add flavorings like herbs or broth to my rice?
Yes! Use broth instead of water and add garlic, onions, or spices during cooking to create flavorful, aromatic rice dishes.
📑 Table of Contents
- Cooking Rice in an Instant Pot: The Ultimate Guide
- Why Choose the Instant Pot for Rice?
- How to Cook Perfect Rice in an Instant Pot
- Troubleshooting Common Rice Issues
- Advanced Techniques: Elevating Your Instant Pot Rice
- Tips for Different Types of Rice
- Cleaning and Maintaining Your Instant Pot
- Frequently Asked Questions About Cooking Rice in an Instant Pot
Cooking Rice in an Instant Pot: The Ultimate Guide
Have you ever stood over a stovetop pot of simmering rice, nervously stirring and watching the clock, wondering if you added too much water or left it on too long? You’re not alone. For years, making perfect rice was a skill reserved for experienced home cooks or professional chefs. But thanks to modern kitchen gadgets like the Instant Pot, achieving fluffy, tender, and evenly cooked rice has never been easier.
The Instant Pot isn’t just a pressure cooker—it’s a multi-functional powerhouse that can sauté, steam, slow cook, and yes, cook rice like a dream. In fact, many people consider it the best alternative to a dedicated rice cooker. With its precise temperature control and sealed environment, it creates ideal conditions for rice to absorb moisture evenly and cook thoroughly without burning.
In this complete guide, we’ll walk you through everything you need to know about cooking rice in an Instant Pot—from basic techniques to advanced tricks, troubleshooting common issues, and even how to make gourmet rice dishes. Whether you’re a beginner or a seasoned cook looking to streamline your routine, this article will help you master one of life’s most essential side dishes.
Why Choose the Instant Pot for Rice?
If you’ve ever used a traditional rice cooker, you might wonder why you’d switch to an Instant Pot. After all, those little machines are designed specifically for rice. But here’s the truth: the Instant Pot offers several advantages that make it a top choice for rice lovers.
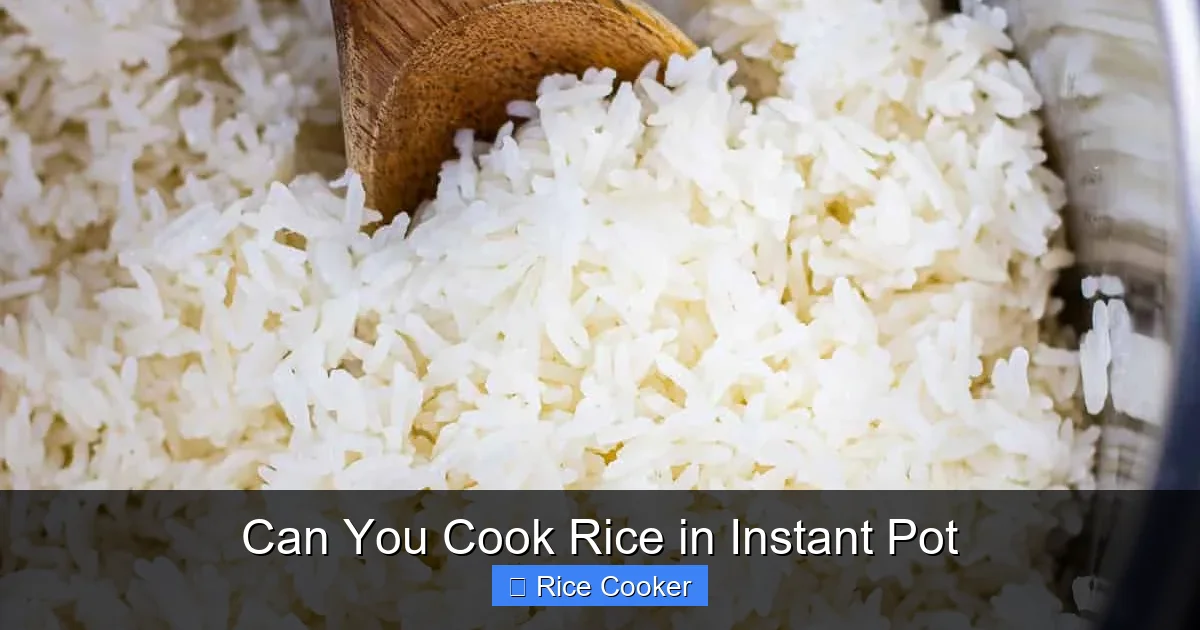
Visual guide about Can You Cook Rice in Instant Pot
Image source: veronikaskitchen.com
Speed and Efficiency
One of the biggest perks of using an Instant Pot is speed. While traditional stovetop rice can take 18–45 minutes depending on the type, Instant Pot rice usually takes just 5–10 minutes under pressure plus 10–20 minutes of natural release. That’s a huge time-saver—especially when you’re preparing a full meal.
For example, if you’re making a stir-fry, the entire dish—rice, protein, and vegetables—can be ready in under 30 minutes. No more waiting for the rice to boil, then reducing heat, then waiting for it to steam. With the Instant Pot, everything happens in one pot.
Consistent Results Every Time
Ever had rice turn out either dry or mushy? It happens when heat fluctuates during cooking. The Instant Pot maintains steady pressure and temperature throughout the process, ensuring each grain gets exactly what it needs—moisture, warmth, and time.
This consistency is especially helpful when cooking large batches or meal-prepping. Whether you’re feeding two people or 12, your rice will look and taste the same.
Versatility Beyond Basics
The Instant Pot isn’t limited to plain white or brown rice. You can cook jasmine, basmati, wild rice, arborio (for risotto), quinoa, barley, and even gluten-free blends. Plus, you can add flavors directly into the pot—garlic, onions, bay leaves, coconut milk, or soy sauce—so your rice tastes amazing right out of the appliance.
Easy Cleanup
Unlike messy stovetop pots with stuck-on rice, the Instant Pot’s non-stick inner pot makes cleanup a breeze. Just rinse it with warm water and a drop of soap. No scrubbing, no burnt residue. And since you’re cooking everything in one vessel, there are fewer dishes to wash.
Safety Features
Pressure cookers can seem intimidating, but modern models like the Instant Pot come with multiple safety locks, automatic shut-offs, and pressure release valves. These features give you peace of mind while cooking, especially if you’re new to pressure cooking.
How to Cook Perfect Rice in an Instant Pot
Now that you know why the Instant Pot is great for rice, let’s dive into the actual process. Follow these steps for foolproof results every time.
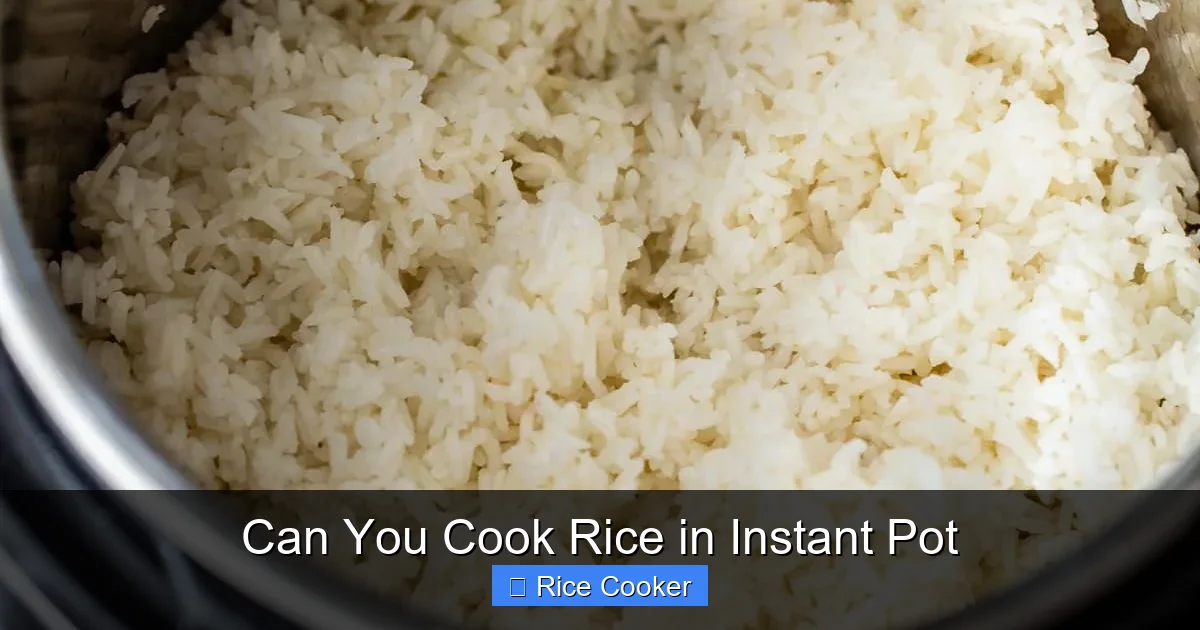
Visual guide about Can You Cook Rice in Instant Pot
Image source: skinnytaste.com
Step 1: Measure Your Ingredients
The secret to great rice starts with the right ratio. Too much water = mushy rice. Too little = dry and hard.
- White rice: 1 cup rice to 1 cup water
- Brown rice: 1 cup rice to 1.5 cups water (or broth)
- Wild rice: 1 cup rice to 2.5 cups liquid
- Quinoa: 1 cup quinoa to 2 cups liquid
Always use a measuring cup specifically for dry ingredients—not liquid cups. Dry rice expands as it cooks, so volume changes aren’t accurate unless measured properly.
Step 2: Rinse the Rice (Optional but Recommended)
Rinsing removes excess starch, which prevents clumping and gives your rice a fluffier texture. Here’s how:
- Place rice in a fine-mesh strainer.
- Rinse under cold running water until the water runs clear.
- Dry gently with a clean towel or let air-dry slightly.
Note: Some types of rice, like jasmine or basmati, benefit more from rinsing. Others, like arborio (used for risotto), should not be rinsed because they need their starch for creaminess.
Step 3: Add Ingredients to the Inner Pot
Place rinsed (or unrinsed) rice in the Instant Pot. Pour in the appropriate amount of water or broth. If adding seasonings (like salt, garlic, or herbs), toss them in now.
Pro tip: Use vegetable, chicken, or beef broth instead of water to boost flavor—especially good for brown rice or pilaf-style dishes.
Step 4: Seal and Set the Timer
Close the lid securely and ensure the vent valve is set to Sealing. Select the Manual or PRESSURE COOK setting.
- White rice: High pressure for 3–4 minutes
- Brown rice: High pressure for 6–7 minutes
- Wild rice: High pressure for 15–18 minutes
- Quinoa: High pressure for 3–4 minutes
After the timer ends, allow a 10-minute natural release, then do a quick release for any remaining pressure. This two-step release helps prevent overcooking and keeps rice tender.
Step 5: Fluff and Serve
Once the float valve drops (indicating safe opening), carefully open the lid away from your face. Gently fluff the rice with a fork to separate the grains. Serve immediately.
Troubleshooting Common Rice Issues
Even with perfect technique, things don’t always go as planned. Here’s how to fix the most common rice problems—and prevent them next time.
Mushy or Sticky Rice
This usually happens when there’s too much water or the pressure release is too fast.
- Fix: Reduce water by ¼ cup next time, and stick to natural release before quick release.
- Prevention: Always measure carefully and follow recommended ratios.
Undercooked or Hard Rice
If your rice is still chewy after the timer ends, it may not have absorbed enough liquid or wasn’t under high enough pressure.
- Fix: Return the pot to high pressure for an extra 2–3 minutes (do a quick release afterward).
- Prevention: Don’t skip soaking brown rice—it helps soften the bran layer so it cooks evenly.
Burnt Bottom Layer
This occurs when rice sticks to the bottom due to low liquid or overheating.
- Fix: Add a tablespoon of oil or butter before cooking to create a barrier.
- Prevention: Ensure your inner pot is clean and free of debris. Never cook rice without enough liquid.
Rice Not Fluffy Enough
If your rice clumps together, it might be overcooked or lacked proper rinsing.
- Fix: Try rinsing again next time, and avoid pressing down on the rice while cooking.
- Prevention: Let rice rest for 5 minutes after cooking—it finishes absorbing moisture and becomes fluffier.
Advanced Techniques: Elevating Your Instant Pot Rice
Once you’ve mastered basic rice, try these creative twists to impress family and friends.
Infused Rice with Herbs and Spices
Instead of plain water, use aromatic liquids like coconut milk, tomato juice, or even red wine. Add bay leaves, cinnamon sticks, or crushed cardamom pods while cooking for a fragrant side dish.
Example: Jasmine rice cooked in coconut milk with lime zest makes a delicious Thai-inspired base for curries or stir-fries.
One-Pot Meals
Cook rice directly with proteins and vegetables for complete meals.
- Chicken and rice: Brown chicken breasts, add rice and broth, cook under pressure.
- Veggie fried rice: Sauté onions, carrots, peas; add rice and soy sauce, cook with 1 cup liquid.
Stuffed Peppers or Rice Balls
Mix cooked rice with mashed beans, cheese, or meat, shape into balls, and bake or fry for crispy outside, soft inside.
Sweet Rice Desserts
Use the same method to make rice pudding: combine rice, milk, sugar, and vanilla. Cook under pressure for 6 minutes, then let sit 10 minutes. Top with fruit or nuts.
Tips for Different Types of Rice
Not all rice behaves the same way. Here’s how to adjust your method based on variety.
White Rice (Long-Grain)
Best for fluffy sides and fried rice. Rinsing is highly recommended.
- Water ratio: 1:1
- Cook time: 3–4 minutes high pressure
- Release: 10-minute natural, then quick
Brown Rice
Denser and chewier, but packed with fiber. Requires longer cooking and soaking.
- Water ratio: 1:1.5
- Soak for 30 minutes before cooking
- Cook time: 6–7 minutes high pressure
- Release: Full natural release (15–20 minutes)
Jasmine and Basmati Rice
Aromatic and slightly sticky. Best rinsed and cooked with a bit more water.
- Water ratio: 1:1.25
- Cook time: 4–5 minutes high pressure
- Add a splash of oil to reduce stickiness
Arborio Rice (Risotto Style)
Used for creamy risottos. Don’t rinse—save the starch!
- Water ratio: 1:1.5
- Cook time: 8–10 minutes high pressure
- Let sit 5 minutes before stirring to thicken
Quinoa and Wild Rice
Quinoa can become bitter if overcooked. Wild rice needs lots of liquid and time.
- Quinoa: 1:2 liquid, 3–4 minutes pressure
- Wild rice: 1:2.5 liquid, 15–18 minutes pressure
Cleaning and Maintaining Your Instant Pot
Keeping your Instant Pot in top shape ensures reliable performance and long life.
- Inner pot: Wash with warm, soapy water. Avoid metal scrubbers that can damage the non-stick coating.
- Lid: Remove the sealing ring, steam release valve, and anti-block shield. Hand-wash separately.
- Vent valve: Wipe with a damp cloth. Never submerge in water.
- Storage: Store with lid off to prevent odors from building up in the sealing ring.
Tip: Replace the sealing ring every 6–12 months or when it shows signs of wear (cracks, discoloration).
Frequently Asked Questions About Cooking Rice in an Instant Pot
Can you cook rice in an Instant Pot?
Yes! The Instant Pot is one of the best tools for cooking rice quickly and evenly. Using the pressure cook function, it produces fluffy, tender rice with minimal effort. Whether you’re using white, brown, or specialty rice, the Instant Pot delivers consistent results every time.
What is the best water-to-rice ratio for Instant Pot rice?
The ideal ratio depends on the type of rice. For white rice, use 1 cup rice to 1 cup water. For brown rice, use 1 cup rice to 1.5 cups water. Always measure dry rice with a dry measuring cup and adjust slightly based on your desired texture.
Should I rinse rice before cooking in an Instant Pot?
Yes, rinsing removes excess starch and prevents clumping. Rinse white, jasmine, and basmati rice under cold water until the water runs clear. Skip rinsing for arborio rice (used in risotto) since it needs its starch for creaminess.
How long does it take to cook rice in an Instant Pot?
White rice takes about 3–4 minutes under high pressure, while brown rice takes 6–7 minutes. Total time including natural release is usually 20–25 minutes. Wild rice and quinoa require longer cooking times—check specific guidelines for each grain.
Can I add flavorings like herbs or broth to my rice?
Absolutely! Adding chicken, vegetable, or beef broth instead of water enhances flavor. You can also toss in garlic cloves, bay leaves, or spices during cooking for infused rice. This works great for pilafs and ethnic dishes.
Frequently Asked Questions
Can you cook rice in an Instant Pot?
Yes, the Instant Pot is excellent for cooking rice. Its pressure cooking function ensures even, fluffy results with minimal effort. Simply add rice and water in the right ratio, set the timer, and let the machine do the work.
What is the best water-to-rice ratio for Instant Pot rice?
The standard ratio is 1 cup of rice to 1 cup of water for white rice, and 1.5 cups of water for every 1 cup of brown rice. These ratios ensure perfectly cooked, neither too wet nor too dry results.
Should I rinse rice before cooking in an Instant Pot?
Yes, rinsing rice before cooking removes excess starch and prevents clumping. Rinse white, basmati, and jasmine rice under cold water until the water runs clear for best texture.
How long does it take to cook rice in an Instant Pot?
White rice takes about 3–4 minutes under high pressure, followed by a 10-minute natural release. Brown rice requires 6–7 minutes under pressure with a full natural release. Always check the rice before serving.
Can I add flavorings like herbs or broth to my rice?
Yes, cooking rice with broth instead of water adds rich flavor. You can also add garlic, onions, bay leaves, or spices during cooking for enhanced taste—perfect for pilafs and ethnic dishes.
Is the Instant Pot better than a rice cooker?
Many find the Instant Pot superior because it combines multiple functions (pressure cook, slow cook, sauté) in one device. While traditional rice cookers are excellent, the Instant Pot offers greater versatility and faster cooking times for rice.